Haberdashery Fun

  • Home
  • About
    • Look Book
  • Contact
    • Collaborate?
  • Tutorials
  • Shop
    • Email
    • Facebook
    • Instagram
    • Pinterest

Keep up to date with the latest posts!

Make Half Square Triangle Pouches

in Bags and Pouches, DIY Projects on 13/04/20

LoveCrafts recently sent me a 10″ stacker from Riley Blake. Have you heard about LoveCrafts?? They are a global community for makers. Yay! If you want to learn about quilting, sewing, knitting or crocheting.. This is your place.

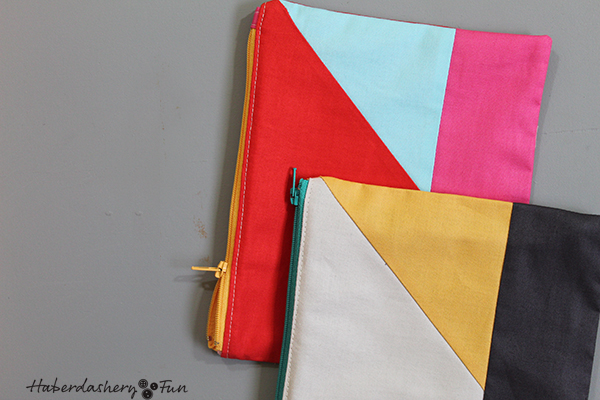
It was a treat to receive the confetti cottons 10″ stacker and I wanted to make something quilting inspired. After giving it some thought, I decided to make color blocked zipper pouches with a twist.

So what is the twist..? Think “half square triangles..”

Materials:

  1. 10″ quilting squares [ quantity 6 for this tutorial ]
  2. 2 zippers
  3. Disappearing fabric pen and pencil
  4. Quilting supplies – rotary cutter, mat and ruler
  5. Sewing supplies and sewing machine
  6. Iron and ironing board

I referenced a popular tutorial for a modern color block tote bag that I recently re-shared on my blog. Both are inspired and start with a half square triangle…

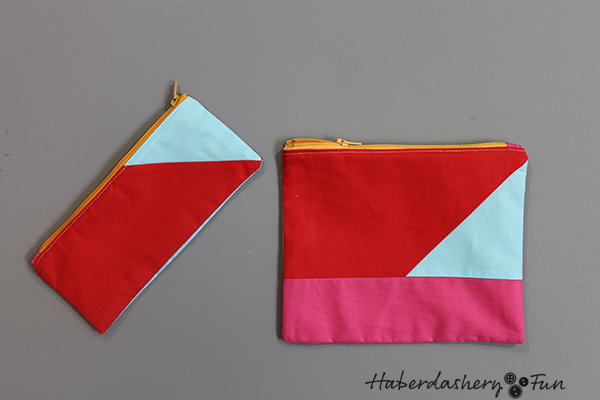
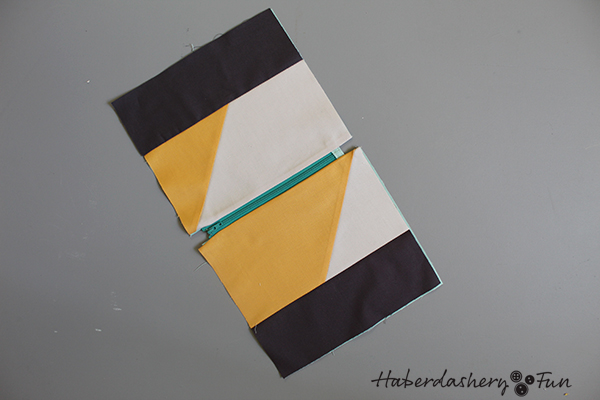
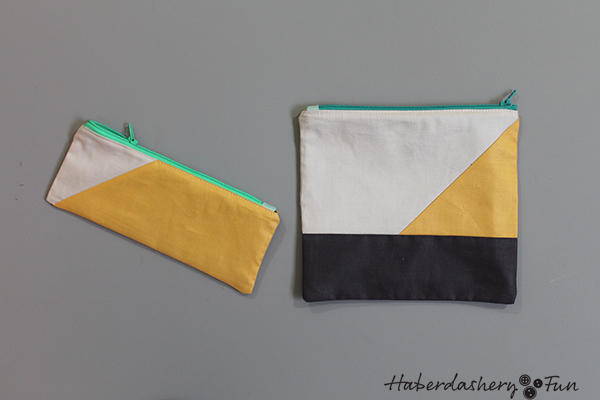
The fun part with this tutorial? You end up with 2 zipper pouches! It requires 6 squares – 2 squares in different colors and 2 sets of squares in different colors.

Let’s get started:

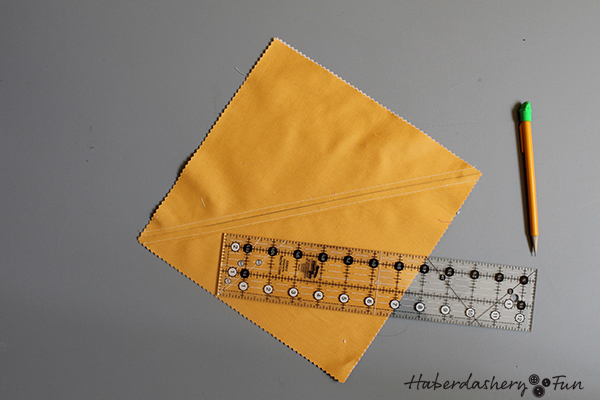
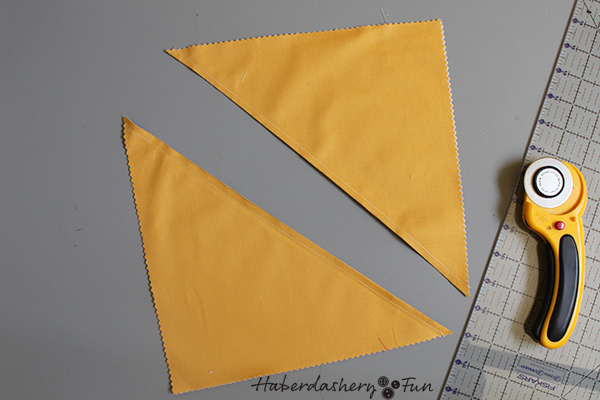
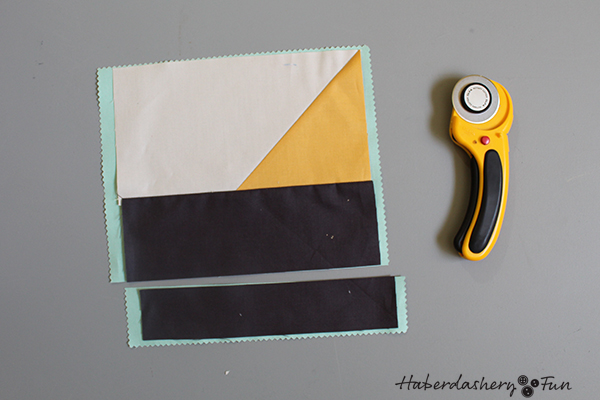
Step 1 – Lay 2 different color squares on top of each other. Adjust so that they are even at all sides. With a pencil, draw a diagonal line from one corner to the other corner. Pin along the line. Place into your sewing machine and stitch a straight line 1/4″ away on each side of the pencil line.

Step 2 – Using a rotary cutter and ruler, cut along the line. Press. Open and press both seam allowances towards the darker side. Repeat for the other side. You now have 2 half square triangles.

Step 3 – Square up both half square triangles. Place the 3rd color [ in this case the color dk grey and the bottom color of the large pouch ] on top of one of the half square triangles. Right sides facing. Use your rotary cutter and trim this color to be the same size. Find the center of the square and draw a straight line across.

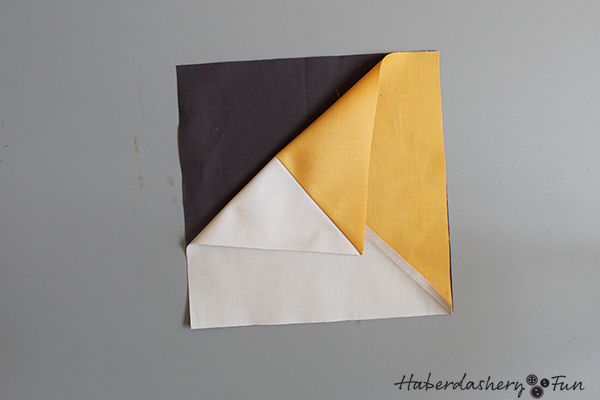
Step 4 – Place into your sewing machine and 1/4″ below the pencil line. Press. Use your rotary cutter and ruler and cut 1/4″ down from the sewn line. Press both seam allowances down or towards the darker side. One side should be larger than the other. Repeat with the other half square triangle.

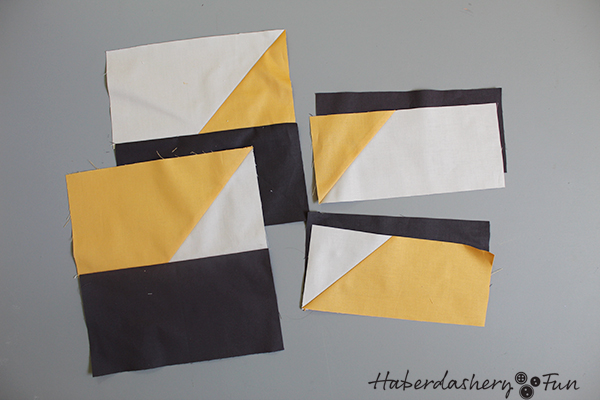
TIP – You should now have the following pieces: 2 exterior pieces for the large square pouch and 2 exterior pieces for the small pouch, plus 2 lining pieces for the small pouch. A total of 6 pieces.

The rest of the tutorial is the same for sewing a zipper pouch. I have quite a few tutorials here on my blog and you can see one here and here.

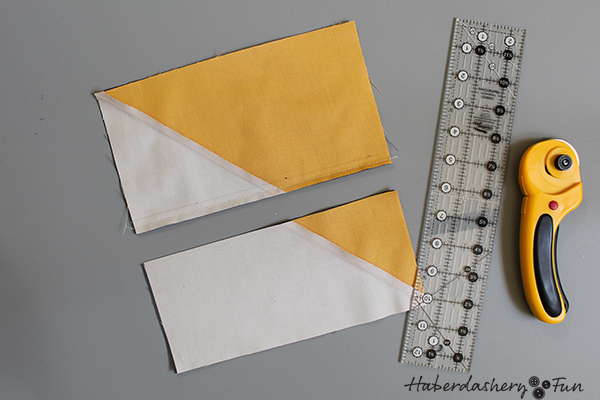
Step 5 – Place the smaller rectangular pieces to the side. Place the lining color square for the large out under one of the exterior pieces. Place your quilting ruler 3″ down from the center line and trim. Use the bottom pieces for the zipper tab and it gives you 2 color options. Cut the zipper tab to be 2″ x 1.5″.

Step 6 – Use a ruler and make a pencil mark along the top edge – 1/2″ from each top side. Make a second mark again, 1/8″” inwards. This is the placement for the zipper along the top edge. The 1/8″ gives wiggle room and allows the zipper to pop out nice and easy.

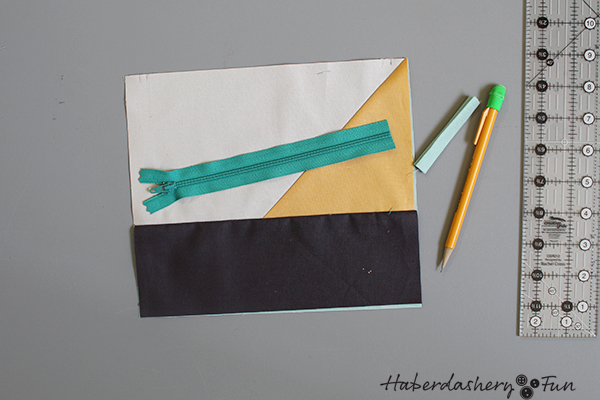
Step 7 – Cut the zipper to size. Lay along the top edge and cut to the match the marks you made. Fold the zipper tab in half length wise. Fold again. Insert the raw zipper end into the tab and stitch down.

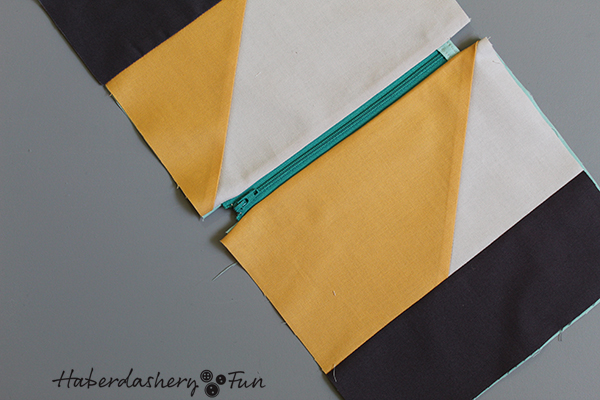
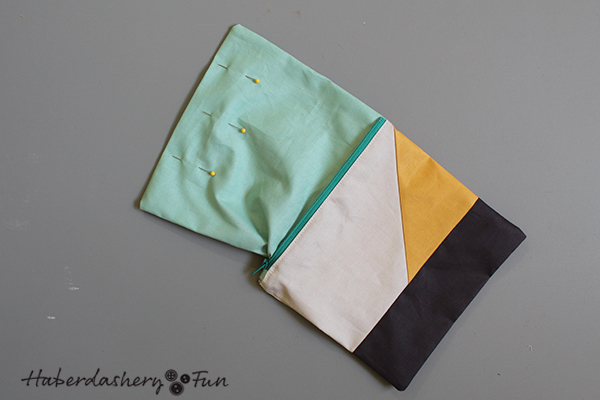
Step 8 – Place the zipper face down between the marks. Pin in place and sew the zipper. Place the lining on top, sandwiching the zipper. Follow the previous stitch line and sew again. Press open. Repeat for the other side.

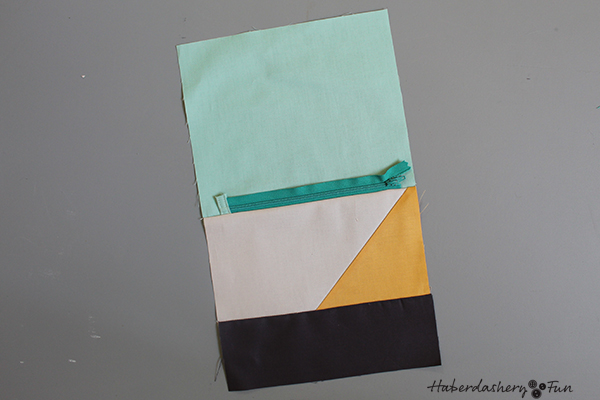
Step 9 – Press the fabric away from the zipper. Be careful to NOT melt the zipper. Place into your sewing machine and topstitch along the zipper edge.

Step 10 – Open the zipper. Fold along the zipper so that the right sides of the exterior pieces are facing each other. Finger press any wrinkles out. Pin along the lining and also the exterior. Place into your sewing machine and stitch together with a 1/2″ seam allowance. Leave a 2″ – 3″ opening along the lining bottom seam.

Step 11 – Press the seam. Trim each corner. Turn rightsize out through the opening along the lining bottom. Finger press any wrinkles out.

Step 12 – Turn under the seam allowance at the opening at the lining bottom seam. Press. Pin closed. Place into your sewing machine and topstitch closed.

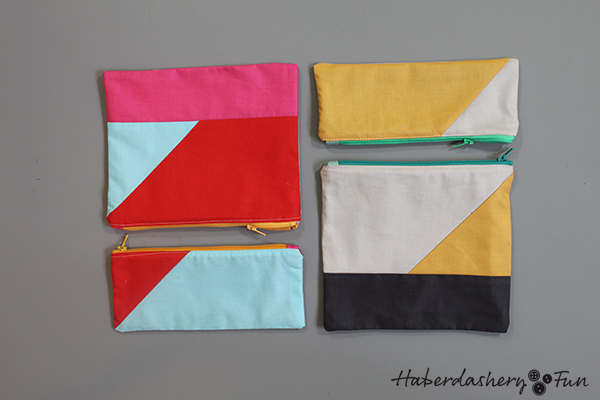
That’s it. I had so much fun with this trial, I mixed and matched a few 10″ squares and made a bunch of pouches!

I was given the product for this post, however, please note that all opinions are my own.

Fabric – Riley Blake Designs, Confetti Solids, 10″ Staker

Zippers – Mood Fabrics

Collaboration – Love Crafts

Related Posts Plugin for WordPress, Blogger...

1 Comment

« Sew Asymmetrical Color Block Totes Tutorial
Make A Fabric Photo Book »

Trackbacks

  1. Linky Thursday | StacySews says:
    July 2, 2020 at 11:10 am

    […] These half square triangle pouches are a great way to use up scraps and store all your essentials. […]

    Reply

Leave a Reply Cancel reply

Your email address will not be published. Required fields are marked *

This site uses Akismet to reduce spam. Learn how your comment data is processed.

About me


Hi there - I'm Marni Weaver. A sewer, a sometimes quilter and a lover of fabric design. I started this blog to share my ideas. Come Join the Fun
shop now

Popular Categories

project for baby fabric projects seasonal projects fat quarter projects sewing tips and tricks inspiration

Categories

  • Applique
  • Baby
  • Bags and Pouches
  • Color
  • DIY Projects
  • Fabric
  • Fabric Design
  • Fat Quarter Projects
  • Home Decor
  • Inspiration
  • Just for Fun
  • Kids
  • No Sew
  • Patterns
  • Print On Fabric
  • Quilting
  • Scrap Fabric Projects
  • Seasonal
  • Sewing Tips & Tricks

Lovely sponsors

Recent Comments

  • Quilted Ripstop Reversible Tote | Haberdashery Fun on Quick Tip.. Sewing Boxed Corners
  • Make Nine in 2021 – Sew, Bake, Snap on DIY.. Reversible Fabric Storage Bin
  • 26 Diy placemats ideas - Perfect Table Setting on DIY.. Heart Shaped Placemats Tutorial For Sew Mama Sew
  • More Free Tote Patterns | on Reversible 1 Hour Tote Pattern
  • Collapsible Kraft-Tex Bowl on DIY.. Collapsible Fabric Bowls

Projects Elsewhere

find me on Pellon Projects sew mama sew contributor

momtastic contributor

Pinterest

Visit Marni@Haberdashery Fun's profile on Pinterest.
Follow on Bloglovin

I'm Reading

  • Cluck Cluck Sew
  • Cooking Dangerously
  • In Color Order
  • Jen Hewitt
  • Jolly Jabber
  • Karly Spalding Photography
  • Leigh Laurel Studios
  • Lindsay Sews
  • Lotta Jansdotter
  • Love Patchwork and Quilting Magazine
  • Made
  • Making It Lovely
  • Noodle-Head
  • Polka Dot Chair
  • Sharon Holland Designs
  • Silhouette America Blog
  • Silhouette Design Store
  • The Purl Bee
  • The Purple Fig

Press:

Stitch Winter 2014

haberdashery_fun

Day 1 for #marchmeetthemaker is Brand Introduction Day 1 for #marchmeetthemaker is Brand Introduction. I started out as a sewing blogger back in 2012, shortly after my first son was born. I had a lot of fun sewing and sharing baby items when my kids were super little. I love sharing sewing tutorials! My blog has been a great place to hone my skills and share the ideas in my head.

“I see sewing patterns”... I have an online store where you can download PDF sewing patterns. I studied fashion design at Ryerson University in Toronto, moved to NYC after graduation and worked as a technical designer. I love figuring out how to make things and put them together.

Block printing is my jam. I started block printing 6 years ago and it was ❤️ at first stamp. I started hosting free online zoom intro to block printing courses last December.  It has been a blast meeting people from all over the world, sharing my knowledge and having them block printing in one hour!
.
.
.
#haberdasheryfun  #haberdasheryfunpatterns  #marchmeetthemaker #haberdasheryfunclasses #pdfpattern #surfacepatterndesign #blockprinting #sewingtutorial #zoomclasses #marchmeetthemaker2021 #isewlation #mmtmf
This photo popped up in my memories this morning. This photo popped up in my memories this morning. It was taken 3 years ago @bookhou store in Toronto. What a fun store Arounna has created.  I was so excited ( and nervous ) to visit the shop and see her designs.

Time flies and wow, how things have changed. I used to travel ALOT for work. In some ways, I miss those days of constant travel. While at the time it seemed as way too much travel and I missed my kids when I was away. Right now, what I would give to be traveling like I did then - places like Toronto, New York and Las Vegas. I always managed to get out and about and have a little fun on the side. Plus my old coworkers were fun, super goofy and so great to be around. They made the travel, trade shows and long hours easy to be with.
.
.
.
#bookhou  #haberdashery #haberdasheryfun #blockprinting #blockprintingfabric #surfacepatterndesign #zoomclasses #isewlation #blockprintdesigns #zoomclasses #haberdasheryfunclasses  #onlineclasses #untilitravelagain
An outcome from the class today. A big thank-you t An outcome from the class today. A big thank-you to everyone who joined my blockprinting workshop.  I love sharing my simple approach and having people start blockprinting and printing on fabric in one hour!  Want to join my “How to start block printing w/simple techniques” workshop in March? Please email me at -  marni@haberdasheryfun.com
.
.
.
#haberdashery #haberdasheryfun #zoomclasses #onlineclasses #surfacedesign #blockprinting #blockprintingonfabric #haberdasheryfunclasses #pdfpattern 
#haberdasheryfunpatterns #haberdasheryfunprints #curvyzipperpouch
Tomorrow is the day! Want to learn blockprint and Tomorrow is the day! Want to learn blockprint and don’t know where to start? This is for you. Come join my free blockprinting zoom workshop. It’s easy, please email me - marni@haberdasheryfun.com to get the details.
.
.
#haberdashery #blockprinting #haberdasheryfunpatterns #speedballink #handmade #haberdasheryfun #handprintedtextiles #handprintedfabric #zoomclasses #zoomworkshop #surfacedesign #surfacepatterndesign #haberdasheryfunclasses
Looking for a simple sewing project? This is a fr Looking for a simple sewing project?  This is a free PDF sewing pattern offered in my online store- the 1 hour reversible tote. My last 2 posts are for the quilting ripstop version. Click the link in my profile for more details.
.
.
.
#haberdasheryfun #1hourreversibletote #haberdasheryfun #aprilrhodesfabric #arizonafabrics #arizonafabric #PDFpattern #sewingproject #easysewingproject #easysewing #simpleliving #learntosew #pdfsewingpatterns #pdfsewingpattern
Follow on Instagram

Copyright © 2021 · Klar theme by Crimson Pear :: web & surface design