I’m back sharing a sewing project and a giveaway today!
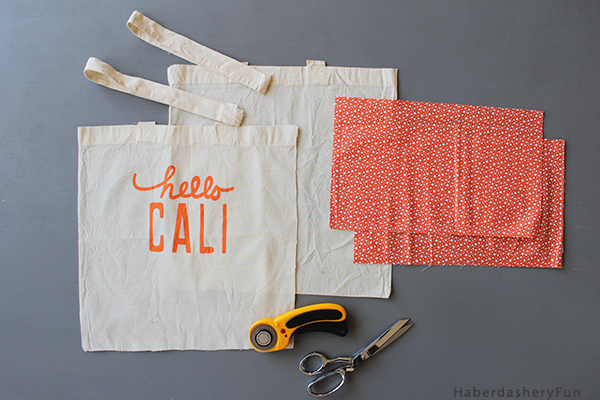
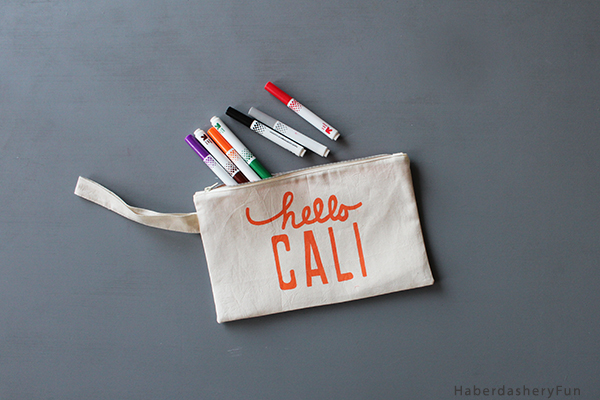
A few years ago I made “Hello Cali” swag bags for a girls trip to Santa Barbara, California. I bought plain cotton shopping totes and used my Silhouette Cameo to create a fun design for the front.
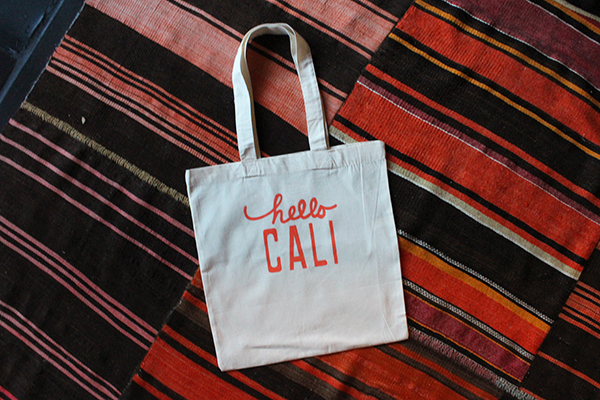
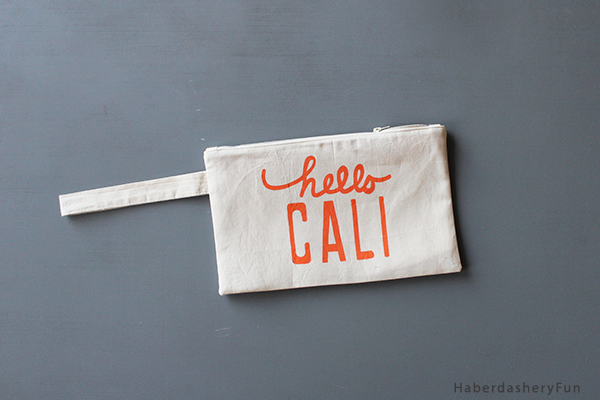
Last June we moved across the country from Tampa to Los Angeles and I left a few moving boxes in the garage. While I was rummaging through the boxes last week, I found one of my “Hello Cali” totes shoved inside. I thought it would be fun to repurpose the bag into something else..
My friend Trish loves receiving my samples. She recently visited for a few days and I promised her some goodies.. Re-working the tote into a zipper pouch was perfect and and right up her alley.
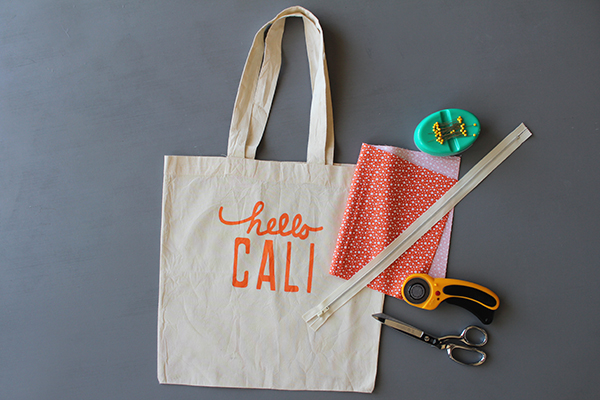
Materials:
- Reusable cotton shopping tote
- Cotton fabric – lining
- Interfacing – optional
- Metal zipper
- Silhouette machine
- Silhouette materials – stencil vinyl, fabric ink and sponges
- Sewing machine and sewing supplies
- Iron and ironing board
Let’s get started:
Step 1 – Use your Silhouette machine, stencil vinyl and fabric ink and create a design on a cotton tote. Not sure where to start? Try one of my tutorials here and here. Skip this step if you already have a cotton tote ready to go.
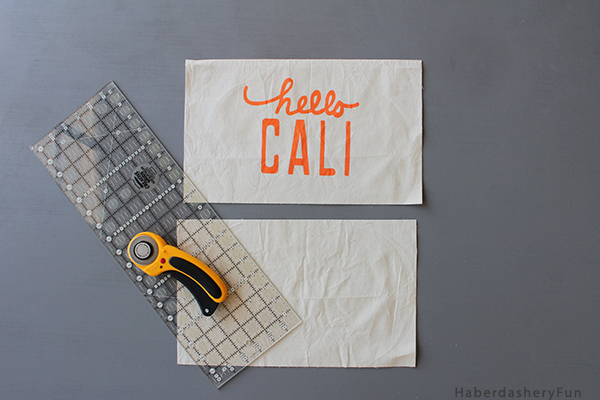
Step 2 – Determine the size of the pouch. The measurements for this pouch ended up being 13-1/2″L x 8-1/2″. I first cut off the straps, then cut the bag open – cut along the sides and bottom. Use a rotary cutter to make 2 even rectangles, cut another 2 rectangles for the lining. Remember to give enough room around the ” logo/saying/words” and also add a 1/2″ seam allowance. Note: The cotton shopping totes can be a bit thin, so if you want a sturdier pouch, use interacting on the back of both outside pieces.
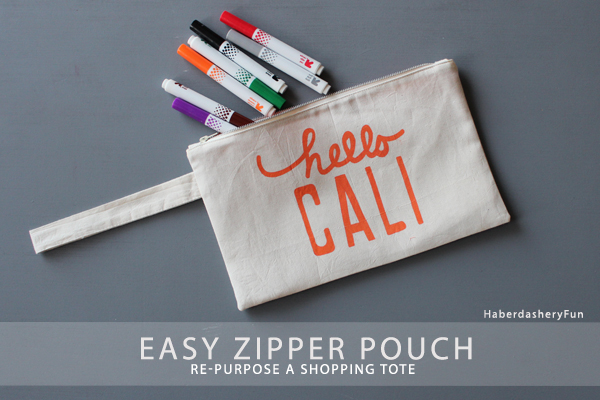
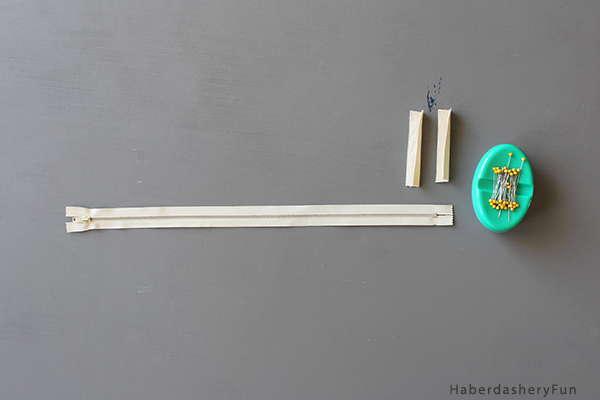
Step 3 – Cut your zipper down to size. Use one of the straps as zipper tabs. Need some help with zipper tabs? I have a few tutorials you can try. Check out this one that I wrote for Momtastic and another one here.
Step 4 – Sew the zipper to the outside and lining rectangles. Not sure how to do this? My tutorial called “Sew a Colorful Printed Pouch” has a great step by step tutorial.

Step 5 – Use all the tote pieces! Make the other shoulder strap into a handy wrist strap. Cut the strap down to the size you like, remember to leave 1/2″ seam allowance at each end. Once you have the zipper sewn into place, measure down from the top left edge about 1 – 2″ and pin the strap in place. Make sure that raw edges meet raw edges. Pin so that the strap faces inwards.
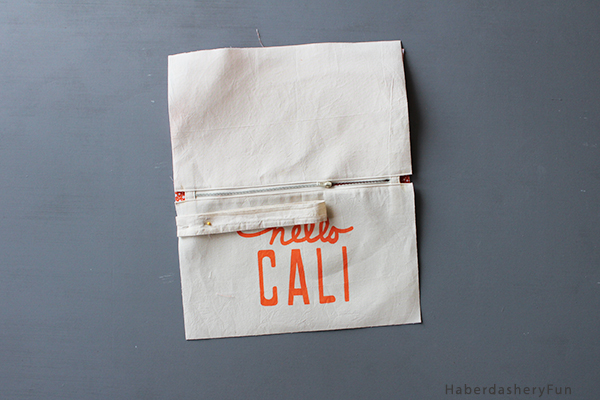
Step 6 – Finish sewing the pouch together. Open the zipper halfway. Fold the pouch along the zipper, place the outside right sides together and then the cotton lining right sides together. Match at all seams, be especially careful to match at the top sides. Pin along the outside edge. Stitch together with a 1/4″ – 1/2″ seam allowance. Leave a 3″ – 4 ” opening along the bottom seam of the lining. Press the seams. Trim each corner. Pull the pouch through the opening and wiggle corners into place. Press again. Pin the lining opening closed and sew together. That was a lot of info – need step by step images with the written instructions? My tutorial called “Sew a Colorful Printed Pouch” is very similar.
And now on to the giveaway.. My Silhouette Challenge buddies and I are all sharing projects on our blogs today, so peruse the projects below for a wealth of inspiration! Please note that this group is not affiliated with the Silhouette America 2016-2017 Design Team.
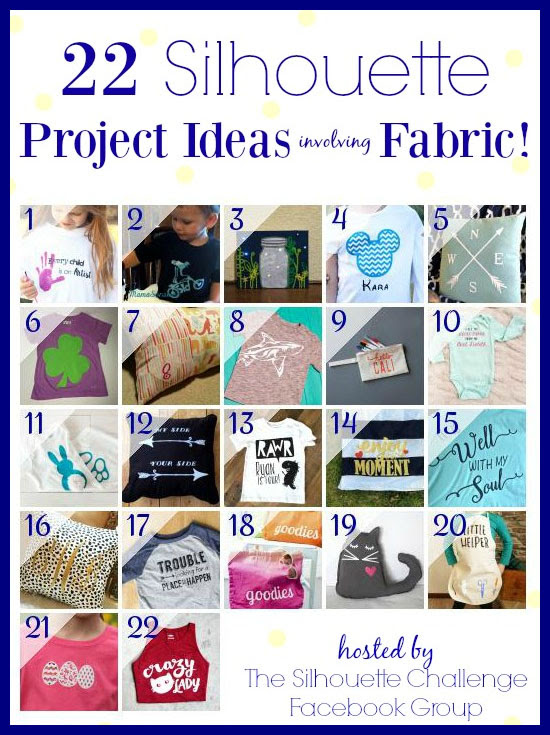
1. Cutesy Crafts // 2. Mama Sonshine // 3. Morena’s Corner // 4. Simply Kelly Designs // 5. Coral + Mint Design Co. // 6. A Time For Seasons // 7. Architecture of a Mom // 8. Where The Smiles Have Been // 9. Haberdashery Fun – Me! // 10. The Thinking Closet // 11. The Crafting Nook // 12. Get Silvered // 13. Tori Grant Designs // 14. From Wine to Whine // 15. Create & Babble // 16. Curly Crafty Mom // 17. unOriginal Mom // 18. The Small Stuff Counts // 19. The Experimental Home // 20. Creative Ramblings // 21. Adventures in All Things Food // 22. Minted Strawberry
Info about the Heat Press:
Pro World Inc is giving one lucky reader a Heat Press Valued at $300! To enter: just complete the entries in the Rafflecopter widget below. You have 26 potential entries, which means a lot of winning power. So, hurry up and enter!
This giveaway runs from today through Monday, March 21st at 11:59p eastern and is open to anyone 18 years of age or older with a lower 48 U.S. mailing address. You can read the rest of the terms and conditions in the widget below.


Terrific idea to re-purpose your tote bags. Great project.
I love this! I have so many tote bags that I never use, this would be a great way to repurpose them!
This is such a cute and personalized tote bag, love the color you selected for the lettering, too!
Carrie
curlycraftymom.com
HI Carrie – thank you! Have a great night. – Marni
So super cute!!!! Love matching things! A tote bag and pouch with the hello Cali is so cute!
Great project!
Hugs
Hi Haberdashery,
I do see creativity in your each post. I must say & appreciate your work toward your blog or audience.