Haberdashery Fun

  • Home
  • About
    • Look Book
  • Contact
    • Collaborate?
  • Tutorials
  • Shop
  • Freebie
    • Email
    • Facebook
    • Instagram
    • Pinterest

Keep up to date with the latest posts!

Quick Tip.. Sewing Boxed Corners

in Sewing Tips & Tricks on 10/07/14

Quick Tip Sewing Boxed Corners

Want to learn how to sew perfect boxed corners? I figured out this trick a few years ago and it works like a charm. I’ve made way too many storage bins that just don’t sit right – and the reason is that the corners are uneven. I’ve wanted to pass along this simple trick and today is the day!

You can use this method for fabric bins, tote bags, cosmetic cases..Anything with a boxed corner. I promise that your wonky, off kilter bottoms will be gone!

Materials needed:

  1. Quilting ruler – I love using the Creative Grids brand
  2. Pins
  3. Disappearing fabric ink pen
  4. Fabric, etc

I’ve used this trick many times. You can see my fabric storage bin tutorials here and here.

Let’s get started…

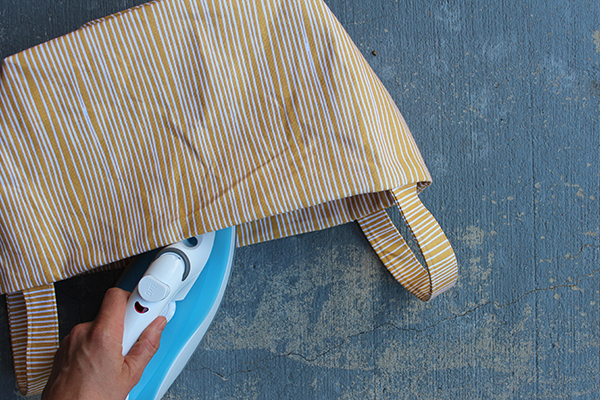
Step 1 – Place right sides together and pin at side seams. Place into your sewing machine and sew each side seam together. Press.

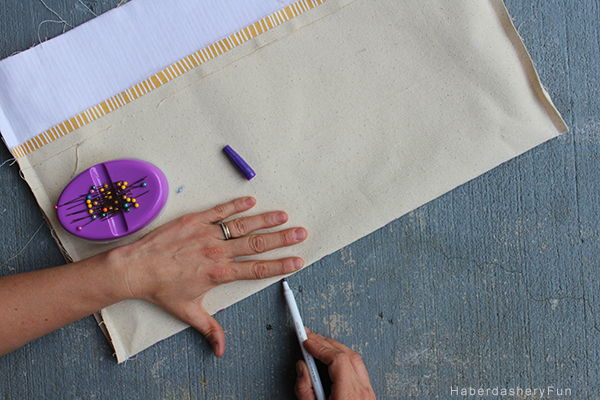
Step 2 – Finger press along the bottom fold to make a crisp line. Use the disappearing fabric ink pen and make a dashed line. Start at one side seam and continue across the entire bottom fold to the other side seam.

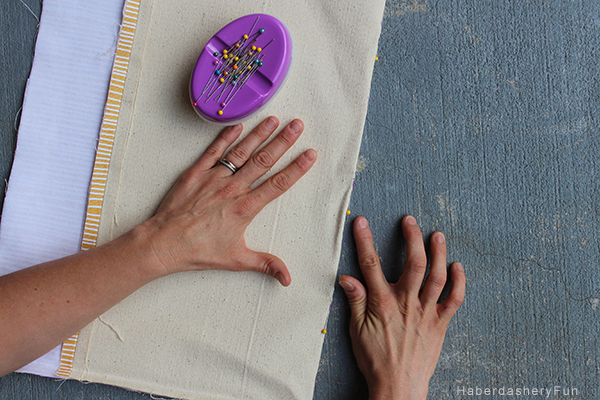
Step 3 – Keep the bottom folded. Starting a few inches in from the side seam, follow the dashed lines and place pins into the fold. Continue placing pins along the entire fold. This is the key part of my simple tutorial… But you need to be precise with the pin placement.

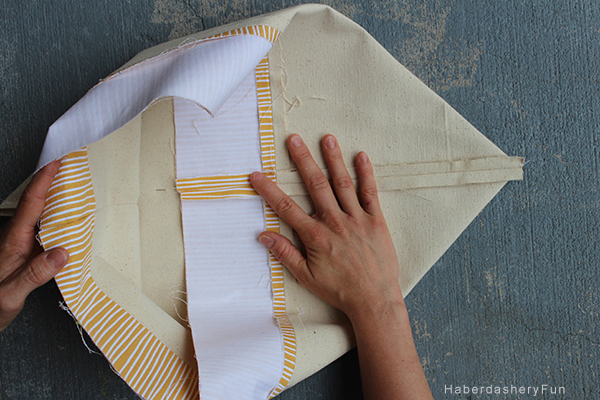
Step 4 – Turn so that the item that you are sewing is facing upwards. You should see the pin line across the bottom of the bin. Fold one corner into the bin and MATCH the side seam with the pin line.. It should make a point.

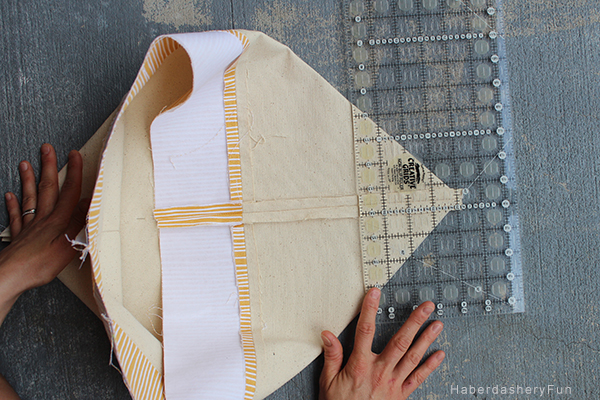
Step 5 – Finger press any wrinkles out. Double check that the side sits at a 45 degree line. Place the ruler at the point, the 45 degree angle on the ruler should be aligned with the fabric that makes the point. Use your disappearing fabric pen, mark a line, pin and you are good to go. Repeat for the other side. Place into your sewing machine you you have a perfect boxed corner..

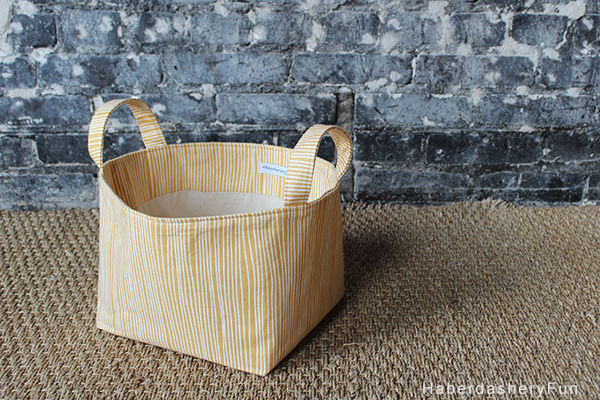
Click here for the full tutorial on this bin with handles

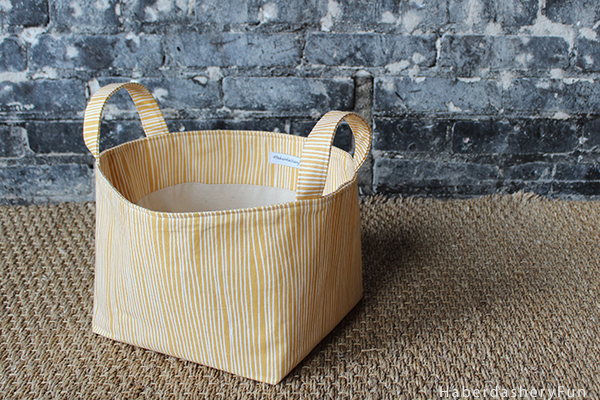
Want to know the fabric I used? It’s canvas fabric from the wonderful Lotta Jandsdotter.

It’s that simple.  Awesome right?

Related Posts Plugin for WordPress, Blogger...

9 Comments

« DIY.. The Perfect Scarf Tutorial
A Little Vacation.. »

Comments

  1. Kate says

    07/19/2014 at 12:40 pm

    Thanks so much for making box corners so easy.

    Reply
  2. 33Adela says

    05/18/2017 at 6:16 pm

    I must say it was hard to find your website in search results.
    You write interesting posts but you should rank your page higher in search
    engines. If you don’t know how to do it search on youtube:
    how to rank a website Marcel’s way

    Reply

Trackbacks

  1. CraftCrave | DigiFree | CraftCrave says:
    07/11/2014 at 8:06 am

    […] Quick Tip.. Sewing Boxed Corners – 1 freebie(s)? […]

    Reply
  2. July Round Up | Haberdashery Fun says:
    07/31/2014 at 9:54 am

    […] Sewing Perfect Boxed Corners.. I’ve wanted to share these super duper easy steps for quite some time. I hope this helps all of you! […]

    Reply
  3. DIY.. Reversible 1 Hour Tote | Haberdashery Fun says:
    10/12/2014 at 5:07 pm

    […] Cut off the tip. Leave a 1/2″ seam allowance. Want to learn more? Check out my quick tip tutorial on sewing boxed corners. […]

    Reply
  4. DIY.. Storage Bins With Piping Trim | Haberdashery Fun says:
    11/04/2014 at 9:30 am

    […] Create your boxed corners – Check out my boxed corner tutorial here. It breaks down the process into very easy steps. on the 45 degree angle, measure inwards 3″. […]

    Reply
  5. mantis irreligiosa - spitting in the gene pool » Blog Archive » Accessories says:
    03/07/2015 at 6:39 am

    […] I don’t add tote straps because I prefer using the shoulder strap. Also I’ll create the inner pockets from folded lining fabric to achieve a sturdier construction (more layers -> less floppy) The bottom gets boxed corners. […]

    Reply
  6. Quilted Ripstop Reversible Tote | Haberdashery Fun says:
    02/01/2021 at 3:58 pm

    […] Cut off the tip. Leave a 1/2″ seam allowance. Want to learn more? Check out my quick tip tutorial on sewing boxed corners. […]

    Reply
  7. Make A Block Printed ToteBag | Haberdashery Fun says:
    01/07/2022 at 1:06 pm

    […] Cut off the tip. Leave a 1/2″ seam allowance. Want to learn more? Check out my quick tip tutorial on sewing boxed corners. […]

    Reply

Leave a Reply Cancel reply

Your email address will not be published. Required fields are marked *

This site uses Akismet to reduce spam. Learn how your comment data is processed.

About me


Hi there - I'm Marni Weaver. A sewer, a sometimes quilter and a lover of fabric design. I started this blog to share my ideas. Come Join the Fun
shop now

Popular Categories

project for baby fabric projects seasonal projects fat quarter projects sewing tips and tricks inspiration

Categories

  • Applique
  • Baby
  • Bags and Pouches
  • Block Printing
  • Color
  • DIY Projects
  • Fabric
  • Fabric Design
  • Fat Quarter Projects
  • Home Decor
  • Inspiration
  • Just for Fun
  • Kids
  • No Sew
  • Patterns
  • Print On Fabric
  • Quilting
  • Scrap Fabric Projects
  • Seasonal
  • Sewing Tips & Tricks

Lovely sponsors

Recent Comments

  • Make A Simple Block Print Tote Bag | Haberdashery Fun on DIY.. Colorful Dish Towel Tote Bags
  • Make A Simple Block Print Tote Bag | Haberdashery Fun on Sew Asymmetrical Color Block Totes Tutorial
  • Make A Block Printed ToteBag | Haberdashery Fun on Sew A Reversible Tote
  • Make A Block Printed ToteBag | Haberdashery Fun on Quick Tip.. Sewing Boxed Corners
  • 20 Creative DIY Storage Bin Ideas - DIY & Crafts on Sew An Easy Fabric Storage Bin

Projects Elsewhere

find me on Pellon Projects sew mama sew contributor

momtastic contributor

Pinterest

Visit Marni@Haberdashery Fun's profile on Pinterest.
Follow on Bloglovin

I'm Reading

  • Cluck Cluck Sew
  • Cooking Dangerously
  • In Color Order
  • Jen Hewitt
  • Jolly Jabber
  • Karly Spalding Photography
  • Leigh Laurel Studios
  • Lindsay Sews
  • Lotta Jansdotter
  • Love Patchwork and Quilting Magazine
  • Made
  • Making It Lovely
  • Noodle-Head
  • Polka Dot Chair
  • Sharon Holland Designs
  • Silhouette America Blog
  • Silhouette Design Store
  • The Purl Bee
  • The Purple Fig

Press:

Stitch Winter 2014

haberdashery_fun

Marni Weaver
I have a drawer where I keep all of my block print I have a drawer where I keep all of my block printed papers and have often wondered.. “What the heck do I do with all of these”.

How about you?

I recently found a bunch of  tutorials over at @modpodgerocks and thought it would be fun to make wood coasters with my block prints. They turned out better than expected and so I thought to share with you.

Want more info? I created a blog post. See the link in my profile for the blog post and details. 

Day27/100 #100dayproject #dothehundreddayproject #100daysofsimpleshapes #haberdasheryfun #blockprintingmadesimple #onlineclasses #zoomworkshops #haberdasheryfunpatterns #haberdasheryfunclasses #handmadestamp #modpodge #modpodgecrafts #decoupageart #decoupagelovers #blockprintedbyhand
I’m sharing about how to frame your block printe I’m sharing about how to frame your block printed fabric on my blog today. Day 26/100 #100dayproject 

If you have ever thought you would like to learn how to block print… I have a course for you. It is called Block Printing Made Easy. It is all about the basics - working with simple shapes, design prompts and getting creative on paper and fabric.

This is an online course and starts on Monday, May 30. There are 3 modules with videos and also included in the course are 3 live zoom workshops. The videos are self paced, so the good news is you can cruise through them or take all the time you need.

The course is $97 USD.

See the link in my profile for additional details on the course( breakdown on each module) and to also access to my blog post.

#dothe100dayproject #haberdasheryfun 
#blockprintingmadeeasy #100daysofsimpleshapes #zoomclasses #haberdasheryfunpatterns #speedballfabricink #handmadefabrics #dothe100dayproject2022 #100dayproject2022 #handmadestamps #blockprintedfabric #ikeahacks #ikeaframes
Goodbye triangles, hello circles. I’m working Goodbye triangles, hello circles. 

I’m working on a project, so I printed a bunch of small fabric squares with my new circle stamp. Such a simple yet effective stamp.

I am launching an online course called “Block Printing Made Easy? Want to learn to block print? The course starts in two weeks (5/30). Want more info? See the link in my profile to join the waitlist and also to view the course details. 

Day 25/100 #100dayproject 

#dothe100dayproject #dothe100dayproject2022 #haberdasheryfun #haberdasheryfunpatterns #pdfpattern #blockprinting #blockprintingonfabric #blockprintingmadeeasy #blockprintingworkshop #speedballfabricink #konacottonsolids #speedballart
I’ve got one more triangle print to share and I I’ve got one more triangle print to share and I think that’s a wrap. Simple and easy. The pin cushion on that right that was gifted to me from my grandmother Mor Mor really takes the stage in my opinion 

The circle shape is next. I’m excited to work with no corners and see what will unfold.

Day 24/100
#haberdashery #100dayproject 
#100daysofsimpleshapes #blockprintingmadeeasy #dothe100dayproject #dothe100dayproject2022 
#haberdasheryfun #ikeahacks #konacotton #konacottonsolids 
#speedballfabricink #blockprinting #easyblockprint #haberdasheryfunpatterns #haberdasheryfunclasses
A mash up of triangle stamps I created so far duri A mash up of triangle stamps I created so far during the #100dayproject.
 
Who knew the triangle shape could be so much fun? I have had a blast the last playing around with it - both dissecting the shape and putting it back together. 

Which one is your favorite?

I can’t believe I am saying this, but Im ready to move on to a new shape. One that is more soft and organic. Next up, the circle!
Day 23/100

#100daysofsimpleshapes 
#haberdashery 
#blockprinting 
#blockprintingonfabric 
#blockprintingmadeeasy 
#haberdasheryfun
#speedballfabricink #speedballink #fatquarters 
#handmade #dothe100dayproject2022 
#100dayproject2022
Follow on Instagram

Copyright © 2022 · Klar theme by Crimson Pear :: web & surface design

Copyright © 2022 · Klar on Genesis Framework · WordPress · Log in