Haberdashery Fun

  • Home
  • About
    • Look Book
  • Contact
    • Collaborate?
  • Tutorials
  • Shop
  • Freebie
  • Block Printing Course
    • Email
    • Facebook
    • Instagram
    • Pinterest

Keep up to date with the latest posts!

DIY.. Fabric Christmas Tree Ornament

in DIY Projects, Seasonal on 29/11/13

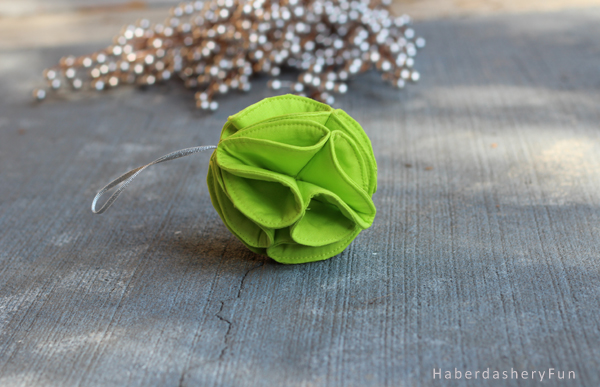
We have a very active toddler in our house. Which means limited options for Christmas decorations this year. We really want to put up a tree, so my mother in law suggested plastic ornaments on the bottom half. Good idea!!??  My husband was flipping though the DwellStudio catalogue and decided that I should make the ornaments.  So here is my attempt at a “DwellStudio Inspired” fabric ornament..

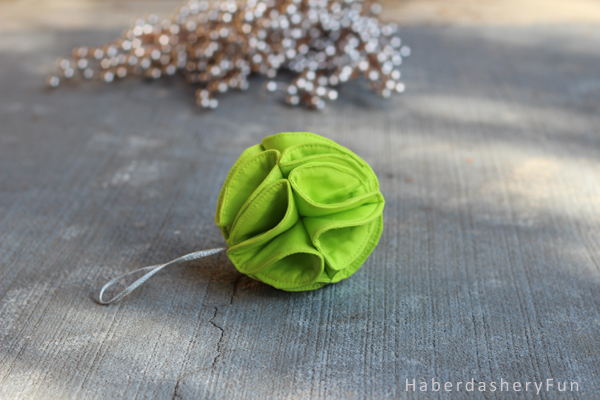
My husband loves the ornament. I’m sure Tanner will think it is a ball to throw around.  If you saw my post on Wednesday, I initially had no idea what the outcome would be. So I’m happy with the results and I plan to make more!! Hello red fabric. Hello sparkly white.. What do you think?

Materials:

  1. 1/4 yard of colorful fabric
  2. Batting – Pellon 987F Fusible Fleece worked great for this project. This is a slightly thinner batting
  3. Ribbon
  4. Sewing machine and sewing supplies
  5. Compass, pen and paper
  6. Iron and ironing board

Before we get sewing you need to make your pattern. Using your compass, draw a circle with a 5″ diameter. Note that this includes the seam allowance.

Alright let’s get sewing!

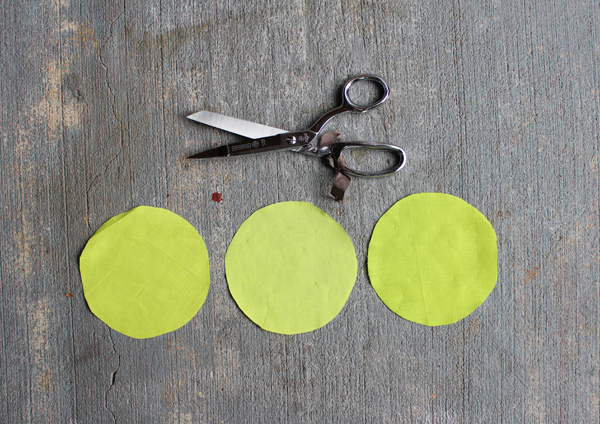
Cut out 18 fabric circles and 8 pieces of batting. You might want to cut out a few extras just for screw ups..

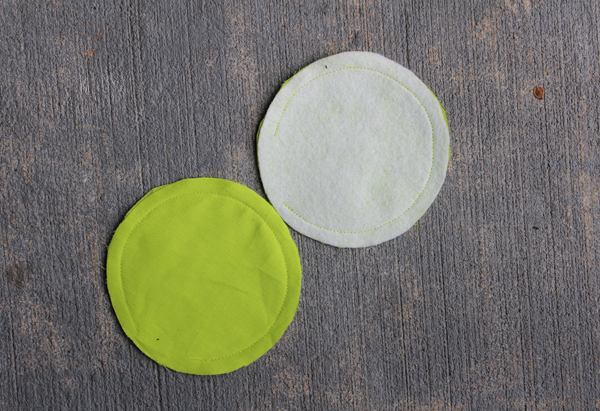
Fuse the batting to 8 circles.  Place right sides together and sew with a 1/4″ seam allowance. Leave a 1″ – 1-1/2″ opening to turn right side out. Press seam with an iron.

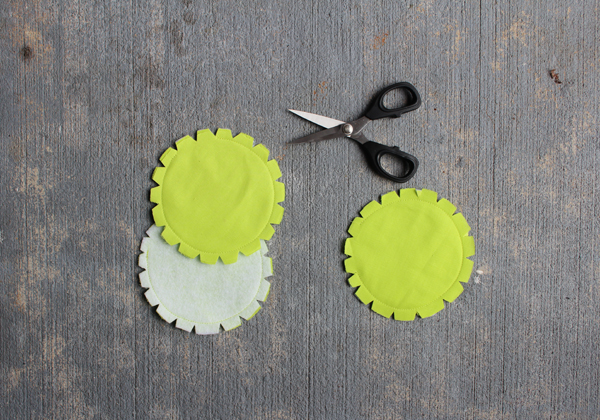
Notch the seam allowances about every 1/2″.

Turn right side out.  Jiggle the seam allowance around so that the circle edge lays smooth.

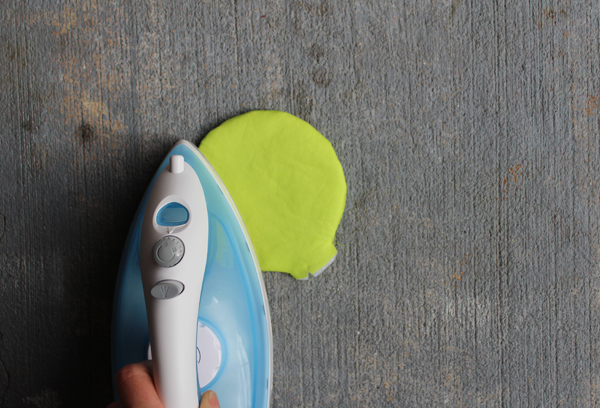
Press with an iron to lay flat. Turn under the opening and press the seam allowance inwards. Pin if needed. Place into a sewing machine and edge stitch, stitch as closely to the edge as possible.

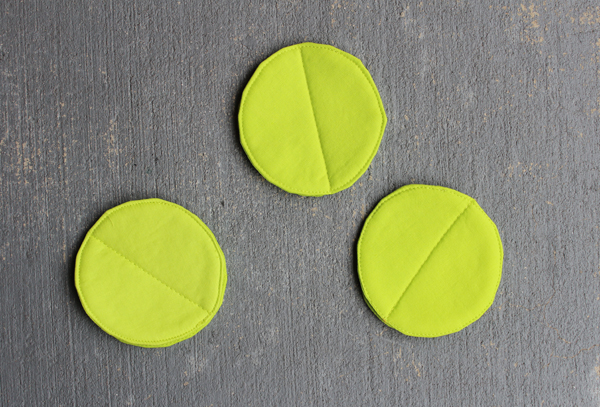
Lay one circle on top of the other. Place into the sewing machine and stitch together at the center. Back stitch at both ends. Press with an iron. You should have 4 circle sets.

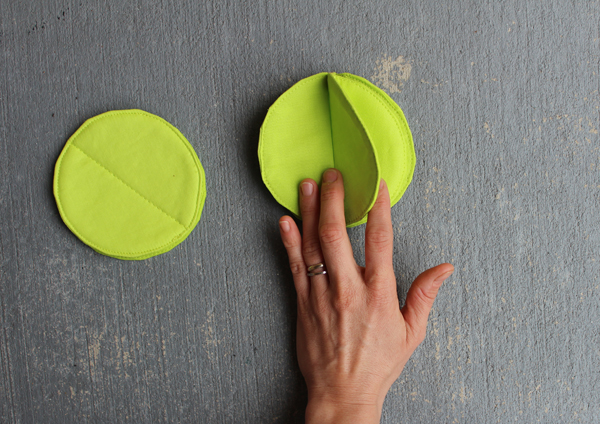
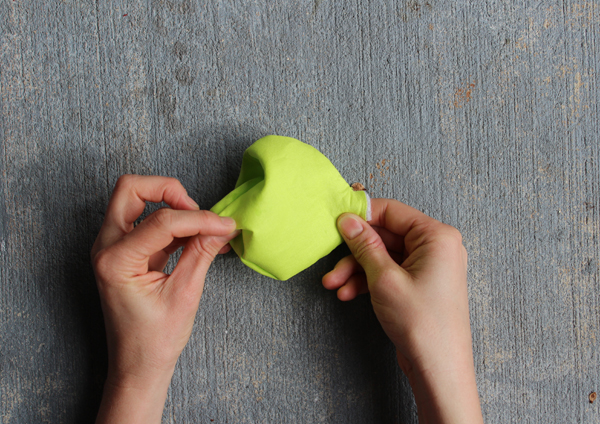
Turn and fold the circle at the stitching line. The stitching line will now be sandwiched and you still have  2 layers of fabric. Press with an iron.  This part gets tricky and you may need to play around with the fabric until you get something fun and pretty. I folded the circles one more time, but in the opposite direction. A swirly flowery shape appeared and I decided this would be the pattern for the ornament. Repeat for the other 3 circles sets. Once you have 4 of the same design, add a small piece of ribbon at that top and hand stitch them all together.. Ta- dah!

Happy Sewing!!

17 Comments

« Inspiration.. Circles
November Round Up »

Comments

  1. Laraine says

    11/29/2013 at 3:10 pm

    This is a terrific ornament for kids to hang and help their parents design. Packing away for the next year will be a breeze

    Reply
  2. onel says

    11/30/2013 at 7:56 pm

    So cute! Not to mention that there are tons of different printed fabric, oh the possibilities…!!

    Reply
  3. Ann says

    12/01/2013 at 9:05 am

    These are so pretty! My aunt & uncle are having a golden anniversary party next weekend, so I might just make them a set of golden ornaments. Thanks!

    Reply
  4. Julia @ FaveCrafts says

    12/06/2013 at 10:05 am

    Hi there!

    What a cute project! I love it so much that I decided to feature it in our roundup of DIY Christmas ornaments! Check it out here: http://www.favecraftsblog.com/easy-christmas-ornament-crafts/

    Have a great day!

    Reply
  5. Katie says

    12/07/2013 at 5:57 pm

    I love your ornament, it is beautiful. Thank you for including tutorial with pictures along every step. I have pinned and may just have to try it out! 🙂

    Reply
    • Haberdashery Fun says

      12/07/2013 at 7:47 pm

      Hi Katie – thank you.I appreciate your stopping by!

      Reply
  6. Tori says

    12/09/2013 at 11:19 pm

    What a cool tutorial! I just love this ornament. They would look so cute tied to a couple of packages too! Thanks for linking up to Tell Me Tuesday. I will be featuring you this week!

    Reply
  7. C B says

    08/07/2014 at 9:51 am

    beautiful … i have grown children, but i like this ornament! I can see using different colors. thanks

    Reply
    • Haberdashery Fun says

      08/12/2014 at 11:09 am

      Thank you. This is a tutorial where you can just go with it and twist and turn the fabric and see what happens. Have a great week.

      Reply
  8. Sarah J says

    11/18/2014 at 12:09 pm

    Popping over from The Makers link up party! These are so cute! The possibilities are endless with the fabrics you could use.

    Reply
    • Haberdashery Fun says

      11/18/2014 at 9:45 pm

      Thanks Sarah. I agree with you. There are so many fun options for a fabric ornament like this. Hope you decide to make one – Marni

      Reply
  9. Genie says

    11/18/2014 at 3:23 pm

    I think those are adorable!

    Reply
    • Haberdashery Fun says

      11/18/2014 at 9:45 pm

      Hi Genie,

      Thanks. Super easy to do.. just twist and have some fun. Hope you decide to make one. Let me know how it goes. – Marni

      Reply
  10. Emily says

    11/23/2014 at 12:08 am

    this is lovely!! I want to make a few of these.. I have some scraps of Christmas fabric that would work great! you have been featured this weekend. Come check it out! http://nap-timecreations.com/2014/11/projects-you-can-sew-this-weekend.html

    Reply

Trackbacks

  1. Link Love: Easy Christmas Ornament Crafts says:
    12/05/2013 at 7:46 pm

    […] Fabric Christmas Tree Ornament from Haberdashery Fun […]

    Reply
  2. Do Tell Tuesday #1 | Lil' Mrs. Tori says:
    12/10/2013 at 12:11 am

    […] The Colored Door // Message Center – Delineate Your Dwelling //Fabric Ornament – Haberdashery Fun // Gift Tags – Persia Lou // Nutcracker Silhouette – Fort Ledbetter // Apple Hat – […]

    Reply
  3. 35 beautiful DIY handmade Christmas ornaments says:
    11/10/2014 at 8:01 am

    […] fabric Christmas ornament from Haberdashery […]

    Reply

Leave a Reply Cancel reply

Your email address will not be published. Required fields are marked *

This site uses Akismet to reduce spam. Learn how your comment data is processed.

About me


Hi there - I'm Marni Weaver. A sewer, a sometimes quilter and a lover of fabric design. I started this blog to share my ideas. Come Join the Fun
shop now

Popular Categories

project for baby fabric projects seasonal projects fat quarter projects sewing tips and tricks inspiration

Categories

  • Applique
  • Baby
  • Bags and Pouches
  • Block Printing
  • Color
  • DIY Projects
  • Fabric
  • Fabric Design
  • Fat Quarter Projects
  • Home Decor
  • Inspiration
  • Just for Fun
  • Kids
  • No Sew
  • Patterns
  • Print On Fabric
  • Quilting
  • Scrap Fabric Projects
  • Seasonal
  • Sewing Tips & Tricks

Lovely sponsors

Recent Comments

  • HaberdasheryFun and an easy Kraft-tex sewing project | Haberdashery Fun on Collapsible Kraft-Tex Bowl
  • HaberdasheryFun and an easy Kraft-tex sewing project | Haberdashery Fun on Sewing With Kraft-Tex
  • 3 Simple Summer Sewing Tutorials | Haberdashery Fun on Sew A Canvas Zipper Pouch
  • 3 Simple Summer Sewing Tutorials | Haberdashery Fun on Sew Asymmetrical Color Block Totes Tutorial
  • 3 Simple Summer Sewing Tutorials | Haberdashery Fun on Sew A Baby Towel With A Hood

Projects Elsewhere

find me on Pellon Projects sew mama sew contributor

momtastic contributor

Pinterest

Visit Marni@Haberdashery Fun's profile on Pinterest.
Follow on Bloglovin

I'm Reading

  • Cluck Cluck Sew
  • Cooking Dangerously
  • In Color Order
  • Jen Hewitt
  • Jolly Jabber
  • Karly Spalding Photography
  • Leigh Laurel Studios
  • Lindsay Sews
  • Lotta Jansdotter
  • Love Patchwork and Quilting Magazine
  • Made
  • Making It Lovely
  • Noodle-Head
  • Polka Dot Chair
  • Sharon Holland Designs
  • Silhouette America Blog
  • Silhouette Design Store
  • The Purl Bee
  • The Purple Fig

Press:

Stitch Winter 2014

haberdashery_fun

Marni Weaver
Working on a commission and a request for the colo Working on a commission and a request for the color terracotta. I’m thinking the top right vs the bottom left. And funny enough, this fits perfectly for today’s #marchmeetthemaker prompt “decision”

#haberdasheryfun #100dayproject #marchmeetthemaker2023 #surfacepattern #terracottabowl #speedballink #textiledesigner #homedepotcolormatch #haberdasheryfunpatterns #blockprinting #blockprintedfabric #surfacepatterndesign #smallbusinesslife
Earlier today I was working on a new pattern and t Earlier today I was working on a new pattern and then realized that my table had legs. 😂 While I’m excited to share about my upcoming tote pattern release, this photo took me down memory lane. My sweet boy Arlo turns 7 this week. He is always by my side and has been my shadow since the day he was born❤️ . He is often in my studio, patiently waiting, photobombing a tutorial or playing w/ my supplies.

#haberdasheryfun #koifabric #rashidcolemanhale #rubystarsocietyfabric #haberdasheryfunpatterns #pdfpattern #marceetthemaker #marchmeetthemaker2023 #100dayproject #blockprintingmadeeasy
I love today's prompt "from idea to product" for # I love today's prompt "from idea to product" for #marchmeetthemaker. If you swipe, you can see the the original. I made that group of block print quite a few years ago and this pinwheel is a motif that I come back to all the time. 

Do you block print or make your own designs? What would you like to create with your patterns or prints? Have anything in mind?

#blockprintingmadeeasy #blockprinting #surfacepatterndesign #haberdasheryfun
#onlinecourses #chelseatakesshots #haberdasheryfunpatterns #makeshit #surfacepatterncommunity #whatsyourwhy #marchmeetthemaker2023 #100dayproject #dothe100dayproject #havefun #scandiboho.
Instagram post 18073744054322730 Instagram post 18073744054322730
Do you mix and match your handmade block prints an Do you mix and match your handmade block prints and your fabric stash?  I love this combo of champagne blush and turquoise. What would you make with it?

#haberdashery #modafabrics #gingiberfabric #modafabricsandsupplies #modafabric #meetthemaker2023 #modafabric 
#meetthemaker #100dayproject #haberdasheryfun #100dayproject2023 #blockprintingmadeeasy #blockprinting #cottoncanvas #speedballfabricink.
Follow on Instagram

Copyright © 2023 · Klar theme by Crimson Pear :: web & surface design

Copyright © 2023 · Klar on Genesis Framework · WordPress · Log in