Haberdashery Fun

  • Home
  • About
    • Look Book
  • Contact
    • Collaborate?
  • Tutorials
  • Shop
    • Email
    • Facebook
    • Instagram
    • Pinterest

Keep up to date with the latest posts!

How To Sew A Fabric Bin

in Bags and Pouches on 07/09/23

I have always loved storage bins and have been sewing them for years. This mini bin is perfect for your desk and will hold all your little goodies.

Need a sewing project? Make a fabric bin with haberdasheryFun

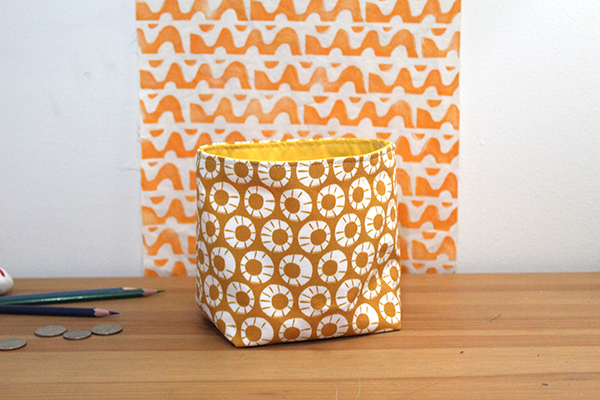
The finished size is 5-½”L x 4-½”W x 5-½”H. You can roll the top edge down.. So make sure to use bright and colorful fabric for the lining.

Did you know that bins are super easy to make? Depending on your sewing skills, you can make this bin in under an hour. All you need is two rectangular pieces of fabric, a little bit sewing experience and you’re done! This project is perfect for a beginner sewer.

Materials Needed:

  1. Fabric – 2 colors of cotton, linen or cotton canvas
  2. Fusible Interfacing – Pellon SF 101 Shape-Flex
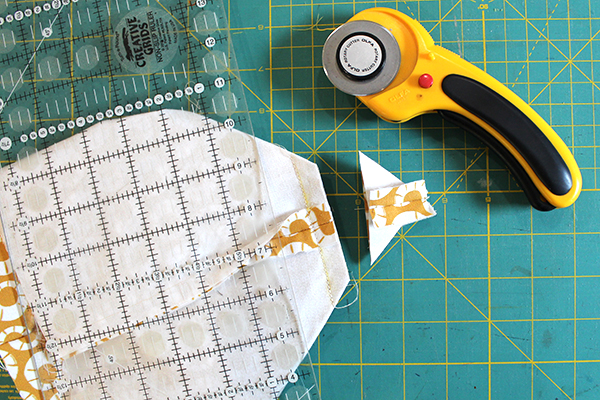
  3. Creative grids quilting ruler
  4. Olfa Rotary Cutter
  5. Cutting Mat
  6. Pen or “Clover” quilt marking pen. Have you tried this chalk pen? It’s one of my favorite tools. Try it, you will love it.
  7. Sewing machine and sewing supplies
  8. Iron and ironing board
Need a sewing project? Make a fabric bin with haberdasheryFun

Let’s get sewing:

Step 1 – Sew the Sides of the Storage Bin

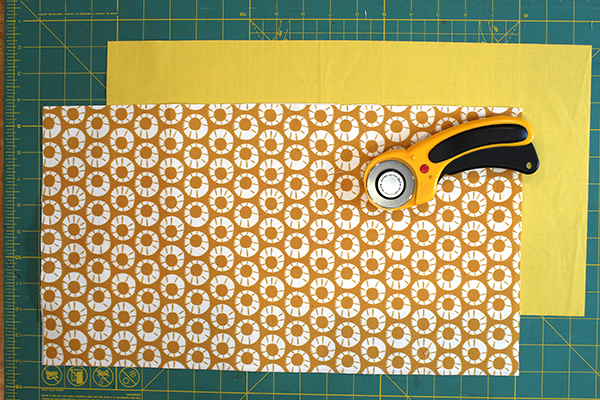
  1. Exterior and lining fabric – Cut 2 pieces measuring 16″L x 10″W.  This measurement includes a 1/2″ seam allowance.  I fused interfacing to both the exterior and lining fabric to give it more structure and let the bin have the ability to stand up on its own.
  2. Fusible Interfacing – Cut 2 pieces measuring 16″L x 10″W.
  3. Iron the interfacing to the wrong side of the exterior and lining fabric.
  4. Fold rectangles in half. Right sides facing. When folded in half, the pieces should measure 8″L x 10″W.
  5. Pin along each side and sew together with a 1/2″ seam allowance. Backstitch at the top and bottom.
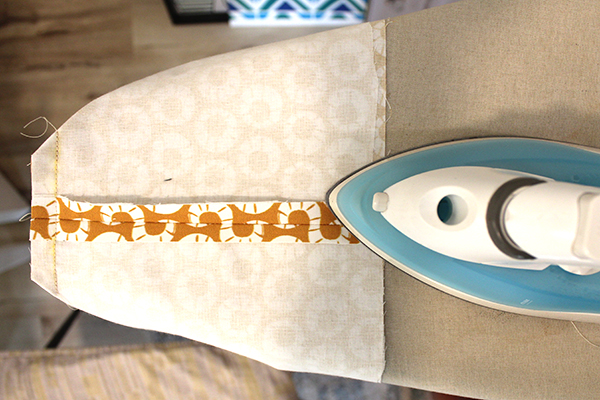
  6. Press the seams. #1 )Press the side seams while flat. #2) Open the side seams and press again. #3) Press a small crease along the bottom. Note – These steps help for making the boxed corners and ensuring that the bottom is even on both sides.
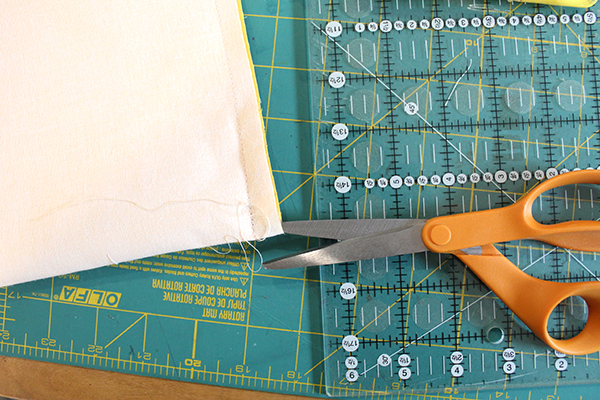
  7. Take your scissors and make a small clip into the side seam at each bottom edge. Do not cut into the stitch. This helps with making the boxed corners.
Need a sewing project? Make a fabric bin with haberdasheryFun

Step 2 – Create the Boxed Corners

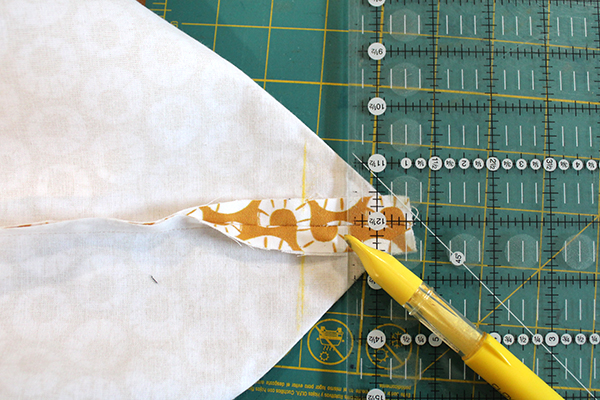
  1. Start with one side seam and bottom edge. Turn to face each other and pinch together. (Pinch the bottom seam to match the side seam). You want the crease that was created by the iron at the bottom seam to match the middle of the side seam. Pin in place.
  2. Use your Creative Grids ruler and measure 1-1/2″ up from the point.  Note – Find the 45 degree angle on the ruler as well. Be as precise as possible. These measurements help to make the bottom square and even.
  3. At the 1-1/2″ mark, make a line. Repeat for the other 3 corners. 
  4. Place into sewing machine and sew along the line.
  5. Bring the bin back to your work surface and trim off each corner piece. Leave a 1/2″ SA.
  6. Take to your ironing board and press the side seams open.
  7. Repeat for the other 3 corners. 

Step 3 – Finish the Bin

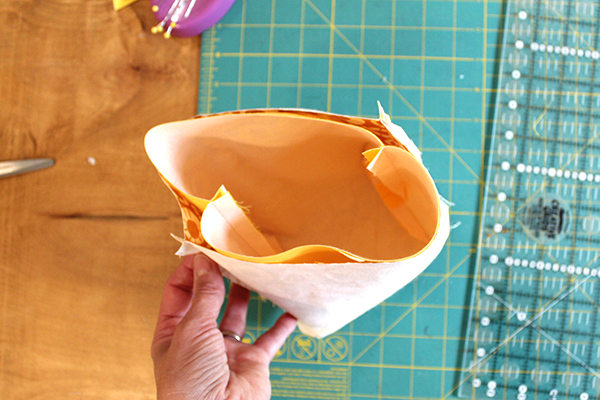
  1. Leave the exterior bin right side facing in and make the lining right side facing out.
  2. Place the lining fabric into the exterior fabric.
  3. Adjust the side seams to match each other and adjust and wiggle the bin around so the corners sit together. Pin at the top edge.
  4. Place into your sewing machine and sew around the top edge with a 1/2″ SA. Leave a 2″ – 3″ opening. Press the seam.
  5. Take to your work surface and pull the pieces through the opening.
  6. Wiggle the bin around. Place your hands into the bin and make the corners match. Finger press along the top edge. Turn the 2″- 3″ opening under and pin in place.
  7. Bring to your ironing board and press the top edge to have a nice crisp edge.
  8. Bring back to your sewing machine and topstitch around the top edge.

That’s it!

Ps – It’s hard to believe, but I blogged about my first storage bin 10 years ago! Crazy right? This blog post was developed from that post. Click Here to see that original post. Times flies.

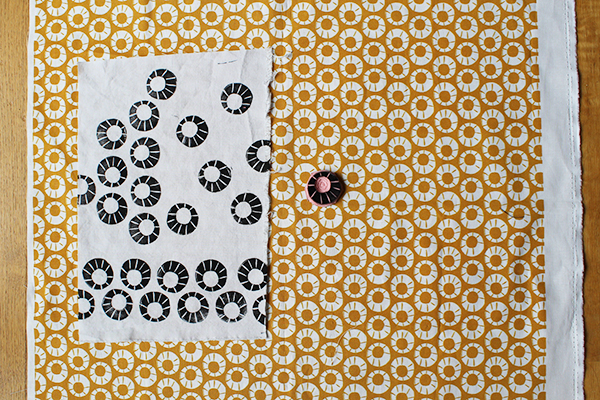
Pps – This fabric was developed from a block print that I made in one of the workshops that I host. I first made the print, scanned it into the computer, created a print in illustrator and uploaded it to Spoonflower. Here is what the print initially looked like..

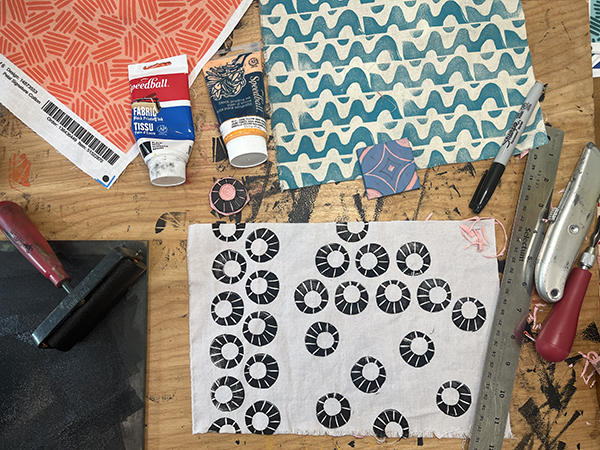
And here is a comparison of the two prints. Interested in block printing? You can join one of my workshops. Check the workshops tab for details. Interested in my Spoonflower fabric? You can access my shop on Spoonflower here.

Need a new sewing project? Try making a fabric bin with HaberdasheryFun a new sewing project? Try making a fabric bin with haberdasheryFun

Add a Comment

« Make The Alma Tote In Fun Colors
Workshops! Design Fabric & Sew a Pouch »

Leave a Reply Cancel reply

Your email address will not be published. Required fields are marked *

This site uses Akismet to reduce spam. Learn how your comment data is processed.

About me


Hi there - I'm Marni Weaver. A sewer, a sometimes quilter and a lover of fabric design. I started this blog to share my ideas. Come Join the Fun
shop now

Popular Categories

project for baby fabric projects seasonal projects fat quarter projects sewing tips and tricks inspiration

Categories

  • Applique
  • Baby
  • Bags and Pouches
  • Block Printing
  • Color
  • DIY Projects
  • Fabric
  • Fabric Design
  • Fat Quarter Projects
  • Home Decor
  • Inspiration
  • Just for Fun
  • Kids
  • No Sew
  • Patterns
  • Print On Fabric
  • Quilting
  • Scrap Fabric Projects
  • Seasonal
  • Sewing Tips & Tricks

Lovely sponsors

Recent Comments

  • How To Make Hand warmers | Haberdashery Fun on DIY.. Sew Heart Shaped Baby Burp Cloths
  • How To Make Hand warmers | Haberdashery Fun on How To Make Mini Heart Shaped Hand Warmers
  • Make Spooky Monster Inspired Face Cloths | Haberdashery Fun on DIY.. Make Monster Inspired Face Cloths
  • How To Sew A Fabric Bin | Haberdashery Fun on Sew An Easy Fabric Storage Bin
  • Make The Alma Tote In Fun Colors | Haberdashery Fun on New – The Alma Tote Pattern

Projects Elsewhere

find me on Pellon Projects sew mama sew contributor

momtastic contributor

Pinterest

Visit Marni@Haberdashery Fun's profile on Pinterest.

I'm Reading

  • Cluck Cluck Sew
  • Cooking Dangerously
  • In Color Order
  • Jen Hewitt
  • Jolly Jabber
  • Karly Spalding Photography
  • Leigh Laurel Studios
  • Lindsay Sews
  • Lotta Jansdotter
  • Love Patchwork and Quilting Magazine
  • Made
  • Making It Lovely
  • Noodle-Head
  • Polka Dot Chair
  • Sharon Holland Designs
  • Silhouette America Blog
  • Silhouette Design Store
  • The Purl Bee
  • The Purple Fig

Press:

Stitch Winter 2014

haberdashery_fun

Marni Weaver
Carve, stamp, scan — my last block print in digi Carve, stamp, scan — my last block print in digital form..

#surfacepatterndesign #haberdasheryfunpatterns #blockprinting #blockprintingart #versafineink #deepdiveplay #3dottedpenguins #surfacepatterndesigner
Working through my deeply committed relationship w Working through my deeply committed relationship with single-color prints and playing with color. 

#surfacepatterndesign #haberdasheryfunpatterns #blockprinting #blockprintingart #versafineink #deepdiveplay #3dottedpenguins
Instagram said I have to start making reels. So he Instagram said I have to start making reels. So here I am mildly uncomfortable, half heartedly participating. The “Next Best Chapter” is playing in the background, because apparently this is it.

#surfacepatterndesign #haberdasheryfun #blockprintingtechnique #blockprintinglove #versafineclair #pfeil
I’m embracing the crazy today. Including the col I’m embracing the crazy today. Including the colors and imperfections in this print.😂

#3dottedpenguinscommunity #haberdasheryfun #blockprintingtechnique #blockprintinglove #versafineclair #pfeil
Joined Ali's @3dottedpenguinscommunity “Play” Joined Ali's @3dottedpenguinscommunity “Play” year-long community. It’s been fun and tough pushing myself out of my comfort zone. I've started by exploring florals, plus experimenting with my style and color palette.

#3dottedpenguinscommunity #haberdasheryfun #blockprintingtechnique #blockprintinglove #versafineclair #pfeil
Follow on Instagram

Copyright © 2025 · Klar theme by Crimson Pear :: web & surface design

Copyright © 2025 · Klar on Genesis Framework · WordPress · Log in