
I’ve been wanting to make mesh laundry bags for a LONG time.
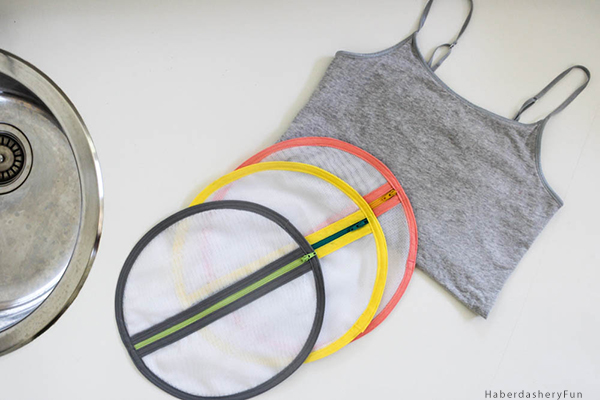
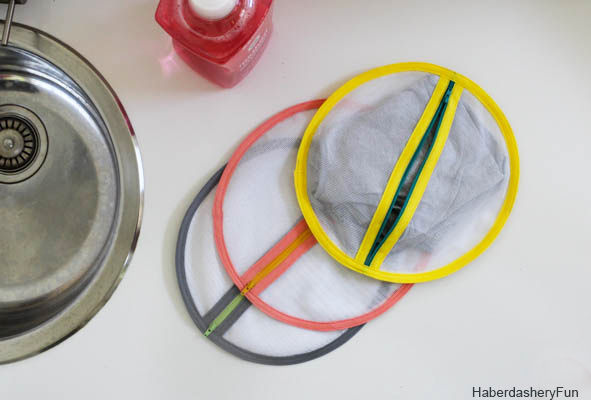
I googled mesh laundry bags and there were a gazillion different styles. Nothing worked for me. They were square in shape and a little bulky. I love sleek, simple and modern designs – so mesh zipper pods came to mind.
I live in Florida so tank tops and thin strap camisoles are staples in my wardrobe. Nothing bothers me more than when I’m taking my clothes from the washer and I find my straps pulled beyond repair or wound the agitator! With the circular design, my straps would be safely enclosed inside the mesh, making the pods very functional. No edges, ties or straps to catch, pull or snag!
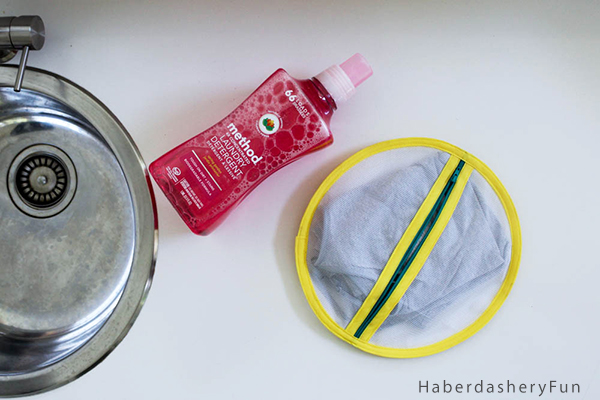
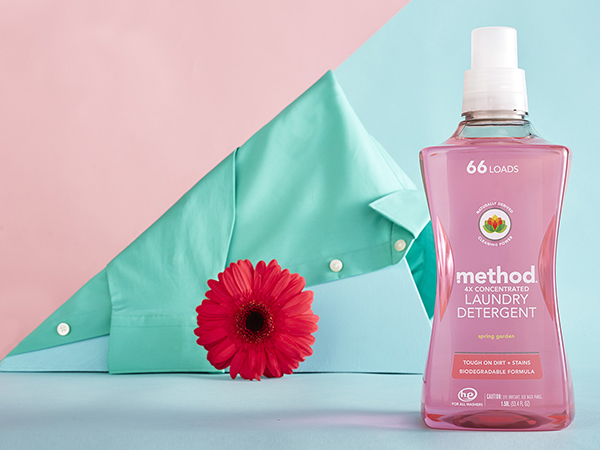
Speaking of modern, functional design – Have you seen the new method 4x laundry detergent? Not only am I in love with the smell, but the packaging is right up my alley. My favorite part about the product..? The bottles have an easy-to-use grip on the bottle, not a handle. Did you know that handles on detergent bottles make them not fully recyclable? I didn’t… I also love the transparent bottle. The clear bottle/colorful detergent will add a pop of color to even the dreariest laundry room.
Back to my pods and how to make them..
Materials needed:
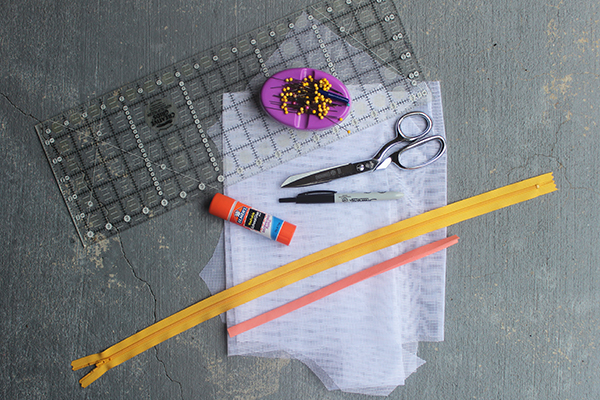
- Mesh fabric
- Zipper
- Double fold bias tape
- Fabric glue
- Sewing machine and sewing supplies
- Dinner plate to use circle template
- Tracing paper, pencil/pen, paper scissors
- Iron and ironing board
Cutting directions:
- Mesh bag back – Place the dinner plate onto the tracing paper and trace around the edge. Cut out. Place the template onto the mesh fabric. Pin in place and cut 1 mesh circle.
- Mesh bag front – Place the dinner plate back onto the tracing paper and trace around the edge. Fold in half and draw a line along the fold line. Place a ruler along the line and measure inwards 1/4″, draw another line at this mark – this second line becomes the “pattern cut” line. Cut the half circle out. Place onto the mesh fabric, pin in place and cut 2 half circles.
- Bias tape for the zipper edges – Find the plate diameter and cut 2 pieces/
- Bias tape for the outside edge – Find the plate’s circumference and add 2″. Cut 1 piece of bias tape to this length.
Remember – Don’t forget to use colorfast fabric and materials for your project. The last thing you need is for the color to run on your delicates!
Ok – Let’s get sewing!
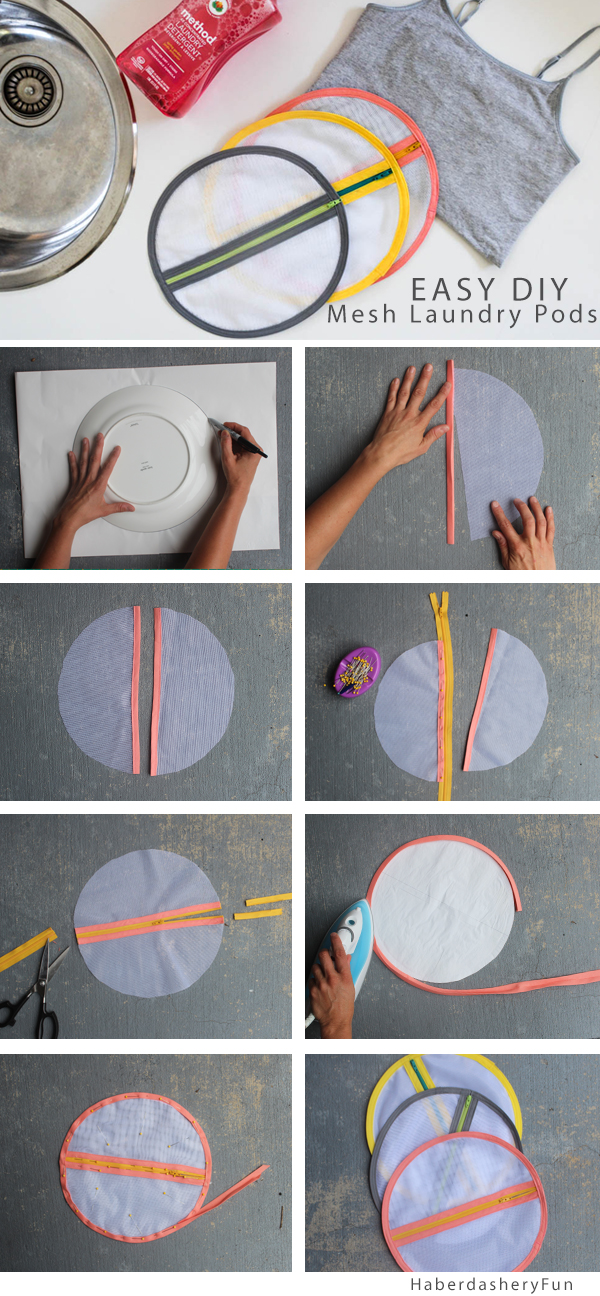
- Lay the 2 half circle mesh pieces onto your work surface. Open the bias tape and insert the straight edge of the mesh between the bias tape. Enclose the entire raw edge and pin in place. If you find the mesh to be little tricky to work with, use dabs of the glue stick to help hold in place. Place into your sewing machine and stitch down, edgestitch along the bias tape closest to the mesh.
- Repeat for the other side. Trim the bias tape if needed
- Place the zipper tape under the bias tape and pin. Give enough room to open and close the zipper. Place into sewing machine and sew the zipper in place, closest to the teeth. Repeat for the other side. Make sure that your mesh/outside edge has a nice consistent/round shape.
- Open the zipper into the center of the pod. Important step! Cut the zipper to the length of the bias tape.
- Lay the front piece on top of the of the back piece, wrong sides together. Pin along the zipper and outer edge. Set aside.
- Place the bias tape and back paper template onto your ironing board. Using the iron, gently press a curve into the bias tape. You can insert the bias tape onto the paper edge and set the curve to be exactly the same as the mesh. Repeat for the entire outside edge. Turn and fold the TOP end under about 1/4″.
- Place the mesh pod back not your work surface. Gently, insert the mesh edge between the bias tape. Enclose the entire raw edge and pin in place. Place into your sewing machine and edgestitch along the bias tape side closest to the mesh. Backstitch at each zipper and then add a second row of topstitching for extra durability.
Note – I recommend 2 rows of topstitching along the bias tape. This will hold the mesh in place and make the pod edges more secure.
Having fun? Want to make more? Find a larger or smaller template and you can make all kinds of pods! I bet these would be great for travel. A great way to pack and store dainty items in a suitcase.
GREAT NEWS – Coupon alert! Use the method coupon code THREEFORME for $3 off your online purchase at methodhome.com
So.. Did you know that method is partnering up with ASOS, the fashion e-commerce giant to create the method and ASOS collection. Head over to check it out.

I was selected for this opportunity as a member of Clever Girls and the content and opinions expressed here are all my own.


This is brilliant! I need to make me some for my delicates because I am not dedicated to laundry enough to hand wash them. This is the perfect solution for me, pinning. Thanks!
Thanks Kati. You can make a bunch in one afternoon! Have a great Sunday.
Very cool, as usual. I should make these to encourage me to buy more delicate delicates
I like how you designed these, very nice and functional!
Thanks Kim! They were fun to come up with.. and much needed!
Good article! We will be linking to this great post on our website.
Keep up the good writing.
this is genius!
These are awesome! I would love for you to link up to the Stitch It, Blog It, Share It Link Party going on now at BehindtheSeamsSewing.com.
~Bonnie
I’m in love with this! Thank you for sharing this with us! Pinned and tweeted! I hope to see you at tonight’s party. Lou Lou Girls
Such a great idea! Mine just broke and these look perfect to make in different sizes. Thanks for sharing!
Thanks Paola! I’ve used the pods a few times already and love them! let me know if you make them. Have a great day. – Marni
Wonderful site you have here but I was wondering if you knew of any
forums that cover the same topics talked about here?
I’d really like to be a part of online community where I can get responses from
other knowledgeable people that share the same interest.
If you have any suggestions, please let me
know. Thanks!