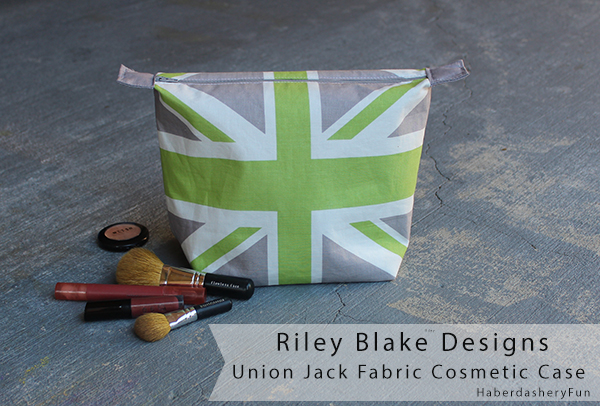
It’s my stop on the Riley Blake Designs Union Jack Blog tour. I can’t tell you how excited I am to be apart of their blog tour. I studied fashion design for a semester in London, England so creating a tutorial using their Union Jack fabric was a highlight for for me.
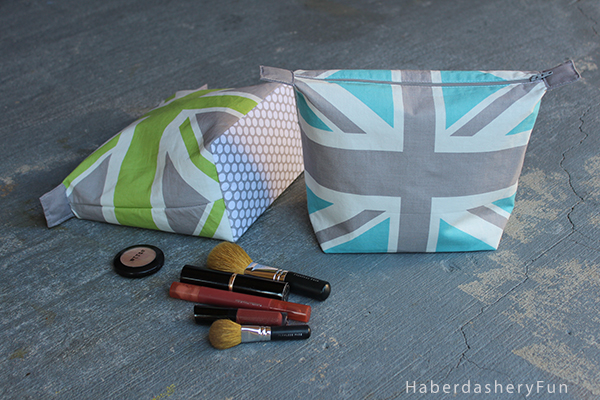
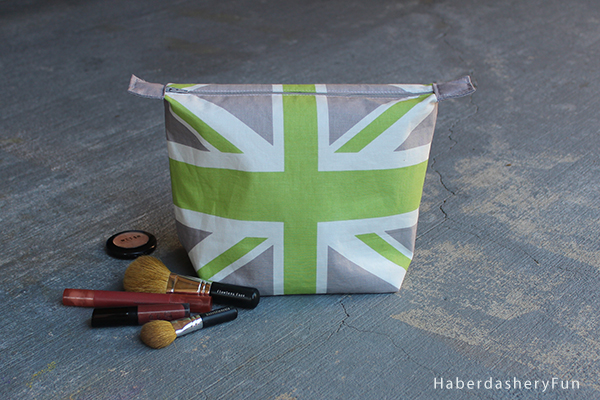
This fabric was so much fun to work with. In one panel there are 8 different flag color options. You can mix and match the flag colors in one project, or buy 2 panels and use the same color within a project. The possibilities are endless!! I’ve wanted to make a make-up case for quite some time, so the panels were PERFECT to sew into a colorful pouch.
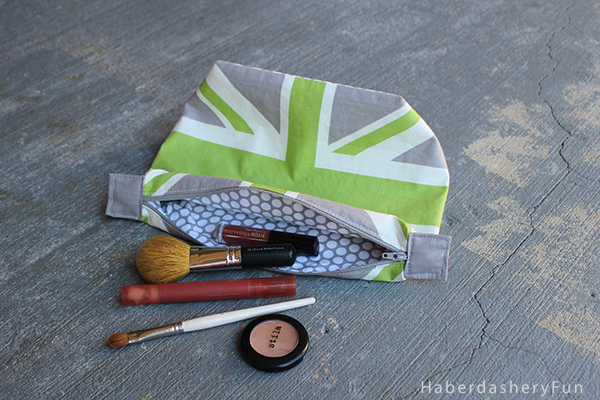
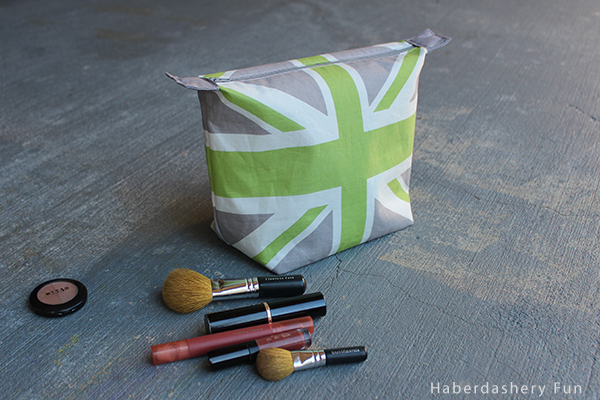
I added tabs to the zipper ends and made a contrast bottom. The bottom matches the lining. I love how it turn out!
Ok let’s get started.
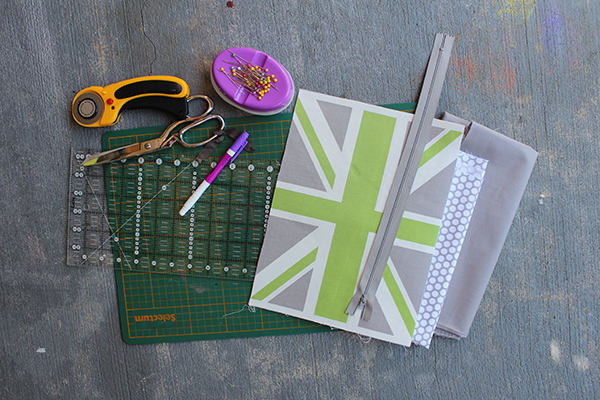
Materials Needed:
- Union Jack flag fabric – 2 panels [ each panel has 8 flags and is 24″ long]
- Bottom, lining and tabs fabric – 1/4 yard each
- Pellon Fusible Interfacing 911FF – 1/4 yard
- 14″ All purpose zipper
- Sewing machine and related supplies
- Rotary cutter, cutting mat and ruler
- Disappearing fabric ink pen
- Wonder Clips – optional
- Zipper foot
- Iron and ironing board
Before we get started, you will need to do the following:
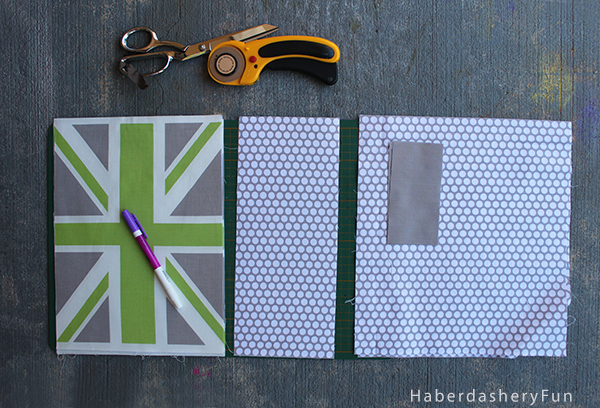
Cut the fabric and iron the fusible to the outside pattern pieces:
- Outside / Union Jack flag fabric – Cut out 2 flags. Cut 2 rectangles measuring 11 7/8″ x 8 7/8″ [ Leave approx 3/8″ seam allowances on the sides and NO seam allowances on the top and bottom]
- Outside / Bottom – Cut 1 rectangle measuring 11 7/8″ x 5″
- Lining – Cut 2 rectangles measuring 11 7/8″ x 10 3/4″
- Zipper tabs – Cut 2 rectangles measuring 5″ x 2 1/2″
- Fusible – Cut the fusible to match the 2 Union Jack pieces and the bottom
- Iron the fusible to each flag and also the bottom piece. Remember to iron to the wrong side of the fabric.
Let’s start sewing!

Sew the bottom to each outside flag piece. Place right sides together and pin along the short side. Place into your sewing machine and stitch together using a 1/2″ seam allowance.
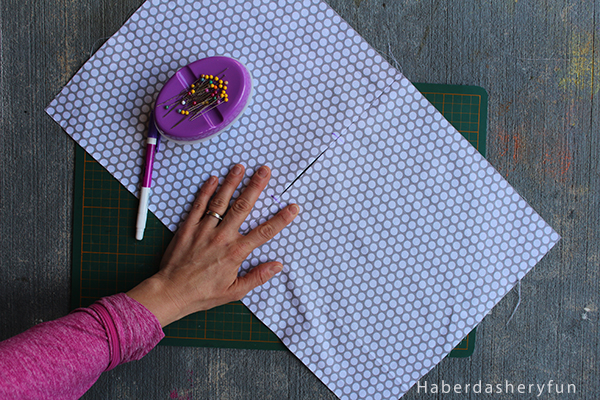
Sew the lining together along the bottom edge. Place right sides together and pin along the short side. Place into sewing machine and stitch together using a 1/2″ seam allowance. Note – Leave a 3 – 4″”opening in the middle of the seam.

Using a disappearing ink pen, mark a notch at the top edge 1/2″ inwards from the side seam. Finger press the seam allowance under. Repeat this step for all seam allowances.
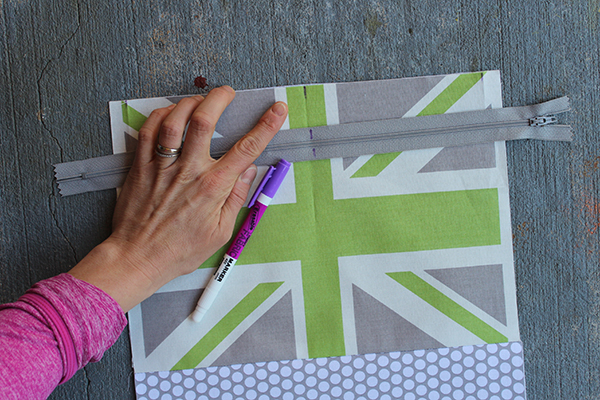
Fold the zipper in half and mark the middle with a disappearing fabric ink pen. Do the same for the flag pieces and mark a line at the top edge. This will help with the zipper alignment. Repeat for the lining.
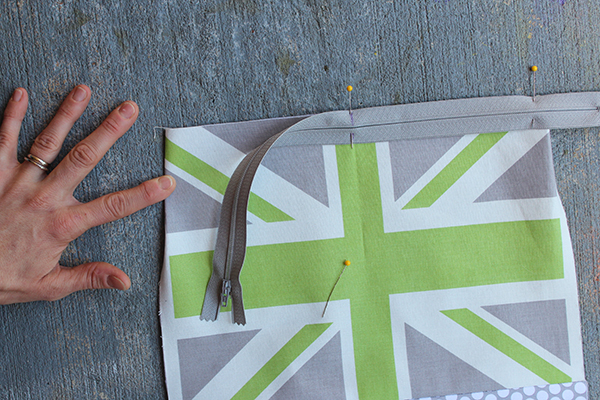
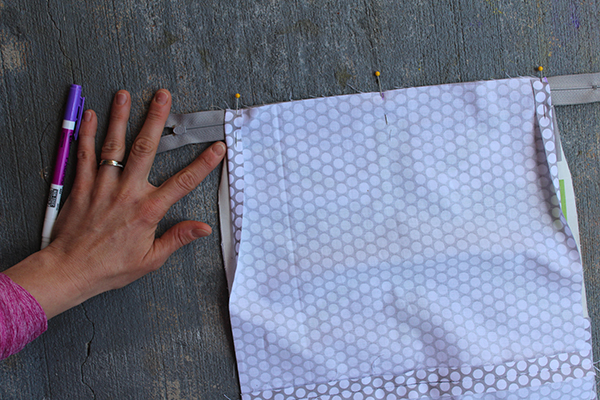
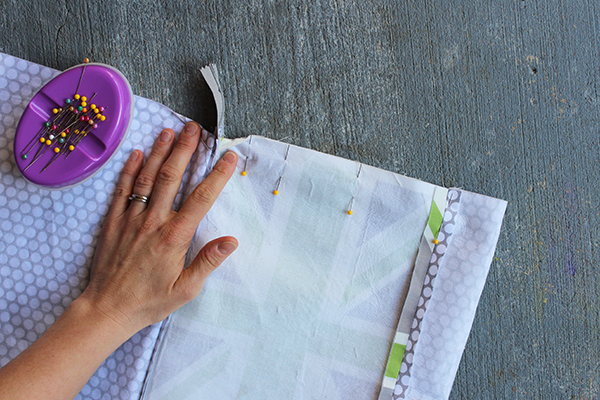
Place the flag right side up on your work surface. Lay the zipper onto the flag fabric with the zipper pull at the left. Match at the ink lines. Make sure to keep the side seams turned under 1/2″. Pin the zipper in place.
Lay the lining piece on top of the zipper. This sandwiches the zipper. Reposition the pins. Place into sewing machine and stitch zipper in place. Carefully press the seam. Open and press again. Edgestitch along the zipper.
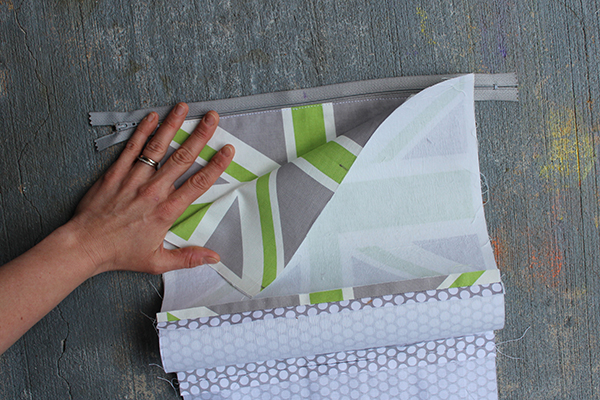
Turn the fabric around so that zipper/teeth are facing up again. Repeat the previous step to attach the zipper to the other side [sandwich the zipper between the flag and lining fabrics]. If this seems awkward, you are doing it correctly!
The zipper is almost complete. Turn bag so that it is right side out.
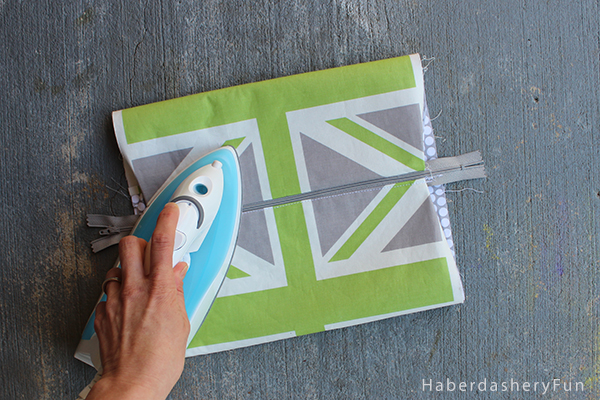
Lay flat and press the seams at the zipper. Be careful to NOT melt the zipper. Open the zipper, place into sewing machine and edgestitch the other side.
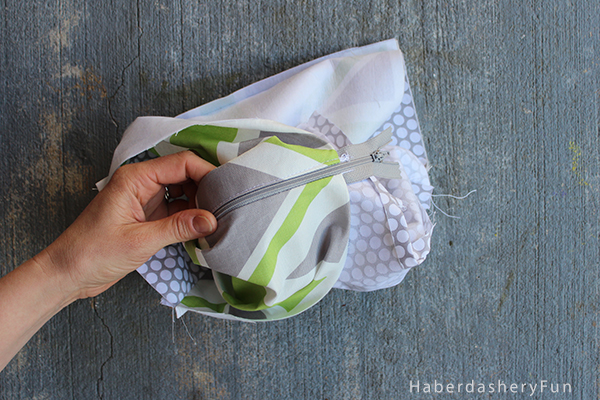
Turn the pouch wrong side out again. The outside bag is facing one way and the lining bag is facing another way. Right sides should be facing each other. Pin along the side seams. Important step – Match the flags at the side seams and the bottom seam also needs to line up! Pin, pin, pin.. Place your sewing machine. Stitch side seams together with a 1/2″ seam allowance. It might get a bit tricky when you get near the zipper/top edge.. Continue and stop sewing the side seams together when you get approximately 1/4″ – 1/2″ away from the zipper. Try to stitch as close to the top as possible and remember to back stitch. Repeat for the other side and lining. Press the seams with an iron. Open the seams and press again.
Time to make the boxed corners. Keep the cosmetic bag inside out with the lining at one and and the outside portion at another end. Start with the outside/flag fabric. Place on your work surface. Wiggle the fabric around so that the side seams are facing upwards. Make a point and also make sure that the sides sit at a 45 degree angle. Finger press any wrinkles out. Measure 2″ upwards from the tip and mark a dashed line with a disappearing ink pen [Note – The seam should hit at the seam where you stitched the bottom to the front flag]. Pin. Place into sewing machine and stitch following the dashed/seam line. Backstitch. Repeat for the other side and again for the lining fabric. Press.

Lay flat onto your work surface again. Carefully cut off the tip with the rotary cutter. Leave a 1/2″ seam allowance. Repeat for all corners.
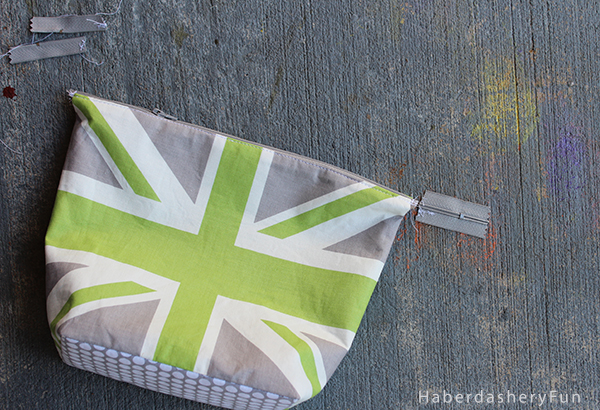
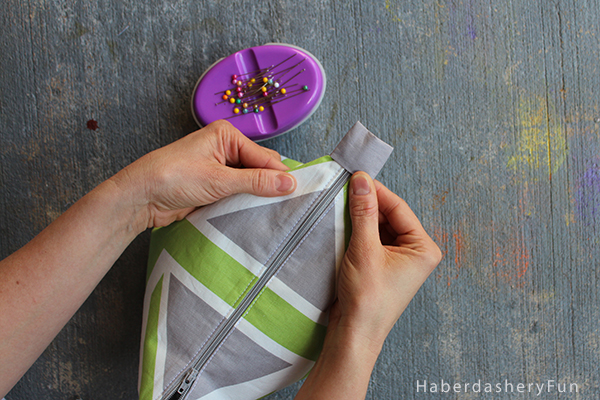
You are on the homestretch… Find the opening that was created in the lining and pull the entire bag throughout itself. You are turning the bag right side out. Wiggle the corners into place. Pull the tab into the middle. Place the bag into the sewing machine and stitch over zipper at each end. Cut off zipper.
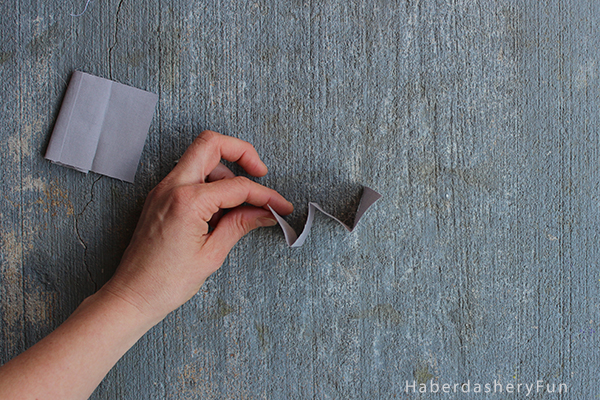
Time to make the zipper tabs. I promise we are almost finished! Fold the tab in half lengthwise. Finger press. Fold each side back towards the fold. You are basically creating a “W”. Press with an iron. Place into your sewing machine and stitch each side with a scant 3/8″seam allowance.
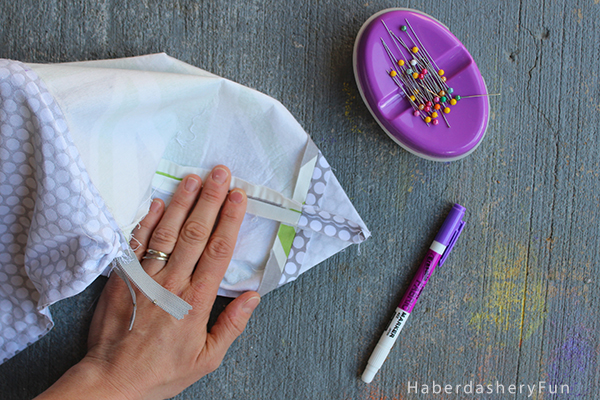
Turn each tab right side. Wiggle the corners into place and press with an iron. Squeeze the zipper at each end and slide the tab into place. Pin. Place into your sewing machine and edge stitch around the outside of the tab. Remember to backstitch along the zipper side. Lastly, pull out the lining and stitch the opening closed. You can hand stitch or machine stitch it closed.. I am too lazy to hand sew, so I always like to run it through my machine.
That’s it! I know it sounds complicated..But I promise if you follow the steps, it is actually a very easy tutorial. Make sure to head over to Riley Blake Designs and check out all their Union Jack fabric!


Absolutely adore them!! Love the fabric, have to check if it’s available in Europe.
I LOVE it,! You have made the directions so clear,and easy to follow, The different
colors will be very attention getting as well, so sharing the source will be a pleasure.
Thanks !
totally doable. and you made it look so darn easy..thank you for a lovely bright well photographed union jack tutorial..( run on was not intentional ) lol
Oh my gosh. These are so cute. Thanks for sharing a tutorial. I most certainly am going to give them a try.
Aaagh thanks! This was a lot of fun to create and make. Check out the Riley Blake full Union Jack panels – there are some fun color options! Here is the link so you can see them all.
https://www.rileyblakedesigns.com/shop/category/riley-blake-designs/available-now/union-jack-cottons-1/
Wonderful tutorial, you make it so doable! The cosmetic cases are lovely to look at too. Thank you for sharing your talent with us.
I love your cosmetic case. The tutorial is very easy to follow. Thanks.
I. LOVE. THESE!!!!
Thanks! Halfway through I wondered what I had gotten myself into.. But they turned out, right? Happy Friday 🙂
It looks fabulous and thanks for the tutorial!!
Thank you for such a great tutorial! I love that fabric!!
So cute! Pinned it. 🙂
I love this! The fabric is so cool, and I like to polka dot bottom!
Thank you for stopping by! I agree the contrast bottom adds a little fun to the overall bag 🙂
Oh my these are completely adorable. I love the colors and the polka dots for the bottoms. Thanks for sharing at our link it or lump it party!
Super cute project! The fabrics are really gorgeous! Thanks so much for sharing this great and helpful tutorial!
Happy Easter!
Hugs from Portugal,
Ana Love Craft
http://www.lovecraft2012.blogspot.com
very nice pouch- i like the method you used- gives a very neat result.
I want one!!
Gorgeous thanks for the share I love the green and grey union jack! Visiting from Do Tell Tuesday
so great! I need to make this.. pinned to come back to it!! Thanks for linking to Create Link Inspire! Emily
Hi – I’d go with WordPress. I’m not that tech savvy and I find it really easy to use. I had a designer create my site. Check out her website and you can request a quote – http://crimsonpear.com.au
I <3 union jacks and your sweet bag! Super tutorial too:) Pinned
Thank you! The union jack panel is a lot of fun and Riley Blake has different sizes. Make sure to check them out 🙂
I am not a fan of zippers, but you make this pattern so easy….Thanks for sharing….Judith, Texas
Great tutorial. Just last year I learned how to install a zipper so this looks like a great project to practice! Love the fabric too. Just found your blog for the first time through Nifty Thrifty and love it. Can’t wait to click around some more and would love to have you at The Makers link party on Tuesday mornings 8 eastern on my blog TinySidekick.com. Hope to see you there!
Thanks for stopping by and leaving some comments. I’ll come on over to your link party tomorrow morning 🙂
LOVE this! The union jack, the shape of the case…you nailed it! I’m featuring you tonight at the Do Tell Tuesday party. 🙂
Marni! This is seriously adorable and a great use of the Union Jack panels. I was so excited to see you on the Union Jack tour – my stop on the tour is tomorrow and, of course, I’m down to the wire with my project 😉
Thanks for stopping by. I will head over tomorrow and see what you come up with!! I hear you on down to the wire.. That’s my game right now as well! 🙂
You have the best tutorials ever!!!!!!!! I love all of your projects, and appreciate you sharing these patterns/tutorials with us!! Thanks!
HI Rachel, Thank you for stopping by and the kind comments. You made my day 🙂
Thank you for your all clear tutorials!
Thank you for this great tutorial. My daughter loves her new make up case.
HI Xiao – wow that is so great! Thank you for letting me know. I’d love to see pictures if you have any.. you can post to Facebook [ https://www.facebook.com/HaberdasheryFun/%5D or on Instagram and tag #haberdasheryfub
Marni