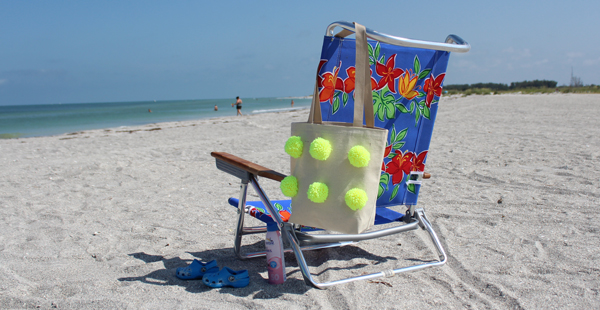
I was at the Atlanta Apparel Mart last week and saw the cutest summer beach bag. It was made out of a braided material with bright neon yellow pom poms all over it.. It looked fresh, so summery and instantly a blogpost came to mind.
Have you made pom poms before? They are super easy..
The big box stores sell templates for making pom poms. But there is no need to buy one. All you need is a piece of cardboard, scissors, a few circles to trace and some yarn. And voila – you have pom poms.
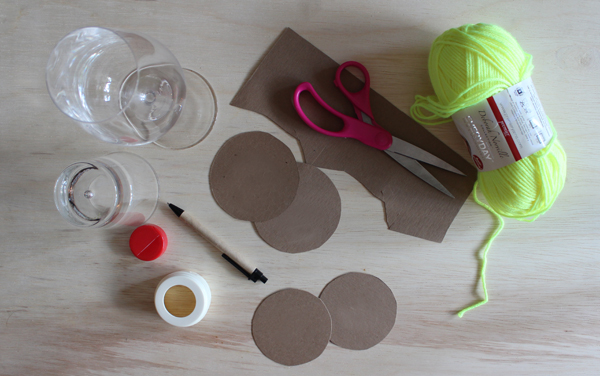
Materials needed:
- Yarn – I found the Deborah Norville neon yarn collection [ yes neon!!] at Jo-Ann fabrics
- Dritz – yarn needles to secure the pom poms
- Cardboard – for the templates
- Dritz – disappearing fabric pen
- Marking pens and circles – to create the templates
- Paper scissors
- Fabric for the totebag – canvas, burlap, linen
- Strap material – webbing, leather, cotton
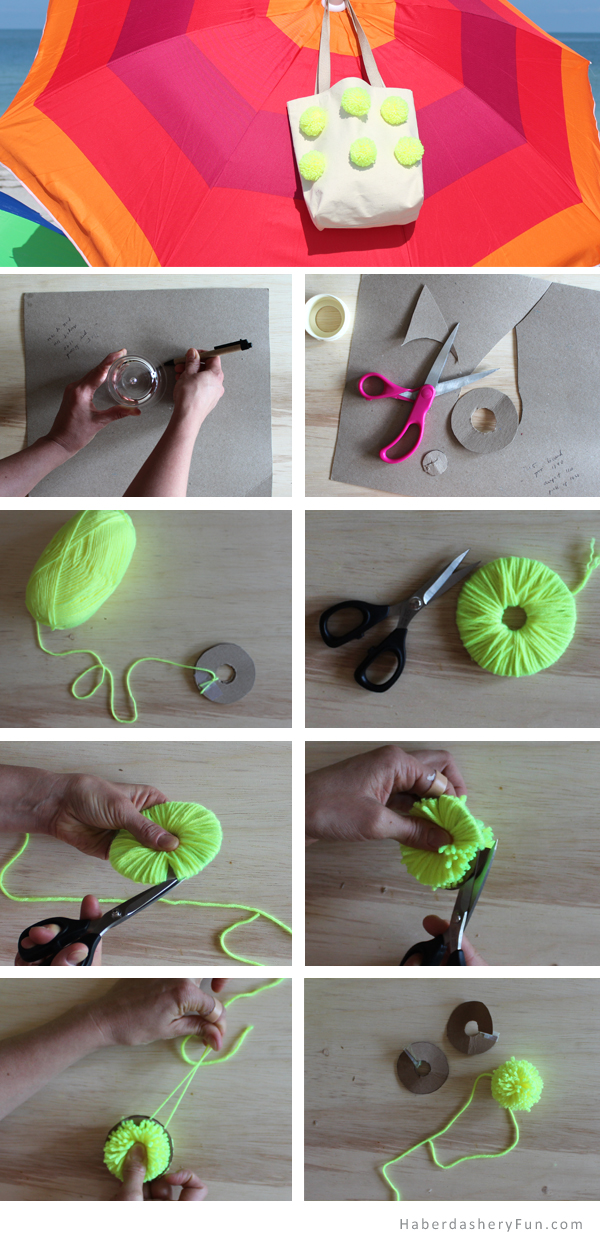
- Trace your circle template and then trace another smaller circle within the large circle. You will need 2 circles to make 1 pom pom. Note -you do not want your inside circle to be too big
- Cut out the templates
- Tie the yarn to the 2 templates. Cut through to the center of the templates. This is so you can pull your yarn through.. You will understand when you try to fit the yarn through the center..
- Wrap the yarn over, over and over and completely cover the entire template
- Hold the template in the middle and cover the center opening with your finger. Pull a small portion of the yarn aside so you can see the cardboard.
- Insert the scissors between the 2 pieces of cardboard. Make sure your finger is secure and holding the center opening very tight. Cut thtough all the yarn wrapped around the template. As the yarn comes loose, your fingers on the center opening are the only thing holding them together.. So be careful not to let go!
- After you have cut the whole way around, put a long piece of yarn between the 2 pieces of cardboard. Wrap around the template and pull taught. Tie in a knot. Tie another knot just to secure the pom pom
- Pull off the template from your pom pom. Keep the tails of the pom pom longs. You will need these later
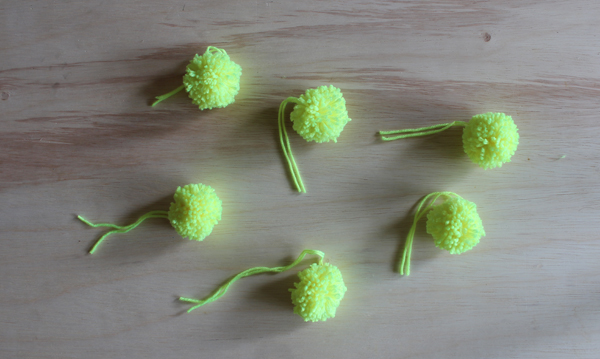
You need to make enough pom poms to cover the front and back of your totebag. The number will vary and be based on the totebag size. I actually think I could have added a few more to my bag.. But too late, I’ll have to add more next time.
I made my totebag, but you can buy blank canvas totes at most crafting stores. Place your bag on flat surface and prepare for the second round.. creating the pom pom bag. I love to sew with cotton canvas, so this was my fabric of choice. But it would have been quite on trend to use a burlap material!
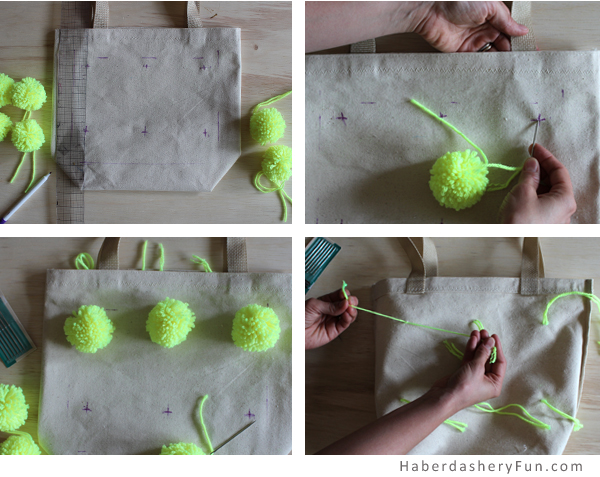
- Using a disappearing fabric ink pen, mark a grid where your pom poms will be placed. Repeat for the other side.
- Thread the pom pom tail onto the yarn needle. Pull the yarn through to the back. Repeat for the second tail.
- Repeat for all pom pom. Pull all the tails to the inside of the bag
- Turn the bag inside out. Pull the tails again to the backside. Make sure each tail is taught and tie a knot. This will secure the pom poms in place. Repeat for all pom poms
That’s it..Your summer totebag is complete! Now go hit the beach and show it off.
Happy Sewing!


Super Cute! i was looking for a fun and easy project for my daughter. This is it. Your tutorial is bang on. Thanks.
Okay now this is something I could tackle!! Awesome tutorial.
How Cute. I love your visuals.. They are easy to follow
Thank you for your comments! I aprpeciate your stopping by