Haberdashery Fun

  • Home
  • About
    • Look Book
  • Contact
    • Collaborate?
  • Tutorials
  • Shop
    • Email
    • Facebook
    • Instagram
    • Pinterest

Keep up to date with the latest posts!

DIY.. Chalkboard Fabric Placemats

in DIY Projects, Fabric on 18/09/14

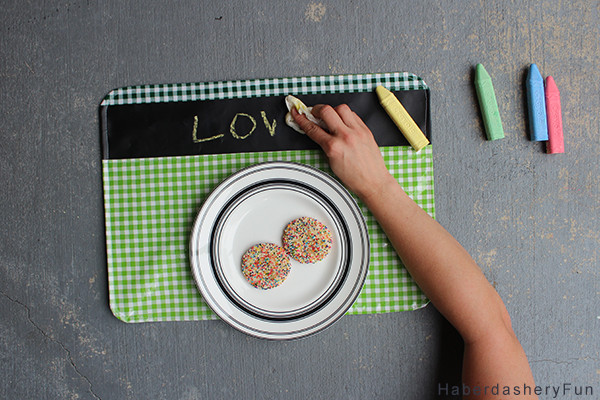
Can you imagine a dinner party with these fun placemats? How about a birthday party?

Chalkboard and Oilcoth placemats HaberdasheyrFun

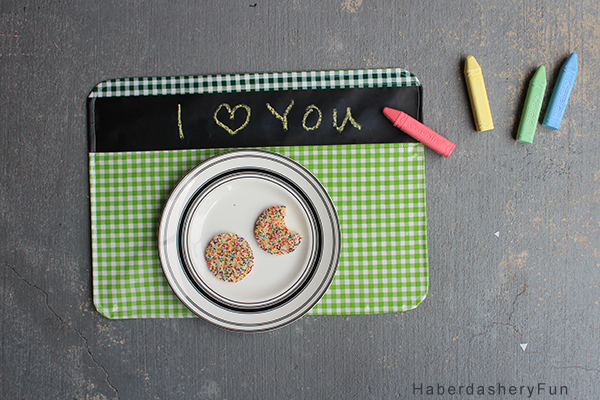
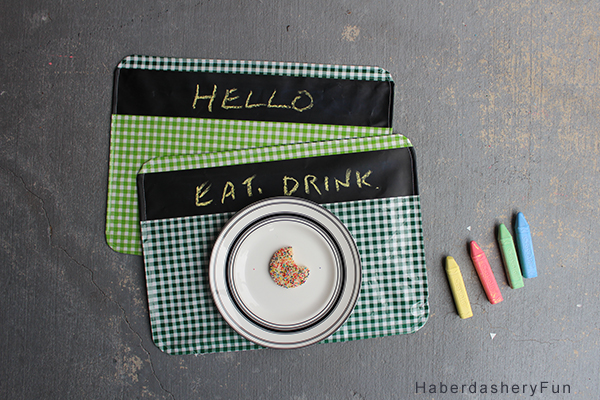
These placemats were inspired by my messy, marker wielding toddler.. They combine oilcloth for cleaning ease and chalkboard fabric for pre-dinner entertainment. However, the placemats would work for any age group.  Imagine the interesting comments after a few glasses of wine at an adults only dinner party? I have a few ideas on what people might write and do.. but I’ll leave it up to your imagination.

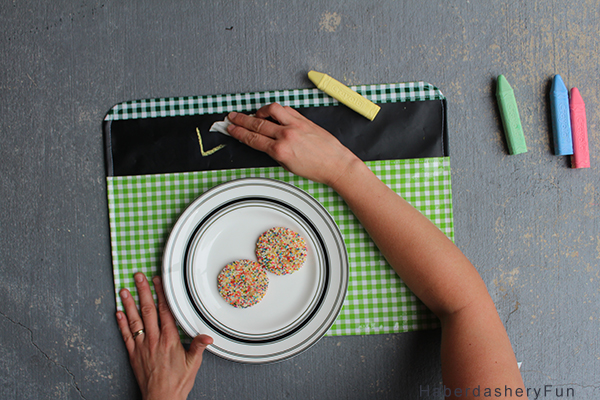
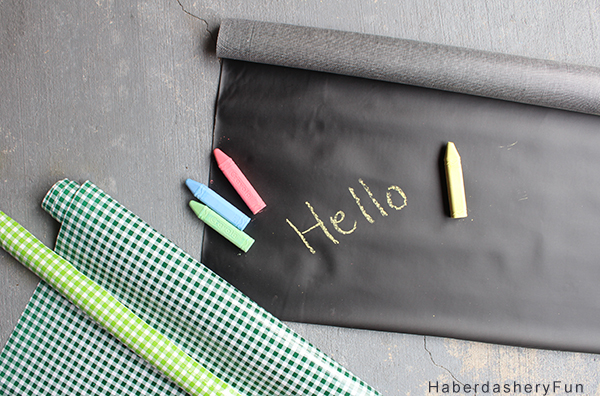
I love how you can just wipe the chalkboard fabric clean..

This is a super easy tutorial. Just a few straight cuts and a few stitches on your sewing machine and you are good to go. Have fun with this project – check out the assortment of patterns, prints and colors on Oilcloth By the Yard. Mix and match for fun placemats. I used a simple placemat for size reference and the finished size is 18″L x 13″W

Let get started on the tutorial.

Materials Needed:

  1. Oilcloth –  1 – 2 yards
  2. Chalkboard fabric – 1 yard
  3. Rotary cutter, cutting mat and ruler
  4. Sewing machine
  5. Sewing supplies
  6. Small cup to trace a corner
  7. Chalk

Cut the pieces for ONE placemat:

  1. Placemat front – Cut 1 rectangle measuring 14″L x 2″W [ top], cut 1 rectangle measuring 14″L x 10″W [ bottom]
  2. Placemat back -Cut 1 rectangle measuring 19″L x 14″W
  3. Chalkboard fabric – Cut 1 rectangle measuring 14″L x 4″W

Note: I cut my placemat back pieces out of the oilcloth fabric. While I love the mix and match feel, it was difficult to sew. Try cutting the placemat back pieces out of cotton. Trust me, it will be easier gliding the placemats through your sewing machine.

Let’s get sewing:

Chalkboard placemats HaberdasheryFun

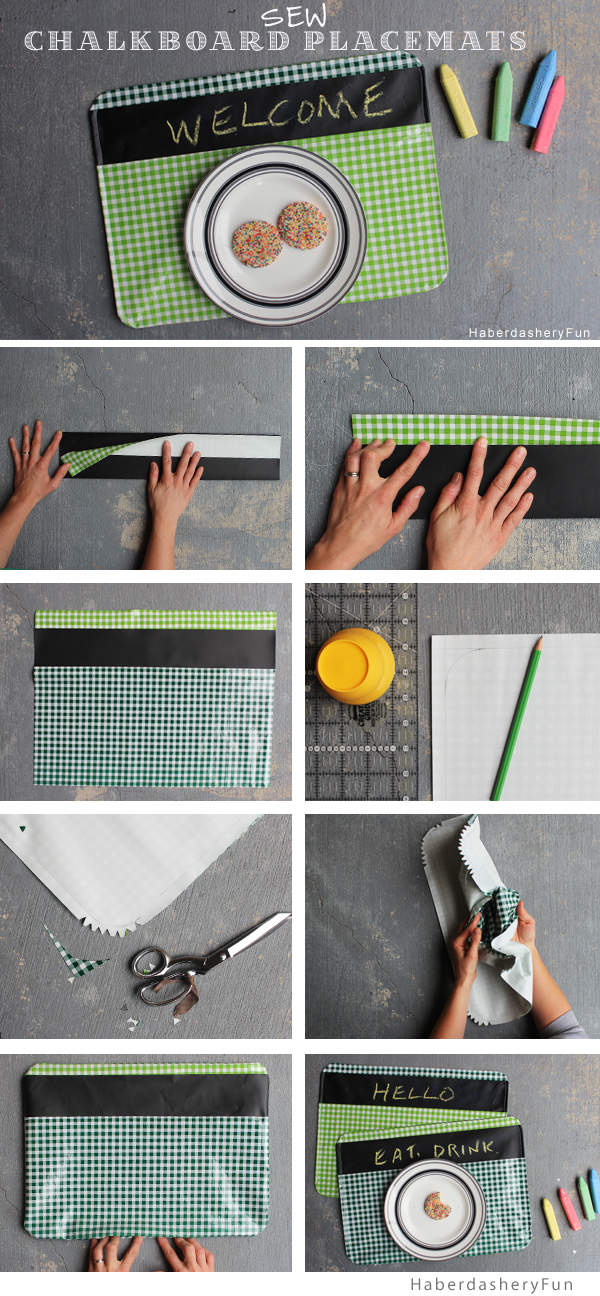
  1. Right sides together, lay the the placemat top rectangle onto the chalkboard rectangle. Place into sewing machine and stitch together with a 1/2″ seam allowance. If you need to pin the pieces together, make sure t0 pin in the seam allowance.
  2. Finger press the seam to lay flat. Place into sewing machine and edgstitch along the oilcloth.
  3. Right sides together, lay the the placemat bottom rectangle onto the chalkboard rectangle. Repeat as #1 and sew together. Repeat as #2 and finger press and edgstitch.
  4. Place 1 placemat onto working surface, right side facing down. Measure inwards 1/2″ at each edge and make an cross at each corner. Place the cup on the cross and trace to round the corner. Repeat for all corners – front and back placemat pieces. Be as precise as possible. This will help your corners be consistent and smooth.
  5. Place into sewing machine and stitch together with a 1/2″ seam allowance. Leave a large opening along the bottom edge. Trim and notch the corners.
  6. Turn right side out. Use your fingers to help round each corner into place.
  7. Finger press along the outside seam to lay flat. Turn the bottom opening seam allowance under 1/2″. Place into sewing machine and topstitch around the outside edge.

I’ll leave you with a few fun sayings..

That’s it! Happy sewing.

Want more daily HaberdasheryFun? Come find me here on social media:

Twitter

Instagram

Pinterest

Facebook

13 Comments

« Inspired By.. OilCloth!
DIY.. Half Square Triangle Pillow »

Comments

  1. Ann says

    09/21/2014 at 5:02 pm

    Sooo neat! What great gifts these will make!

    Reply
  2. Anne Weaver says

    09/21/2014 at 7:25 pm

    Cute!! I’ve got a Craft Gossip post scheduled for tomorrow morning that links to your tutorial:
    http://sewing.craftgossip.com/tutorial-chalkboard-fabric-placemats/2014/09/22/
    –Anne

    Reply
  3. Tori says

    09/22/2014 at 9:05 pm

    <3 these! I have a stash of chalkboard fabric to use! This would be the perfect project for them! Thanks for the inspiration.

    Reply
  4. Nancherrow says

    10/03/2014 at 4:00 pm

    Oh, how adorable! And perfect for fidgety little hands at the supper table-adults and kiddos! Thanks for sharing at Fridays Unfolded. Just pinned!

    Alison
    Nancherrow

    Reply
  5. Christine says

    10/07/2014 at 8:57 am

    How adorable is that!!! So FUN!! Thanks for sharing at The DIY Dreamer.

    Reply
    • Haberdashery Fun says

      10/07/2014 at 11:13 am

      Thank you so much. They were fun to make and imagine the dinner parties and sayings people would write.. lol. Have a great week.

      Reply
  6. Lisa at Mabey She Made It says

    10/08/2014 at 12:34 am

    So much fun! I love these–thanks for linking to the Do Tell Tuesday party; I’m featuring you tomorrow!

    Reply

Trackbacks

  1. Inspired By.. OilCloth! | Haberdashery Fun says:
    09/18/2014 at 8:57 am

    […] the works. Come back Thursday, I’m combining the oilcloth and chalkboard fabric into placemats. Can’t wait to share the […]

    Reply
  2. CraftCrave | DigiFree | CraftCrave says:
    09/19/2014 at 11:14 am

    […] DIY.. Chalkboard Fabric Placemats – 1 freebie(s)? […]

    Reply
  3. Tutorial: Chalkboard fabric placemats – Sewing says:
    09/22/2014 at 9:15 am

    […] DIY Chalkboard Fabric Placemat, by Haberdashery Fun […]

    Reply
  4. 25 Sewing Gifts For Kids - Lil' Mrs. Tori says:
    10/06/2014 at 10:05 am

    […] DIY Chalkboard Place Mats // Haberdashery Fun […]

    Reply
  5. In case you missed it says:
    11/11/2014 at 10:50 am

    […] Haberdashery FunHalf Square Triangle Pillow || How to Make Bias Tape || Chalkboard Fabric Pillows […]

    Reply
  6. Autumn Sewing Projects - Mabey She Made It says:
    03/07/2016 at 4:48 pm

    […] Chalkboard Placemats || Haberdashery Fun || My girls would never eat their food they’d have so much fun with these! […]

    Reply

Leave a Reply Cancel reply

Your email address will not be published. Required fields are marked *

This site uses Akismet to reduce spam. Learn how your comment data is processed.

About me


Hi there - I'm Marni Weaver. A sewer, a sometimes quilter and a lover of fabric design. I started this blog to share my ideas. Come Join the Fun
shop now

Popular Categories

project for baby fabric projects seasonal projects fat quarter projects sewing tips and tricks inspiration

Categories

  • Applique
  • Baby
  • Bags and Pouches
  • Block Printing
  • Color
  • DIY Projects
  • Fabric
  • Fabric Design
  • Fat Quarter Projects
  • Home Decor
  • Inspiration
  • Just for Fun
  • Kids
  • No Sew
  • Patterns
  • Print On Fabric
  • Quilting
  • Scrap Fabric Projects
  • Seasonal
  • Sewing Tips & Tricks

Lovely sponsors

Recent Comments

  • How To Make Hand warmers | Haberdashery Fun on DIY.. Sew Heart Shaped Baby Burp Cloths
  • How To Make Hand warmers | Haberdashery Fun on How To Make Mini Heart Shaped Hand Warmers
  • Make Spooky Monster Inspired Face Cloths | Haberdashery Fun on DIY.. Make Monster Inspired Face Cloths
  • How To Sew A Fabric Bin | Haberdashery Fun on Sew An Easy Fabric Storage Bin
  • Make The Alma Tote In Fun Colors | Haberdashery Fun on New – The Alma Tote Pattern

Projects Elsewhere

find me on Pellon Projects sew mama sew contributor

momtastic contributor

Pinterest

Visit Marni@Haberdashery Fun's profile on Pinterest.

I'm Reading

  • Cluck Cluck Sew
  • Cooking Dangerously
  • In Color Order
  • Jen Hewitt
  • Jolly Jabber
  • Karly Spalding Photography
  • Leigh Laurel Studios
  • Lindsay Sews
  • Lotta Jansdotter
  • Love Patchwork and Quilting Magazine
  • Made
  • Making It Lovely
  • Noodle-Head
  • Polka Dot Chair
  • Sharon Holland Designs
  • Silhouette America Blog
  • Silhouette Design Store
  • The Purl Bee
  • The Purple Fig

Press:

Stitch Winter 2014

haberdashery_fun

Marni Weaver
It’s been awhile since I printed some fabric. Pl It’s been awhile since I printed some fabric. Played around with space on this one and wanted to see what would happen when the I didn’t lay the hexagons in perfect symmetry. I chose Interstellar music for the post. Thoughts on the movie? That movie really got me.

#surfacepatterndesign #haberdasheryfunpatterns #blockprinting #blockprintingart #versafineink #versafineclair #deepdiveplay #3dottedpenguinscommunity #surfacepatterndesigner #geometricpattern #repeatpatterndesigner #textilepattern #patterndesign 

@3dottedpenguinscommunity
Magic lives in the opposite. Obsessed with my new Magic lives in the opposite. Obsessed with my new love: developing inverse blocks. 

#surfacepatterndesign #haberdasheryfunpatterns #blockprinting #blockprintingart #versafineink #versafineclair #deepdiveplay #3dottedpenguinscommunity #surfacepatterndesigner #geometricpattern #repeatpatterndesigner #textilepattern #patterndesign
Carve, stamp, scan — my last block print in digi Carve, stamp, scan — my last block print in digital form..

#surfacepatterndesign #haberdasheryfunpatterns #blockprinting #blockprintingart #versafineink #deepdiveplay #3dottedpenguins #surfacepatterndesigner
Working through my deeply committed relationship w Working through my deeply committed relationship with single-color prints and playing with color. 

#surfacepatterndesign #haberdasheryfunpatterns #blockprinting #blockprintingart #versafineink #deepdiveplay #3dottedpenguins
Instagram said I have to start making reels. So he Instagram said I have to start making reels. So here I am mildly uncomfortable, half heartedly participating. The “Next Best Chapter” is playing in the background, because apparently this is it.

#surfacepatterndesign #haberdasheryfun #blockprintingtechnique #blockprintinglove #versafineclair #pfeil
Follow on Instagram

Copyright © 2025 · Klar theme by Crimson Pear :: web & surface design

Copyright © 2025 · Klar on Genesis Framework · WordPress · Log in