Haberdashery Fun

  • Home
  • About
    • Look Book
  • Contact
    • Collaborate?
  • Tutorials
  • Shop
    • Email
    • Facebook
    • Instagram
    • Pinterest

Keep up to date with the latest posts!

DIY.. Pillowcases and Zig Zag Trim

in DIY Projects, Fabric on 22/08/13

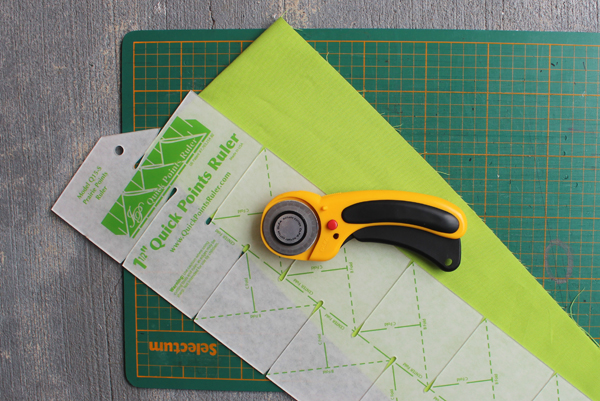
A few weeks ago I bought The Quick Points Ruler.. This ruler is pretty cool – you can make prairie points and very unique trim with it.

Making pillowcases has never been high on my sewing radar. How about you?  However, I didn’t realize they were so easy to make. I was at my local sewing and quilting store “Keep Me In Stitches” and my favorite salesperson Annette convinced me to give them a try. She said something like.. It’s just a few straight cuts with a rotary cutter and a few stitches in your machine.. And voila – king size pillowcases! Well it was true.

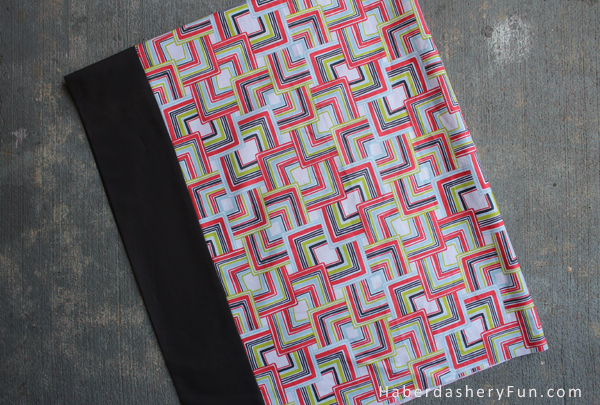
While discussing the pillowcases, I was shown this super bright fabric combination and bought it on the spot. I tend to be much more subdued in my color choices and bounce most color ideas off my husband. He studied industrial design and has a very keen eye.  For once though, I thought what the heck and went for a more intense and vivid look.

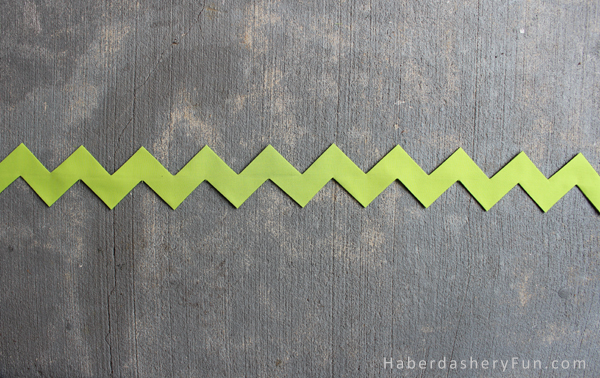
The material was cut down to size at the store. All I needed to do was sew on the grey cuff, create the zig zag trim and stitch the pillowcase together.. Super easy. The hardest part was using the ruler to make the zig zag trim and that was more time consuming than “hard”. I’m not going to show how to make the pillowcase.. Google “Easy Tube Pillowcase Tutorial” and see what comes up.

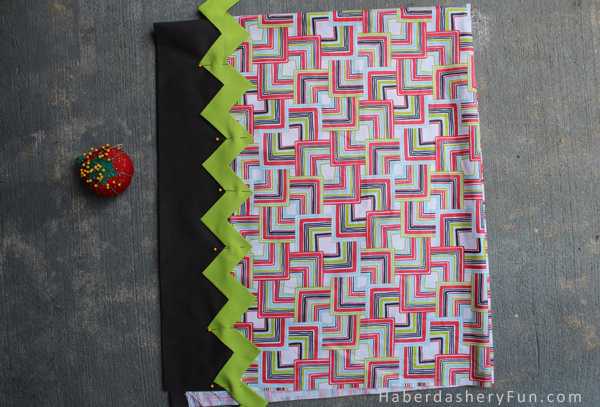
Once the cuff was attached to to main fabric, I pinned the zig zag trim over the seam. Using matching thread color, I placed it into my sewing machine and edgestitched along each zig zag side..  Take your time sewing this part. I got a little crossed eyed sewing up and down and up and down!!

So that’s it.. Easy room update. Colorful pillows for the spare bedroom. What do you think? Should I keep them or give them away? These would make an awesome hostess gift. All I need to do is make a little bag to go along with it and hello awesome present.

A little close up image. Next time, I think I will make my stitch length a little longer..

Fabric Source – “Field Day” by Josephine Kimberling for Blend

Thanks for stopping by. If you have any questions on this project, please let me know. I love hearing from everyone and answering all your questions.

Happy Sewing!

1 Comment

« Marking Tools 101
DIY.. Toy Bath Bag »

Comments

  1. Haley Kennedy says

    08/23/2013 at 8:11 pm

    Awesome idea. I like the ideas of pillowcases for a housewarming present. Thanks!

    Reply

Leave a Reply to Haley Kennedy Cancel reply

Your email address will not be published. Required fields are marked *

This site uses Akismet to reduce spam. Learn how your comment data is processed.

About me


Hi there - I'm Marni Weaver. A sewer, a sometimes quilter and a lover of fabric design. I started this blog to share my ideas. Come Join the Fun
shop now

Popular Categories

project for baby fabric projects seasonal projects fat quarter projects sewing tips and tricks inspiration

Categories

  • Applique
  • Baby
  • Bags and Pouches
  • Block Printing
  • Color
  • DIY Projects
  • Fabric
  • Fabric Design
  • Fat Quarter Projects
  • Home Decor
  • Inspiration
  • Just for Fun
  • Kids
  • No Sew
  • Patterns
  • Print On Fabric
  • Quilting
  • Scrap Fabric Projects
  • Seasonal
  • Sewing Tips & Tricks

Lovely sponsors

Recent Comments

  • How To Make Hand warmers | Haberdashery Fun on DIY.. Sew Heart Shaped Baby Burp Cloths
  • How To Make Hand warmers | Haberdashery Fun on How To Make Mini Heart Shaped Hand Warmers
  • Make Spooky Monster Inspired Face Cloths | Haberdashery Fun on DIY.. Make Monster Inspired Face Cloths
  • How To Sew A Fabric Bin | Haberdashery Fun on Sew An Easy Fabric Storage Bin
  • Make The Alma Tote In Fun Colors | Haberdashery Fun on New – The Alma Tote Pattern

Projects Elsewhere

find me on Pellon Projects sew mama sew contributor

momtastic contributor

Pinterest

Visit Marni@Haberdashery Fun's profile on Pinterest.

I'm Reading

  • Cluck Cluck Sew
  • Cooking Dangerously
  • In Color Order
  • Jen Hewitt
  • Jolly Jabber
  • Karly Spalding Photography
  • Leigh Laurel Studios
  • Lindsay Sews
  • Lotta Jansdotter
  • Love Patchwork and Quilting Magazine
  • Made
  • Making It Lovely
  • Noodle-Head
  • Polka Dot Chair
  • Sharon Holland Designs
  • Silhouette America Blog
  • Silhouette Design Store
  • The Purl Bee
  • The Purple Fig

Press:

Stitch Winter 2014

haberdashery_fun

Marni Weaver
Still experimenting with keeping the block printin Still experimenting with keeping the block printing, handmade feel in digital form. This one is a little rougher/less perfect, but still has the spirit ✨ Which one’s your pick—1 or 2.

#haberdasheryfun #versafineink #versafineclair #surfacepatterndesign
Who knew that one little stamp could do so much? # Who knew that one little stamp could do so much?
#haberdasheryfun #versafineink #versafineclair
Just added a new stamp pad to my collection—meet Just added a new stamp pad to my collection—meet Lilac Bloom! 💜 And before you ask… nope, this design is not a corn stalk. Are you a fan of this soft shade, or is it a bit too light for your taste?

#versafineclair #blockprints #surfacepatternprint #haberdasheryfunpatterns #surfacepatterndesign #pfeil
Atlanta feels like a steam room right now 🫠 so Atlanta feels like a steam room right now 🫠 so I’m manifesting cooler temps by reworking my Alberta Wild Rose block print into Evergreen.

#blockprinting #banffnationalpark #alberta #surfacepatterndesign #haberdasheryfun
#versafineclair
Ode to summer travels. Alberta wild rose stamp alo Ode to summer travels. Alberta wild rose stamp along with a few sketches. 

#blockprinting #banffnationalpark #alberta #surfacepatterndesign #haberdasheryfun 
@3dottedpenguinscommunity #versafineclair
Follow on Instagram

Copyright © 2025 · Klar theme by Crimson Pear :: web & surface design

Copyright © 2025 · Klar on Genesis Framework · WordPress · Log in