Haberdashery Fun

  • Home
  • About
    • Look Book
  • Contact
    • Collaborate?
  • Tutorials
  • Shop
  • Freebie
    • Email
    • Facebook
    • Instagram
    • Pinterest

Keep up to date with the latest posts!

How to Frame Your Fabric

in Block Printing on 12/05/22

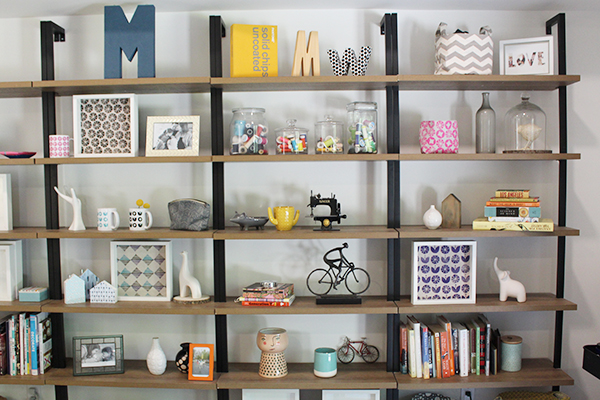
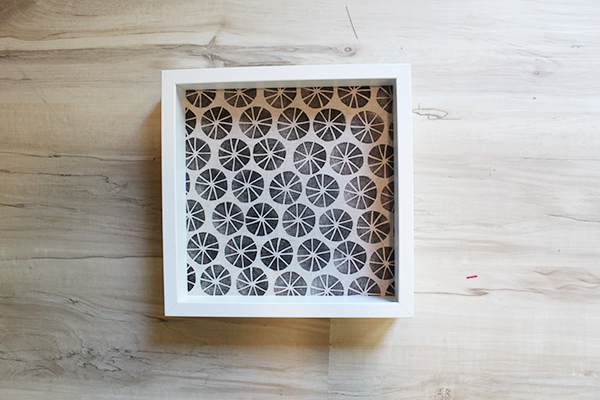
I recently shared a few images of my office shelves on Instagram and had quite a few readers reach out and ask me about the framed fabric on my shelves.

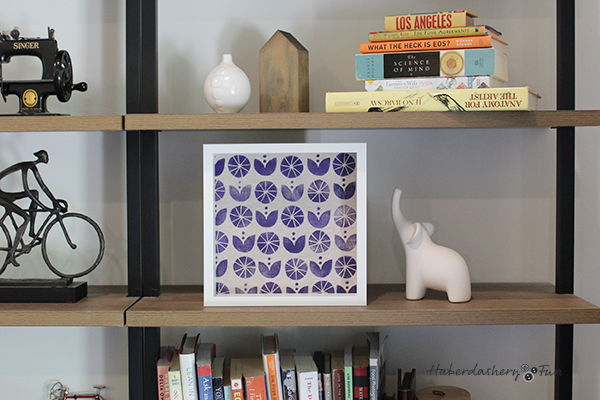
Everyone wanted to know more about these wonderful frames and ” How did the fabric get inside…? and also “How did you do that”?

The truth is… I did not come up with this idea. Last June, we were lucky to have our basement renovated and designed by HGTV ( Yes, that HGTV ). When they were preparing for the big reveal, the show designers asked for a bunch of my personal stuff. At the reveal, I was floored. They had framed a bunch of my fabric. Some frames were hung on the walls and the other pieces of fabric were put into shadows boxes and styled on the shelves.

So while I did not come up with this idea, I think people should know about this golden nugget of information.

The Frame:

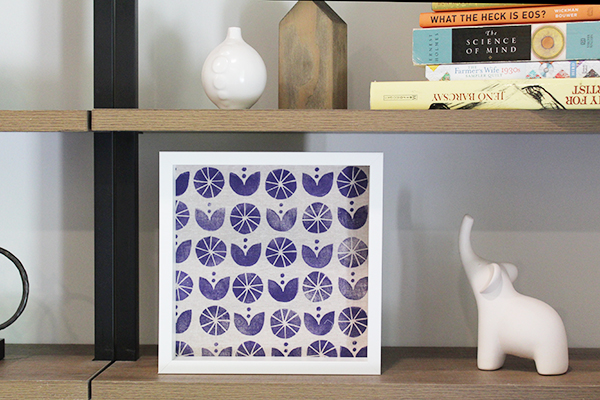
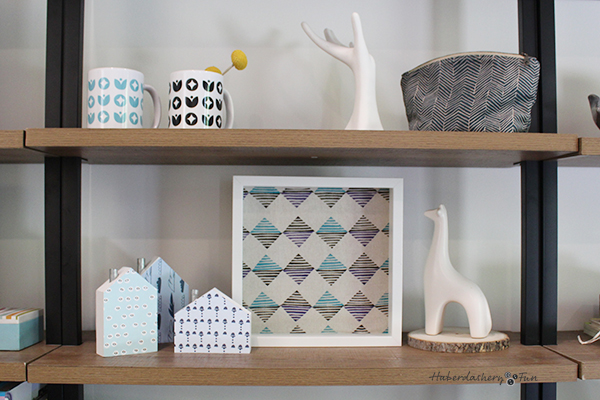
  • The frame is from IKEA and is called the “SANNAHED“.
  • The frame is not too big and not too small. I love how it is square which feels modern. The measurements are 9-3/4″ x 9-3/4″.
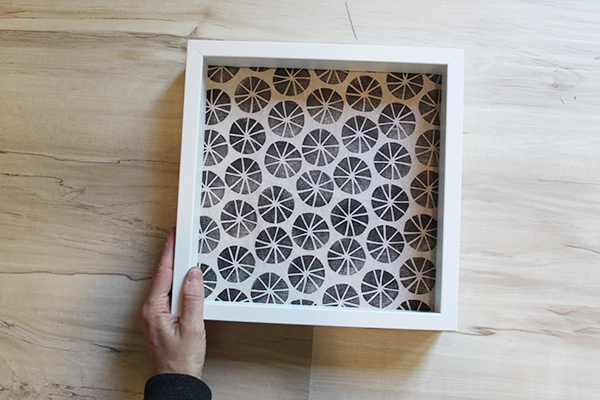
  • The frame is deep and has options to place the image ( fabric ) up front or towards the back. I like how the HGTV designers placed my fabric at the back and I have kept it that way. This gives a shadow box feel.
  • You can stand the frame up on itself, hang it on the wall ( it comes with a hook on the back ) and you can even use the easel back to stand it at an angle.
HaberdasheryFun - Block Printing Made Easy.

Here are the simple steps for placing your fabric into the frame:

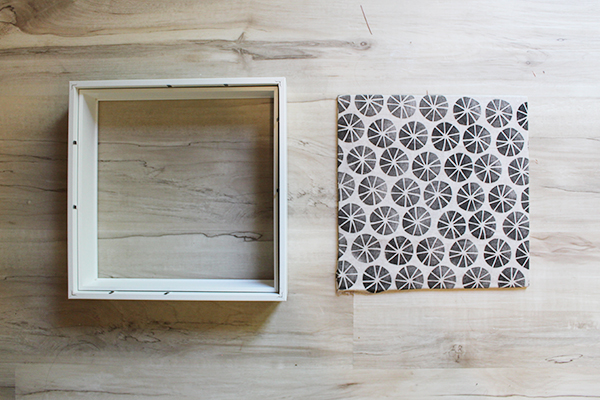
First, you open the frame from the back and take out the pieces.

Next, Lay your fabric on the ground. The fabric should be right side facing down. Lay the cardboard and plexiglass that comes with the frame on top. Arrange the cardboard and plexiglass to be right in the middle. You will need extra fabric on all sides so you can wrap it around.

Side Note – The HGTV designers took the plexiglass out of the frames, so there wouldn’t be a glare while filming. This is why I am wrapping the fabric around the cardboard and the plexiglass. I also happen to like the look of no plexiglass.

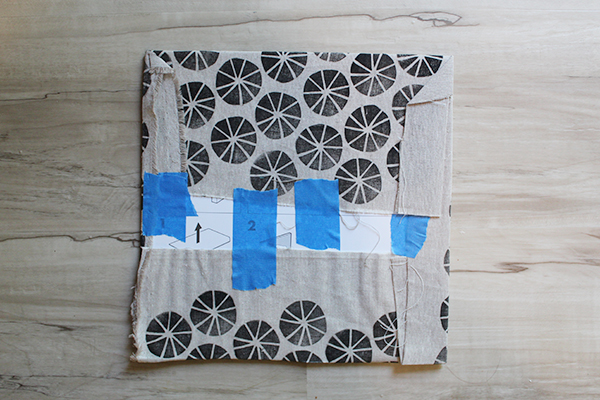
Lastly, wrap the fabric around the cardboard and plexiglass and secure at the back with tape. Use a tape that will not damage the fabric. Blue painters tape is always a safe bet. Place the backing piece back onto the back of the frame and voila!

Block Printing Made Easy - HaberdasheryFun
HaberdasheryFun - Creative Used with your block printed fabric.

Ps – Have you wanted to learn how to block print? Have you tried to block print and got frustrated and so you stopped? Do you scribble and design little motifs and think, “Gosh, I would love to design fabric”.

Well, I am so happy to share that I have create an online course called “Block Printing Made Easy”.

The course is 3 weeks long with content being released every Monday morning. The course starts Monday 5/30. The course is $97 USD.

The course dates are: 5/30, 6/6 and 6/13

Also included are Live Zoom Saturday Q&A Workshops from 11am – 12pm EST.

The workshop dates are: 6/4, 6/11 and 6/18

Click here for additional details on the modules and course content. I am so happy to share this course with everyone.

It has been a dream come true to develop and create the content for this course. While listening to my son and his teacher work together in virtual school during the pandemic, I realized that I should have been a teacher. I loved their interactions and her teaching style brought me so much joy. This course is a way for me to share all the knowledge that I gathered over the years with those who want to learn to block print

For further information on each of the three modules – please click here

Happy sewing and happy block printing.

Related Posts Plugin for WordPress, Blogger...

Add a Comment

« What Is A Fat Quarter & How To Use With Block Printing

Leave a Reply Cancel reply

Your email address will not be published. Required fields are marked *

This site uses Akismet to reduce spam. Learn how your comment data is processed.

About me


Hi there - I'm Marni Weaver. A sewer, a sometimes quilter and a lover of fabric design. I started this blog to share my ideas. Come Join the Fun
shop now

Popular Categories

project for baby fabric projects seasonal projects fat quarter projects sewing tips and tricks inspiration

Categories

  • Applique
  • Baby
  • Bags and Pouches
  • Block Printing
  • Color
  • DIY Projects
  • Fabric
  • Fabric Design
  • Fat Quarter Projects
  • Home Decor
  • Inspiration
  • Just for Fun
  • Kids
  • No Sew
  • Patterns
  • Print On Fabric
  • Quilting
  • Scrap Fabric Projects
  • Seasonal
  • Sewing Tips & Tricks

Lovely sponsors

Recent Comments

  • Make A Simple Block Print Tote Bag | Haberdashery Fun on DIY.. Colorful Dish Towel Tote Bags
  • Make A Simple Block Print Tote Bag | Haberdashery Fun on Sew Asymmetrical Color Block Totes Tutorial
  • Make A Block Printed ToteBag | Haberdashery Fun on Sew A Reversible Tote
  • Make A Block Printed ToteBag | Haberdashery Fun on Quick Tip.. Sewing Boxed Corners
  • 20 Creative DIY Storage Bin Ideas - DIY & Crafts on Sew An Easy Fabric Storage Bin

Projects Elsewhere

find me on Pellon Projects sew mama sew contributor

momtastic contributor

Pinterest

Visit Marni@Haberdashery Fun's profile on Pinterest.
Follow on Bloglovin

I'm Reading

  • Cluck Cluck Sew
  • Cooking Dangerously
  • In Color Order
  • Jen Hewitt
  • Jolly Jabber
  • Karly Spalding Photography
  • Leigh Laurel Studios
  • Lindsay Sews
  • Lotta Jansdotter
  • Love Patchwork and Quilting Magazine
  • Made
  • Making It Lovely
  • Noodle-Head
  • Polka Dot Chair
  • Sharon Holland Designs
  • Silhouette America Blog
  • Silhouette Design Store
  • The Purl Bee
  • The Purple Fig

Press:

Stitch Winter 2014

haberdashery_fun

Marni Weaver
I have a drawer where I keep all of my block print I have a drawer where I keep all of my block printed papers and have often wondered.. “What the heck do I do with all of these”.

How about you?

I recently found a bunch of  tutorials over at @modpodgerocks and thought it would be fun to make wood coasters with my block prints. They turned out better than expected and so I thought to share with you.

Want more info? I created a blog post. See the link in my profile for the blog post and details. 

Day27/100 #100dayproject #dothehundreddayproject #100daysofsimpleshapes #haberdasheryfun #blockprintingmadesimple #onlineclasses #zoomworkshops #haberdasheryfunpatterns #haberdasheryfunclasses #handmadestamp #modpodge #modpodgecrafts #decoupageart #decoupagelovers #blockprintedbyhand
I’m sharing about how to frame your block printe I’m sharing about how to frame your block printed fabric on my blog today. Day 26/100 #100dayproject 

If you have ever thought you would like to learn how to block print… I have a course for you. It is called Block Printing Made Easy. It is all about the basics - working with simple shapes, design prompts and getting creative on paper and fabric.

This is an online course and starts on Monday, May 30. There are 3 modules with videos and also included in the course are 3 live zoom workshops. The videos are self paced, so the good news is you can cruise through them or take all the time you need.

The course is $97 USD.

See the link in my profile for additional details on the course( breakdown on each module) and to also access to my blog post.

#dothe100dayproject #haberdasheryfun 
#blockprintingmadeeasy #100daysofsimpleshapes #zoomclasses #haberdasheryfunpatterns #speedballfabricink #handmadefabrics #dothe100dayproject2022 #100dayproject2022 #handmadestamps #blockprintedfabric #ikeahacks #ikeaframes
Goodbye triangles, hello circles. I’m working Goodbye triangles, hello circles. 

I’m working on a project, so I printed a bunch of small fabric squares with my new circle stamp. Such a simple yet effective stamp.

I am launching an online course called “Block Printing Made Easy? Want to learn to block print? The course starts in two weeks (5/30). Want more info? See the link in my profile to join the waitlist and also to view the course details. 

Day 25/100 #100dayproject 

#dothe100dayproject #dothe100dayproject2022 #haberdasheryfun #haberdasheryfunpatterns #pdfpattern #blockprinting #blockprintingonfabric #blockprintingmadeeasy #blockprintingworkshop #speedballfabricink #konacottonsolids #speedballart
I’ve got one more triangle print to share and I I’ve got one more triangle print to share and I think that’s a wrap. Simple and easy. The pin cushion on that right that was gifted to me from my grandmother Mor Mor really takes the stage in my opinion 

The circle shape is next. I’m excited to work with no corners and see what will unfold.

Day 24/100
#haberdashery #100dayproject 
#100daysofsimpleshapes #blockprintingmadeeasy #dothe100dayproject #dothe100dayproject2022 
#haberdasheryfun #ikeahacks #konacotton #konacottonsolids 
#speedballfabricink #blockprinting #easyblockprint #haberdasheryfunpatterns #haberdasheryfunclasses
A mash up of triangle stamps I created so far duri A mash up of triangle stamps I created so far during the #100dayproject.
 
Who knew the triangle shape could be so much fun? I have had a blast the last playing around with it - both dissecting the shape and putting it back together. 

Which one is your favorite?

I can’t believe I am saying this, but Im ready to move on to a new shape. One that is more soft and organic. Next up, the circle!
Day 23/100

#100daysofsimpleshapes 
#haberdashery 
#blockprinting 
#blockprintingonfabric 
#blockprintingmadeeasy 
#haberdasheryfun
#speedballfabricink #speedballink #fatquarters 
#handmade #dothe100dayproject2022 
#100dayproject2022
Follow on Instagram

Copyright © 2022 · Klar theme by Crimson Pear :: web & surface design

Copyright © 2022 · Klar on Genesis Framework · WordPress · Log in