Haberdashery Fun

  • Home
  • About
    • Look Book
  • Contact
    • Collaborate?
  • Tutorials
  • Shop
    • Email
    • Facebook
    • Instagram
    • Pinterest

Keep up to date with the latest posts!

Creative Uses For Your Block Prints

in Block Printing, DIY Projects on 04/05/22

I don’t normally share crafting ideas on my blog, but this crafting idea was too good to pass up.

I have a pile of block prints in my desk drawer. Every time I make more, I open the drawer and add to the pile of paper. I have often thought to myself, what can I do with these?

HaberdasheryFun block printed coasters. Use Mod Podge for a fun project!

Over the years, I have spent a lot of time and energy making these prints. So I have a hard time throwing them away.

Does this happen to you?

I recently saw a post on Plaid Crafts and they were using their Mod Podge brand to make wooden signs. Mod Pode is a decoupage, glue and sealer in one. I thought to myself how great those signs looked, so why not try to use Mod Podge with my block prints and create something wooden as well?

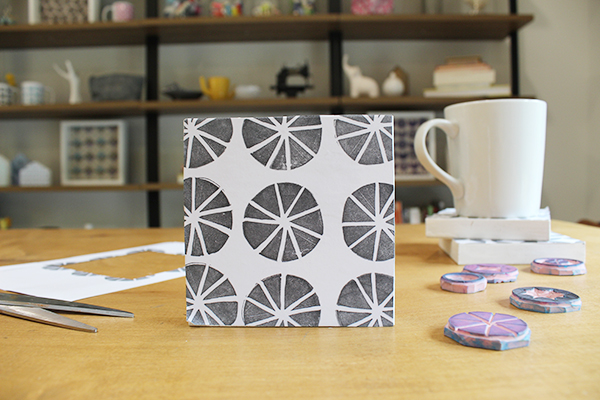
I found light weight wood coasters in the Dollar Spot at Target and knew I had the perfect pieces of wood for my Mod Podge block printed coasters.

Turns out, the project was fun and actually super easy.

Here are the materials needed:

  • Lightweight wood coasters – check Amazon, Target and craft stores for light wood items
  • Mod Podge Gloss or Matte
  • Mod Podge Hard Coat
  • Craft paint brush or sponge applicator
  • Cup – for the water and to clean the brush
  • Paper – printed with your block prints
  • Paper scissors
  • Craft Paint – white / optional
  • Pencil
  • Kraft paper – to protect your work surface

Here is the fun part. Let’s walk thru the steps on how to make coasters with your block prints on top.

Step 1 – First, I sanded the wood and then painted over the design that was on the surface of the coasters. Let the paint dry for at least 48 hours.

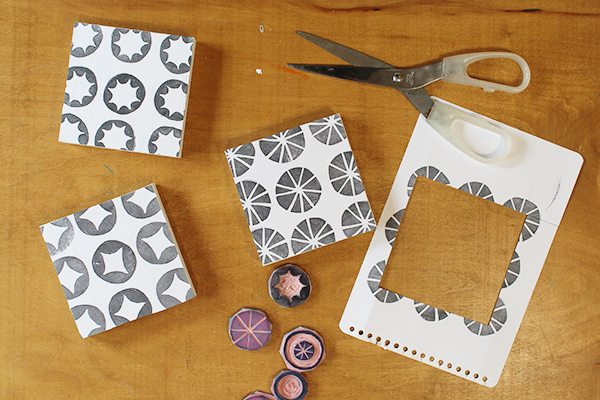
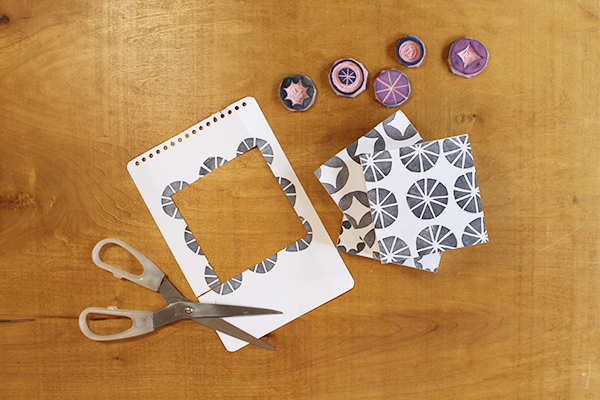
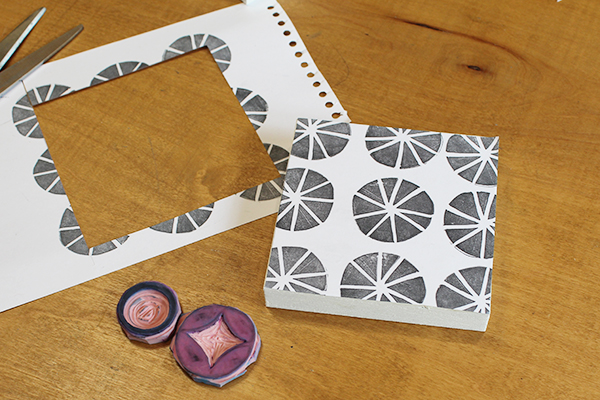
Then, I placed my block printed paper and wood item onto my work surface. I traced around the wood item and repeated for each item.

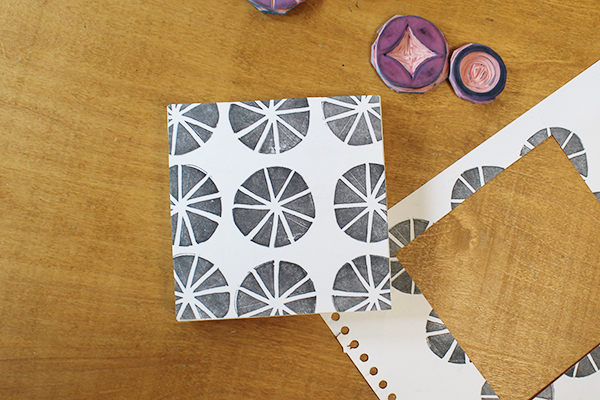
Step 2 – Next, I cut out the design. I put the paper back onto the wood surface and trimmed any excess that was hanging off the edges.

Step 3 – Lastly, I applied the Mod Podge. Make sure to follow the directions on bottle. Here is a condensed version of the steps. One thing to note, do not shake your bottle. Instead you can roll the Mod Podge bottle to gently to mix the contents.

Bottle Directions:

  • Apply Mod Podge to the back of the paper and also onto the wood surface. Wiggle around to get into placement.
  • Gently smooth out air bubbles. Start from the center and move outwards. I have a Mod Podge squeegee that works great for this. DO NOT push too hard or you can rip your paper and designs.
  • Let dry for 24 hours.
  • Once the item is dry, apply a top coat of the Mod Podge onto the paper surface.
  • Follow directions for applying additional top coats.

That’s it! Isn’t this an awesome and unique way to showcase your designs? They would even make a great gift.

Do you think you would make these? I would love to hear from you.

So I have Good news! You can now register for my new online course called ” Block Printing Made easy”.

Do you want to learn how to block print? Are you a beginner block printer and need inspiration or tips and tricks on how to find designs? Have you tried to block print and found it very frustrating?

Well, my online class is made for you. This is introductory level class called and it starts Monday May 30th, 2022. The course is online and will run for 3 weeks, with online video content being shared every Monday. You can take the course at your own pace. PLUS – Every Saturday for the 3 weeks of the course, I will host a live, one hour long Zoom Q&A workshop.

Click HERE for additional information on each module

I hope you join and can’t wait to meet this new community of block printers 🙂

HaberdasheryFun Block Printed Coasters. Creative Uses for your block prints

Add a Comment

« Make A Simple Block Print Tote Bag
What Is A Fat Quarter & How To Use With Block Printing »

Leave a Reply Cancel reply

Your email address will not be published. Required fields are marked *

This site uses Akismet to reduce spam. Learn how your comment data is processed.

About me


Hi there - I'm Marni Weaver. A sewer, a sometimes quilter and a lover of fabric design. I started this blog to share my ideas. Come Join the Fun
shop now

Popular Categories

project for baby fabric projects seasonal projects fat quarter projects sewing tips and tricks inspiration

Categories

  • Applique
  • Baby
  • Bags and Pouches
  • Block Printing
  • Color
  • DIY Projects
  • Fabric
  • Fabric Design
  • Fat Quarter Projects
  • Home Decor
  • Inspiration
  • Just for Fun
  • Kids
  • No Sew
  • Patterns
  • Print On Fabric
  • Quilting
  • Scrap Fabric Projects
  • Seasonal
  • Sewing Tips & Tricks

Lovely sponsors

Recent Comments

  • How To Make Hand warmers | Haberdashery Fun on DIY.. Sew Heart Shaped Baby Burp Cloths
  • How To Make Hand warmers | Haberdashery Fun on How To Make Mini Heart Shaped Hand Warmers
  • Make Spooky Monster Inspired Face Cloths | Haberdashery Fun on DIY.. Make Monster Inspired Face Cloths
  • How To Sew A Fabric Bin | Haberdashery Fun on Sew An Easy Fabric Storage Bin
  • Make The Alma Tote In Fun Colors | Haberdashery Fun on New – The Alma Tote Pattern

Projects Elsewhere

find me on Pellon Projects sew mama sew contributor

momtastic contributor

Pinterest

Visit Marni@Haberdashery Fun's profile on Pinterest.

I'm Reading

  • Cluck Cluck Sew
  • Cooking Dangerously
  • In Color Order
  • Jen Hewitt
  • Jolly Jabber
  • Karly Spalding Photography
  • Leigh Laurel Studios
  • Lindsay Sews
  • Lotta Jansdotter
  • Love Patchwork and Quilting Magazine
  • Made
  • Making It Lovely
  • Noodle-Head
  • Polka Dot Chair
  • Sharon Holland Designs
  • Silhouette America Blog
  • Silhouette Design Store
  • The Purl Bee
  • The Purple Fig

Press:

Stitch Winter 2014

haberdashery_fun

Marni Weaver
It’s been awhile since I printed some fabric. Pl It’s been awhile since I printed some fabric. Played around with space on this one and wanted to see what would happen when the I didn’t lay the hexagons in perfect symmetry. I chose Interstellar music for the post. Thoughts on the movie? That movie really got me.

#surfacepatterndesign #haberdasheryfunpatterns #blockprinting #blockprintingart #versafineink #versafineclair #deepdiveplay #3dottedpenguinscommunity #surfacepatterndesigner #geometricpattern #repeatpatterndesigner #textilepattern #patterndesign 

@3dottedpenguinscommunity
Magic lives in the opposite. Obsessed with my new Magic lives in the opposite. Obsessed with my new love: developing inverse blocks. 

#surfacepatterndesign #haberdasheryfunpatterns #blockprinting #blockprintingart #versafineink #versafineclair #deepdiveplay #3dottedpenguinscommunity #surfacepatterndesigner #geometricpattern #repeatpatterndesigner #textilepattern #patterndesign
Carve, stamp, scan — my last block print in digi Carve, stamp, scan — my last block print in digital form..

#surfacepatterndesign #haberdasheryfunpatterns #blockprinting #blockprintingart #versafineink #deepdiveplay #3dottedpenguins #surfacepatterndesigner
Working through my deeply committed relationship w Working through my deeply committed relationship with single-color prints and playing with color. 

#surfacepatterndesign #haberdasheryfunpatterns #blockprinting #blockprintingart #versafineink #deepdiveplay #3dottedpenguins
Instagram said I have to start making reels. So he Instagram said I have to start making reels. So here I am mildly uncomfortable, half heartedly participating. The “Next Best Chapter” is playing in the background, because apparently this is it.

#surfacepatterndesign #haberdasheryfun #blockprintingtechnique #blockprintinglove #versafineclair #pfeil
Follow on Instagram

Copyright © 2025 · Klar theme by Crimson Pear :: web & surface design

Copyright © 2025 · Klar on Genesis Framework · WordPress · Log in