Haberdashery Fun

  • Home
  • About
    • Look Book
  • Contact
    • Collaborate?
  • Tutorials
  • Shop
  • Freebie
  • Block Printing Course
    • Email
    • Facebook
    • Instagram
    • Pinterest

Keep up to date with the latest posts!

DIY.. Kids Name Pillow + Giveaway

in DIY Projects, Kids on 19/03/15

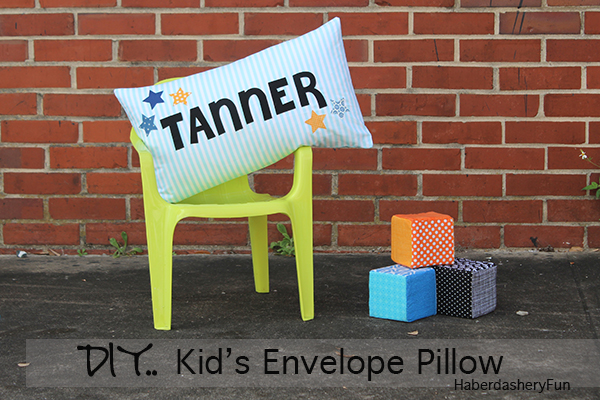
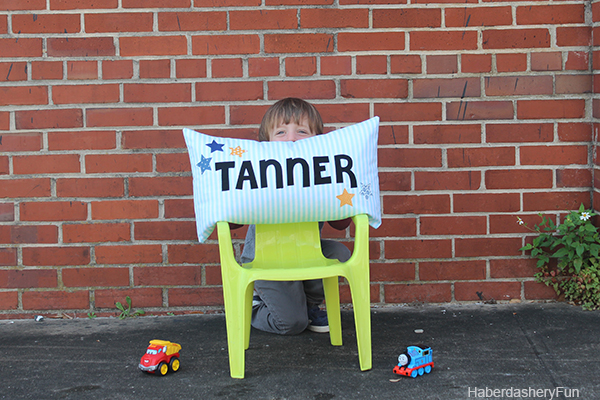
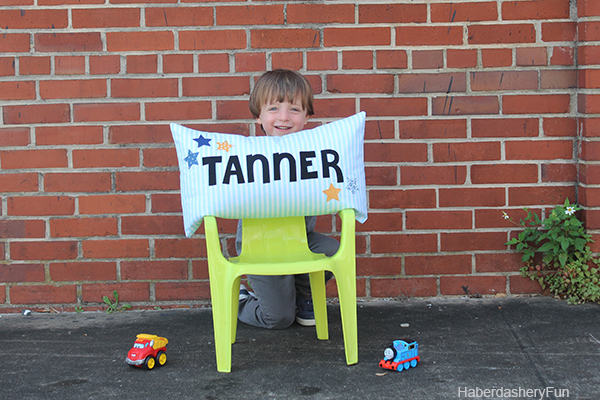
I’m happy to be sharing this adorable pillow today.  I’ve wanted to make a “Tanner” pillow since my little guy was born. I’ve just never gotten around to it… Pillows are super simple to make AND add style to your child’s bedroom. So when the opportunity came about to be apart of the Shabby Fabrics Blogger Challenge, I jumped at the chance.

Tanner Pillow 4

Tanner Pillow 6B

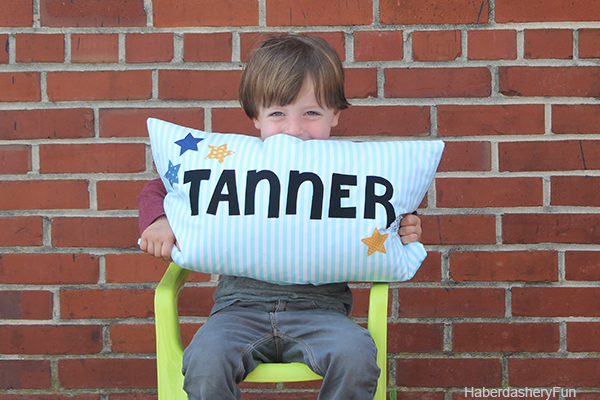
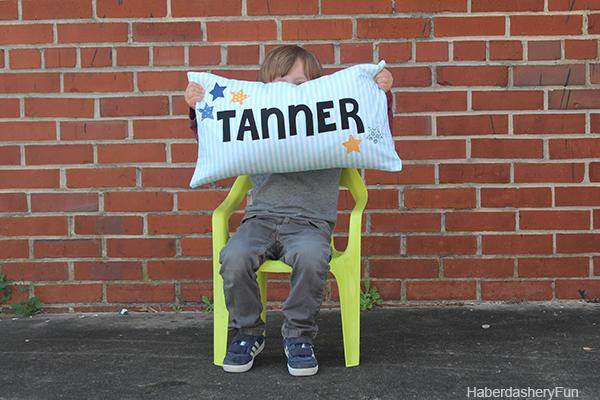
I had a lot of fun making this pillow. My son is 3 and loves finding the letter T in his surroundings.. He always shouts out, “Hey Mommy..  “T” for Tanner” when he sees a stop sign or the letter on the side of a truck. It is the cutest thing and warms my heart.

Tanner Pillow 7

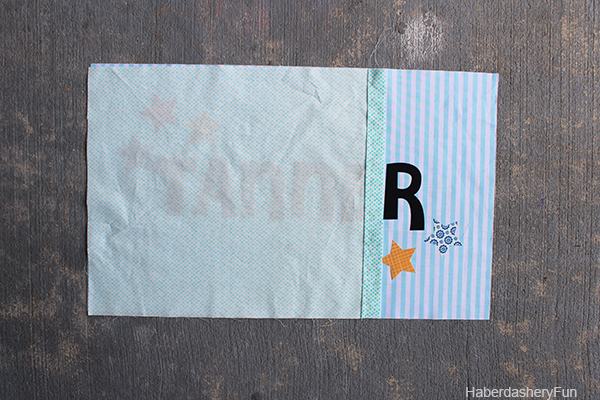
Shabby Fabrics created laser cut shapes and they come in different shapes and sizes – hearts, dots, stars, butterflies, letters.. There are so many options! The laser cut shapes are so easy to use and you’ll be sewing in 1.2.3…

And guess what? I’m hosting a giving away with this post – a FREE package of shapes. Make sure to read below, it’s easy to enter.
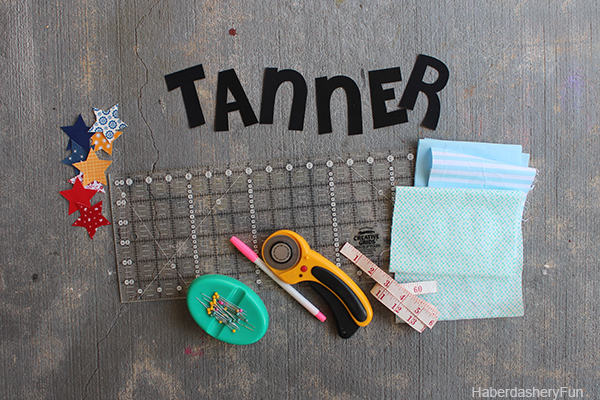
Materials

Materials needed:

  1. 3 fat quarters
  2. Shabby Fabrics Laser Cut Applique Shapes – Alphabet Set and/or laser cut shapes
  3. 12″ x 21″ Pillow form
  4. Velcro pieces
  5. Disappearing fabric ink pen
  6. Sewing supplies and sewing machine
  7. Iron and ironing board
  8. Serger – optional

2015_Blogger_Challenge_600x400

An envelope pillow is the perfect project for beginner sewers. I promise you can do this in an afternoon  – just grab 3 coordinating fat quarters, the laser cut applique shapes, your sewing supplies and you are good to go.

HaberdasheryFun pillow 2 copy

Ok. Let’s get started.. Cutting instructions:

  1. Pillow front –  Cut out 1 rectangle 21 3/4″L x 12 3/4″W.
  2. Pillow Back –  Cut out 1 rectangle measuring 15″L x 12 3/4″W [ large side] and another measuring 13 “L x 12 3/4″W [ small side]

Here are your 5 Easy steps:

Step 1 – Lay the back fabric pieces on your work surface.  On the “large side”, turn and fold under the short edge 1″. Press with an iron. Turn and fold under 1″ again. Press. Place into your sewing machine and top stitch along the folded edge. Repeat for the “small side. These pieces create the envelope back.

Step1

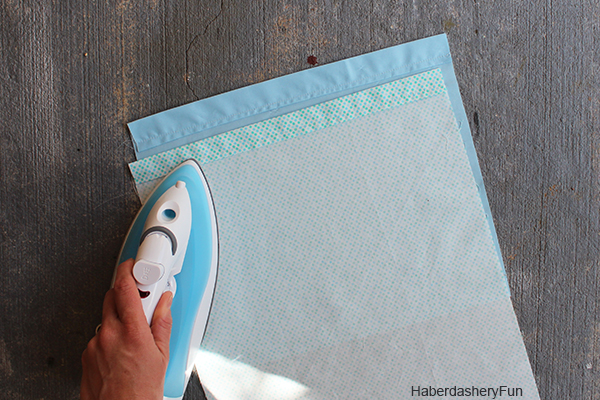
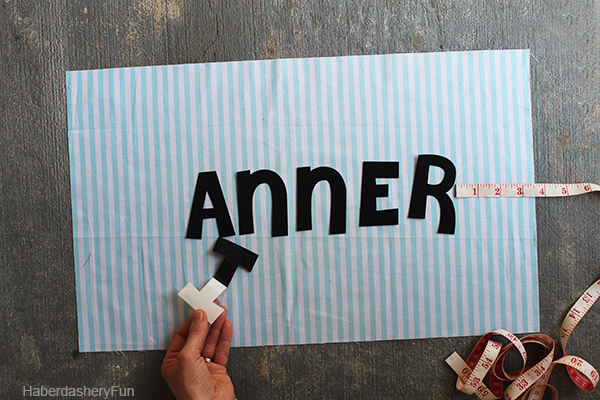
Step 2 – Lay the front pillow piece on your work surface. Take letters and shapes out of the package and play with the layout on the front. Leave a little extra room for the sides and make sure it it even especially the ends. Read Shabby Fabrics package directions – carefully peel off the backing off the pieces. Place the shapes onto your pillow front. Press in place. Applique around the outside of each letter and shape. I usually use a straight stitch, but any stitch will do.

Step2B

Step2C

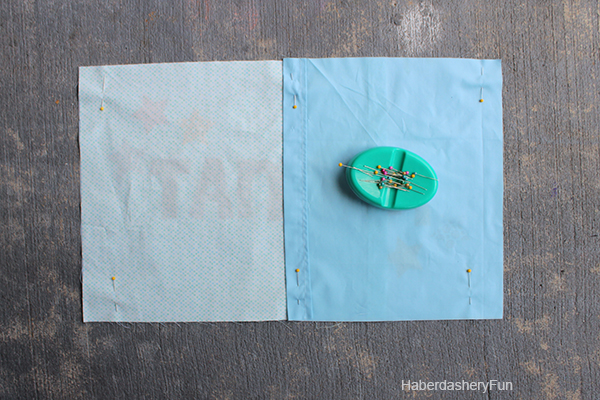
Step 3 – Place pillow front right side up on your work surface. Lay the back rectangle pieces right side facing down.  The “large side” should be placed first and on the left. The “small side” should be placed on the right. Pin where they overlap and also around the outside edge. Place into sewing machine and stitch together with a 3/8″ seam allowance. Press. Finish the raw edges.

Step3

Step3B

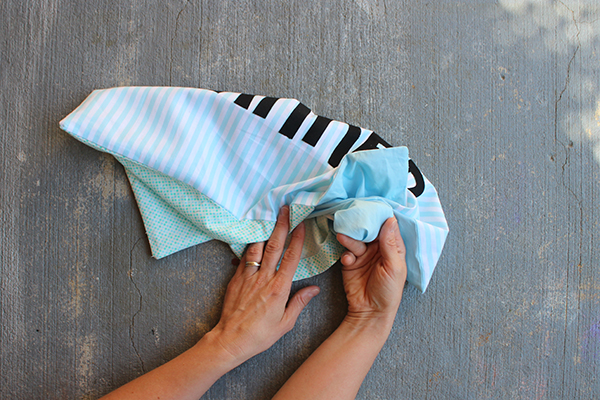
Step 4 – Turn right side out. Wiggle corners into place. Press.

Step5

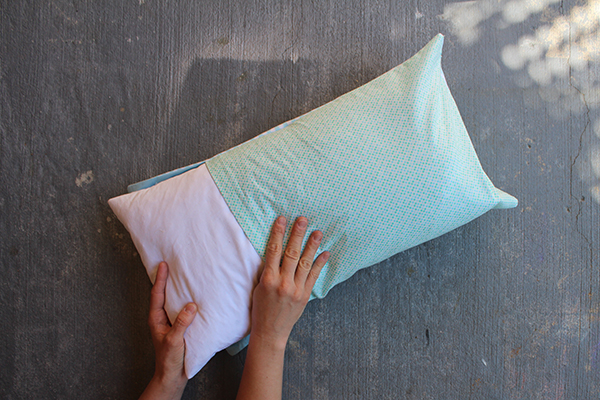
Step 5 – Insert the pillow form. Wiggle around so the side seams match. Jiggle each corner into place again. And that’s it, cute pillow complete.

Step6

And now on to the BEST part!! I’m giving a set of ALPHABET SHAPES away!! It’s easy. Just leave a comment for this post and let me know what you would make.. That’s it.. The winner will be selected at random and is open internationally. The contest is open through Sunday, March 22nd 12pm EST.

Please note – the contest is now closed. Thank you to everyone who entered.

Tanner Pillow 2 Bottom

Tanner Pillow 3 Bottom

There are a bunch of great projects in the Blog Hop – check out the links below:

Tuesday, March 17th – Paula at The Sassy Quilter

Wednesday, March 18th – Daniela at On The Cutting Floor

Wednesday, March 18th – Erin at Why Not Sew?

Wednesday, March 18th – Deby at So Sew Easy

Thursday, March 19th – Alyce at Blossom Heart Quilts

Thursday, March 19th – Me 🙂

Friday, March 20th – Melissa at Happy Quilting

Friday, March 20th – Mahriam at Three Owls handmade

Saturday, March 21st – Melissa at Polka Dot Chair

Please note that Shabby Fabrics sent me the appliqué letters and stars for this project. However, all opinions are my own. Can’t wait to hear from you.

Happy Sewing.

57 Comments

« DIY.. Colorful Canvas Pouches
Vinyl & Ribbon Pouches – Ribbon Blog Tour »

Comments

  1. Allison CB says

    04/03/2015 at 12:26 pm

    Cute pillow – and model!

    Reply
  2. Ruth says

    04/15/2015 at 11:57 am

    Adorable and fun! Our (almost) three-year-old grandson would love this! Thank you.

    Reply
  3. Stacey says

    07/18/2015 at 8:58 am

    My Granddaughter (4) does the same thing everything is B for Bella. I would make her a pillow with her name on it, she would be over the moon!

    Reply
  4. Lisa M says

    07/18/2015 at 10:20 am

    I know a few kiddies who would love this! Thanks

    Reply
  5. Debbie Wakelee says

    07/19/2015 at 1:04 am

    Love this idea for all of my great nieces and nephews! What a fun gift to make! Thanks!

    Reply
« Older Comments

Trackbacks

  1. Tutorial: Make a kids name pillow – Sewing says:
    04/14/2015 at 12:07 pm

    […] DIY.. Kids Name Pillow, by Haberdashery Fun […]

    Reply

Leave a Reply Cancel reply

Your email address will not be published. Required fields are marked *

This site uses Akismet to reduce spam. Learn how your comment data is processed.

About me


Hi there - I'm Marni Weaver. A sewer, a sometimes quilter and a lover of fabric design. I started this blog to share my ideas. Come Join the Fun
shop now

Popular Categories

project for baby fabric projects seasonal projects fat quarter projects sewing tips and tricks inspiration

Categories

  • Applique
  • Baby
  • Bags and Pouches
  • Block Printing
  • Color
  • DIY Projects
  • Fabric
  • Fabric Design
  • Fat Quarter Projects
  • Home Decor
  • Inspiration
  • Just for Fun
  • Kids
  • No Sew
  • Patterns
  • Print On Fabric
  • Quilting
  • Scrap Fabric Projects
  • Seasonal
  • Sewing Tips & Tricks

Lovely sponsors

Recent Comments

  • HaberdasheryFun and an easy Kraft-tex sewing project | Haberdashery Fun on Collapsible Kraft-Tex Bowl
  • HaberdasheryFun and an easy Kraft-tex sewing project | Haberdashery Fun on Sewing With Kraft-Tex
  • 3 Simple Summer Sewing Tutorials | Haberdashery Fun on Sew A Canvas Zipper Pouch
  • 3 Simple Summer Sewing Tutorials | Haberdashery Fun on Sew Asymmetrical Color Block Totes Tutorial
  • 3 Simple Summer Sewing Tutorials | Haberdashery Fun on Sew A Baby Towel With A Hood

Projects Elsewhere

find me on Pellon Projects sew mama sew contributor

momtastic contributor

Pinterest

Visit Marni@Haberdashery Fun's profile on Pinterest.
Follow on Bloglovin

I'm Reading

  • Cluck Cluck Sew
  • Cooking Dangerously
  • In Color Order
  • Jen Hewitt
  • Jolly Jabber
  • Karly Spalding Photography
  • Leigh Laurel Studios
  • Lindsay Sews
  • Lotta Jansdotter
  • Love Patchwork and Quilting Magazine
  • Made
  • Making It Lovely
  • Noodle-Head
  • Polka Dot Chair
  • Sharon Holland Designs
  • Silhouette America Blog
  • Silhouette Design Store
  • The Purl Bee
  • The Purple Fig

Press:

Stitch Winter 2014

haberdashery_fun

Marni Weaver
Working on a commission and a request for the colo Working on a commission and a request for the color terracotta. I’m thinking the top right vs the bottom left. And funny enough, this fits perfectly for today’s #marchmeetthemaker prompt “decision”

#haberdasheryfun #100dayproject #marchmeetthemaker2023 #surfacepattern #terracottabowl #speedballink #textiledesigner #homedepotcolormatch #haberdasheryfunpatterns #blockprinting #blockprintedfabric #surfacepatterndesign #smallbusinesslife
Earlier today I was working on a new pattern and t Earlier today I was working on a new pattern and then realized that my table had legs. 😂 While I’m excited to share about my upcoming tote pattern release, this photo took me down memory lane. My sweet boy Arlo turns 7 this week. He is always by my side and has been my shadow since the day he was born❤️ . He is often in my studio, patiently waiting, photobombing a tutorial or playing w/ my supplies.

#haberdasheryfun #koifabric #rashidcolemanhale #rubystarsocietyfabric #haberdasheryfunpatterns #pdfpattern #marceetthemaker #marchmeetthemaker2023 #100dayproject #blockprintingmadeeasy
I love today's prompt "from idea to product" for # I love today's prompt "from idea to product" for #marchmeetthemaker. If you swipe, you can see the the original. I made that group of block print quite a few years ago and this pinwheel is a motif that I come back to all the time. 

Do you block print or make your own designs? What would you like to create with your patterns or prints? Have anything in mind?

#blockprintingmadeeasy #blockprinting #surfacepatterndesign #haberdasheryfun
#onlinecourses #chelseatakesshots #haberdasheryfunpatterns #makeshit #surfacepatterncommunity #whatsyourwhy #marchmeetthemaker2023 #100dayproject #dothe100dayproject #havefun #scandiboho.
Instagram post 18073744054322730 Instagram post 18073744054322730
Do you mix and match your handmade block prints an Do you mix and match your handmade block prints and your fabric stash?  I love this combo of champagne blush and turquoise. What would you make with it?

#haberdashery #modafabrics #gingiberfabric #modafabricsandsupplies #modafabric #meetthemaker2023 #modafabric 
#meetthemaker #100dayproject #haberdasheryfun #100dayproject2023 #blockprintingmadeeasy #blockprinting #cottoncanvas #speedballfabricink.
Follow on Instagram

Copyright © 2023 · Klar theme by Crimson Pear :: web & surface design

Copyright © 2023 · Klar on Genesis Framework · WordPress · Log in