Haberdashery Fun

  • Home
  • About
    • Look Book
  • Contact
    • Collaborate?
  • Tutorials
  • Shop
  • Freebie
    • Email
    • Facebook
    • Instagram
    • Pinterest

Keep up to date with the latest posts!

Quick Tip.. How To Use Eyelet Pliers

in Sewing Tips & Tricks on 18/11/13

I bought a Dritz eyelet plier kit over the weekend. So much fun. I’m not sure about you, but I love buying new sewing tools and equipment. The excitement I feel about a silly tool always reinforces what a sewing nerd I am.

How to use eyelet pliers

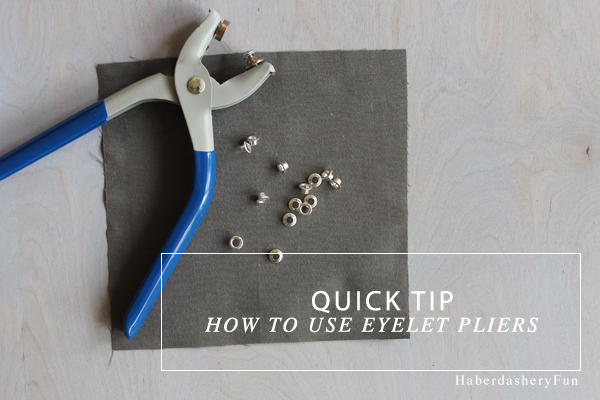
Here is a quick breakdown on how to use the pliers.. The package directions are very easy to follow, but as the saying goes.. Pictures are worth a thousand words.  I have a drawstring jewelry jewelry pouch tutorial that I am sharing on Wednesday –  it requires 2 eyelets for the drawstring opening.. So, please stay tuned.

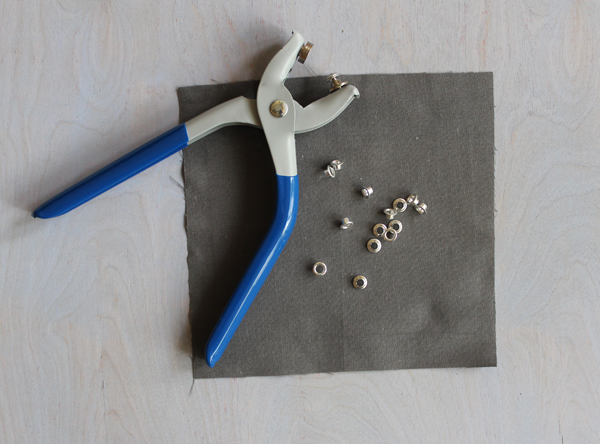
I strongly suggest practicing with the pliers and eyelets before you start using them on your real fabric or project. Trust me, I’ve learned this lesson the hard way. Cut out a small square and give it a whirl.. I promise you will gain confidence in the process. A few screw ups along the way always reinforces what not to do.

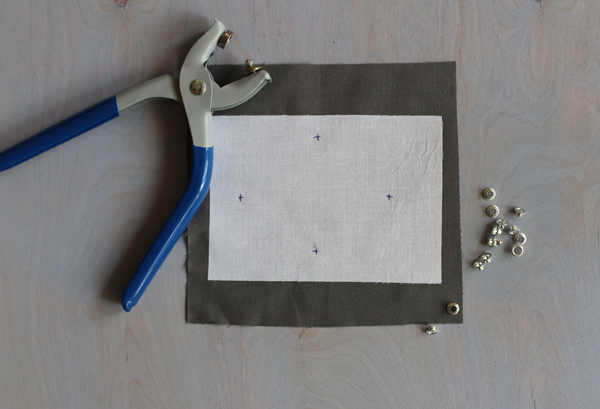
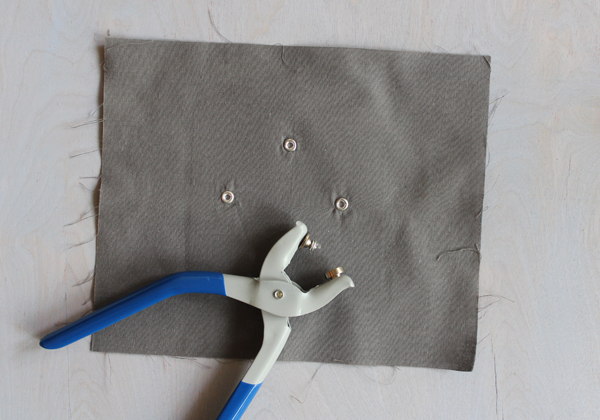
Fuse interfacing on the back of the fabric/near the area you will be placing an eyelet. Using interfacing is important and gives the fabric more structure. It is easy for the eyelet to pull through the weave. Mark each eyelet placement on the back.

Puncture holes using the pliers. Once you puncture the hole, don’t jiggle the tool around too much. If you make the hole too big, the eyelet will not stay in place.

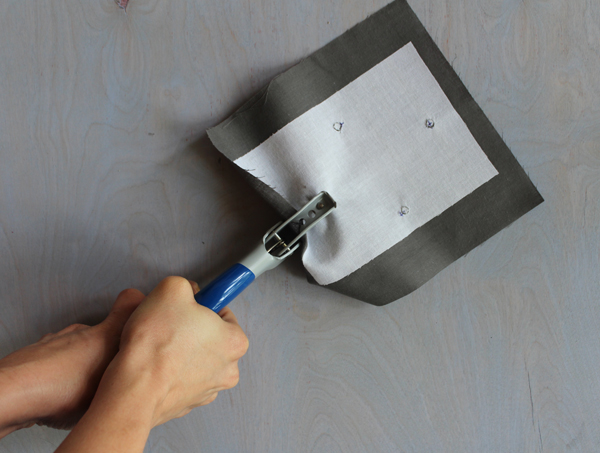
This part can be a bit tricky. You will need to figure out your own technique and get comfortable with it… Starting from the right side of the fabric, place an eyelet into the hole. Place another eyelet onto the plier prong and bring the pliers into your fabric. Match up the eyelets and squish HARD.. Squish again just a little harder. Pull out and check your work. See something your don’t quite like? Make a small adjustment in your technique on the next go round. Repeat until you feel confident.

Ta-da!! that’s it. Eyelets complete.. Fun stuff right?

Check back on Wednesday for my drawstring jewelry pouch tutorial. It’s super handy and small, so it’s great for travel.  It also makes for an easy gift.

Related Posts Plugin for WordPress, Blogger...

8 Comments

« Sew A Super Easy Baby Burp Cloth
DIY.. Make A Drawstring Jewelry Pouch »

Comments

  1. Trish says

    11/18/2013 at 2:15 pm

    Ahhh cool! That looks like a fun little tool 🙂

    Reply
  2. Ann says

    11/18/2013 at 4:26 pm

    Neat! I love hoarding sewing tools, even if I don’t know how to use them all. But now I could use an eyelet tool, thanks!

    Reply
  3. Haberdashery Fun says

    11/19/2013 at 11:41 am

    Thanks Trish and Ann.. I’m glad you guys stopped by!

    Reply
  4. Theresa says

    12/17/2014 at 10:17 pm

    Thanks so much for the pictorial! I learn so much more easily visually than reading instructions. Going to try this on a doll dress that does not quite fit the intended doll so I thought I could make the back lace up with fancy matching ribbon.
    Thank you!
    Theresa

    Reply
    • Haberdashery Fun says

      12/17/2014 at 11:10 pm

      Hi. Glad it worked for you. I’m the same.. I like seeing images and find they help. You’ll the love the eyelet pliers 🙂

      Reply
  5. Cass says

    03/12/2015 at 1:45 pm

    Hello!

    I liked the quick, to-the-point tutorial- I’ll definitely take a look again once I find our eyelet tool. Unfortunately, it’s currently MIA and I’m too broke to buy another one. Do you know how I could apply eyelets without one?

    -Cass

    Reply
    • Haberdashery Fun says

      03/12/2015 at 1:59 pm

      HI Cass,

      Truthfully, I would save up and buy a new one. Maybe the have them for a reduced cost on Ebay? I’ve tried other ways and the pliers work the best and makes the project look the most professional. I’d hate for you to sew something together and then not have the eyelets work out because you used a different method. Been there, done that and it stinks.
      Have a great day.
      Marni

      Reply

Trackbacks

  1. DIY.. Make A Drawstring Jewelry Pouch | Haberdashery Fun says:
    11/20/2013 at 12:35 pm

    […] Large outside circle – this step is to add the eyelets. At the fold line, measure 1-3/4″ inwards from outside edge and mark. This is for the outside line of the casing. From this line measure 5/8″ inwards and mark again. This is the inside line of the casing. Place the eyelet in the middle. Repeat and place an other eyelet on the other side. Scared to use the eyelet plies? Check out my tutorial here […]

    Reply

Leave a Reply Cancel reply

Your email address will not be published. Required fields are marked *

This site uses Akismet to reduce spam. Learn how your comment data is processed.

About me


Hi there - I'm Marni Weaver. A sewer, a sometimes quilter and a lover of fabric design. I started this blog to share my ideas. Come Join the Fun
shop now

Popular Categories

project for baby fabric projects seasonal projects fat quarter projects sewing tips and tricks inspiration

Categories

  • Applique
  • Baby
  • Bags and Pouches
  • Block Printing
  • Color
  • DIY Projects
  • Fabric
  • Fabric Design
  • Fat Quarter Projects
  • Home Decor
  • Inspiration
  • Just for Fun
  • Kids
  • No Sew
  • Patterns
  • Print On Fabric
  • Quilting
  • Scrap Fabric Projects
  • Seasonal
  • Sewing Tips & Tricks

Lovely sponsors

Recent Comments

  • Make A Simple Block Print Tote Bag | Haberdashery Fun on DIY.. Colorful Dish Towel Tote Bags
  • Make A Simple Block Print Tote Bag | Haberdashery Fun on Sew Asymmetrical Color Block Totes Tutorial
  • Make A Block Printed ToteBag | Haberdashery Fun on Sew A Reversible Tote
  • Make A Block Printed ToteBag | Haberdashery Fun on Quick Tip.. Sewing Boxed Corners
  • 20 Creative DIY Storage Bin Ideas - DIY & Crafts on Sew An Easy Fabric Storage Bin

Projects Elsewhere

find me on Pellon Projects sew mama sew contributor

momtastic contributor

Pinterest

Visit Marni@Haberdashery Fun's profile on Pinterest.
Follow on Bloglovin

I'm Reading

  • Cluck Cluck Sew
  • Cooking Dangerously
  • In Color Order
  • Jen Hewitt
  • Jolly Jabber
  • Karly Spalding Photography
  • Leigh Laurel Studios
  • Lindsay Sews
  • Lotta Jansdotter
  • Love Patchwork and Quilting Magazine
  • Made
  • Making It Lovely
  • Noodle-Head
  • Polka Dot Chair
  • Sharon Holland Designs
  • Silhouette America Blog
  • Silhouette Design Store
  • The Purl Bee
  • The Purple Fig

Press:

Stitch Winter 2014

haberdashery_fun

Marni Weaver
I have a drawer where I keep all of my block print I have a drawer where I keep all of my block printed papers and have often wondered.. “What the heck do I do with all of these”.

How about you?

I recently found a bunch of  tutorials over at @modpodgerocks and thought it would be fun to make wood coasters with my block prints. They turned out better than expected and so I thought to share with you.

Want more info? I created a blog post. See the link in my profile for the blog post and details. 

Day27/100 #100dayproject #dothehundreddayproject #100daysofsimpleshapes #haberdasheryfun #blockprintingmadesimple #onlineclasses #zoomworkshops #haberdasheryfunpatterns #haberdasheryfunclasses #handmadestamp #modpodge #modpodgecrafts #decoupageart #decoupagelovers #blockprintedbyhand
I’m sharing about how to frame your block printe I’m sharing about how to frame your block printed fabric on my blog today. Day 26/100 #100dayproject 

If you have ever thought you would like to learn how to block print… I have a course for you. It is called Block Printing Made Easy. It is all about the basics - working with simple shapes, design prompts and getting creative on paper and fabric.

This is an online course and starts on Monday, May 30. There are 3 modules with videos and also included in the course are 3 live zoom workshops. The videos are self paced, so the good news is you can cruise through them or take all the time you need.

The course is $97 USD.

See the link in my profile for additional details on the course( breakdown on each module) and to also access to my blog post.

#dothe100dayproject #haberdasheryfun 
#blockprintingmadeeasy #100daysofsimpleshapes #zoomclasses #haberdasheryfunpatterns #speedballfabricink #handmadefabrics #dothe100dayproject2022 #100dayproject2022 #handmadestamps #blockprintedfabric #ikeahacks #ikeaframes
Goodbye triangles, hello circles. I’m working Goodbye triangles, hello circles. 

I’m working on a project, so I printed a bunch of small fabric squares with my new circle stamp. Such a simple yet effective stamp.

I am launching an online course called “Block Printing Made Easy? Want to learn to block print? The course starts in two weeks (5/30). Want more info? See the link in my profile to join the waitlist and also to view the course details. 

Day 25/100 #100dayproject 

#dothe100dayproject #dothe100dayproject2022 #haberdasheryfun #haberdasheryfunpatterns #pdfpattern #blockprinting #blockprintingonfabric #blockprintingmadeeasy #blockprintingworkshop #speedballfabricink #konacottonsolids #speedballart
I’ve got one more triangle print to share and I I’ve got one more triangle print to share and I think that’s a wrap. Simple and easy. The pin cushion on that right that was gifted to me from my grandmother Mor Mor really takes the stage in my opinion 

The circle shape is next. I’m excited to work with no corners and see what will unfold.

Day 24/100
#haberdashery #100dayproject 
#100daysofsimpleshapes #blockprintingmadeeasy #dothe100dayproject #dothe100dayproject2022 
#haberdasheryfun #ikeahacks #konacotton #konacottonsolids 
#speedballfabricink #blockprinting #easyblockprint #haberdasheryfunpatterns #haberdasheryfunclasses
A mash up of triangle stamps I created so far duri A mash up of triangle stamps I created so far during the #100dayproject.
 
Who knew the triangle shape could be so much fun? I have had a blast the last playing around with it - both dissecting the shape and putting it back together. 

Which one is your favorite?

I can’t believe I am saying this, but Im ready to move on to a new shape. One that is more soft and organic. Next up, the circle!
Day 23/100

#100daysofsimpleshapes 
#haberdashery 
#blockprinting 
#blockprintingonfabric 
#blockprintingmadeeasy 
#haberdasheryfun
#speedballfabricink #speedballink #fatquarters 
#handmade #dothe100dayproject2022 
#100dayproject2022
Follow on Instagram

Copyright © 2022 · Klar theme by Crimson Pear :: web & surface design

Copyright © 2022 · Klar on Genesis Framework · WordPress · Log in