Haberdashery Fun

  • Home
  • About
    • Look Book
  • Contact
    • Collaborate?
  • Tutorials
  • Shop
    • Email
    • Facebook
    • Instagram
    • Pinterest

Keep up to date with the latest posts!

DIY.. Make A Drawstring Jewelry Pouch

in Fat Quarter Projects on 20/11/13

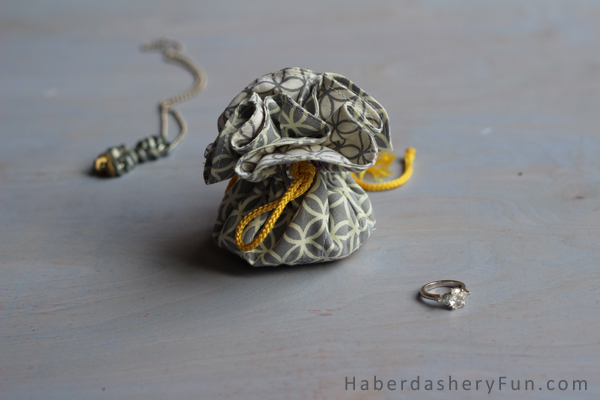
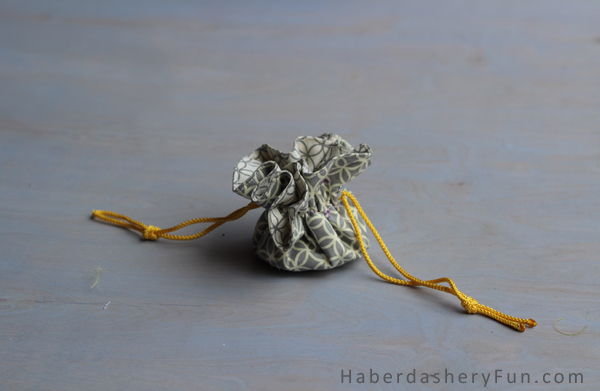
I love this little jewelry pouch. It’s small enough, it fits in the palm of your hand!

I’ve been wanting to make one for all my work travels. Such a perfect little companion for a quick getaway – holds your jewelry safe and tight, with multiple inside pockets that keep everything neat and tidy.

Holiday season is fast approaching. Gift giving at the top of your mind? Well, this jewelry pouch makes a great gift.  Sew one for yourself and a few extras to give to those special people in your life.

Materials needed:

  1. Cotton fabric – 3-4 colors. Mix and match your fabric. This is a great fat quarter project!!
  2. Eyelet Plier Kit – optional
  3. Nylon cord – approximately 40″
  4. Batting
  5. Light weight interfacing – Pellon SF101 works great
  6. Disappearing fabric pen
  7. Sewing machine and sewing supplies
  8. Iron and ironing board
  9. Zipper foot – optional

Before we get started, you will need to do the following:

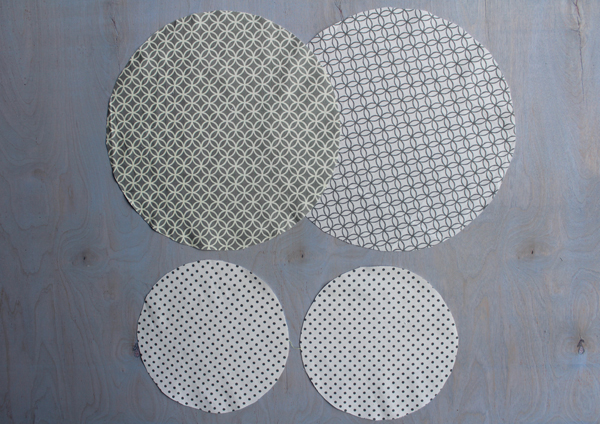
  1. Draw 1 large circle with the diameter of 11″, this includes seam allowances
  2. Draw 1 smaller circle with the diameter of 7-1/2″, also includes seam allowances
  3. For each size circle – decide what fabric will be the outside and the lining
  4. Cut out 4 circles – 2 large and 2 small

Alright, let’s get sewing:

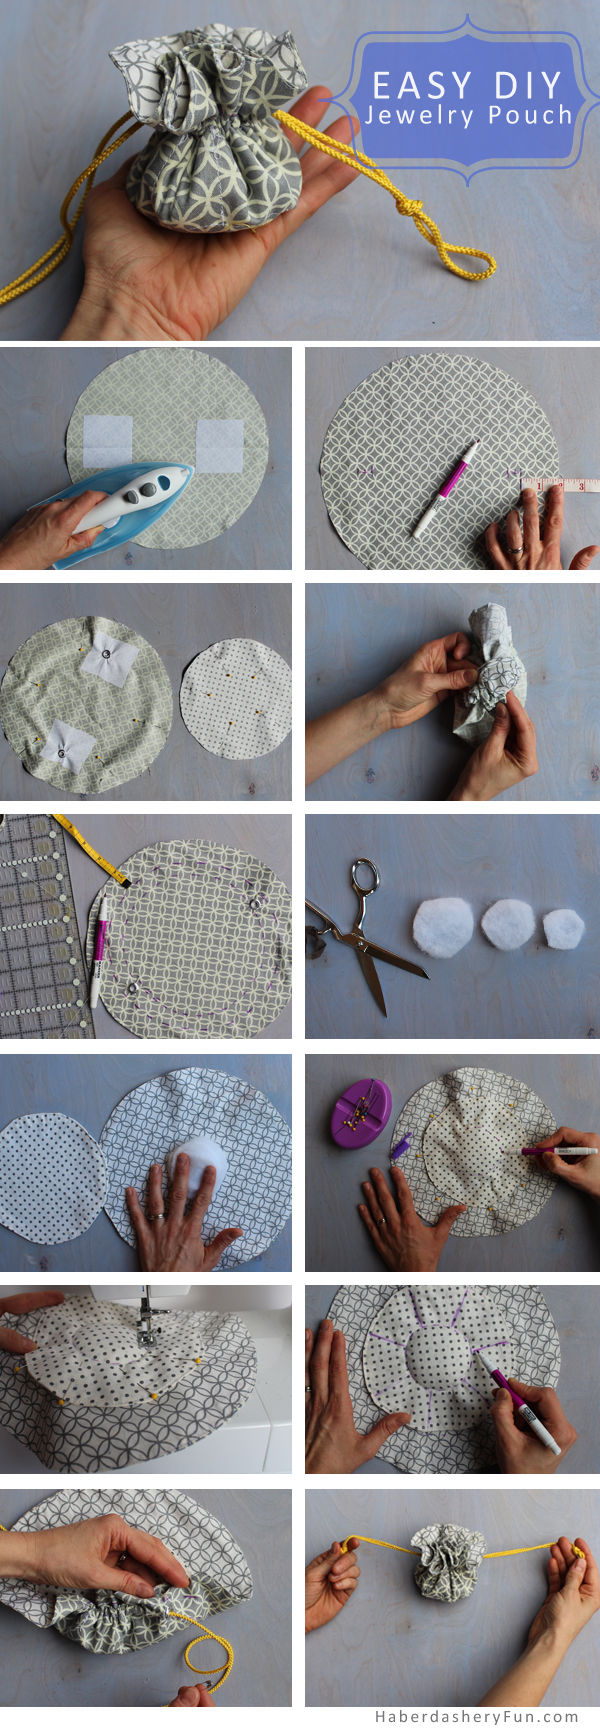
  1. Large outside circle – fold fabric in half and finger press. This will give the center line and where to fuse the interfacing and also place the eyelets. Turn wrong side up. Cut out 2 small squares [ approx 2″x2″] of interfacing. Measure 1/2″ inwards from outside edge and fuse the interfacing in place
  2. Large outside circle – this step is to add the eyelets. At the fold line, measure 1-3/4″ inwards from outside edge and mark. This is for the outside line of the casing. From this line measure 5/8″ inwards and mark again. This is the inside line of the casing. Place the eyelet in the middle. Repeat and place an other eyelet on the other side. Scared to use the eyelet pliers? Check out my easy tutorial here
  3. For each circle, place right sides together and pin. Place into sewing machine and stitch with a 3/8″ seam allowance, backstitch at each end. Leave a small 1″ – 2″ opening. Press with an iron.  Notch seam allowances 1″ apart for the entire outside edge
  4. Turn circles right side out. Press to lay flat. Place into sewing machine and edge stitch 1/8″ from outside edge. Repeat for second circle
  5. Large circle – this step is to sew the casing. Return to the casing marks that were created earlier. Follow measurements and create 2 circular stitching lines. Note that the eyelets should be in the MIDDLE of the dashed lines. Place into sewing machine and stitch following the lines. Switch to a zipper foot as this helps maneuver around the eyelets
  6. Cut 3 batting pieces. Use the bottom of a wine glass for reference. Cut 1 piece of batting the same size of the wine glass bottom. Make the next 2 pieces slightly smaller
  7. Turn the large circle so that the outside fabric is facing down [Eyelets face outwards]. Place batting pieces on top of each other in the centre
  8. Lay the small circle on top of the batting pieces. Pin in place. Feel for the edge of the batting and use disappearing ink pen to create a circular stitching line
  9. Place into sewing machine and stitch following circular line
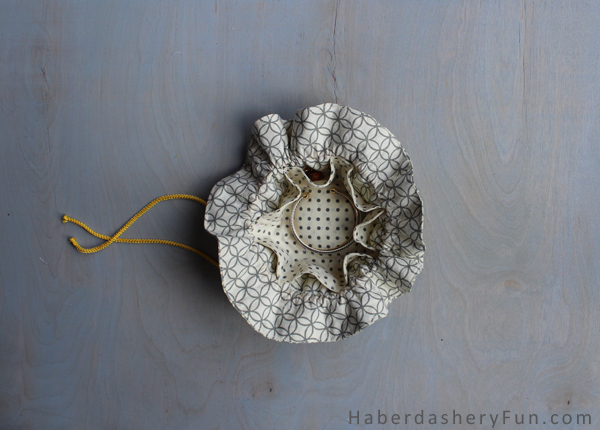
  10. This step is to create the inside pockets – use disappearing ink pen to draw 7 lines for the pockets. Lines look like the spokes of a wheel and are approximately 2-1/2″ apart at outside edge. Place into sewing machine and stitch following these lines. Make sure to backstitch at beginning and end. Also make sure to NOT stitch into casing area
  11. Cut cord length in half. Place a pin at the end of the cord and insert into an eyelet. Pull the cord through the casing and exit through the same eyelet. Repeat for the other eyelet.
  12. Pull cord to test you inserted it properly. The cord should gather top edge when pulled from each side

Happy sewing. Let me know how it goes and please comment or email if you have any questions.

25 Comments

« Quick Tip.. How To Use Eyelet Pliers
DIY.. Quilted Bread Basket Cover »

Comments

  1. Destri says

    11/21/2013 at 3:02 pm

    Ooo, I love little stuff to sew!! Super cute and perfect for stocking stuffers!

    Reply
  2. Eileen says

    11/21/2013 at 9:37 pm

    This is so adorable! Love it 🙂

    Cheers,
    Eileen

    Reply
    • Haberdashery Fun says

      11/21/2013 at 10:02 pm

      Hi – thank you!!

      Reply
  3. Maurice says

    11/22/2013 at 2:11 pm

    Just beautiful! …i think you dropped your ring…

    Reply
  4. Karley says

    11/22/2013 at 7:52 pm

    Saw this on craftgawker! Had to stop by. This is a great tutorial.

    Reply
  5. Katie Goldsworthy says

    11/27/2013 at 1:31 am

    So cute! It would be great for a present! Great pics too! Thanks for linking it up at Monday Funday.

    Reply
  6. Allison @ Dream a Little Bigger says

    11/30/2013 at 7:42 pm

    I totally want to make one larger to wear on my wrist when I get dressed up. Not that it happens all that often but rocking this bag would be so cute with a pretty little party dress! I love it, Marni!

    Reply
    • Haberdashery Fun says

      12/02/2013 at 10:07 am

      Hi – now that is a great idea.. Thanks for stopping by 🙂

      Reply
  7. Melissa @ Two It Yourself says

    12/01/2013 at 3:35 pm

    Hi, I wanted to let you know that your Drawstring Jewelry Pouch is being featured this week, by one of my co-hosts, as one of my top picks from the Link It or Lump It Link Party! Come on over and grab a button and don’t forget to link up again this week! http://www.twoityourself.blogspot.com/2013/12/link-it-or-lump-it-party-16-plus.html
    Thanks!
    Melissa

    Reply
    • Haberdashery Fun says

      12/01/2013 at 9:23 pm

      Hi – thank you so much!!

      Reply
  8. Amy says

    07/25/2015 at 11:24 pm

    Brilliant! Thanks for the tut!

    Reply
    • Haberdashery Fun says

      07/26/2015 at 11:22 am

      Thanks Amy! I hope you make one. Let me know how it goes – Marni

      Reply
  9. Slava says

    03/16/2016 at 2:56 am

    Jewelry is an essential part of fashion especially when packing a compact  capsule travel wardrobe . Check out these 10 DIY packing tips and tricks for traveling with jewelry. Click on the images below to find the original source.

    Reply
  10. Laura says

    10/29/2016 at 8:49 pm

    I love the pattern and had fun making it. I even bought the eyelet pliers. the only problem was as soon as I put the cord in both eyelets fell out. I practiced before and used interfacing. The size was 5/32. Thoughts…

    Reply
    • Haberdashery Fun says

      11/08/2016 at 10:36 am

      Hi Laura,

      I just sent you an email. Let me know if you don’t get it. Thanks, Marni

      Reply
  11. Kay bussjaeger says

    03/31/2017 at 6:52 pm

    Love love this. Making A few for easter basKets but wonder how make hole without eyelet Pliers

    Reply
    • Haberdashery Fun says

      04/01/2017 at 4:22 pm

      Hi Kay- Thanks for stopping by. Ive been thinking about this. My only concern without the eyelet pliers is fraying… You could make little holes in the fabric and use “fray check” to keep the fabric from fraying. It’s a liquid seam sealant. Here is a link if you don’t know what it is:

      https://www.amazon.com/Dritz-1674-Liquid-Sealant-0-75-Ounce/dp/B000YQKIDY

      The other option is an eyelet stick on your sewing machine. You can google it and see if your machine has it. let me know how it goes. I would love to see finished images 🙂
      Marni

      Reply

Trackbacks

  1. Drawstring Pouch DIY Tutorial | My Craft Assistant says:
    12/08/2013 at 12:05 pm

    […] love this DIY drawstring pouch tutorial on the haberdasheryfun.com blog! It looks like it’s fun and easy to do, plus there are so many pattern and design […]

    Reply
  2. DIY Jewelry #2248 says:
    10/09/2014 at 8:13 pm

    […] here via […]

    Reply
  3. Stacy’s Top Picks Dainty Little DIY Pouches | Stacy's Club says:
    05/24/2015 at 8:07 pm

    […] via haberdasheryfun.com […]

    Reply
  4. Top 10 Dainty Little DIY Pouches | Viseem says:
    05/24/2015 at 9:03 pm

    […] via haberdasheryfun.com […]

    Reply
  5. Quick Tip.. How To Use Eyelet Pliers | Haberdashery Fun says:
    10/02/2015 at 5:52 am

    […] back on Wednesday for my mini drawstring jewelry pouch […]

    Reply
  6. 35 DIY Gift Bags That Will Blow Them Away | Dodo Burd says:
    09/30/2016 at 4:17 am

    […] Drawstring Pouch […]

    Reply
  7. Jewelry Cinch Pouches says:
    11/20/2016 at 4:05 pm

    […] DIY.. Make A Drawstring Jewelry Pouch […]

    Reply
  8. Awesome DIY Travel Accessories to Make in a Weekend says:
    02/18/2019 at 10:56 am

    […] item I rarely travel without is a jewellery pouch I got for my 18th birthday.  Make a similar pouch with this tutorial. Though I’ve found this style invaluable for transporting earrings and rings, a jewellery roll […]

    Reply

Leave a Reply Cancel reply

Your email address will not be published. Required fields are marked *

This site uses Akismet to reduce spam. Learn how your comment data is processed.

About me


Hi there - I'm Marni Weaver. A sewer, a sometimes quilter and a lover of fabric design. I started this blog to share my ideas. Come Join the Fun
shop now

Popular Categories

project for baby fabric projects seasonal projects fat quarter projects sewing tips and tricks inspiration

Categories

  • Applique
  • Baby
  • Bags and Pouches
  • Block Printing
  • Color
  • DIY Projects
  • Fabric
  • Fabric Design
  • Fat Quarter Projects
  • Home Decor
  • Inspiration
  • Just for Fun
  • Kids
  • No Sew
  • Patterns
  • Print On Fabric
  • Quilting
  • Scrap Fabric Projects
  • Seasonal
  • Sewing Tips & Tricks

Lovely sponsors

Recent Comments

  • How To Make Hand warmers | Haberdashery Fun on DIY.. Sew Heart Shaped Baby Burp Cloths
  • How To Make Hand warmers | Haberdashery Fun on How To Make Mini Heart Shaped Hand Warmers
  • Make Spooky Monster Inspired Face Cloths | Haberdashery Fun on DIY.. Make Monster Inspired Face Cloths
  • How To Sew A Fabric Bin | Haberdashery Fun on Sew An Easy Fabric Storage Bin
  • Make The Alma Tote In Fun Colors | Haberdashery Fun on New – The Alma Tote Pattern

Projects Elsewhere

find me on Pellon Projects sew mama sew contributor

momtastic contributor

Pinterest

Visit Marni@Haberdashery Fun's profile on Pinterest.

I'm Reading

  • Cluck Cluck Sew
  • Cooking Dangerously
  • In Color Order
  • Jen Hewitt
  • Jolly Jabber
  • Karly Spalding Photography
  • Leigh Laurel Studios
  • Lindsay Sews
  • Lotta Jansdotter
  • Love Patchwork and Quilting Magazine
  • Made
  • Making It Lovely
  • Noodle-Head
  • Polka Dot Chair
  • Sharon Holland Designs
  • Silhouette America Blog
  • Silhouette Design Store
  • The Purl Bee
  • The Purple Fig

Press:

Stitch Winter 2014

haberdashery_fun

Marni Weaver
I’m embracing the crazy today. Including the col I’m embracing the crazy today. Including the colors and imperfections in this print.😂

#3dottedpenguinscommunity #haberdasheryfun #blockprintingtechnique #blockprintinglove #versafineclair #pfeil
Joined Ali's @3dottedpenguinscommunity “Play” Joined Ali's @3dottedpenguinscommunity “Play” year-long challenge. It’s been fun and also tough pushing myself out of my comfort zone. I've started by exploring florals, plus experimenting with my style and color palette.

#3dottedpenguinscommunity #haberdasheryfun #blockprintingtechnique #blockprintinglove #versafineclair #pfeil
Another round of block printing, adding inverse st Another round of block printing, adding inverse stamp into the mix. 

#3dottedpenguinscommunity #haberdasheryfun #blockprintingtechnique #blockprintinglove #versafineclair #pfeil @3dottedpenguinscommunity
Quick print of a triangle block I've been working Quick print of a triangle block I've been working on. Plus a little music to go along w/ it.
#haberdasheryfun #blockprintinglove #3dottedpenguinscommunity #versafineink #blockprinting @3dottedpenguinscommunity
It’s a nice, cool spring morning in Atlanta. Wor It’s a nice, cool spring morning in Atlanta. Working through a new hexagon block and making prints. Added a little audio b/c Instagram said to do it. My kids had this song on repeat awhile back.
#blockprintinglove #3dottedpenguinscommunity #haberdasheryfun #blockprinting #surfacepatterndesign
Follow on Instagram

Copyright © 2025 · Klar theme by Crimson Pear :: web & surface design

Copyright © 2025 · Klar on Genesis Framework · WordPress · Log in