Haberdashery Fun

  • Home
  • About
    • Look Book
  • Contact
    • Collaborate?
  • Tutorials
  • Shop
    • Email
    • Facebook
    • Instagram
    • Pinterest

Keep up to date with the latest posts!

Sew A Monster Inspired Hooded Towel

in Baby, DIY Projects on 02/10/13

I can’t believe it is already October. Bring on the goblins and ghosts.. It’s the season for monsters!

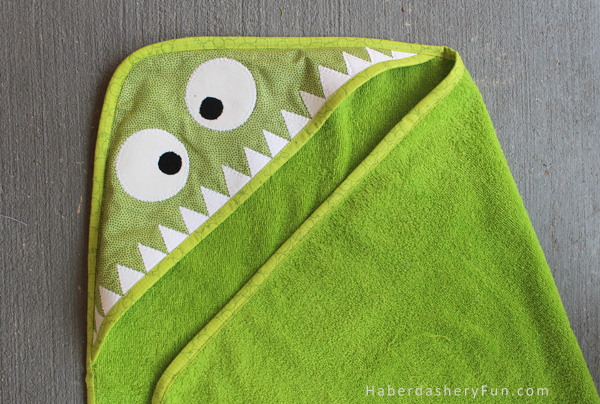
Last March I posted a tutorial on how to sew a baby and toddler hooded towel. It has been quite a popular post, both here on my blog and also on Pinterest.  With Halloween just around the corner, I thought it was the perfect time to create a fun monster update.  Click here If you would like to check out the original post.

To sew your own little monster, here are the materials needed:
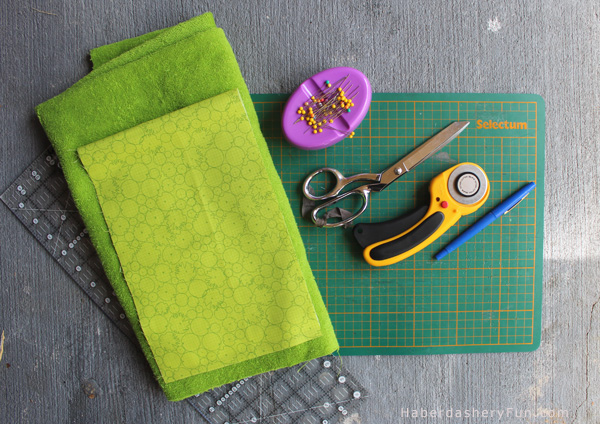
  1. Terry Towel
  2. Cotton fabric in 4 colors – you will use the cotton for the hood, binding, eyes and teeth
  3. Fusible web – Pellon EZ Steam works great
  4. Sewing machine and related supplies
  5. Disappearing ink pen
  6. Rotary cutter and cutting mat
  7. Quilting ruler and measuring tape
  8. Ink pen, paper, ruler
  9. Iron and ironing board

Before we get started, you will need to complete the following:

  1. Wash your terry towel
  2. Cut the main towel piece – lay the terry flat on a surface. Cut a large square that measures 30″ x 30″
  3. Cut out the hood pattern piece in both the terry towel and cotton fabric – click here to download the pattern Haberdashery-Fun-Hood-Pattern-Piece.pdf
  4. Cut the binding strips – cut the binding 2 1/2″ wide. You will need approximately 140″ of binding
  5. Sew the binding strips together – not sure how to do this? Check out my recent tutorial here
  6. Prepare the binding – with wrong sides together, fold the binding in half  lengthwise. Press with an iron

Alright, let’s get sewing:

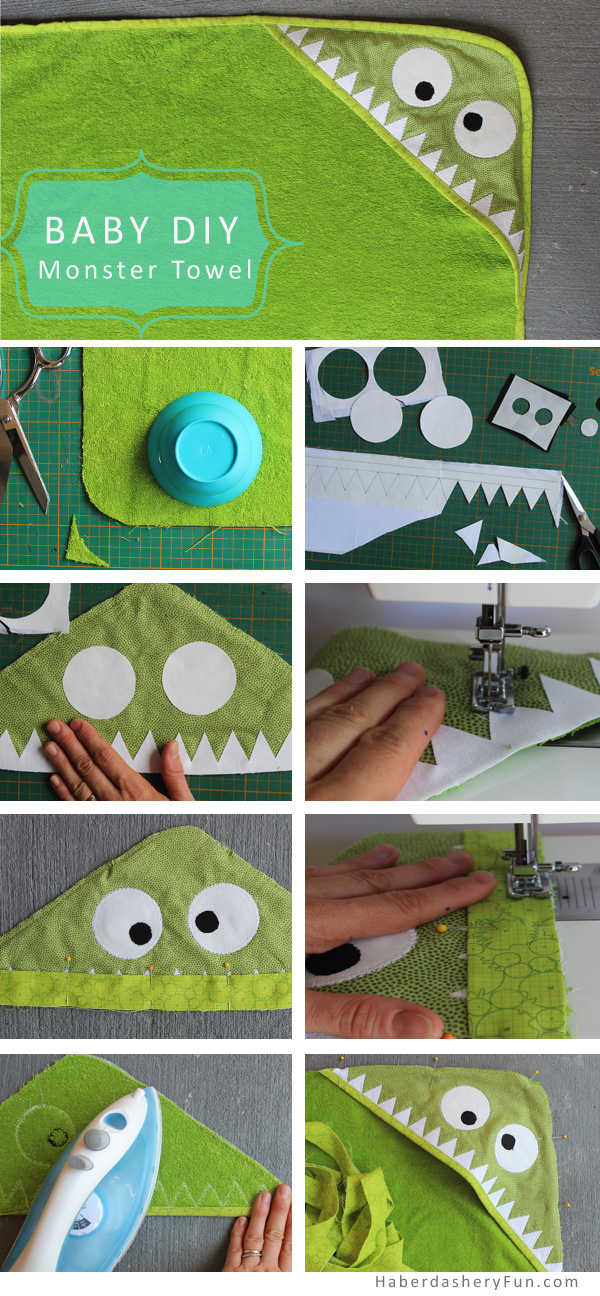
  1. Lay your 30″ x 30″ towel flat.  Hand press out any wrinkles. Find a small round template to trace [a coffee cup, saucer, glass or CD work well]. Trace at each corner and cut. This will round your corners and make it easy to sew the binding down
  2. Draw monster eyes and teeth onto the EZ Steam paper. Reference the the hood pattern piece for the size of the eyes and teeth. Iron these images onto the white and black fabric
  3. Cut out your pieces. Lay the 2 hood pieces on top of each other. The cotton piece is right side up. Baste along the top edge to secure together. Place the the white eyes and teeth on to the hood. Once you are certain of their placement, press in place with an iron
  4. Applique around the edges.  Once you finish with the first layer, place the black pupils down. Press and applique around the edges again
  5. With the monster face now finished, cut a 14″  strip of your binding and pin it to the bottom edge of your hood piece. Line up raw edges together
  6. Place into sewing machine and sew with a 1/4″ seam allowance
  7. Press seams with an iron. Press with seams closed and then open the binding and press again. Roll binding towards back of the hood piece and press again with the iron. If needed pin in place. Place into sewing machine and topstitch down. This completes the binding edge
  8. Pin the hood piece onto the terry towel at a corner. It will be larger than the towel, so just match the edges together. It is ok that there is a excess fabric in the middle [a bump]. This is where the baby’s head goes.. Baste in place.  Now repeat steps above for sewing your binding in place. This will sew the binding around the outside edge of the towel.. That’s it. Your towel is complete!

Thanks for stopping by. It has been quiet on my blog the last week or so.. We’ve been on vacation. I couldn’t bring along my sewing machine, so I decided and I take a slight breather and lay low for a few days.

Please let me know if you have any questions on this project.  You can leave a comment or email me through my comment page. If you email me, please make sure to write the question in the “big box” so I can answer you back. I love hearing from everyone.

Want more monsters? Check out my monster facecloths here.

Happy Sewing!

Related Posts Plugin for WordPress, Blogger...

21 Comments

« Exciting News!
DIY… Recipe Inspired Apron »

Comments

  1. Karin @ Leigh Laurel Studios says

    October 3, 2013 at 9:22 pm

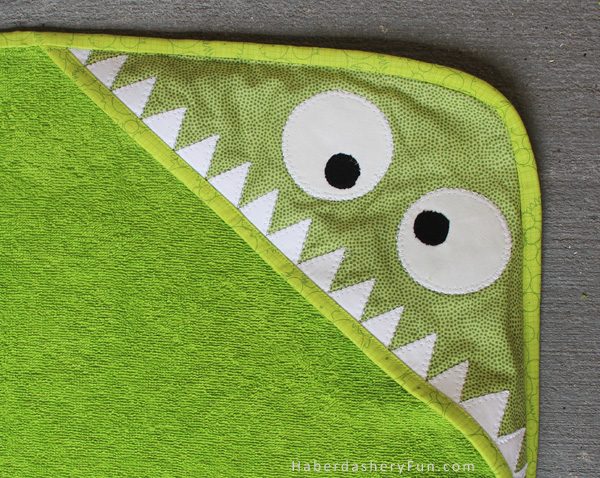
    Love the wonky eyes! So cute. Every kid needs one of these!

    Reply
  2. palak says

    October 6, 2013 at 5:30 pm

    I love this! Every baby needs one 🙂 ITA with Karin– the wonky eyes make it perfect.

    Reply
  3. Allison @ Dream a Little Bigger says

    October 14, 2013 at 4:04 pm

    I love how cute this guy is – quick question, though – how do you keep the terrycloth from tearing up? My last attempt the terrycloth felt like it was disintegrating from the edges inward and kept gunking up my machine. Any tips? I’d also like if you’d link up to my new link party – http://www.dreamalittlebigger.com/post/link-party-9.html Hope to see you there!

    Reply
    • Haberdashery Fun says

      October 14, 2013 at 4:14 pm

      HI – thanks for stopping by. I just added my link to your link party! Thanks for inviting me and letting me know about it. I have sewn quite a few towels and haven’t had the problem you are talking about. I wash the terry towel first and it leaves alot of fluff in my dryer.. I make sure to check the terry towel for snares. If you see even the smallest snare, don’t use that part. Once the “hook” is broken on top, there will be a hole at some point. Also, once I cut the pattern, I don’t play or work with the fabric too much before the edges are bound. Not sure if this helps.. But I hope it does 🙂

      Reply
      • Allison @ Dream a Little Bigger says

        October 14, 2013 at 4:36 pm

        I totally didn’t wash mine. It was such an ordeal I swore never again, but I want to make a beastie like this so I just might do the wash and dry and give it another go! Thanks for the tips and the link up 🙂

        Reply
        • Haberdashery Fun says

          October 14, 2013 at 4:48 pm

          That might be the trick! Give it a shot and I’d love to hear how it goes. PS. Love your blog, just went over and cruised around some more. You have some great tutorials.

          Reply
  4. lisa says

    October 15, 2013 at 8:31 am

    This is adorable! I wish my son would wear the hoods on his towels because he’d look so cute in something like this!

    Reply
    • Haberdashery Fun says

      October 15, 2013 at 9:17 am

      I agree – Hooded towels are super cute on warm, washed little babies and kids! I wanted to take a picture of my son in this one, but he is now a mover and shaker and won’t sit still 🙂

      Reply
  5. Katie Adams says

    October 20, 2013 at 10:16 am

    What a fun idea for a hooded Towel. Thank you for sharing.

    Reply
    • Haberdashery Fun says

      October 21, 2013 at 9:10 pm

      Thanks Katie! I appreciate your stopping by 🙂

      Reply
  6. Tori says

    October 21, 2013 at 6:07 pm

    Oh My Marni! Can I just gush and say I just love all your projects:) You are such an inspiration. I will be featuring your monster towels tomorrow! I so must try this!! Thanks!

    Reply
    • Haberdashery Fun says

      October 21, 2013 at 9:06 pm

      Agh.. Thanks Tori! I love what your creations as well! Congrats on being a part of the Silhouette design team!

      Reply
  7. Kelly says

    October 22, 2013 at 10:14 pm

    One word: ADORABLE! Thanks so much for linking up at at the LLR par-tay last week. xo

    Reply
    • Haberdashery Fun says

      October 23, 2013 at 9:00 am

      Thanks Kelly!

      Reply
    • Haberdashery Fun says

      October 24, 2013 at 12:17 pm

      Hi Kelly, Thank you. Your comment means alot cause I love what you are up to over at your blog!!

      Reply

Trackbacks

  1. Tell Me Tuesdays! #42 says:
    October 22, 2013 at 12:00 am

    […] a Comment Candy Corn Cupcakes – My Love For Words// Monster Towel – Haberdashery Fun// Monster Tissue Pom Poms – Persia Lou Halloween Door Decor – Delineate your […]

    Reply
  2. Link Party says:
    October 24, 2013 at 8:01 am

    […] DIY Monster Hooded Towel by Haberdashery Fun […]

    Reply
  3. shout out sunday - A girl and a glue gun says:
    November 3, 2013 at 7:02 am

    […] haberdashery fun […]

    Reply
  4. hooded bath towel--easy tutorial!!! - A girl and a glue gun says:
    August 20, 2014 at 8:19 am

    […] towel || monster towel ||  ruffled kimono ||   panda bear towel || embellished towel || princess towel || superhero […]

    Reply
  5. DIY.. Make Monster Inspired Face Cloths | Haberdashery Fun says:
    September 11, 2015 at 11:30 am

    […] Want more monsters? Check out my monster hooded baby towel here. […]

    Reply
  6. DIY HOODED MONSTER TOWEL – Best Towel Models and Patterns 2020 says:
    May 16, 2020 at 8:26 am

    […] DIY HOODED MONSTER TOWEL (via haberdasheryfun.c…) […]

    Reply

Leave a Reply Cancel reply

Your email address will not be published. Required fields are marked *

This site uses Akismet to reduce spam. Learn how your comment data is processed.

About me


Hi there - I'm Marni Weaver. A sewer, a sometimes quilter and a lover of fabric design. I started this blog to share my ideas. Come Join the Fun
shop now

Popular Categories

project for baby fabric projects seasonal projects fat quarter projects sewing tips and tricks inspiration

Categories

  • Applique
  • Baby
  • Bags and Pouches
  • Color
  • DIY Projects
  • Fabric
  • Fabric Design
  • Fat Quarter Projects
  • Home Decor
  • Inspiration
  • Just for Fun
  • Kids
  • No Sew
  • Patterns
  • Print On Fabric
  • Quilting
  • Scrap Fabric Projects
  • Seasonal
  • Sewing Tips & Tricks

Lovely sponsors

Recent Comments

  • Make Nine in 2021 – Sew, Bake, Snap on DIY.. Reversible Fabric Storage Bin
  • 26 Diy placemats ideas - Perfect Table Setting on DIY.. Heart Shaped Placemats Tutorial For Sew Mama Sew
  • More Free Tote Patterns | on Reversible 1 Hour Tote Pattern
  • Collapsible Kraft-Tex Bowl on DIY.. Collapsible Fabric Bowls
  • Haberdashery Fun on DIY.. Reversible Fabric Storage Bin

Projects Elsewhere

find me on Pellon Projects sew mama sew contributor

momtastic contributor

Pinterest

Visit Marni@Haberdashery Fun's profile on Pinterest.
Follow on Bloglovin

I'm Reading

  • Cluck Cluck Sew
  • Cooking Dangerously
  • In Color Order
  • Jen Hewitt
  • Jolly Jabber
  • Karly Spalding Photography
  • Leigh Laurel Studios
  • Lindsay Sews
  • Lotta Jansdotter
  • Love Patchwork and Quilting Magazine
  • Made
  • Making It Lovely
  • Noodle-Head
  • Polka Dot Chair
  • Sharon Holland Designs
  • Silhouette America Blog
  • Silhouette Design Store
  • The Purl Bee
  • The Purple Fig

Press:

Stitch Winter 2014

haberdashery_fun

I made the most glorious little Kraft-tex journal I made the most glorious little Kraft-tex journal cover over the holidays.  Not only do I love the color of the month for December (blue turquoise), but the texture of my journal is like aged leather and looks durable and rugged. Did you know Kraft-tex is actually paper??? My cover was simple to make and is just one rectangular piece of Kraft-tex, folded over at the ends and topstitched. Thats it.❤️

You can check @ctpublishing for other projects and more info.
.
.
.
#haberdasheryfun #haberdasheryfunpatterns #krafttex #krafttexuniversity #krafttexstyle #ctpublishing #isew #isewlation
Highlights from 2020. Glad it’s complete. Upward Highlights from 2020. Glad it’s complete. Upward and onward. What are you creating for the year ahead? Here’s to making 2021 a creative, fun, adventurous and graceful year.
What a fun class! Thank you to the participants in What a fun class! Thank you to the participants in my first zoom block printing class. It was an amazing group of people coming together with a common goal - sharing their love of print and pattern design.

My hubby snapped a few pictures during the workshop. I’m normally a “hider outer”, but thought this was a perfect opportunity to say Hi.  Even if it is looking down and away from the camera. 🤪

I will be hosting another block printing zoom workshop mid January. Come one come all. DM or email me for details.
.
.
.
#coffeewithhaberdasheryfun #blockprintingworkshop #zoomclass #pdfpattern #haberdasheryfun #haberdashery 
#blockprint #blockprinting #isew #fabricdesign #surfacepatterndesign #zoomsewingclass #zoomdesignclass
You’ve printed some fabric.. now what?? Build or You’ve printed some fabric.. now what?? Build or buy a frame and make yourself some easy wall art = ✔️

Want to learn how to block print? Grab a cup of coffee, a few supplies and join me for a free zoom class this Sunday, Dec 13th at 11am ( Eastern Time Zone ).

Check my recent blog post for the supply list. If you want to come and just hang out and watch, that’s ok too. DM or email me for details.
.
.
#haberdashery #blockprint #coffeewithhaberdasheryfun #PDF 
#isew #haberdasheryfun #curvyzipperpouch #fabricdesign 
#surfacedesign #haberdasheryfunpatterns #creativehappylife
Want to learn how to block print? I’m hosting a Want to learn how to block print? I’m hosting a free zoom class and the supply list is now up on my blog. You can DM me or send an email to marni@haberdasheryfun.com to join this free class. Click on the link in my bio to go to my blog.

Sunday, December 13 at 11am Est time zone.

.
#haberdashery #haberdasheryfun #blockprinting #pdfpattern #haberdasheryfunpatterns #coffeewithhaberdasheryfun #fabricdesign #blockprint
Follow on Instagram

Copyright © 2021 · Klar theme by Crimson Pear :: web & surface design