Haberdashery Fun

  • Home
  • About
    • Look Book
  • Contact
    • Collaborate?
  • Tutorials
  • Shop
  • Freebie
  • Block Printing Course
    • Email
    • Facebook
    • Instagram
    • Pinterest

Keep up to date with the latest posts!

Sew A Quilted Ripstop Reversible Tote

in Bags and Pouches on 01/02/21

I have been wanting to work with ripstop for quite some time. When Fabric Wholesale Direct reached out to me to see if I wanted to collaborate, I jumped for joy. They have the most amazing selection of ripstop fabric.

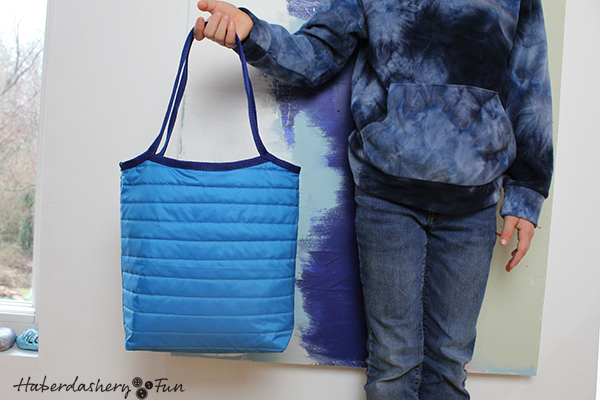
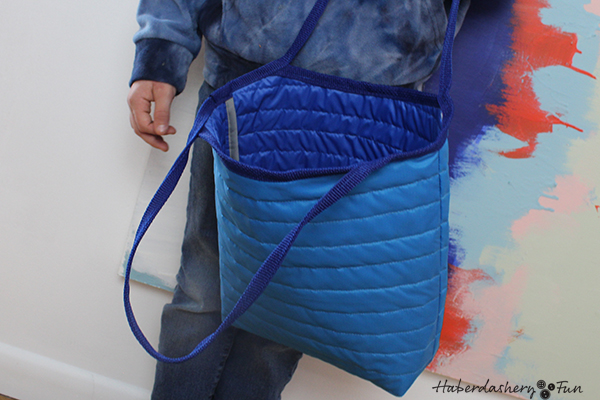
I decided to make my 1 hour reversible tote with the fabric they sent me, but with a twist. I quilted the ripstop fabric.

I love the way it turned out. Not only does the quilting give the tote additional structure, but the peak a boo contrast lining makes the tote super sporty and fun. The ripstop has such a modern feel.

Materials to sew your reversible tote:

  1. Fabric – 2 colors of ripstop fabric, 1/2 yard each ( I used 1.9oz PU coated ripstop )
  2. Cotton batting – 1/2 yard
  3. Thread – same color thread or contrasting thread
  4. 1″ Poly webbing – 2 yards
  5. Double fold bias tape – 1 package
  6. Clover chalk pen
  7. Ruler
  8. Sewing supplies – thread, pins, scissors, wonder clips, sewing machine
Quilted Rip Stop Tote from HaberdasheryFun. This tote is so much fun to make. Check out the free pattern today

Before we begin you will need to download the PDF pattern. You can find it in my online store here. Please print 2 copies of the pattern. Tape or glue the 4 pieces together so you have a full size pattern ( not just the 1/2 side ).

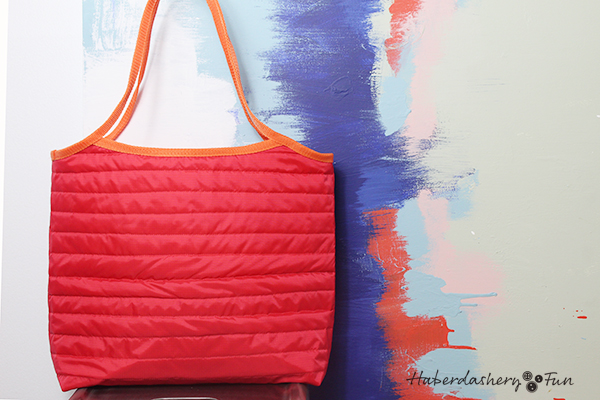
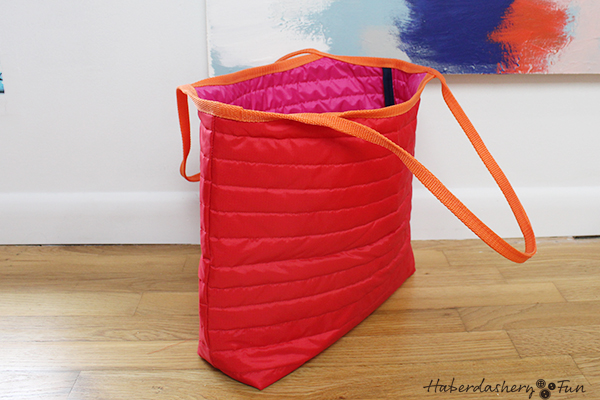
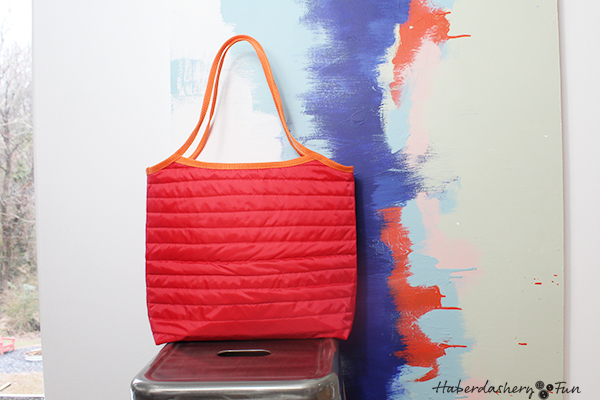
Note – I adjusted and enlarged the pattern sightly to make the red tote and those details are not in this tutorial.

Steps for the blue reversible tote bag:

  1. Cut 2 large rectangles measuring 31″ L x 17″ W in each color of ripstop.
  2. Cut 1 large rectangle measuring 32″ x 18″ in the cotton batting.
  3. Sandwich the cotton batting between the 2 layers of ripstop. Adjust so that the batting is centered. The batting will be slightly larger that the ripstop.
  4. Pin or use wonder clips around the outside edge.
  5. Using your ruler and clover chalk pen, draw lines across the length of the ripstop fabric. ( Start at the top and measure down 1″, draw a line. Measure down another 1″ and draw another line, continue until you have drawn lines all the way down.
  6. Place into your sewing machine and sew straight stitches following the lines. Lengthen you stitch to 2.8 – 3.0. Continue until the entire length of fabric has been quilted.
  7. Cut the rectangle in half. You should now have 2 smaller rectangles measuring 15-1/2″ x 17.
  8. Lay the full size pattern piece onto the fabric, pin around the edges and cut out. Repeat for the other piece of fabric.
  9. Place main pieces on top of each other, right sides facing. Pin. Place into sewing machine and sew side seams and bottom together with a 1/2″ seam allowance.
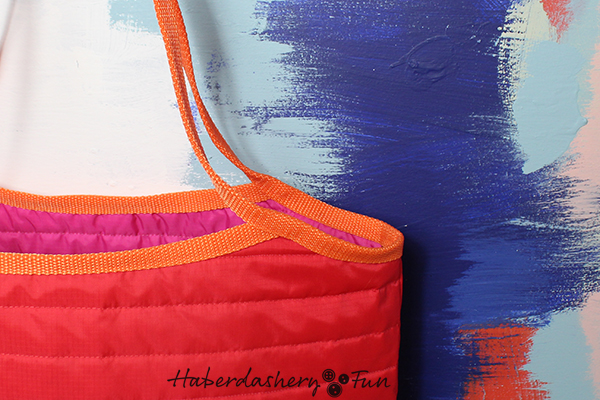
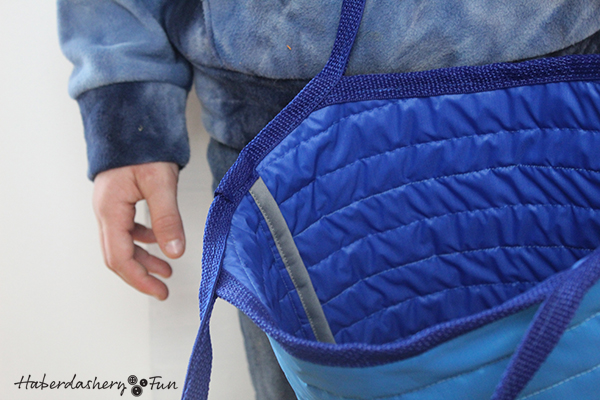
  10. Add bias binding to the side seams and the bottom seam.
  11. Create the boxed corners at all 4 corners – wiggle the bottom seam to meet the side seam. Sit these seams directly on top of one another. Pin. Place quilting ruler on top and line up at the 45 degree line and mark 1-1/2″ up from point. Mark a line with the disappearing fabric ink pen. Repeat for each corner. Place into sewing machine and stitch following the line.
  12. Cut off the tip. Leave a 1/2″ seam allowance. Want to learn more? Check out my quick tip tutorial on sewing boxed corners.
  13. Add bias binding to the 2 boxed corners.
  14. Turn main bag right side facing out.
  15. Lay bag flat on working surface. Measure along front along front curve and add 1″ to each side. Cut webbing to the length of the front curve. Cut 2 pieces [ one for back and one for front]
  16. Cover center front raw edge with the webbing – fold the webbing over the raw edge. Pin and place into sewing machine. Edgestitch webbing along the center front. Repeat for center back. Trim the ends off.
  17. Create the continuous strap – start at one side seam and cover the raw edge with the webbing. Pin in place. Place into your swing machine sew in place. Continue up the side seam towards the front top edge curve just folding over to cover the raw edges and sewing. Stop at the curve and pin to hold in place. 
  18. Leave 16″ of webbing free and then place a pin at the 16″ mark. Sew the webbing together ( with no raw edges between the webbing ) stopping at the 16″ mark.
  19. At the 16″ pin mark, place the webbing onto the other side of the curve, folding the webbing over the raw edge. Pin. Continue folding and sewing the webbing over the raw edge. Repeat for the strap on the other side. That’s it!

See how awesome and sporty the contrast bias tape looks?

Things to consider:

  • Take caution to not twist the webbing when sewing the straps. You don’t want to sew the webbing in place, only to find that it is twisted around. While you are wrapping the raw edges, make sure it lays nice and flat.
  • Are the ends of your webbing frayed ? Use a lighter and gently melt the ends of the webbing. Just a tad. This technique is perfect for anywhere the webbing is not enclosed or under another seam.
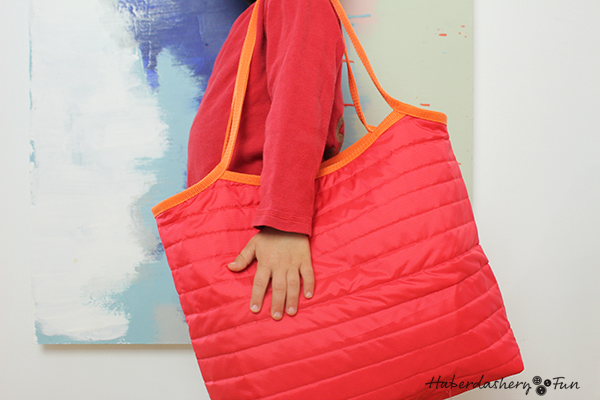
  • You can determine your own strap length. Each strap in this tutorial is 16″ long. Change the strap length to suit your armhole.
  • Consider using 4 different colors for this bag – one for the outside, another for the lining, a third for the webbing and a fourth for the bias binding.
  • Quilting the ripstop is easier than you think! For lots of color options, check out the Ripstop at Fabric Wholesale Direct
Quilted Rip Stop Tote from HaberdasheryFun. This tote is so much fun to make. Check out the free pattern today
HaberdasheryFun quilted ripstop tote pattern. Use the popular reversible tote pattern and make a bag today

Disclaimer – I was given the fabric for this post and project. However, all opinions are my own.

Add a Comment

« Intro to Block Printing Zoom Class
New Sewing Pattern – Arlo Bucket Tote »

Leave a Reply Cancel reply

Your email address will not be published. Required fields are marked *

This site uses Akismet to reduce spam. Learn how your comment data is processed.

About me


Hi there - I'm Marni Weaver. A sewer, a sometimes quilter and a lover of fabric design. I started this blog to share my ideas. Come Join the Fun
shop now

Popular Categories

project for baby fabric projects seasonal projects fat quarter projects sewing tips and tricks inspiration

Categories

  • Applique
  • Baby
  • Bags and Pouches
  • Block Printing
  • Color
  • DIY Projects
  • Fabric
  • Fabric Design
  • Fat Quarter Projects
  • Home Decor
  • Inspiration
  • Just for Fun
  • Kids
  • No Sew
  • Patterns
  • Print On Fabric
  • Quilting
  • Scrap Fabric Projects
  • Seasonal
  • Sewing Tips & Tricks

Lovely sponsors

Recent Comments

  • Easy Little Kid Sewing Project | Haberdashery Fun on DIY.. Make Monster Inspired Face Cloths
  • Easy Little Kid Sewing Project | Haberdashery Fun on DIY.. Easy Toddler Apron
  • HaberdasheryFun and an easy Kraft-tex sewing project | Haberdashery Fun on Collapsible Kraft-Tex Bowl
  • HaberdasheryFun and an easy Kraft-tex sewing project | Haberdashery Fun on Sewing With Kraft-Tex
  • 3 Simple Summer Sewing Tutorials | Haberdashery Fun on Sew A Canvas Zipper Pouch

Projects Elsewhere

find me on Pellon Projects sew mama sew contributor

momtastic contributor

Pinterest

Visit Marni@Haberdashery Fun's profile on Pinterest.
Follow on Bloglovin

I'm Reading

  • Cluck Cluck Sew
  • Cooking Dangerously
  • In Color Order
  • Jen Hewitt
  • Jolly Jabber
  • Karly Spalding Photography
  • Leigh Laurel Studios
  • Lindsay Sews
  • Lotta Jansdotter
  • Love Patchwork and Quilting Magazine
  • Made
  • Making It Lovely
  • Noodle-Head
  • Polka Dot Chair
  • Sharon Holland Designs
  • Silhouette America Blog
  • Silhouette Design Store
  • The Purl Bee
  • The Purple Fig

Press:

Stitch Winter 2014

haberdashery_fun

Marni Weaver
Block and paper print from Saturday’s workshop. Block and paper print from Saturday’s workshop. This was a fun workshop to lead. Such an awesome group with great questions and engagement. Many new friends to follow here on IG❤️

Thank you to everyone who signed up or attended a workshop this Spring. 

I love teaching about simple shapes. It really is eye opening when you start deconstructing a repeat pattern into super simple shapes!

My block printing made easy online class starts today with module 1 out now. It will be offered again this August. More workshops and details to come. 

#haberdasheryfun #blockprintingmadeeasy #simpleshapes #surfacepattern #surfacepatterndesign #memademay2023 #100dayproject #100dayproject2023 #easycarve #haberdasheryfunclasses
One more, one more.. I had so much fun, I’m offe One more, one more.. I had so much fun, I’m offering one more workshop for the spring season.

This Saturday, May 20th @ 10am est. Come join the fun!

I love teaching the basics to block printing using simple shapes. Feel like you can’t draw? thats ok, I have a guided worksheet that we use. 

If you cant make the workshop and want a deep dive into block printing, my online course starts this Monday, May 22. It’s a 3 week adventure with self paced video modules, worksheets and Saturday Live Q&As

Link in profile has details for the free workshop and my course.

#haberdasheryfun #blockprintingmadeeasy #simpleshapes #memademay2023 #blockprintingsimpleshapes #surfacepatterndesign #100dayproject #100dayproject2023 #memademay #konacotton #konacottonsolids
Sharing a few simple blocks from the last few week Sharing a few simple blocks from the last few weeks of workshops. I had a blast teaching these workshops. So I am now considering adding one more workshop this week. Should it be daytime or in the evening? I would love to hear your thoughts.

TBD on date and time, will share more details here and a sign up page in the next few days.

#blockprinting #blockprintingmadeeasy #haberdasheryfun #haberdasheryfunpatterns #surfacepatterndesign #memdemay2023 #100dayproject2023 #100dayptoject #haberdasheryfunclasses #printwithspeedball
What a fun workshop yesterday. Thanks to all who j What a fun workshop yesterday. Thanks to all who joined and gave their  time and energy. We had participants from South Africa to Austria to Canada and here in the US. I love it b/c I am from Alberta Canada and live in Atlanta.

My workshops are only an hour and we have alot to accomplish.. but I love hearing where are from and what they are up to! 

We even had a brief appearance from the cutest 11mos old ❤️🎉 

I played with the same shape the last 3 workshops and had fun seeing what could be made with the half moon shape. Now what yo do next?? Sew something or have fun with them in illustrator 

#haberdasheryfun #haberdasheryfunpatterns #onlineclasses #blockprintingmadeeasy #memademay2023 #100dayproject #100dayproject2023 #surfacepatterndesign #blockprintedfabric #konacotton #konacottonsolids
I’m hosting one last workshop this week. Come jo I’m hosting one last workshop this week. Come join in for some fun creating block prints with simple shapes. 

Can’t draw? Don’t feel inspired or imaginative?? That’s ok. I promise block printing can be fun and easy.

Sign up details in the link in my profile. See you Wednesday ❤️

#haberdasheryfun #blockprintingmadeeasy #haberdasheryfunpatterns #zoomclasses #surfacepatterndesign #memademay2023 #100dayproject #blockprinting #fabricdesign #fabricdesigner #blockprinted
Follow on Instagram

Copyright © 2023 · Klar theme by Crimson Pear :: web & surface design

Copyright © 2023 · Klar on Genesis Framework · WordPress · Log in