Haberdashery Fun

  • Home
  • About
    • Look Book
  • Contact
    • Collaborate?
  • Tutorials
  • Shop
  • Workshops
    • Email
    • Facebook
    • Instagram
    • Pinterest

Keep up to date with the latest posts!

Make A Block Printed ToteBag

in Block Printing on 07/01/22

Thanks for stopping by. If you recently grabbed my free guide called “Basic Block Printing Information / Sew A Block Printed” you came to the right place.

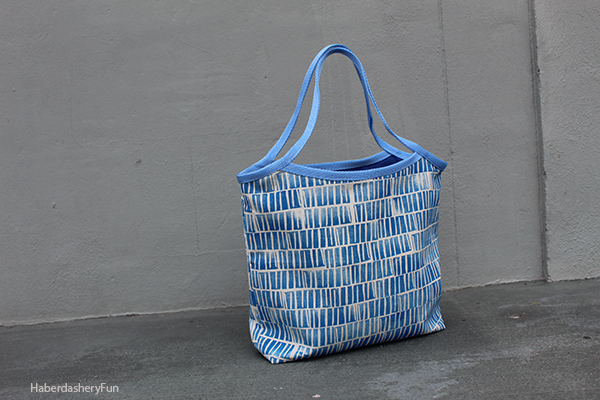
Here are the details on making this wonderful little tote.

First you will need sewing supplies:

  • Fabric – 2 colors, 1/2 yard each or 2 fat quarters for the outside/same color/pattern & 2 fat quarters for the lining/same color/pattern
  • Interfacing – I like using Pellon SF101
  • 1″ Polyester or cotton webbing – 2 yards
  • Sewing supplies – thread, pins, scissors, etc
  • Iron and ironing board

Next you will need block printing supplies:

  • Lino handles and cutters
  • Ruber brayer
  • Speedy Carve Block
  • Fabric block printing ink ( Or you can buy a kit that has the items above, including the fabric ink )
  • Flat re-usable / washable inking surface
  • Cutting mat and metal ruler
  • X-Acto knife or cutting blade
  • Pen, pencil and Sharpie
  • Kraft paper to protect your work surface
HaberdasheryFun Block Printed Tote Bag. 

Want to learnt to bloc print? Take an online class with HaberdasheryFun and learn how to block print

Last, here are the steps to making the tote:

  1. Iron the interfacing to the wrong side of your fabric. ( for a more sturdy bag, iron interfacing to both the interior and exterior )
  2. Place and pin pattern onto the fabric. Cut out 2 main and 2 lining pieces.
  3. Place main pieces on top of each other, right sides facing. Pin. Place into sewing machine and stitch side seams and bottom together with a 1/2″ seam allowance. Repeat for lining pieces. Press seams. Open seams and press again.
  4. Create boxed corners at all 4 corners. Wiggle bottom to meet side seam. Sit seams directly on top of one another. Place quilting ruler on top and line up at the 45 degree mark and 1″ up from point. Mark a line with the disappearing fabric ink pen. Repeat for each corner. Place into sewing machine and stitch following the line.
  5. Cut off the tip. Leave a 1/2″ seam allowance. Want to learn more? Check out my quick tip tutorial on sewing boxed corners.
  6. Turn main bag right side facing out. Leave lining right side facing in. Place the lining into the main bag and wiggle corners into place. Pin along top edge.
  7. Lay bag flat on working surface. Hand press wrinkles out. Measure along front along front curve and add 1″ to each side. Cut webbing to the length of the front curve. Cut 2 pieces ( 1 for back and 1 for front )
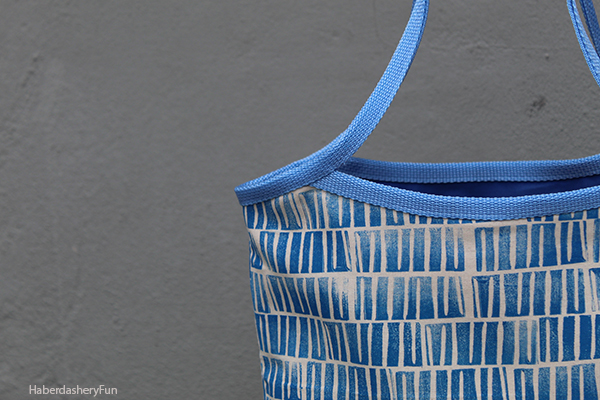
  8. Cover center front raw edge with the webbing. Pin and place into sewing machine. Edgestitch webbing along the center front.  Backstitch. Repeat for center back. Trim the ends off.
  9. Create the continuous strap – start at one side seam and cover the raw edge with webbing. Pin in place. Continue up the side seam towards the front top edge curve. Pin to hold in place. Leave 16″ of webbing free and then pin the webbing in place at the other side, top front edge. Pin. Continue around side seam [ covering raw edges] and repeat for the back. Place into your sewing machine and edgestitch along the webbing. Stitch in one continuos loop, including along the 16″ strap. Backstitch at the end. ( Note – be super careful. If the ends are fraying, you can use a lighter to melt the polyester webbing ends ).
HaberdasheryFun Block Printed Tote Straps

Want to learnt to bloc print? Take an online class with HaberdasheryFun and learn how to block print

A couple of comments:

  • Take caution to not twist the webbing when sewing the straps. You don’t want to sew the webbing in place, only to find that it is twisted around. While you are wrapping the raw edges, make sure it lays nice and flat.
  • Are the ends of your webbing frayed and gross? Use a lighter and gently melt the ends of the webbing. Just a tad. This technique is perfect for anywhere the webbing is not enclosed or under another seam. Works like a charm.
  • You can determine your own strap length. Change the strap length to suit your armhole. However, remember to cut enough at the beginning and before you attach to your bag.

Want to read another tutorial similar to this one? Click here to see the original post called “Sew A Reversible Tote”

I love seeing your creations. If you make an item from one of my tutorials or patterns, please consider using the hashtags:

#haberdasheryfun #haberdasheryfunpatterns #haberdasheryfunprints

Add a Comment

« Simple Steps For Block Printing
Sew An Easy Lunch Tote »

Leave a Reply Cancel reply

Your email address will not be published. Required fields are marked *

This site uses Akismet to reduce spam. Learn how your comment data is processed.

About me


Hi there - I'm Marni Weaver. A sewer, a sometimes quilter and a lover of fabric design. I started this blog to share my ideas. Come Join the Fun
shop now

Popular Categories

project for baby fabric projects seasonal projects fat quarter projects sewing tips and tricks inspiration

Categories

  • Applique
  • Baby
  • Bags and Pouches
  • Block Printing
  • Color
  • DIY Projects
  • Fabric
  • Fabric Design
  • Fat Quarter Projects
  • Home Decor
  • Inspiration
  • Just for Fun
  • Kids
  • No Sew
  • Patterns
  • Print On Fabric
  • Quilting
  • Scrap Fabric Projects
  • Seasonal
  • Sewing Tips & Tricks

Lovely sponsors

Recent Comments

  • How To Sew A Fabric Bin | Haberdashery Fun on Sew An Easy Fabric Storage Bin
  • Make The Alma Tote In Fun Colors | Haberdashery Fun on New – The Alma Tote Pattern
  • New Tote Bag Sewing Pattern Coming Soon! | Haberdashery Fun on New – The Alma Tote Pattern
  • New – The Alma Tote Pattern | Haberdashery Fun on Sew A Reversible Tote
  • Easy Little Kid Sewing Project | Haberdashery Fun on DIY.. Make Monster Inspired Face Cloths

Projects Elsewhere

find me on Pellon Projects sew mama sew contributor

momtastic contributor

Pinterest

Visit Marni@Haberdashery Fun's profile on Pinterest.

I'm Reading

  • Cluck Cluck Sew
  • Cooking Dangerously
  • In Color Order
  • Jen Hewitt
  • Jolly Jabber
  • Karly Spalding Photography
  • Leigh Laurel Studios
  • Lindsay Sews
  • Lotta Jansdotter
  • Love Patchwork and Quilting Magazine
  • Made
  • Making It Lovely
  • Noodle-Head
  • Polka Dot Chair
  • Sharon Holland Designs
  • Silhouette America Blog
  • Silhouette Design Store
  • The Purl Bee
  • The Purple Fig

Press:

Stitch Winter 2014

haberdashery_fun

Marni Weaver
Thank you to all who attended my first “Design F Thank you to all who attended my first “Design Fabric & Sew A Pouch” workshop on Sunday. You never know what may happen with a live zoom workshop. Magic always happens and I love to seeing what gets created!

FYI.. I have another workshop like this at the end of the month on Saturday Oct28 2pm-4pm( via zoom)

+Want to make something fun? 
+Want to learn to block print?
+Want to design your own fabric and sew something?

Come and join the fun! Beginners welcome. You just need sewing experience for later when you see the pouch. The link to register is in my profile.

#haberdasheryfun #haberdasheryfunprints #surfacepattern #dashpattern #blockprinting #blockprintedtextiles #blockprintedfabric #haberdasheryfunprints #fatquarterproject #pdfsewingpatterns
I gave myself a few minutes this morning to carve I gave myself a few minutes this morning to carve another 1” stamp. There is something magical about a quiet morning with a cup of coffee and an open door open that lets in the cool fall weather. 🍁 

#haberdasheryfun #haberdasheryfunpatterns #haberdasheryfunprints #blockprinting #blockprintmadeeasy #versafineclair #versafineclairinks #surfacepatterndesign
I had so much fun yesterday that I gave myself 20m I had so much fun yesterday that I gave myself 20mins today to get creative with another 1” stamp. Added yesterdays stamp in the mix. 

What do you do for self care and wellness? Do you put times into your calendar or just wing it each day? I am practicing adding time each day for a walk (or even two) and some form of relaxation.

#haberdasheryfun #haberdasheryfunpatterns #blockprintingmadeeasy #fatquarterproject #haberdasheryfunprints #blockprints #blockprintedfabric #blockprintedfabrics #surfacepatterndesign #spoonflower #spoonflowerfabric #versafineclair #versafineink
What do you do to get out of your head? I go for a What do you do to get out of your head? I go for a lot of walks, take a lot of showers (weird I know) and block print.

Today was one of those days, so I grabbed a small 1” stamp and made a quick print. It’s super simple, but I like how it turned out. 

#haberdasheryfun #blockprintingonfabric #blockprintingmadeeasy #blockprinting #fatquarterprojects #haberdasheryfunpatterns #haberdasheryfunprints #fabricdesign #surfacepatterndesign #spoonflower #badcaseofthemondays #blockprinted #versafineclair #versafineink
I often have people ask me.. what do I sew with th I often have people ask me.. what do I sew with the fabric I just block printed? 

Introducing.. the Dash Pouch. This pouch is included with my upcoming workshop called “Design fabric and sew a pouch”. 

There are 2 dates. Oct 1 and Oct 28, come join me and let’s have some fun. Link in profile has all the details.

#fatquarters #fatquarterproject #haberdasheryfun #haberdasheryfunpatterns #blockprintingonfabric #blockprintedteatowel #blockprintingmadeeasy
Follow on Instagram

Copyright © 2023 · Klar theme by Crimson Pear :: web & surface design

Copyright © 2023 · Klar on Genesis Framework · WordPress · Log in