Haberdashery Fun

  • Home
  • About
    • Look Book
  • Contact
    • Collaborate?
  • Tutorials
  • Shop
    • Email
    • Facebook
    • Instagram
    • Pinterest

Keep up to date with the latest posts!

Adding A Seam To Your Curvy Zipper Pouch

in Bags and Pouches, DIY Projects on 26/09/17

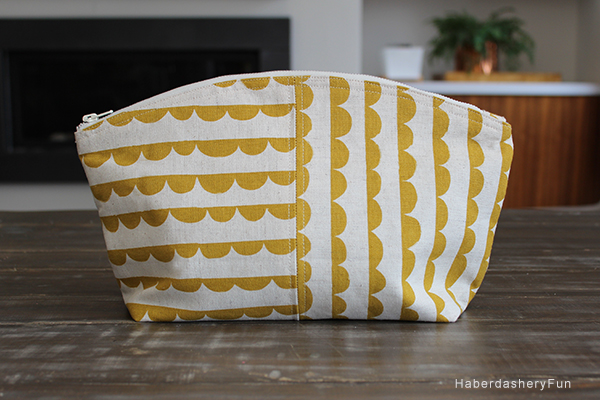
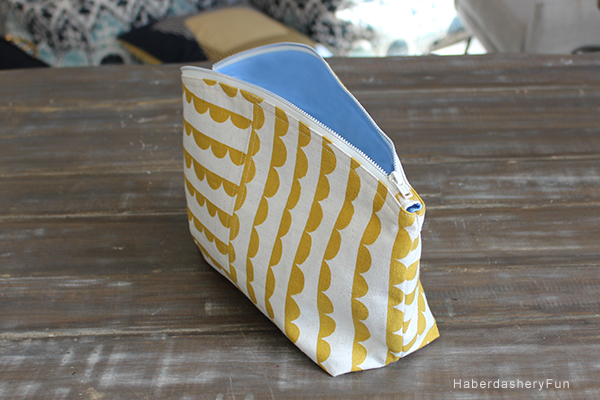
I’ve had this wonderful scalloped Kokka Fabric in my stash forever and it has been begging to be sewn into a Curvy Zipper Pouch, but with a twist. I finally had the time to sit down, get sewing and share the details with you all.

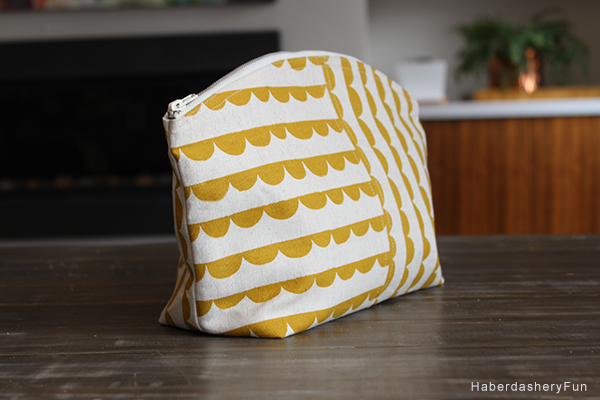
The twist part? I added a seam down the center front and topstitched on either side. It is super easy to do and gives this scalloped fabric a fun look.

Are you interested in pattern drafting?  This easy tutorial will set you on the right track..

Here are 3 steps to add a CF seam to your Curvy Zipper Pouch pattern. If you need a reminder on sewing together the pouch, head here for the original tutorial.

Materials to get you started:

  1. Cotton canvas fabric for exterior
  2. Cotton fabric for lining
  3. Interfacing – try Pellon SF101
  4. 12″  or 14″ metal zipper – try Ziptit on Etsy. I love their selection of affordable metal zippers.
  5. Disappearing fabric pen
  6. Sewing machine and supplies
  7. Iron and ironing board
  8. Curvy Zipper Pattern

The Curvy Zipper Pouch pattern is available in my online store. You can visit it here.

A few things to remember:

  • The original Curvy Zipper Pouch pattern calls for the fabric to be cut on the fold.
  • For the CF seam pouch, you will need to cut 2 front pieces AND 2 back pieces. These are not on the fold.
  • For the CF seam pouch, you will only cut 2 lining pieces. The lining pieces are on the fold.

Let’s get started:

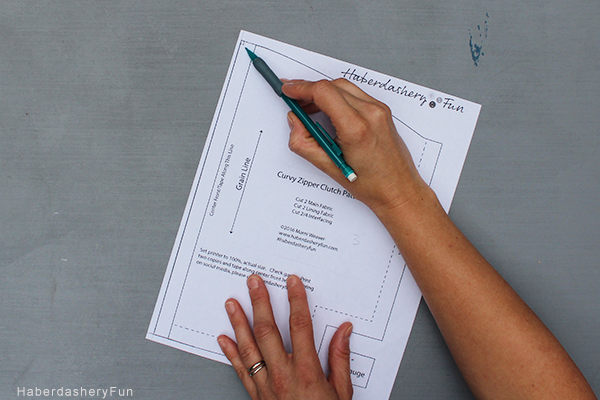
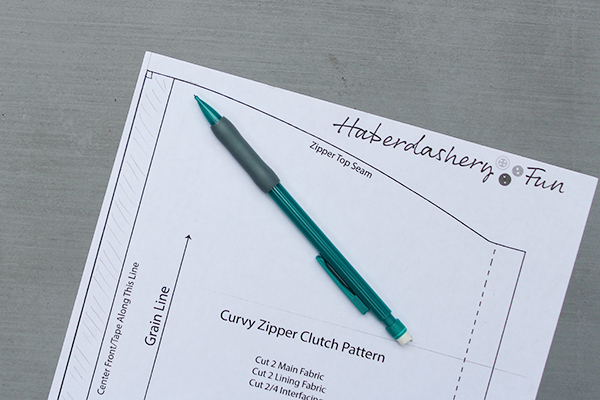
Step 1 – Lay the pattern on your work surface and add 1/2″ to the CF seam. Make sure that the 1/2″ is even down the entire front, this becomes your seam allowance. Next, elongate the top edge seam to meet the new CF seam. Where the CF seam and top edge meet, it needs to be perpendicular. Why? If it isn’t perpendicular, you will have a point or dip where the two CF seams join.

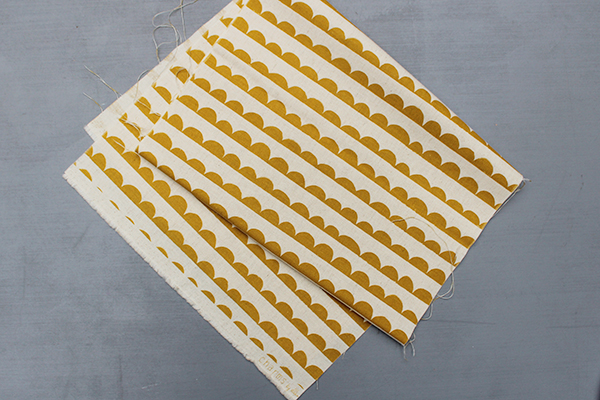
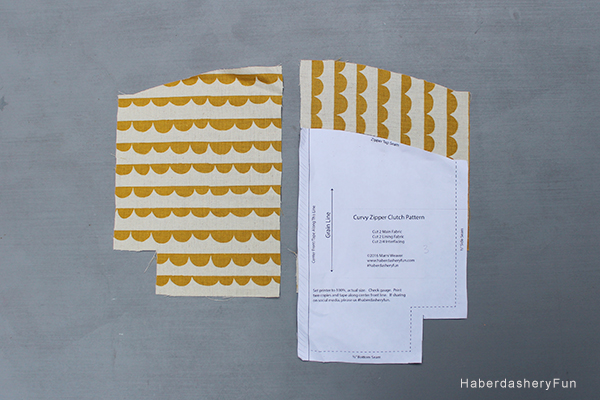
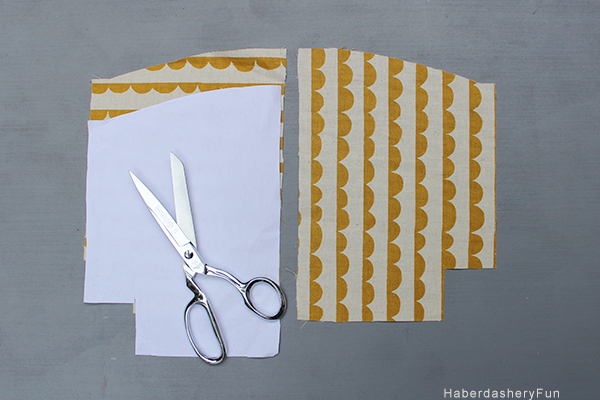
Step 2 – Cut your fabric. If you have a solid fabric with the back the same as the front, you can cut at the same time. However, if the fabric has a print or design [ like my scallops ], it is important to mirror the pieces. You need to cut one with the pattern laying face up, then flip it over and cut the second with the pattern laying face down.

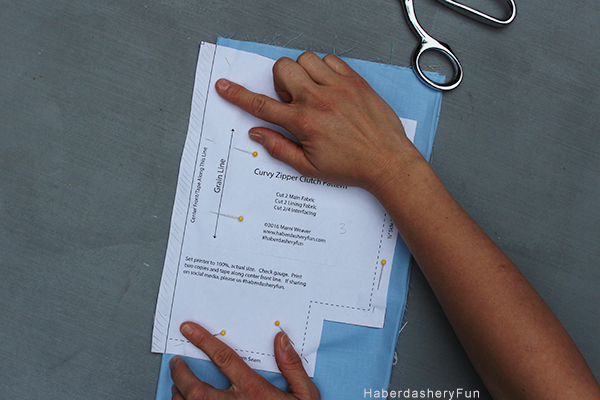
Step 3 – Cut the lining as you normally would. The original pattern is to be cut on the fold, so remember that you added a 1/2″ seam to the center front. Fold the fabric in half, lay the fabric along the original line and pin in place. Cut.

That’s it! You are on your way to pattern drafting and making changes to a pattern. Fun right?

If you need help with the remaining steps and sewing the pouch together – head to my other tutorials:

  • How to sew the Curvy Zipper Pouch
  • Additional information on the Curvy Zipper Pouch

Let me know how it goes.. Happy Sewing.

Add a Comment

« Bella Solids Quilt Along Starburst Block
Bella Solids Lazy Angle Block »

Leave a Reply Cancel reply

Your email address will not be published. Required fields are marked *

This site uses Akismet to reduce spam. Learn how your comment data is processed.

About me


Hi there - I'm Marni Weaver. A sewer, a sometimes quilter and a lover of fabric design. I started this blog to share my ideas. Come Join the Fun
shop now

Popular Categories

project for baby fabric projects seasonal projects fat quarter projects sewing tips and tricks inspiration

Categories

  • Applique
  • Baby
  • Bags and Pouches
  • Block Printing
  • Color
  • DIY Projects
  • Fabric
  • Fabric Design
  • Fat Quarter Projects
  • Home Decor
  • Inspiration
  • Just for Fun
  • Kids
  • No Sew
  • Patterns
  • Print On Fabric
  • Quilting
  • Scrap Fabric Projects
  • Seasonal
  • Sewing Tips & Tricks

Lovely sponsors

Recent Comments

  • How To Make Hand warmers | Haberdashery Fun on DIY.. Sew Heart Shaped Baby Burp Cloths
  • How To Make Hand warmers | Haberdashery Fun on How To Make Mini Heart Shaped Hand Warmers
  • Make Spooky Monster Inspired Face Cloths | Haberdashery Fun on DIY.. Make Monster Inspired Face Cloths
  • How To Sew A Fabric Bin | Haberdashery Fun on Sew An Easy Fabric Storage Bin
  • Make The Alma Tote In Fun Colors | Haberdashery Fun on New – The Alma Tote Pattern

Projects Elsewhere

find me on Pellon Projects sew mama sew contributor

momtastic contributor

Pinterest

Visit Marni@Haberdashery Fun's profile on Pinterest.

I'm Reading

  • Cluck Cluck Sew
  • Cooking Dangerously
  • In Color Order
  • Jen Hewitt
  • Jolly Jabber
  • Karly Spalding Photography
  • Leigh Laurel Studios
  • Lindsay Sews
  • Lotta Jansdotter
  • Love Patchwork and Quilting Magazine
  • Made
  • Making It Lovely
  • Noodle-Head
  • Polka Dot Chair
  • Sharon Holland Designs
  • Silhouette America Blog
  • Silhouette Design Store
  • The Purl Bee
  • The Purple Fig

Press:

Stitch Winter 2014

haberdashery_fun

Marni Weaver
Loved the idea of an addition stamp and pattern. F Loved the idea of an addition stamp and pattern. First Day of #printersolstice2526 #printersolstice 

#haberdasheryfun
Carve December’s prompt "Home". Thinking a multi Carve December’s prompt "Home". Thinking a multi-colored print could really bring these little houses to life. 

Thank you for hosting @balzerdesigns. This is always such a fun time of year. 
#carvedecember2025 #carvedecember #haberdasheryfun
The Prompt “Above” for #carvedecember2025. I n The Prompt “Above” for #carvedecember2025. I normally like a clean stamp and perfectly aligned print, but the chatter and misalignment works here. I also dispise making reels. But this music was too good to not share.

#printmaking #blockprinting #carvedecember #rubberstampcarving #patterndesign #haberdasheryfun
Square and heart prompts layered into this stamp. Square and heart prompts layered into this stamp. I’m in Phoenix for my son’s soccer tournament and brought my block-printing supplies along. With a limited color palette, this ghost print actually grew on me.

Set to Stranger Things because I’m fully obsessed. Wishing everyone a wonderful holiday season

#carvedecember2025 #carvedecember #blockprint #repeatpattern #haberdasheryfun #surfacepatterndesign
#handcarvedstamp #handmadestamp #handcarvedprint #handprinted #printedpattern #tiledpattern
Numerous prompt for day 7 #carvedecember2025. Nume Numerous prompt for day 7 #carvedecember2025. Numerous lines, lines, lines

PS Anyone else watching Stranger Things? Season 5 had this song and it so so brought back childhood memories. ❤️

#carvedecember #blockprinting #surfacepatterndesign #versafineclair
Follow on Instagram

Copyright © 2025 · Klar theme by Crimson Pear :: web & surface design

Copyright © 2025 · Klar on Genesis Framework · WordPress · Log in