Haberdashery Fun

  • Home
  • About
    • Look Book
  • Contact
    • Collaborate?
  • Tutorials
  • Shop
  • Freebie
  • Block Printing Course
    • Email
    • Facebook
    • Instagram
    • Pinterest

Keep up to date with the latest posts!

Sew.. A Curvy Zipper Pouch

in Bags and Pouches, DIY Projects on 09/12/15

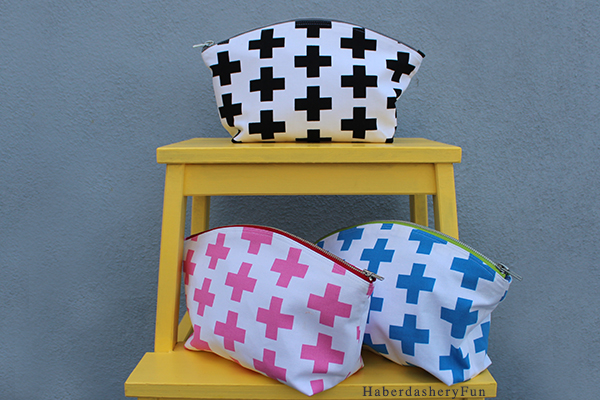
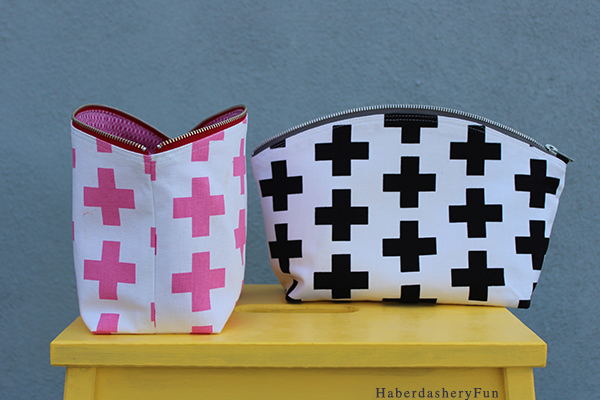
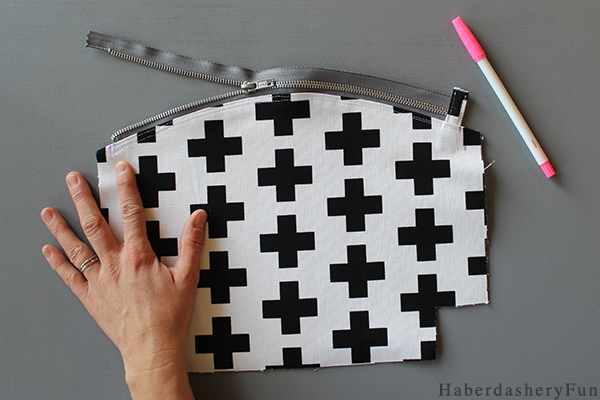
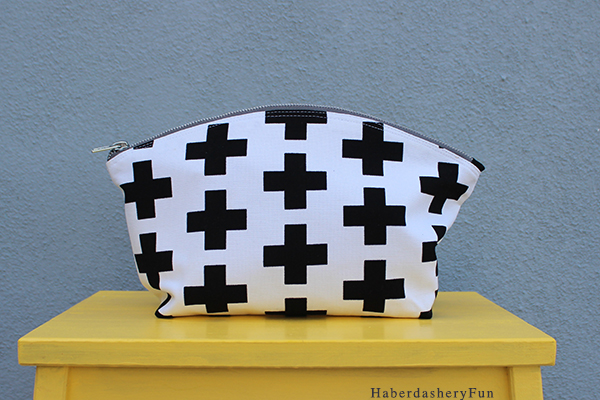
I’ve been staring at my Geo Pop canvas fabric for months.  I love CANVAS fabric and the the bold, modern prints designed by Emmie K and from Robert Kaufman Fabrics are right up my alley. The fabric has been sitting under my monitor and I’ve had a gazillion ideas on what I should sew. I finally decided to make a versatile clutch / make-up pouch.

Curvy Clutch 2 offset

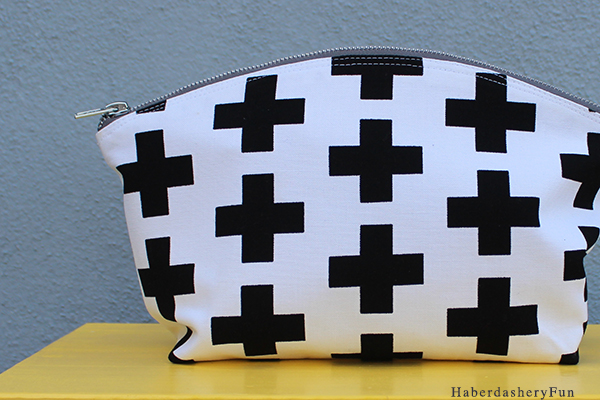
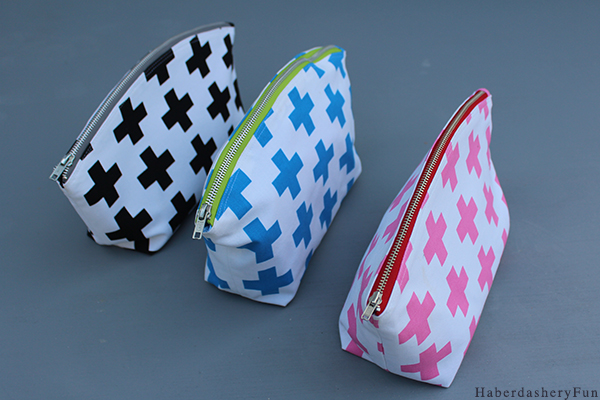
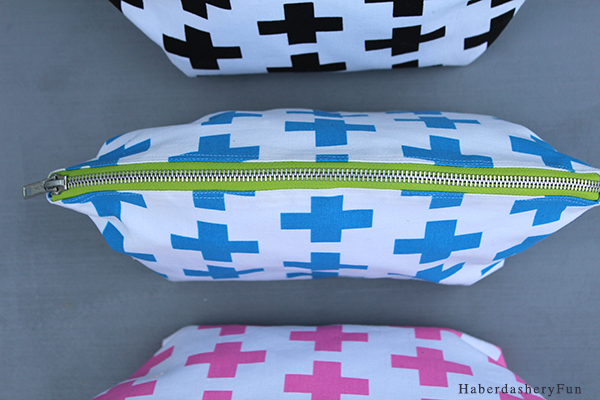
The details are in the fabric.. This is a pretty basic clutch, but the fabric and a contrast zipper make it pop. Plus, I really love the curve along the top edge!

Curvy Zip Clutch Haberdashery Fun

Curvy Zip Clutch 3 side Haberdashery Fun

The pattern is now available for purchase in my online store.

Materials:

  1. Canvas fabric for exterior
  2. Cotton fabric for lining
  3. Interfacing – try Pellon SF101
  4. 12″  or 14″ metal zipper – try Ziptit on Etsy. They have a great selection of affordable metal zippers.
  5. Disappearing fabric pen
  6. Pressing ham – optional
  7. Sewing machine and supplies
  8. Iron and ironing board
  9. Paper and pen for template

Curvy Zip Clutch Zipper Haberdashery Fun copy

A couple things to consider before we get started:

  • The top curve of the pouch is is a little tricky, so the zipper will be sewn in a little differently than my other zipper tutorials.
  • Metal zippers can be difficult to work with. I suggest lengthening the stitch length and then sewing slowly.
  • Create a hard paper template for ironing the top curve. To make the template, print 2 paper patterns and tape along the CF. Follow along the curve in the steps below.
  • This pouch has a tab at only one end  I love this feature, as it makes for a really wide pouch opening.

Curvy Zip Clutch Haberdashery Fun

Curvy Zip Clutch Close up open Haberdashery Fun copy

Cut your pieces:

  • Outside – Fuse the SF101 Interfacing to the wrong side of the cotton canvas. Cut 2 pieces.
  • Lining – Cut 2 pieces. Note – if you want an extra sturdy pouch, fuse interfacing to the wrong side of the lining as well.
  • Zipper tab – Cut 1 rectangle measuring 3″L x 2″W.

Curvy Zip Clutch HaberdasheryFun

Let’s go:

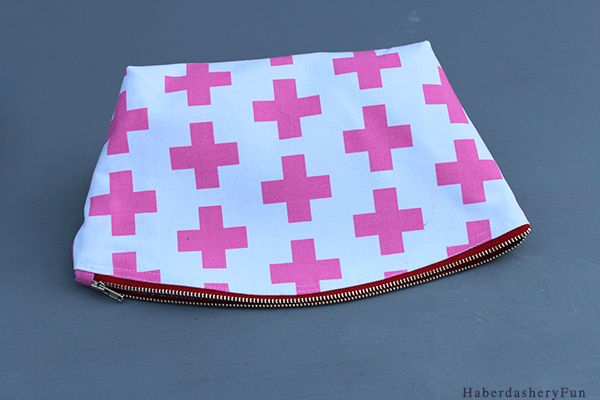
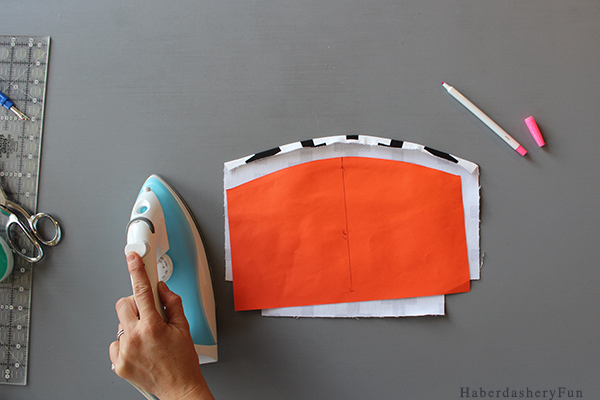
Step 1 – Use your ruler, disappearing fabric ink pen and template and mark a dashed line along the top curve 1/2″ from the top edge. Turn and fold the top edge under 1/2″ / fold under at the dashed line. Press. The template helps make sure that the top edge and side seams are even and match. Lay the 2 pieces on top of each other and make sure everything matches, especially where they meet at side seams. Re-press and adjust if needed. Repeat for the lining pieces.

Step 1 Curvy Clutch haberdasheryFun

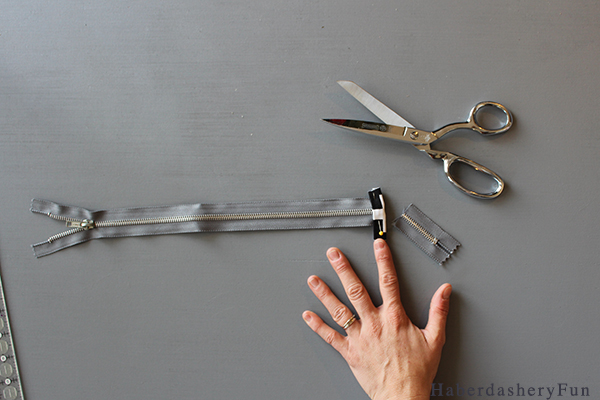
Step 2 – Prepare the zipper – Cut the zipper  to measure 12 1/4″. Cut the bottom portion off, as you will add a tab to cover the bottom zipper stop. Fold the zipper tab rectangle in half along the center, fold each end inwards to meet at the center fold. Press with an iron. Insert the zipper tab over the raw edge of the zipper end. Lengthen the stitch length on your machine. Place into your sewing machine and stitch the zipper down. Sew very slowly over the teeth or you can break a needle.  Set zipper aside.

Step 2 Curvy Clutch

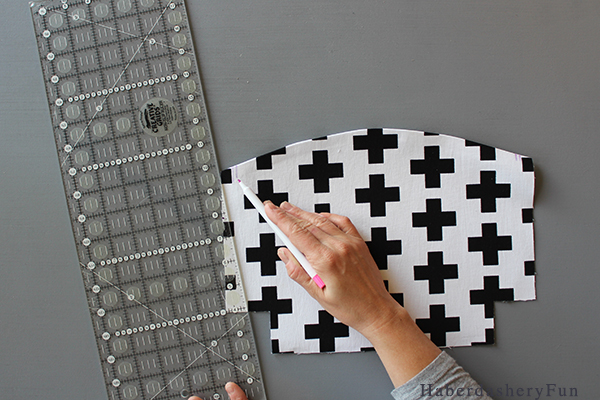
Step 3 – On the outside pouch piece, measure inwards 1/2″ from the top edge/side seam and make a mark. Measure inwards another 1/8″ and make another mark.  Repeat for the other side.

Step 3 Curvy Clutch

Step 4 – Start at the top of the zipper. Place the top metal stop at the 5/8″ mark and pin the zipper in place along the top edge. The zipper tab should end at the other 5/8″ mark. Turn and fold under the zipper tape at the top stop. Pin the zipper tape in place.

Step 5B Curvy Clutch

Step 5 – Place into your sewing aching and topstitch the zipper down with a 1/4″  seam allowance. Start stitching at the 1/2″ pen mark and stop at the other side- 1/2″ pen mark. Repeat for the other piece. Note – You do not need change to your zipper foot. Press. Use your pressing ham and press the zipper curve in place.  The sewing ham helps set a nice, smooth curve.

Step 5 Curvy Clutch

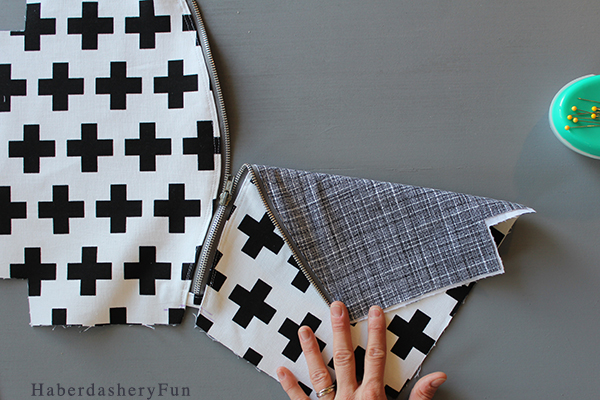
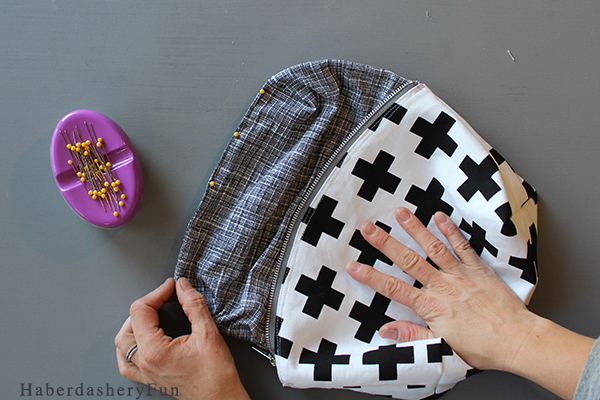
Step 6 – Repeat and now sew both lining pieces into the pouch.  Place the lining piece, wrong sides facing on the back of the pouch piece. Pin along the top edge. Place into your sewing machine and edgestitch in place with a scant 1/8″ seam allowance.  You want to catch both the outside and lining fabric with this seam.

Step 6 Curvy Clutch

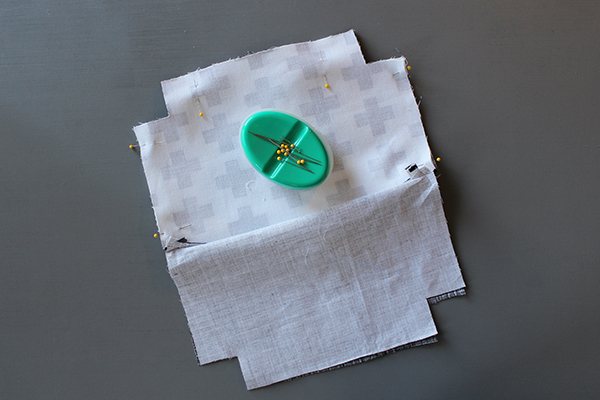
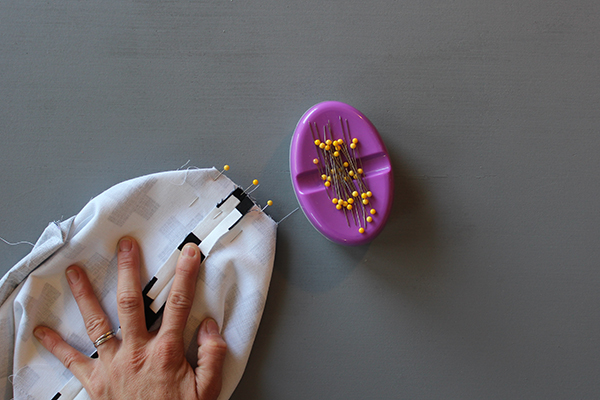
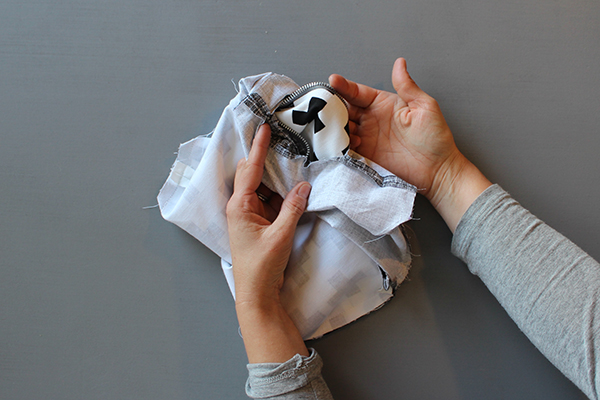
Step 7 – Sew the pouch together – Open your zipper and fold in half. Fold along the zipper and also fold the zipper tab in half. Place outside pieces right side together and lining pieces right side together. Pin along the outside edge. Place into your sewing machine and first stitch the outside side seams and bottom seam together. Use a 1/2″ seam allowance. Repeat and stitch the lining side seams and bottom seam together with a 1/2″ seam allowance. Leave a small 2″ – 3″ opening along the bottom lining seam. Press.

Step 7 Curvy Clutch

Step 8 – Create the corners – For one corner, twist the side seam and bottom seam to lay on top of each other. Finger press to lay flat and match at the seams. Open seam allowance. Pin. Place into your sewing machine and stitch together with a 1/2″ seam allowance. Repeat for all corners.

Step 8 Curvy Clutch

Step 9 – Turn right side out through the lining opening. Press all seams.

Step 9a Curvy Clutch

Step 10 – Pin the opening at the bottom seam. Place into your sewing machine and sew opening closed.

Step 10 Curvy Clutch

Thats it! Fun right? Emmie K and Robert Kaufman just launched Geo Pop Canvas 2.. so many modern canvas options now.

Curvy Zip Clutch Main Haberdashery Fun

Curvy Zip Clutch zippers Haberdashery Fun copy

Thank you for your support and patience. The pattern is now available in my shop. Please let me know if you plan to sew a curvy zipper pouch. I love hearing from you all and look forward to seeing your finished projects.

Happy Sewing – Marni

150 Comments

« Delectable Mountains Baby Quilt
Make Printed Holiday Tea Towels »

Comments

  1. Heather says

    06/23/2016 at 12:49 am

    I would love the pattern.

    Reply
    • Catherine charles says

      10/12/2019 at 4:33 am

      I love the pattern but dont understand the measurements and cutting

      Reply
      • Haberdashery Fun says

        02/26/2020 at 1:22 pm

        Hi There,

        You can purchase the pattern in my online store. Here is the link:

        For cutting instructions:
        Outside fabric = cut 2 pieces
        Lining fabric = cut 2 pieces
        Interfacing = cut 2 pieces [ and iron to the outside fabric wrong side ]

        That’s it! Hope this helps.

        Marni

        Reply
  2. Gouri says

    07/01/2016 at 12:03 am

    Hey. Your tutorial is great ! Can you please share the pattern.

    Thanks
    Gouri

    Reply
  3. Revathi says

    07/20/2016 at 1:40 am

    Nice tutorial.Can you Please share me the pattern from Curvy Zipper Pouch?

    Reply
    • Haberdashery Fun says

      07/21/2016 at 2:02 pm

      Hi – thanks for stopping by. I hope to have it up in the next 2 weeks 🙂
      Marni

      Reply
  4. Dona says

    07/24/2016 at 4:36 pm

    I would like the pattern. Thanks!

    Reply
  5. Anne Marie says

    08/01/2016 at 1:50 pm

    I would love the pattern too.

    Reply
  6. Colleen says

    08/21/2016 at 1:22 pm

    HI…would love this pattern!
    Thanks

    Reply
  7. Jenn says

    08/27/2016 at 1:17 pm

    I would like the pattern as well! thank you!

    Reply
  8. Carol Wilson says

    08/29/2016 at 12:30 am

    I would love the pattern if you have it… or otherwise the approximate sizes

    Reply
  9. Lisa says

    08/30/2016 at 11:56 am

    Love this!! Would like to have the pattern.

    Thanks!!

    Reply
  10. Aude Ernault says

    08/31/2016 at 11:52 am

    I w ou le lire the pattern too. Thanks!

    Reply
  11. Vicki Garbett says

    09/06/2016 at 8:50 am

    Please share the pattern, would love to have it

    Reply
  12. Kim says

    09/10/2016 at 4:37 pm

    I would love to have the pattern as well. Thank you!

    Reply
  13. Sophie B. says

    09/15/2016 at 6:00 am

    I would like the pattern as well. Thank you!

    Reply
  14. Chris says

    09/25/2016 at 12:14 am

    Is the pattern available – would love to make this thanks

    Reply
    • Haberdashery Fun says

      09/27/2016 at 12:36 pm

      Hi Chris,

      Thanks for the comment. Pattern will be up next week 🙂
      Marni

      Reply
  15. Lisa Stephan says

    09/28/2016 at 6:43 pm

    Love, love, love this bag using canvas fabric! I would like to make these for christmas gifts for my sisters!

    Reply
  16. Lisa says

    10/09/2016 at 12:01 am

    Has this pattern been released? I love the size and shape of this bag and would love to make some for my sisters. Could I please have you email this pattern to me? Thanks!

    Reply
    • Haberdashery Fun says

      10/09/2016 at 11:08 pm

      Hi Lisa,

      Should be going out this week. I will email for sure. Thanks for leaving a comment 🙂 – Marni

      Reply
      • Bonnie J Hildreth says

        09/18/2018 at 9:15 pm

        I would love to have this pattern. I love the looks of it and especially the curved top. Thank you.

        Reply
        • Haberdashery Fun says

          09/24/2018 at 1:58 pm

          Hi Bonnie,

          This is no longer available as a free pattern. You can now find it in my online shop – https://haberdasheryfun.myshopify.com/products/curvy-zipper-pouch

          Thanks
          Marni

          Reply
  17. Maria says

    10/10/2016 at 4:59 am

    Yes plesse I would love the pattern I also adore your fabric. Many thanks maria

    Reply
  18. Kat says

    10/13/2016 at 9:08 am

    So cute! Could i get the pattern please?

    Reply
    • Haberdashery Fun says

      10/13/2016 at 1:45 pm

      Hi Kat- the pattern is ready and I released it yesterday. I just didn’t update the post. You can find it here.. let me know how it goes 🙂

      https://haberdasheryfun.com/diy-projects/curvy-zipper-pouch-pattern-available

      Marni

      Reply
  19. Cheryl says

    11/03/2016 at 5:09 pm

    Marni, I forgot to ask. Do you have a tutorial for putting in a zipper for the bag? Can you believe I used to, make suits, coats, bridal gowns, etc.? And then my car and I were hit by a train. lol It’s sad but true. So, here I am at just a wee bit past square one and moving forward at a snail’s pace.

    Reply
    • Haberdashery Fun says

      11/08/2016 at 10:43 am

      Hi again. I am so sorry to hear about your accident.. I hope you are on the mend. I just had corrective surgery on my bladder and ureter, thru my c section incision, so I understand to some degree about moving at a very slow pace..

      I don’t have the exact zipper tutorial, but you could try a few of these…

      https://haberdasheryfun.com/diy-projects/turn-a-shopping-tote-into-a-zipper-pouch
      https://haberdasheryfun.com/diy-projects/sew-a-colorful-printed-pouch
      http://www.momtastic.com/diy/415383-zipper-pouch-bags/

      Let me know how it goes 🙂
      Marni

      Reply
  20. Kathy Gordon says

    12/17/2016 at 2:12 pm

    Can get the pattern please. I thought I had downloaded on October but can’t find it. Thanks Kwilty.pleasures@tmail.com

    Reply
    • Haberdashery Fun says

      12/23/2016 at 9:51 am

      HI Kathy,

      Thanks for the request. I plan to start selling the sewing pattern in the new year. Happy Holidays. Marni

      Reply
  21. Debra Ressel says

    03/12/2019 at 7:06 am

    Hi
    I just bought your pattern and tried to follow the tutorial but I must be a horrible sewer cause I just don’t get some parts. Did you by any CHANCE make a MORE in depth tutorial? Please help. It just seems like some steps are missing i hate to think I paid 4.00 for nothing 🙁

    Reply
    • Haberdashery Fun says

      07/29/2019 at 3:48 pm

      Hi Debra,
      I apologize for the delay on answering your question/email as it only came thru to my email now. Did you figure this out out? I have an updated post as below. I am also working on written instructions and can send you a copy when they are finished
      https://haberdasheryfun.com/diy-projects/tips-on-sewing-the-curvy-zipper-pouch

      Marni

      Reply
  22. Melisa says

    04/12/2021 at 1:21 pm

    I cut my zipper too short. Should the measurement be 13 1/2 inches instead of 12 1/2 inches? Thnaks!

    Reply
« Older Comments

Trackbacks

  1. Curvy Zipper Pouch Pattern Available | Haberdashery Fun says:
    10/12/2016 at 11:44 am

    […] of time – the pattern link will be available until October 28th. Please check out my original blog post for the full tutorial. Here is the link to the pattern – Curvy Zipper Clutch APRIL […]

    Reply
  2. My New Online Pattern Store | Haberdashery Fun says:
    03/23/2017 at 9:39 am

    […] Curvy Zipper Pouch: […]

    Reply
  3. Large Canvas Zipper Beach Pouch | Haberdashery Fun says:
    06/20/2017 at 10:18 am

    […] Curvy zipper pouch […]

    Reply
  4. Tips On Sewing the Curvy Zipper Pouch | Haberdashery Fun says:
    07/05/2017 at 3:27 pm

    […] out my previous post for the original set of instructions. First you need to fuse your fabric and then cut your pattern pieces, including the zipper […]

    Reply
  5. A Fun Update To Your Zipper Pouch | Haberdashery Fun says:
    09/26/2017 at 3:20 pm

    […] Here are 3 steps to add a CF seam to your Curvy Zipper Pouch pattern. If you need a reminder on sewing together the pouch, head here for the original tutorial. […]

    Reply
  6. Sew A Set of Pouches | Haberdashery Fun says:
    02/05/2018 at 4:17 pm

    […] to the original tutorial, but here is a quick run down on the […]

    Reply
  7. Free Zipper Bag Patterns – Sewing With Scraps says:
    08/13/2019 at 7:53 am

    […] Curvy Top Clutch […]

    Reply
  8. A collaboration with www.modes4u.com says:
    02/26/2020 at 10:49 pm

    […] you can find quite a few sewing tutorials for it here on my blog. Here is the first tutorial for the pouch and follow up tutorial here. The pattern is also available in my online […]

    Reply

Leave a Reply Cancel reply

Your email address will not be published. Required fields are marked *

This site uses Akismet to reduce spam. Learn how your comment data is processed.

About me


Hi there - I'm Marni Weaver. A sewer, a sometimes quilter and a lover of fabric design. I started this blog to share my ideas. Come Join the Fun
shop now

Popular Categories

project for baby fabric projects seasonal projects fat quarter projects sewing tips and tricks inspiration

Categories

  • Applique
  • Baby
  • Bags and Pouches
  • Block Printing
  • Color
  • DIY Projects
  • Fabric
  • Fabric Design
  • Fat Quarter Projects
  • Home Decor
  • Inspiration
  • Just for Fun
  • Kids
  • No Sew
  • Patterns
  • Print On Fabric
  • Quilting
  • Scrap Fabric Projects
  • Seasonal
  • Sewing Tips & Tricks

Lovely sponsors

Recent Comments

  • HaberdasheryFun and an easy Kraft-tex sewing project | Haberdashery Fun on Collapsible Kraft-Tex Bowl
  • HaberdasheryFun and an easy Kraft-tex sewing project | Haberdashery Fun on Sewing With Kraft-Tex
  • 3 Simple Summer Sewing Tutorials | Haberdashery Fun on Sew A Canvas Zipper Pouch
  • 3 Simple Summer Sewing Tutorials | Haberdashery Fun on Sew Asymmetrical Color Block Totes Tutorial
  • 3 Simple Summer Sewing Tutorials | Haberdashery Fun on Sew A Baby Towel With A Hood

Projects Elsewhere

find me on Pellon Projects sew mama sew contributor

momtastic contributor

Pinterest

Visit Marni@Haberdashery Fun's profile on Pinterest.
Follow on Bloglovin

I'm Reading

  • Cluck Cluck Sew
  • Cooking Dangerously
  • In Color Order
  • Jen Hewitt
  • Jolly Jabber
  • Karly Spalding Photography
  • Leigh Laurel Studios
  • Lindsay Sews
  • Lotta Jansdotter
  • Love Patchwork and Quilting Magazine
  • Made
  • Making It Lovely
  • Noodle-Head
  • Polka Dot Chair
  • Sharon Holland Designs
  • Silhouette America Blog
  • Silhouette Design Store
  • The Purl Bee
  • The Purple Fig

Press:

Stitch Winter 2014

haberdashery_fun

Marni Weaver
Working on a commission and a request for the colo Working on a commission and a request for the color terracotta. I’m thinking the top right vs the bottom left. And funny enough, this fits perfectly for today’s #marchmeetthemaker prompt “decision”

#haberdasheryfun #100dayproject #marchmeetthemaker2023 #surfacepattern #terracottabowl #speedballink #textiledesigner #homedepotcolormatch #haberdasheryfunpatterns #blockprinting #blockprintedfabric #surfacepatterndesign #smallbusinesslife
Earlier today I was working on a new pattern and t Earlier today I was working on a new pattern and then realized that my table had legs. 😂 While I’m excited to share about my upcoming tote pattern release, this photo took me down memory lane. My sweet boy Arlo turns 7 this week. He is always by my side and has been my shadow since the day he was born❤️ . He is often in my studio, patiently waiting, photobombing a tutorial or playing w/ my supplies.

#haberdasheryfun #koifabric #rashidcolemanhale #rubystarsocietyfabric #haberdasheryfunpatterns #pdfpattern #marceetthemaker #marchmeetthemaker2023 #100dayproject #blockprintingmadeeasy
I love today's prompt "from idea to product" for # I love today's prompt "from idea to product" for #marchmeetthemaker. If you swipe, you can see the the original. I made that group of block print quite a few years ago and this pinwheel is a motif that I come back to all the time. 

Do you block print or make your own designs? What would you like to create with your patterns or prints? Have anything in mind?

#blockprintingmadeeasy #blockprinting #surfacepatterndesign #haberdasheryfun
#onlinecourses #chelseatakesshots #haberdasheryfunpatterns #makeshit #surfacepatterncommunity #whatsyourwhy #marchmeetthemaker2023 #100dayproject #dothe100dayproject #havefun #scandiboho.
Instagram post 18073744054322730 Instagram post 18073744054322730
Do you mix and match your handmade block prints an Do you mix and match your handmade block prints and your fabric stash?  I love this combo of champagne blush and turquoise. What would you make with it?

#haberdashery #modafabrics #gingiberfabric #modafabricsandsupplies #modafabric #meetthemaker2023 #modafabric 
#meetthemaker #100dayproject #haberdasheryfun #100dayproject2023 #blockprintingmadeeasy #blockprinting #cottoncanvas #speedballfabricink.
Follow on Instagram

Copyright © 2023 · Klar theme by Crimson Pear :: web & surface design

Copyright © 2023 · Klar on Genesis Framework · WordPress · Log in