Haberdashery Fun

  • Home
  • About
    • Look Book
  • Contact
    • Collaborate?
  • Tutorials
  • Shop
  • Freebie
    • Email
    • Facebook
    • Instagram
    • Pinterest

Keep up to date with the latest posts!

Sew A Colorful Printed Zipper Pouch

in Bags and Pouches, DIY Projects on 13/02/16

I’m a bit of a sewing and crafting hoarder. I save all the leftover pieces from my projects – scrap fabric, string and ribbon, tiny pieces of Velcro.. The list goes on.  An item I have an especially hard time discarding is the left over freezer paper bits from when I print on fabric.

Freezer Paper Main

I love using my Silhouette machine to cut unique freezer paper designs, and to my husband’s dismay I always save the little pieces for a rainy day.

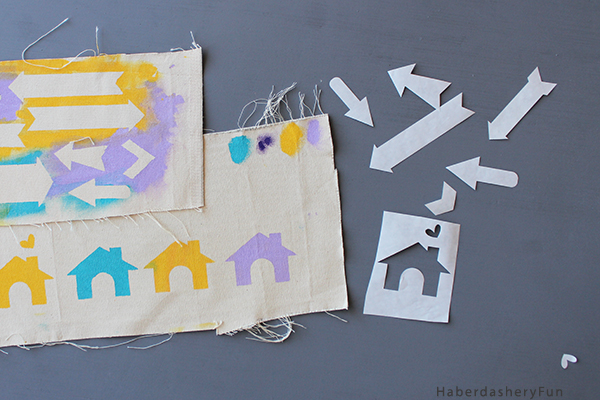
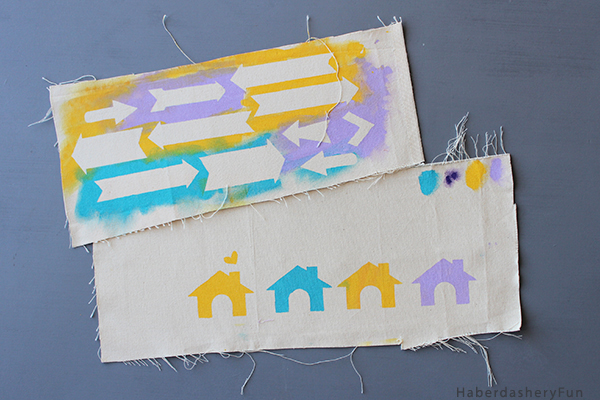
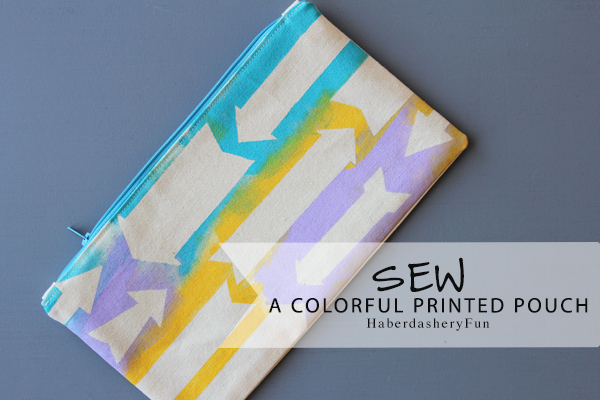
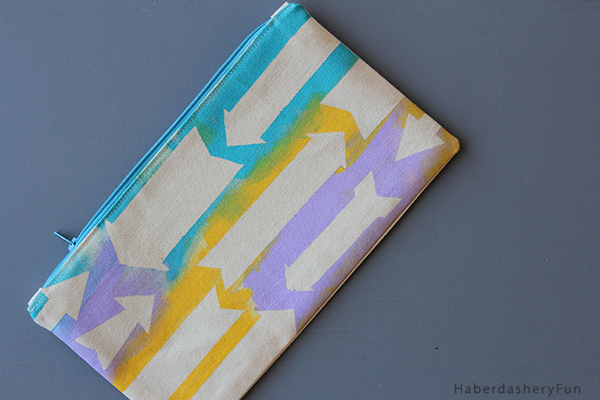
While I was using my Silhouette Cameo a few weeks ago my 4 year old wanted to ‘help”.  He loves to feed the cutting mat into the machine and then push all the buttons! I had saved a bunch of arrow and house freezer paper pieces from previous projects and thought it would be an easy activity to do together.. I let him choose the fabric paint colors, create the layout and then he painted the canvas fabric. Ok, I helped a bit. But the perfectionist in me had to sit back as he painted and just let him go at it. The end result was beautiful!

Painted fabric

HaberdasheryFun Arrows Pouch Side ways

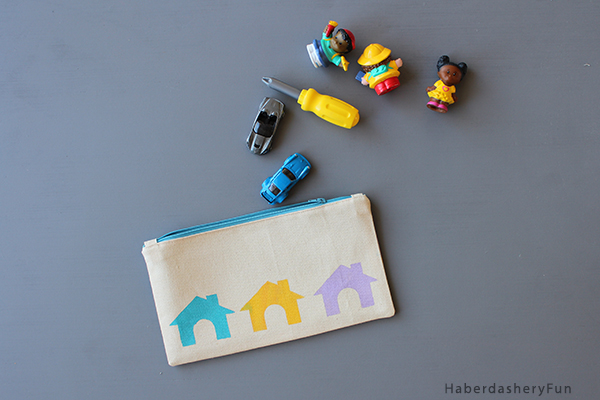
After we painted the fabric, I promised him I would sew the canvas fabric into a little pouch. While I’m not sure he will use the pouch.. I will probably  “borrow” it from him because it turned out so cute.

Houses pouch Main

Want to make a printed pouch? Materials needed:

  • Canvas fabric – outside
  • Cotton fabric – lining
  • Silhouette machine
  • Freezer paper and/or left over cut designs from a Silhouette project
  • Fabric paint, sponge and craft paper – The Tulip brand or Martha Stewart work great.
  • Zipper
  • Disappearing fabric pen
  • Sewing supplies
  • Iron and ironing board

Sew A Colorful Printed Pouch HaberdasheryFun

Let’s get started:

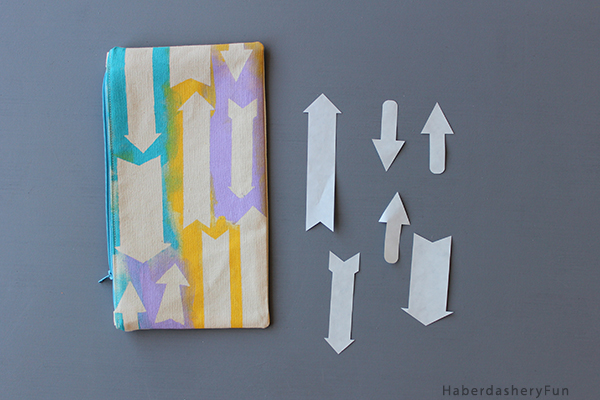
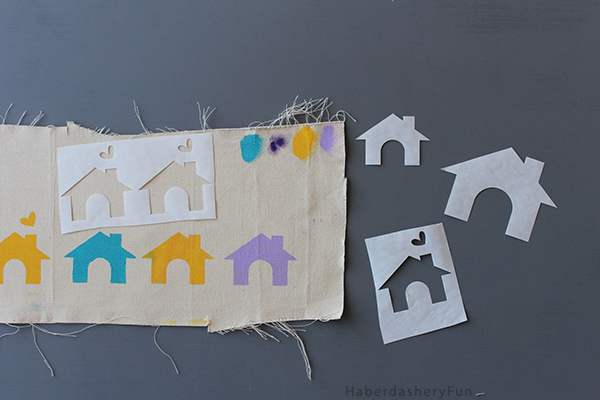
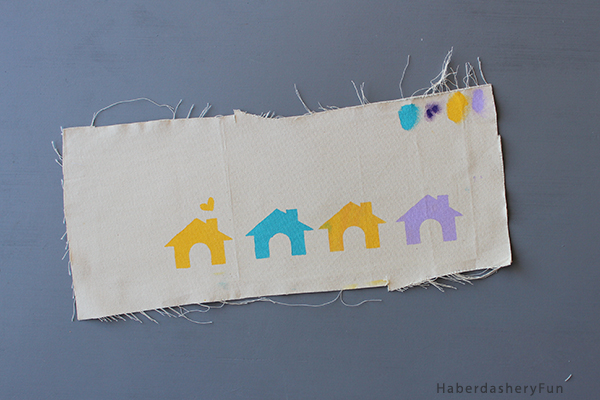
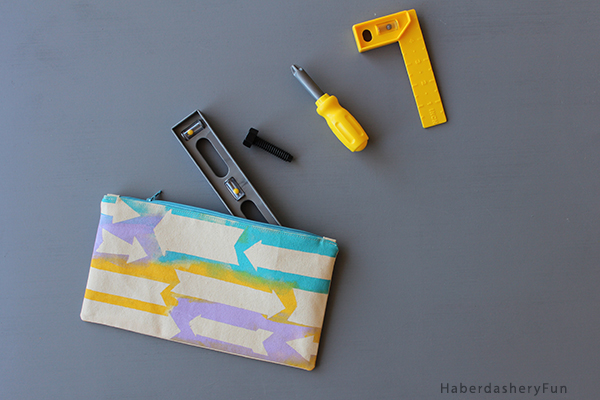
Step 1 – Print the fabric. The arrows in this project are Karla Dudley’s  “filled arrows” design. Lay the left over pieces in a random fashion on scrap fabric. Iron in place. Squirt fabric paint onto a plate, dip the sponge into the paint and dab gently away at the fabric. While the paint is still wet remove the freezer paper bits. Set aside to dry.

Step1A

Step1B

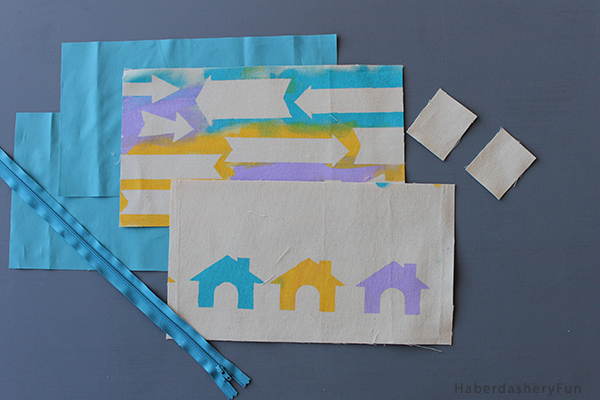
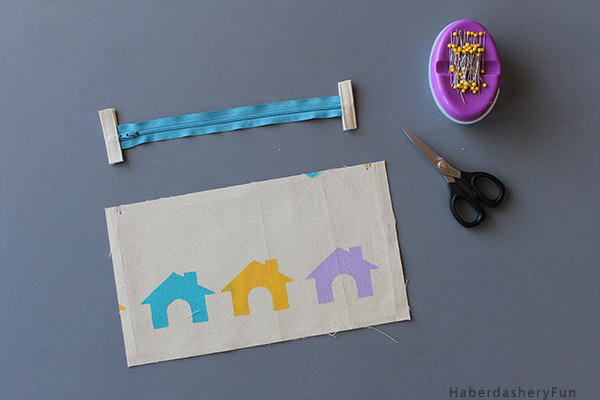
Step 2 – Cut the fabric. Cut the outside and lining fabric into rectangles. In this case, I cut the 2 printed outside pieces into rectangles measuring 12-1/2″ x 7″. I also cut 2 rectangles in the lining fabric the same size. For the zipper tabs, I cut 2 canvas rectangles measuring 3″ x 2″.

Step2

Step 3 – Cut the zipper down to fit the pouch. For this pouch size, the zipper was cut to 11″ long. Place a zipper tab at each end and topstitch on either side of the tab. Need help sewing the tabs? Check my tutorial here.. From each side seam, measure inwards at the top edge 5/8″” and mark with the disappearing fabric pen.

Step3

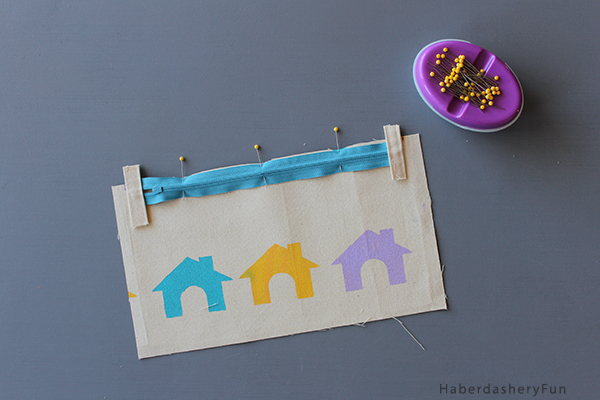
Step 3 – Place the zipper face down along the top edge. Each zipper tab should hit the 5/8″ mark. Pin. Change to zipper foot, place into your sewing machine and stitch down.

Step4

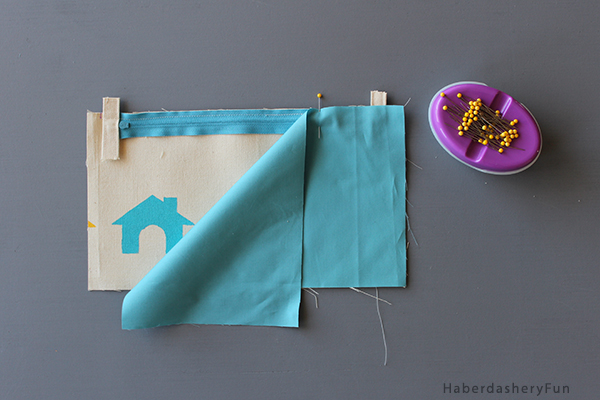
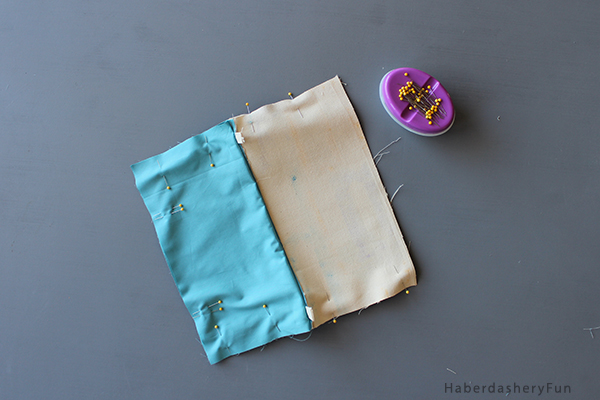
Step 4 – Lay the lining fabric on top of the outside fabric. The zipper should be sandwiched between the canvas/outside fabric and the cotton/lining fabric. Pin. Place into your sewing machine and stitch down. For best results, turn over and follow the first stitch line. Press in place. Open the canvas and lining and press again.

Step5

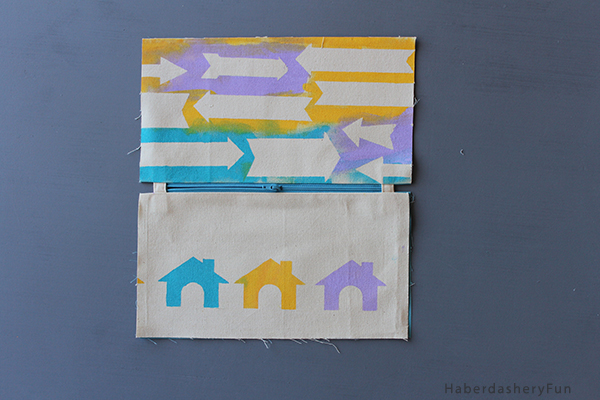
Step 5 – Repeat steps 3 and 4 for the other side. Press again. Topstitch along each side of the zipper.

Step6

Step 6 – Now it’s time to sew the pouch together. Open the zipper halfway. This is an important step for later, so please remember to open your zipper. Fold the zipper and the tabs in half. Lay the canvas pieces on top of each other, right sides facing and the lining pieces on top of each other, right sides facing. Match at all sides and pin. Place into your sewing machine and stitch together with a 3/8″ – 1/2″ seam allowance. When sewing the lining together, leave a 2″ – 3″ opening along the bottom seam. Press. Trim the corners.

Step6

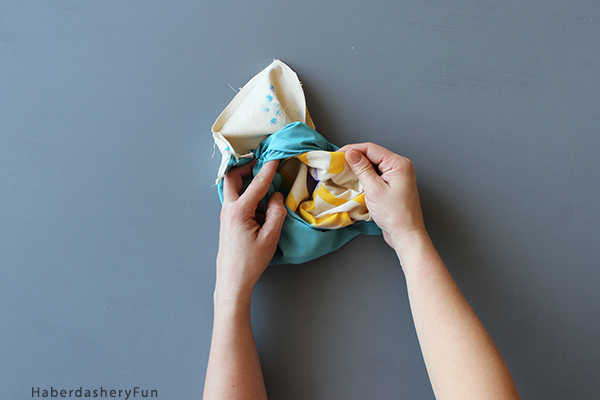
Step 7 – Pull right side out through the opening in the lining [this is where opening the zipper comes into play]. Wiggle corners into place. Press all seams.

Step7

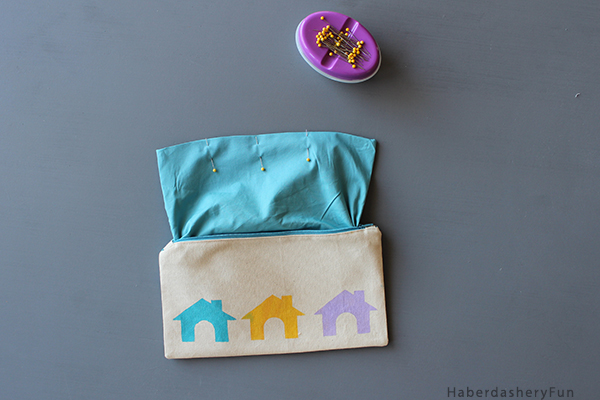
Step 8 – Pin the opening in the lining closed and stitch closed.

Step8

That’s it.. Cute, right? Plan on saving your freezer paper bits? if so, what would you make?

Arrows pouch Tools Main

Arrow pouch Solo

HaberdasheryFun Arrows Pouch close up

Want to see the project where the arrows came from, click here. How about the little houses, click here. I have another project where I saved my little freezer bits.. Click here for the cutest little hello gift bag around!

Happy Sewing!

Related Posts Plugin for WordPress, Blogger...

24 Comments

« Sew An Emergency Travel Pouch
Sew A Shopping Tote Into A Zipper Pouch »

Comments

  1. Maurice Golson says

    02/13/2016 at 3:17 pm

    Great looking pouch. Fun that you let your son print the fabric!

    Reply
  2. Virginia says

    02/14/2016 at 10:21 am

    How cute. I love that you painted the fabric to make the bag more unique. Good job.

    Reply
  3. swapna says

    02/15/2016 at 8:54 am

    This is interesting! Pls do Link UP at the Practical Mom Link Up! I’d love to see you there 🙂

    Reply
  4. Create With Joy says

    02/21/2016 at 3:13 pm

    What a delightful pouch you’ve created – thanks for sharing your project at Inspire Me Monday at Create With Joy – this week’s party is now open, can’t wait to see what you share with us this week! 🙂

    Reply
  5. Ashley ~ 3 Little Greenwoods says

    02/23/2016 at 1:38 pm

    Such a sweet little bag for all sorts of goodies! Love the stamps you made!

    Reply
  6. Jerusha (ThePositiveYear.com) says

    03/09/2016 at 11:21 am

    I’m loving these ideas! They look so lasting, too. Not like something you make and then is forgotten about, but something that will last long enough to be a treasured memento.

    And to answer your question… Yes, you should take it again! I wrote a bit extra on your comment from earlier, but I did want to make sure you know that when you pay once, you’re in the course forever. You can restart it again anytime without paying again. 🙂

    Hope to see you around Ruth’s!

    Reply
    • Haberdashery Fun says

      03/09/2016 at 11:41 am

      I’m in it forever.. oh really?? That’s so good to know. I will definitely look into it. I don’t usually sign up for things and not finish.. but I needed to just take a break from everything. I’m really wanting to grow it all. Thanks again for everything 🙂

      Reply
  7. Carter Mcdugle says

    03/12/2016 at 2:09 am

    Just ordered this pattern and can t wait til it arrives! These will make wonderful gifts for my 4 daughters!

    Reply
    • Haberdashery Fun says

      03/13/2016 at 11:31 am

      That’s great! Let me know how it goes and I would love to see pictures. Happy Sunday – Marni

      Reply
  8. Layla Bera says

    04/12/2016 at 3:10 am

    Wow… what a unique idea to design zipper pouch that you have design. I understand design is most important thing to give a beautiful look.

    Reply
  9. kelly says

    10/15/2017 at 9:56 am

    This is a perfect little bag to take my kids colored pencils in the car for when we go out to restaurants and they need entertainment. Love using my Silhouette Cameo to make neat designs that the kids just love. Thanks for the idea! https://www.thebestvinylcutter.com

    Reply
    • Haberdashery Fun says

      10/16/2017 at 9:51 am

      Hi Kelly,

      Thank you so much for the kind words! Have a great day – Marni

      Reply

Trackbacks

  1. CraftCrave | DigiFree | CraftCrave says:
    02/14/2016 at 1:17 am

    […] Sew A Colorful Printed Zipper Pouch – 1 freebie(s)? […]

    Reply
  2. Craftaholics Anonymous® | Friday Finds Link Party 2.19.16 says:
    02/19/2016 at 8:00 pm

    […] Colorful Printed Pouch from Haberdashery Fun […]

    Reply
  3. Best of the Weekend | Hello Little Home says:
    02/19/2016 at 8:02 pm

    […] Sew a Colorful Printed Pouch from Haberdashery Fun […]

    Reply
  4. The Creative Exchange #92 {Thursday Linky Party} - Creations by Kara says:
    02/25/2016 at 6:01 am

    […] How to Sew a Zippered Pouch from Haberdashery Fun […]

    Reply
  5. The Creative Exchange Link Party #91 - The Happy Scraps says:
    02/25/2016 at 6:01 am

    […] Colorful Printed Pouch  | Haberdashery Fun […]

    Reply
  6. Sew A Shopping Tote Into A Zipper Pouch | Haberdashery Fun says:
    03/16/2016 at 12:30 pm

    […] Step 3 – Cut your zipper down to size. Use one of the straps as zipper tabs. Need some help with zipper tabs? I have a few tutorials you can try. Check out this one that I wrote for Momtastic and another one here. […]

    Reply
  7. Make A Half Moon Printed Pouch | Haberdashery Fun says:
    05/09/2016 at 12:46 pm

    […] Step 4 – Cut the zipper to fit the pouch [ I like to measure inwards 5/8″ from each top side seam and mark a line with a disappearing fabric pen]. Cut the zipper to fit this measurement. From scrap fabric, cut a rectangle measuring 3″ x 2″ and make a zipper tab. Fold the rectangle in half and then fold each side inwards again to meet in the middle. Place the cut zipper end into the tab. With your sewing machine, topstitch on either side of the tab. Need more information on sewing a zipper? Try my tutorial here.. […]

    Reply
  8. The Box Pouch, the Sack and the Zip-Up Case - Sew Blue Thread says:
    08/22/2016 at 8:12 am

    […] These cases were a bit more fiddly, since, I decided to add a clear front to one of the cases.  It took a little more than an hour to select fabric, cut, and stitch together.  This case pattern came from haberdasheryfun.com. […]

    Reply
  9. Make Fun Canvas Pencil Cases | Haberdashery Fun says:
    09/12/2016 at 10:16 am

    […] Sew into a pouch. Need help with sewing the pouch? I have a bunch of tutorials to get your started. Try this tutorial and this one. […]

    Reply
  10. Curvy Zipper Pouch Pattern Available | Haberdashery Fun says:
    10/11/2016 at 1:32 pm

    […] promised and promised the curvy zipper pouch pattern for months. And.. I’m happy to announce it is finally […]

    Reply
  11. Make Custom Designs With “Sticker You” says:
    09/23/2019 at 8:46 am

    […] Step 7 – I finished making my pouch and was ready to go. Need instructions on how to make a zipper pouch? Head to this post or this fun post. […]

    Reply
  12. Make Half Square Triangle Pouches says:
    04/13/2020 at 10:58 pm

    […] The rest of the tutorial is the same for sewing a zipper pouch. I have quite a few tutorials here on my blog and you can see one here and here. […]

    Reply

Leave a Reply Cancel reply

Your email address will not be published. Required fields are marked *

This site uses Akismet to reduce spam. Learn how your comment data is processed.

About me


Hi there - I'm Marni Weaver. A sewer, a sometimes quilter and a lover of fabric design. I started this blog to share my ideas. Come Join the Fun
shop now

Popular Categories

project for baby fabric projects seasonal projects fat quarter projects sewing tips and tricks inspiration

Categories

  • Applique
  • Baby
  • Bags and Pouches
  • Block Printing
  • Color
  • DIY Projects
  • Fabric
  • Fabric Design
  • Fat Quarter Projects
  • Home Decor
  • Inspiration
  • Just for Fun
  • Kids
  • No Sew
  • Patterns
  • Print On Fabric
  • Quilting
  • Scrap Fabric Projects
  • Seasonal
  • Sewing Tips & Tricks

Lovely sponsors

Recent Comments

  • Make A Simple Block Print Tote Bag | Haberdashery Fun on DIY.. Colorful Dish Towel Tote Bags
  • Make A Simple Block Print Tote Bag | Haberdashery Fun on Sew Asymmetrical Color Block Totes Tutorial
  • Make A Block Printed ToteBag | Haberdashery Fun on Sew A Reversible Tote
  • Make A Block Printed ToteBag | Haberdashery Fun on Quick Tip.. Sewing Boxed Corners
  • 20 Creative DIY Storage Bin Ideas - DIY & Crafts on Sew An Easy Fabric Storage Bin

Projects Elsewhere

find me on Pellon Projects sew mama sew contributor

momtastic contributor

Pinterest

Visit Marni@Haberdashery Fun's profile on Pinterest.
Follow on Bloglovin

I'm Reading

  • Cluck Cluck Sew
  • Cooking Dangerously
  • In Color Order
  • Jen Hewitt
  • Jolly Jabber
  • Karly Spalding Photography
  • Leigh Laurel Studios
  • Lindsay Sews
  • Lotta Jansdotter
  • Love Patchwork and Quilting Magazine
  • Made
  • Making It Lovely
  • Noodle-Head
  • Polka Dot Chair
  • Sharon Holland Designs
  • Silhouette America Blog
  • Silhouette Design Store
  • The Purl Bee
  • The Purple Fig

Press:

Stitch Winter 2014

haberdashery_fun

Marni Weaver
Test print and then fabric. Are you an all over ra Test print and then fabric. Are you an all over random print or a linear structured print person? 

I always say to myself that I’m going to create a random print and then go straight for a structured layout.

#blockprintingmadeeasy #haberdashery #haberdasheryfun #blockprinting #simpleshapesmadefun #fatquarterproject #100daysofsimpleshapes #dothe100dayproject #dothe100dayproject2022 #speedballfabricink #konacottonsolids #haberdasheryfunpatterns #100dayproject2022 #handmadestamp #blockprintedfabric #blockprintedtextiles #100daysofsimpleshapes #blickartmaterials  Day 30/100
Simple and effective. I’m still cruising thru th Simple and effective. I’m still cruising thru the #100dayproject and my simple shapes prompts.

Here is our friend the square with simple lines cut thru it.

#blockprinting #100dayproject2022 #blockprintingmadeeasy #simpleshapesarefun #100daysofsimpleshapes #dothe100dayproject #haberdashery #haberdasheryfunpatterns #haberdasheryfun #handmadestamps #blockprintedfabric #fatquarterproject #fatquarters #speedballfabricink Day29/100
Anyone else have an assistant who gets into everyt Anyone else have an assistant who gets into everything, makes a mess and then sits under the desk doing nothing??

#haberdashery #marriedtorealestate 
#hgtvhome #hgtvdesign 
#haberdasheryfun #egyptsherrod #egyptsherroddesign #rebeccazajac #haberdasheryfunpatterns #chelseatakesshots #blockprintingmadeeasy #blockprintedfabric #hgtvdreamhome #hgtvhome #hgtvmakeover
There are only a few more days until my online blo There are only a few more days until my online block printing course starts! Have you wanted give block printing a try? 

Well… Come on over and spend the next 3 weeks with me. The link in my profile will take you to my sales page with all the details- what to expect, lesson breakdown, material list, frequently asked questions and the option to register.

Would love to see you in class. 

#blockprintingmadeeasy #onlineclasses
#haberdasheryfun ##100daysofsimpleshapes #dothe100dayproject #100dayproject2022 #haberdasheryfunpatterns #blockprintedfabric #handmade #handmadefabric #blockprinting #surfacepatterndesign #chelseatakesshots #immersion2020 Day28/100
I have a drawer where I keep all of my block print I have a drawer where I keep all of my block printed papers and have often wondered.. “What the heck do I do with all of these”.

How about you?

I recently found a bunch of  tutorials over at @modpodgerocks and thought it would be fun to make wood coasters with my block prints. They turned out better than expected and so I thought to share with you.

Want more info? I created a blog post. See the link in my profile for the blog post and details. 

Day27/100 #100dayproject #dothehundreddayproject #100daysofsimpleshapes #haberdasheryfun #blockprintingmadesimple #onlineclasses #zoomworkshops #haberdasheryfunpatterns #haberdasheryfunclasses #handmadestamp #modpodge #modpodgecrafts #decoupageart #decoupagelovers #blockprintedbyhand
Follow on Instagram

Copyright © 2022 · Klar theme by Crimson Pear :: web & surface design

Copyright © 2022 · Klar on Genesis Framework · WordPress · Log in