Haberdashery Fun

  • Home
  • About
    • Look Book
  • Contact
    • Collaborate?
  • Tutorials
  • Shop
  • Freebie
    • Email
    • Facebook
    • Instagram
    • Pinterest

Keep up to date with the latest posts!

Make Custom Designs With “Sticker You”

in Bags and Pouches, DIY Projects on 23/09/19

Want to make custom designs with your kids artwork?

I was recently contacted by Sticker You about trying some of their products. After cruising through their website, I decided it would be fun to try their iron on transfers. I wasn’t sure what this would entail, but I got super excited when I realized I could upload my son’s artwork.

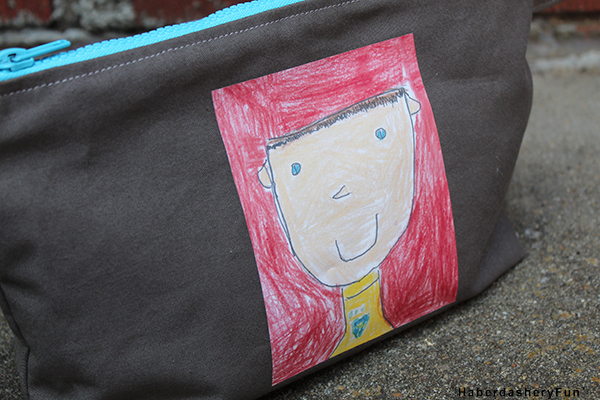
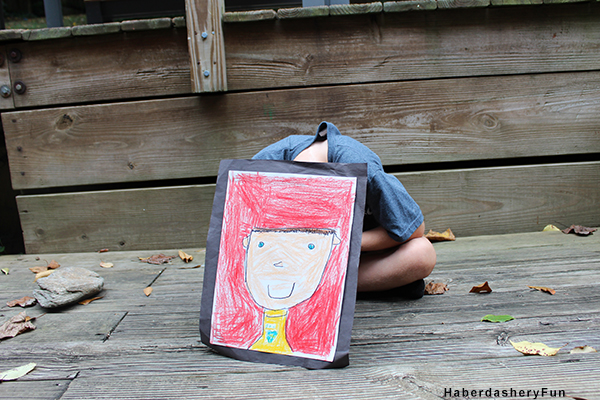
Last year, my son made a portrait of himself in art class. The whole class made one and it is the cutest thing. I have wanted to do something special with it, outside of framing it and hanging it on the wall.

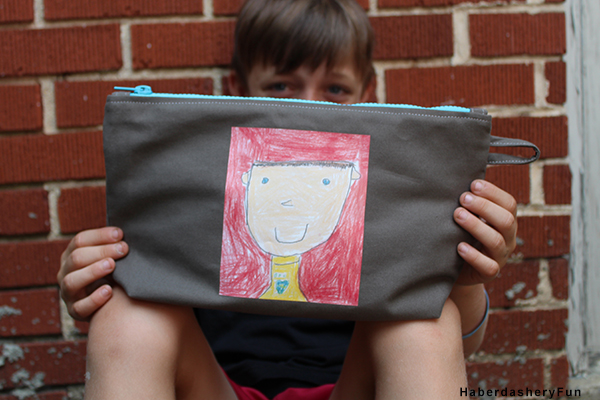
Here is the elusive model with his artwork:

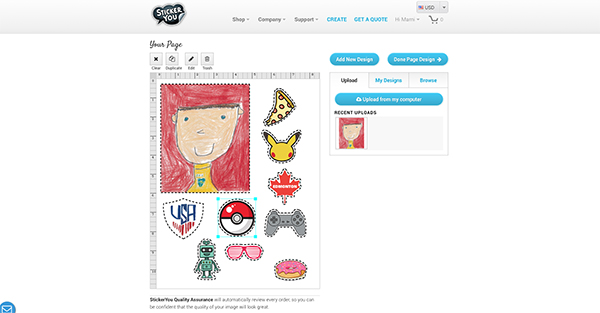
The cool part about Sticker You? There is an option to create a page that has different designs on it, so you can pick and choose from your own home-made designs and also designs unique to Sticker You.

One sheet is $14.99 and such an awesome deal! My kids and neighbor got so excited when the package came in the mail, that they each picked out their favorite design.


Here is how you do it:

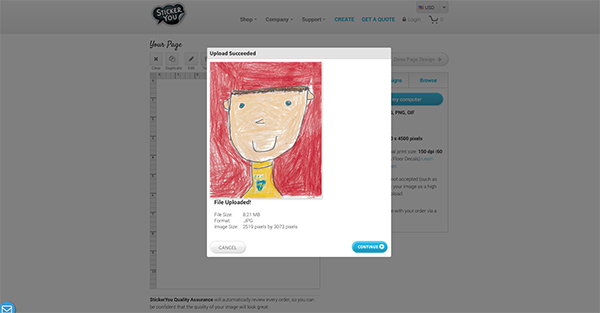
Step 1 – I scanned my son’s artwork and cleaned it up in photoshop. I used the clone tool and took away any pencil marks that I didn’t want to show up on the transfer. However, I left all the perfectly- imperfect parts in his art. I then uploaded it to Sticker You and started having fun.

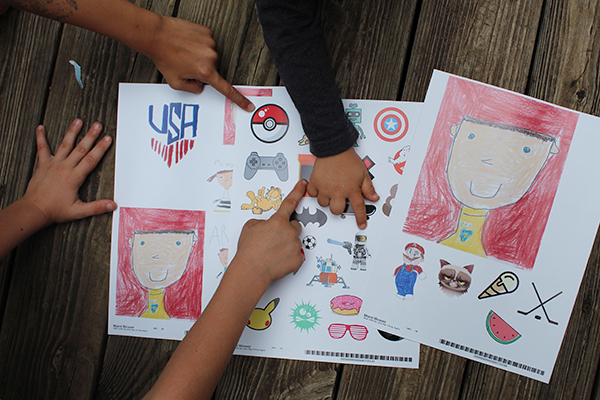
Step 2 – As I said before, I made a page with multiple designs. I uploaded another design of my son’s [ see his team USA below? ] and then chose a bunch of their stock designs – Pokemon, video games, and even pizza.

Step 3 – I added everything to my cart and was ready to go. The package came sooner than expected and it was time to get creative.

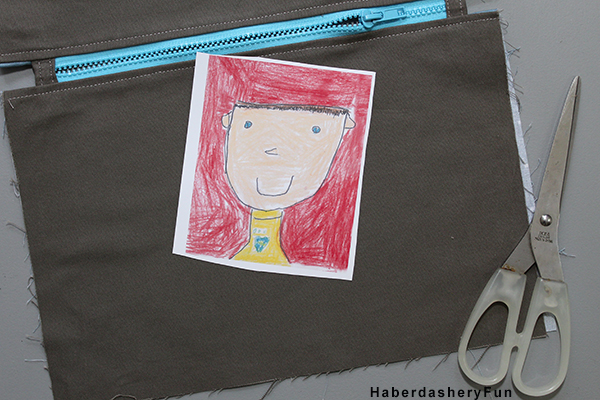
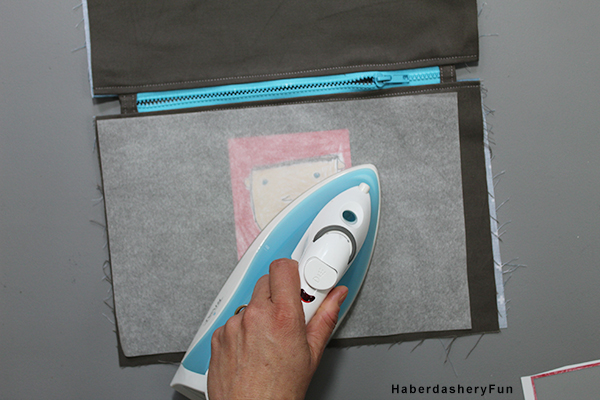
Step 4 – My son asked me to make him a zipper pouch to hold his Pokemon cards and books so he could bring them to school. I had multiple designs on one iron on transfer page, so I cut around the design I wanted to use on the pouch.

Step 5 – I gently peeled back the iron on transfer from the backing. Pulling super slow and steady.

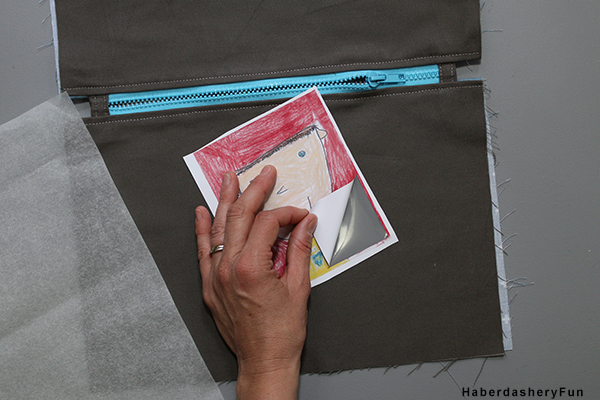
Step 6 – I centered the iron onto my fabric, placed the transfer paper on top and used a hot iron to set in place.

Step 7 – I finished making my pouch and was ready to go. Need instructions on how to make a zipper pouch? I have quite a few tutorials – Head to this post or this fun post.

That’s it! Let me know how it goes. Please note that this post was sponsored by Sticker you. They gave me product for the post. However as with all my blog posts and sponsored posts – all opinions are my own.

Related Posts Plugin for WordPress, Blogger...

Add a Comment

« The Retreat Bag Pattern Review
A collaboration with www.modes4u.com »

Leave a Reply Cancel reply

Your email address will not be published. Required fields are marked *

This site uses Akismet to reduce spam. Learn how your comment data is processed.

About me


Hi there - I'm Marni Weaver. A sewer, a sometimes quilter and a lover of fabric design. I started this blog to share my ideas. Come Join the Fun
shop now

Popular Categories

project for baby fabric projects seasonal projects fat quarter projects sewing tips and tricks inspiration

Categories

  • Applique
  • Baby
  • Bags and Pouches
  • Block Printing
  • Color
  • DIY Projects
  • Fabric
  • Fabric Design
  • Fat Quarter Projects
  • Home Decor
  • Inspiration
  • Just for Fun
  • Kids
  • No Sew
  • Patterns
  • Print On Fabric
  • Quilting
  • Scrap Fabric Projects
  • Seasonal
  • Sewing Tips & Tricks

Lovely sponsors

Recent Comments

  • 3 Simple Summer Sewing Tutorials | Haberdashery Fun on Sew A Canvas Zipper Pouch
  • 3 Simple Summer Sewing Tutorials | Haberdashery Fun on Sew Asymmetrical Color Block Totes Tutorial
  • 3 Simple Summer Sewing Tutorials | Haberdashery Fun on Sew A Baby Towel With A Hood
  • Make A Simple Block Print Tote Bag | Haberdashery Fun on DIY.. Colorful Dish Towel Tote Bags
  • Make A Simple Block Print Tote Bag | Haberdashery Fun on Sew Asymmetrical Color Block Totes Tutorial

Projects Elsewhere

find me on Pellon Projects sew mama sew contributor

momtastic contributor

Pinterest

Visit Marni@Haberdashery Fun's profile on Pinterest.
Follow on Bloglovin

I'm Reading

  • Cluck Cluck Sew
  • Cooking Dangerously
  • In Color Order
  • Jen Hewitt
  • Jolly Jabber
  • Karly Spalding Photography
  • Leigh Laurel Studios
  • Lindsay Sews
  • Lotta Jansdotter
  • Love Patchwork and Quilting Magazine
  • Made
  • Making It Lovely
  • Noodle-Head
  • Polka Dot Chair
  • Sharon Holland Designs
  • Silhouette America Blog
  • Silhouette Design Store
  • The Purl Bee
  • The Purple Fig

Press:

Stitch Winter 2014

haberdashery_fun

Block Printing
A big hello to everyone new around here. Thank you A big hello to everyone new around here.
Thank you for stopping by ❤️🎉

Did you know that along with all my block printing that I also sew? I have had a sewing blog for 10 years. If you are new to sewing or looking for tips and tricks, I’ve got the spot for you.

Head to the link in my profile and click sewing tutorials - blog. I even have a tutorial for this cross body tote over on my blog. 

#haberdasheryfun #haberdasheryfunpatterns #isewbags #surfacepatterndesigner #blockprintingmadeeasy #100daysofsimpleshapes #100dayproject #dothe100dayproject #haberdasheryfunonlineclasses #konacotton #canvasbags #speedballfabricink #simpleshapesarefun #blockprintmadeeasy
I’m back in my favorite Toronto kitchen so had t I’m back in my favorite Toronto kitchen so had to take a few block print photos. Continuing on with my simple prints theme and playing around with the heart block.

#haberdasheryfunpatterns #blockprinted #100daysofsimpleshapes #speedballfabricink #100daysproject #dothe100dayproject #blockprintedfabric #100daysofblockprinting #blockprintmadeeasy #blockprintingmadeeasy #100daysofsimpleprints #blockprintedfabric #haberdasheryfun Day 32/100
Happy Monday! We are back from vacation and I am s Happy Monday! We are back from vacation and I am still cruising thru my “simple circle” blockprint theme. This one is my favorite of the last group. Swipe to see it’s companions.

What are you working on?

#haberdasheryfun #haberdasheryfunpatterns #speedballink #100dayproject2022 #dothe100dayproject2022 #surfacedesigncommunity #surfacepatterndesign #handmadestamp #blockprintfabrics #blockprintedfabric #100daysofsimpleshapes #blockprintingmadeeasy #blockprintingmadesimple #fatquarterprojects #fatquarterproject #konacottonsolids #konacottons 

Day 31/100
Instagram post 18239908753108863 Instagram post 18239908753108863
Test print and then fabric. Are you an all over ra Test print and then fabric. Are you an all over random print or a linear structured print person? 

I always say to myself that I’m going to create a random print and then go straight for a structured layout.

#blockprintingmadeeasy #haberdashery #haberdasheryfun #blockprinting #simpleshapesmadefun #fatquarterproject #100daysofsimpleshapes #dothe100dayproject #dothe100dayproject2022 #speedballfabricink #konacottonsolids #haberdasheryfunpatterns #100dayproject2022 #handmadestamp #blockprintedfabric #blockprintedtextiles #100daysofsimpleshapes #blickartmaterials  Day 30/100
Follow on Instagram

Copyright © 2022 · Klar theme by Crimson Pear :: web & surface design

Copyright © 2022 · Klar on Genesis Framework · WordPress · Log in