Haberdashery Fun

  • Home
  • About
    • Look Book
  • Contact
    • Collaborate?
  • Tutorials
  • Shop
    • Email
    • Facebook
    • Instagram
    • Pinterest

Keep up to date with the latest posts!

DIY.. Easy Business Card Holder

in DIY Projects, Fat Quarter Projects on 27/05/14

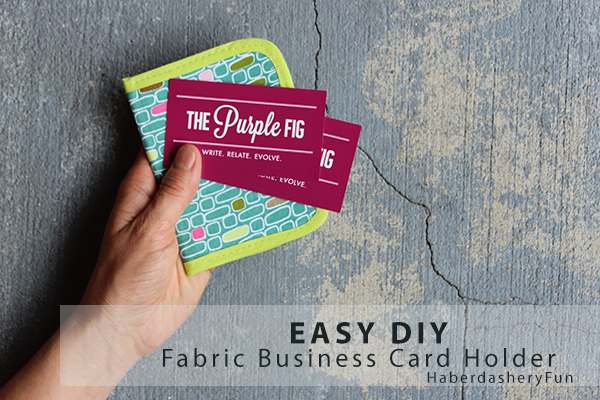
I’ve wanted to make a business card holder for quite come time. My friend Trish is in the final stages of having her online magazine ” The Purple Fig” redesigned.  It was the perfect opportunity to make one for her.

The Purple Fig is an online blogzine with an emphasis on realistic and inspiring personal stories from women of all age groups, lifestyles and nationalities.. Trish is an amazing writer and the articles she publishes are real, raw, powerful and inspiring. If you need a good read, head on over and check it out.
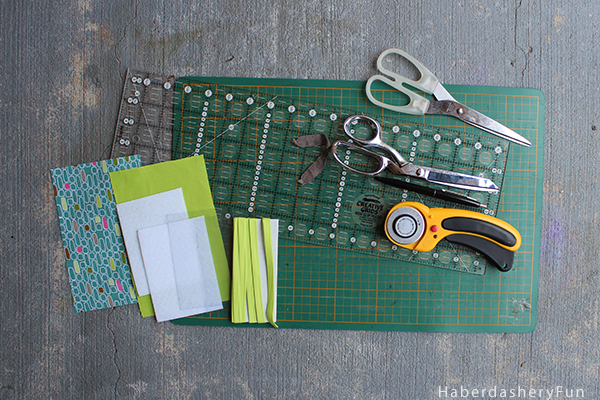
Materials needed:

  1. 2 colors fabric – scraps or fat quarters
  2. 1/4″ double fold bias tape
  3. Pellon Peltex 71F – Single Sided Fusible Stabilizer
  4. Clear vinyl
  5. Disappearing fabric ink pen
  6. Sewing machine and supplies
  7. Pen, paper, ruler and paper scissors
  8. Iron and ironing board
  9. Wonder clips – optional
  10. Fabric glue – optional

This project is pretty easy and you can complete it in a few hours. The only really “hard” part is the bias tape. You might feel like you have two left hands sewing it in place. Don’t fret, I have a few tricks up my sleeve.

Let’s get started:

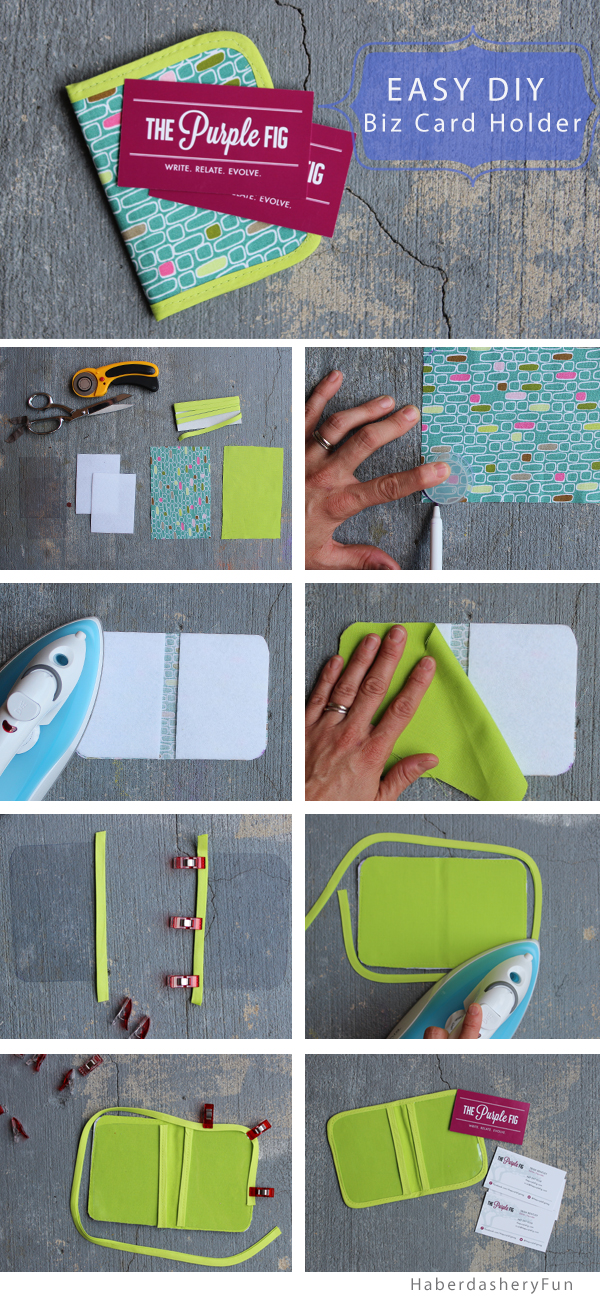
  1. Cut the pattern pieces: Cut 2 rectangles measuring 7″L x 4 1/2″W from your outside and lining fabric. Cut 2 rectangles measuring 3 1/4″ L x 4 1/2″W”  from the Peltex 71F. Cut 2 rectangles measuring 3″L x 4 1/2″W from the vinyl. Wait to cut your bias tape later.
  2. Round the outside corners on all pieces – outside and lining fabric, Peltex 71F  and the clear vinyl pieces.
  3. Place the outside piece onto your work surface, right side down. Lay each piece of Peltex 71F on top and at each end. The fusible is facing down. The should be a space between the Peltex 71F pieces. Press in place with a hot iron.
  4. Place your lining fabric on top, right side facing up. The pieces of Peltex 71F are sandwiched between. Place into sewing machine and baste together around the outside edge.
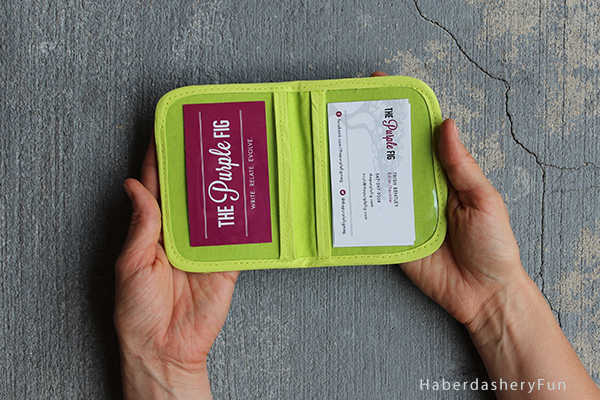
  5. Cut 2 pieces of bias tape measuring 5″ in length.  Place the bias tape along the straight edge of each piece of vinyl. Pin or use wonder clips to hold. Place into sewing machine and stitch the bias tape onto the vinyl. Note: if you are having issues with the bias tape and vinyl, hold onto a long thread tail while you start sewing the bias tape.  Trim down at each end.
  6. Now cut a long piece of bias tape around 24″ in length. Using your iron, turn and press each of the 4 corners into the bias tape.
  7. Sew the bias tape around the outside. I tend to be lazy when I sew with store bought bias tape, I just wrap it around the raw edges and stitch down. For this approach, I like using wonder clips.. Using the wonder clips, secure one end of the bias tape and hold down approximately 6″ of the bias tape. Place into your sewing machine and stitch down. Wrap and continue sewing. Note – if you are having a hard time with your corners and/or sewing the bias tape in general, place a small amount of fabric glue along the entire outside edge of the business card holder. Gently finger press to set in place. Place it back into your sewing machine and stitch in place. Backstitch at the end.
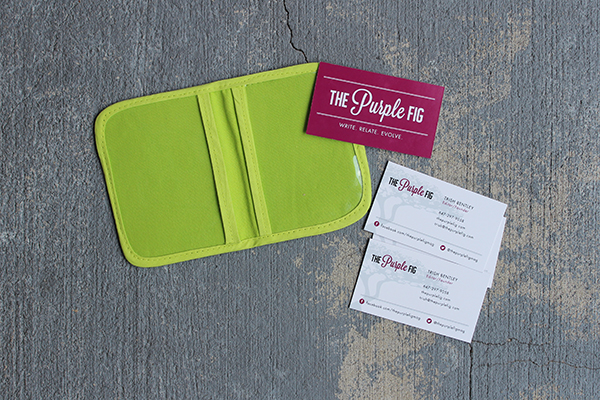
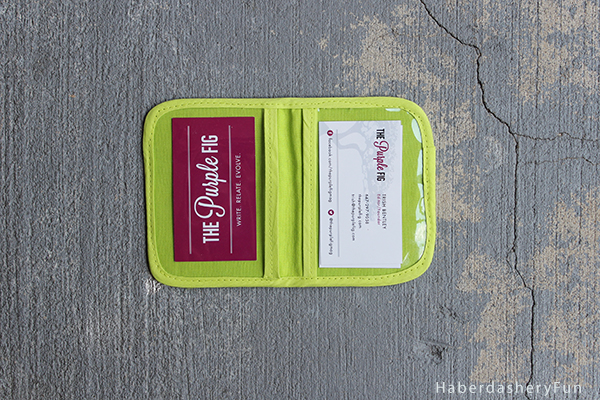
  8. I didn’t fold the bias tape under at the end.. I was too lazy to do it, but really should have. For a more clean finish, turn and fold the bias tape under itself. Backstitch over the top to secure in place.

That’s it. Super easy, right?

Ok, so you don’t want to make a business car holder.. Well, have any international travel coming up? Make a passport holder…  Or how about a photo frame? Just increase my measurements and you are good to go.

Ps.. I’m now on Instagram.. Come on over and say hello. I’m sharing my world of sewing, inspiration, and a bit on my travels.

Happy sewing!

20 Comments

« Inspired By.. Designer Silkie Lloyd
DIY.. Easy Phone Cord Organizer »

Comments

  1. Bernadette says

    05/27/2014 at 7:37 pm

    I just got my business cards for my blog in the mail today and was thinking that I needed a cute business card holder! This one is super cute! I stopped by from the From Dream to Reality link party! 🙂

    Reply
  2. ananda says

    05/29/2014 at 2:03 am

    so cute!! i can see this being an ipad holder somehow! =)

    Reply
    • Haberdashery Fun says

      05/29/2014 at 9:36 pm

      Good idea..You are super crafty… 🙂

      Reply
  3. Chrystal @ YUM eating says

    05/29/2014 at 9:36 am

    Super cute. Now I have an excuse to play on the sewing machine so that my business cards aren’t falling all over in the bottom of my purse!

    Reply
    • Haberdashery Fun says

      05/29/2014 at 9:37 pm

      Thanks! I just stopped by your blog. Love it and your logo too!

      Reply
  4. onel says

    05/30/2014 at 7:49 pm

    You make everything looks so simple 🙂 Thanks again for the tutorial! I could use this for paper tissue pocket!

    Reply
  5. Ann says

    05/31/2014 at 12:42 am

    Awesome. And you couldn’t have found a more fantastic magazine business card to showcase!

    Reply
  6. maria kitching says

    05/31/2014 at 4:29 am

    this is a great little project and very clear step by step.

    Reply
    • Haberdashery Fun says

      06/01/2014 at 7:04 am

      Thank you Maria 🙂

      Reply
  7. Emily says

    05/31/2014 at 10:30 am

    I love this idea!!! its adorable! Featuring this today in the weekend create link inspire features on Nap-Time Creations! I’ve posted on FB, twitter, G+ and tagged you where I could! I would love any reshares ;o) Happy Saturday! Emily

    Reply
    • Haberdashery Fun says

      06/01/2014 at 7:04 am

      Thanks Emily! I hope you are having a great weekend.

      Reply
  8. Afton Warrick says

    06/01/2014 at 3:38 pm

    Thanks for the great tutorial with clear pictures and complete instructions. This would make a great, quick and inexpensive, gift item.

    Reply
    • Haberdashery Fun says

      06/01/2014 at 9:14 pm

      Hi – thank you for stopping by! I appreciate your comment 🙂

      Reply
  9. Amy says

    06/04/2014 at 10:52 pm

    Oh I LOVE THIS!!

    Reply
  10. Phyllis calvert says

    06/09/2014 at 3:12 pm

    How can I copy your pattern without getting all the comments…My computer is on one floor and sewing area on another…..Thanks Phyllis

    Reply
    • Haberdashery Fun says

      06/10/2014 at 7:26 am

      Unfortunately, I don’t have the pattern ready to add to my bog, but I will email you the cutting directions so you can print them off. Let me know if this sounds ok.

      Reply
  11. Haberdashery Fun says

    06/03/2014 at 10:10 am

    Thanks Tori! I appreciate the feature on my business card holder and hope all is well on your end 🙂

    Reply

Trackbacks

  1. Do Tell Tuesday #26 - Lil' Mrs. Tori says:
    06/03/2014 at 12:01 am

    […] Fabric Business Card Holders // Haberdashery Fun- Adorable. I want to make a couple of these to keep in my purses. […]

    Reply
  2. May Round Up | Haberdashery Fun says:
    06/03/2014 at 10:23 am

    […] Easy Business Card Holder – I made this for my good friend Trish. She just redesigned her online magazine The Purple Fig, so i thought it would be fun to make her new business cards a fancy home. […]

    Reply
  3. DIY.. Top 5 Vinyl Sewing Projects | Haberdashery Fun says:
    10/14/2014 at 9:32 am

    […] Business Card Holder […]

    Reply

Leave a Reply Cancel reply

Your email address will not be published. Required fields are marked *

This site uses Akismet to reduce spam. Learn how your comment data is processed.

About me


Hi there - I'm Marni Weaver. A sewer, a sometimes quilter and a lover of fabric design. I started this blog to share my ideas. Come Join the Fun
shop now

Popular Categories

project for baby fabric projects seasonal projects fat quarter projects sewing tips and tricks inspiration

Categories

  • Applique
  • Baby
  • Bags and Pouches
  • Block Printing
  • Color
  • DIY Projects
  • Fabric
  • Fabric Design
  • Fat Quarter Projects
  • Home Decor
  • Inspiration
  • Just for Fun
  • Kids
  • No Sew
  • Patterns
  • Print On Fabric
  • Quilting
  • Scrap Fabric Projects
  • Seasonal
  • Sewing Tips & Tricks

Lovely sponsors

Recent Comments

  • How To Make Hand warmers | Haberdashery Fun on DIY.. Sew Heart Shaped Baby Burp Cloths
  • How To Make Hand warmers | Haberdashery Fun on How To Make Mini Heart Shaped Hand Warmers
  • Make Spooky Monster Inspired Face Cloths | Haberdashery Fun on DIY.. Make Monster Inspired Face Cloths
  • How To Sew A Fabric Bin | Haberdashery Fun on Sew An Easy Fabric Storage Bin
  • Make The Alma Tote In Fun Colors | Haberdashery Fun on New – The Alma Tote Pattern

Projects Elsewhere

find me on Pellon Projects sew mama sew contributor

momtastic contributor

Pinterest

Visit Marni@Haberdashery Fun's profile on Pinterest.

I'm Reading

  • Cluck Cluck Sew
  • Cooking Dangerously
  • In Color Order
  • Jen Hewitt
  • Jolly Jabber
  • Karly Spalding Photography
  • Leigh Laurel Studios
  • Lindsay Sews
  • Lotta Jansdotter
  • Love Patchwork and Quilting Magazine
  • Made
  • Making It Lovely
  • Noodle-Head
  • Polka Dot Chair
  • Sharon Holland Designs
  • Silhouette America Blog
  • Silhouette Design Store
  • The Purl Bee
  • The Purple Fig

Press:

Stitch Winter 2014

haberdashery_fun

Marni Weaver
Carve, stamp, scan — my last block print in digi Carve, stamp, scan — my last block print in digital form..

#surfacepatterndesign #haberdasheryfunpatterns #blockprinting #blockprintingart #versafineink #deepdiveplay #3dottedpenguins #surfacepatterndesigner
Working through my deeply committed relationship w Working through my deeply committed relationship with single-color prints and playing with color. 

#surfacepatterndesign #haberdasheryfunpatterns #blockprinting #blockprintingart #versafineink #deepdiveplay #3dottedpenguins
Instagram said I have to start making reels. So he Instagram said I have to start making reels. So here I am mildly uncomfortable, half heartedly participating. The “Next Best Chapter” is playing in the background, because apparently this is it.

#surfacepatterndesign #haberdasheryfun #blockprintingtechnique #blockprintinglove #versafineclair #pfeil
I’m embracing the crazy today. Including the col I’m embracing the crazy today. Including the colors and imperfections in this print.😂

#3dottedpenguinscommunity #haberdasheryfun #blockprintingtechnique #blockprintinglove #versafineclair #pfeil
Joined Ali's @3dottedpenguinscommunity “Play” Joined Ali's @3dottedpenguinscommunity “Play” year-long community. It’s been fun and tough pushing myself out of my comfort zone. I've started by exploring florals, plus experimenting with my style and color palette.

#3dottedpenguinscommunity #haberdasheryfun #blockprintingtechnique #blockprintinglove #versafineclair #pfeil
Follow on Instagram

Copyright © 2025 · Klar theme by Crimson Pear :: web & surface design

Copyright © 2025 · Klar on Genesis Framework · WordPress · Log in