Haberdashery Fun

  • Home
  • About
    • Look Book
  • Contact
    • Collaborate?
  • Tutorials
  • Shop
  • Freebie
  • Block Printing Course
    • Email
    • Facebook
    • Instagram
    • Pinterest

Keep up to date with the latest posts!

Sew Storage Bins With Piping Trim

in DIY Projects, Fat Quarter Projects on 28/10/14

If you’ve been hanging around for awhile you can see that I have a thing for storage bins. Well, I think what I really have is a thing about clutter.

Fabric bins with piping trim

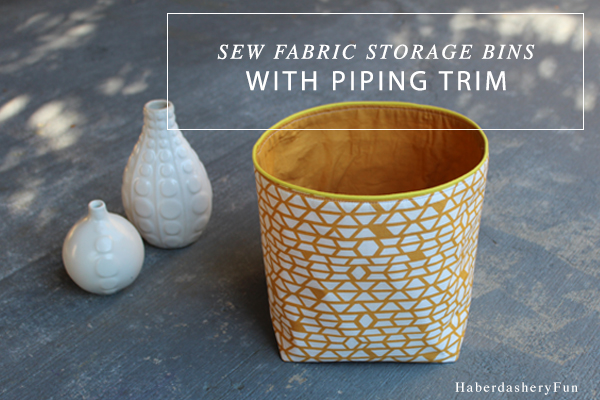
I’ve posted a few tutorials on storage bins, and I plan to keep posting until the clutter is gone! Lol. Not going to happen. What really happens is that I get all wonky and excited about adding trim to something and then it becomes another tutorial.. On this bin, I wanted to add a contrast or subtle pop to the top edge.  Piping was perfect to use!

Main Bin bottom close up copy

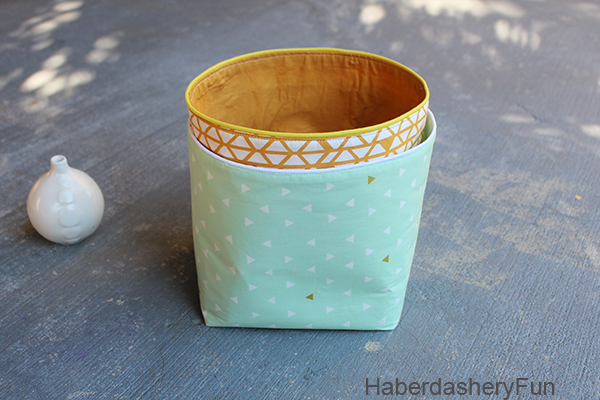
Wouldn’t these bins be perfect in your home office? How about the new nursery?

This is a perfect fat quarter project.. You will need 2 fat quarters, so make sure to select FUN prints and colors. Then all you need to do is trim each fat quarter down a little, fold in half and you are almost done.. Really it’s that simple.

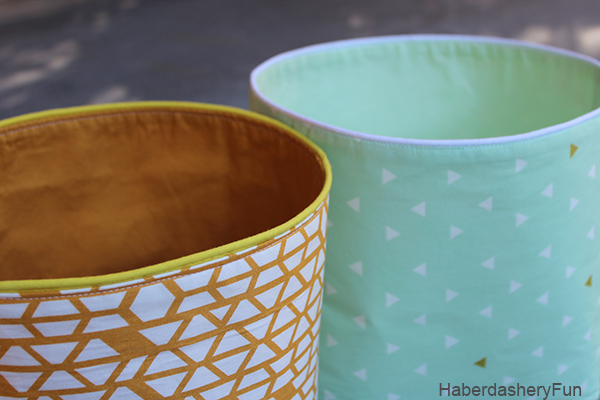
I love the mixing and matching options with a fat quarter bundle.  I have had April Rhode’s “Arizona” collection fat quarter bundle from the Fat Quarter Shop in my stash begging to be used… Perfect – One bin with color pop and the other with a soft subtle trim.

Materials:

  1. Fabric in 2 colors – 1/2 yard each
  2. Interfacing for outside – Pellon 809 Decor-Bond 
  3. Interfacing for the lining – Pellon SF101 Shape-Flex
  4. Piping – contrast color
  5. Disappearing fabric ink pen
  6. Sewing materials
  7. Piping Foot
  8. Rotary cutter, cutting mat and ruler
  9. Iron and ironing board

Before we get started you need to do the following:

  1. Cut your bin fabric – cut 2 rectangles measuring 22″ L x 14 1/2″W.
  2. Cut your interfacing – cut 1 rectangle in the same dimensions as above in the SF101 Shape-Flex and another in the 809 Decor-Bond.
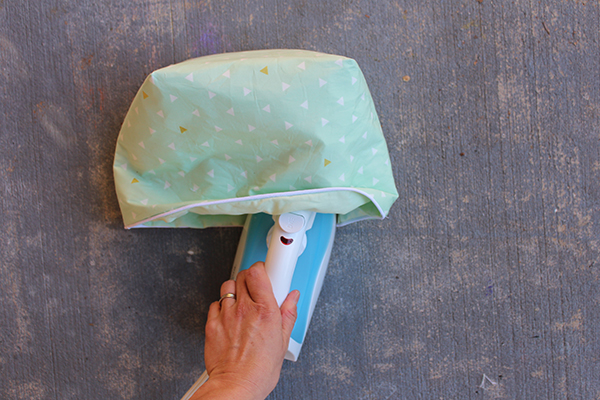
  3. Iron the interfacing to the fabric – Iron the 809 Decor-Bond to the outer fabric and iron the SF101 Shape-Flex to the lining.

A couple things to consider:

  • If you are using fat quarters, you might need to trim the ends a bit. If you are making a few bins, this may make them slightly different in size.. As mine ended up being.
  • You need to really fuse the Decor-Bond to your fabric [backside..]. Test a small piece before going full tilt on your main fabric. Also, as you work with the fabric, it tends to gets wrinkly. Just tell yourself that this gives your bins a little more character.
  • Want more bin tutorials? Click here for a larger size and here for a bin with handles

Alright now that we have the boring stuff covered, let’s get sewing:

Step1: Lay the rectangles onto your work surface. Fold one of the rectangles in half, it should measure 11″L x 14 1/2″W Pin. Place into sewing machine and stitch together with a 1/4″ seam allowance. Press seams closed and then open and press again. Repeat for the other rectangle. NOTE – this step is not shown.

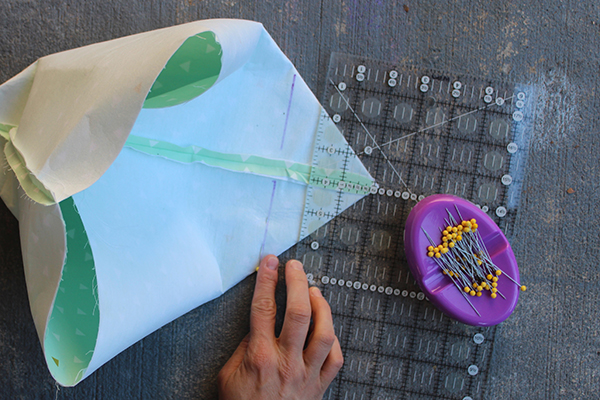
Step2: Create your boxed corners – Check out my boxed corner tutorial here. It breaks down the process into very easy steps. on the 45 degree angle, measure inwards 3″. Mark with a disappearing fabric ink pen. Place into sewing machine and stitch following the line.  Repeat for the other 3 sides.

Step3: Cut the tip off, leaving about 1/4″ –  1/2″/

Step 4: Turn the outside bin to be right side facing in. You will be sewing the piping onto the outside bin top edge.

Step 5: Cut your piping – it should be the circumference around the top edges, plus approx 2″. Start at a side seam and pin in place, over lap the side seam 1″ Note that the raw edges face each other/piping faces into the bin.

Step 6: Pin the piping around the top edge.

Step 7: There are a few ways to finish the ends of the piping. One these bins, I inserted one end of the piping into the other end. It gives it a super clean finish. If that scares you, you can just lay the piping on top of each other, criss cross and have the raw ends run into the seam allowance.

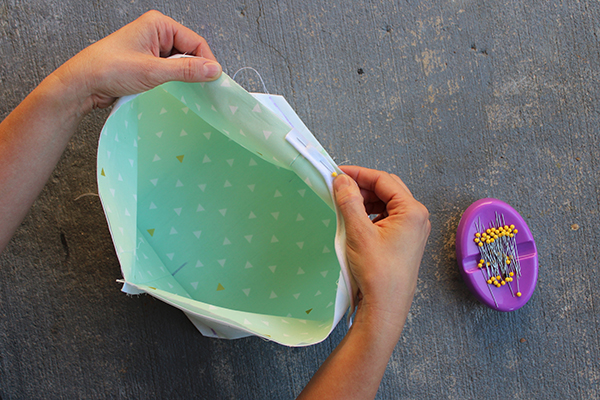
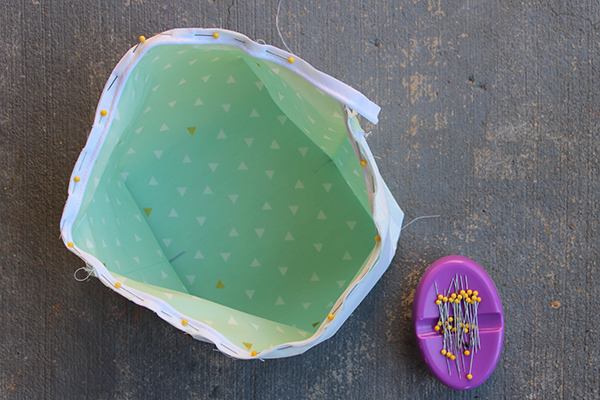
Step 8: Turn the lining bin to be right side facing in and the outside to be right side facing out. Place the lining into the outside bin. Pin along the top edge. Place into your sewing machine and stitch together. Remember to leave a 3″ – 4″ opening. Press.

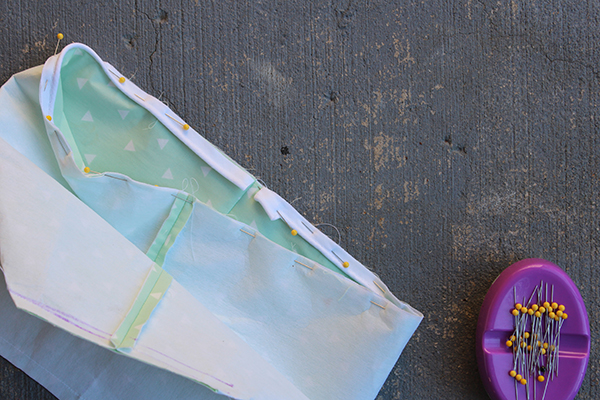
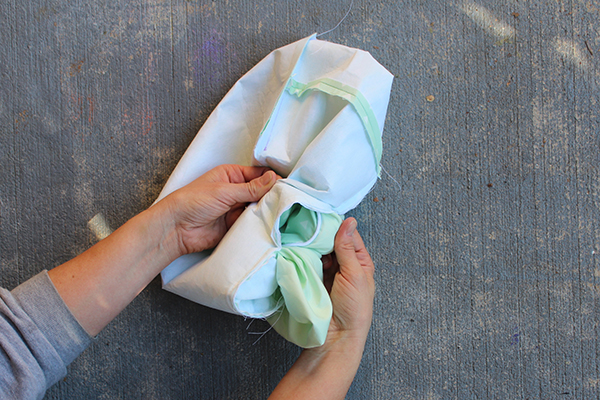
Step 9: Pull the bins right side out through the opening. Press.

Step 10: Turn under the opening seam allowance. Press. Pin. Place into your sewing machine and topstitch around the outside edge.

Fabric bins with piping

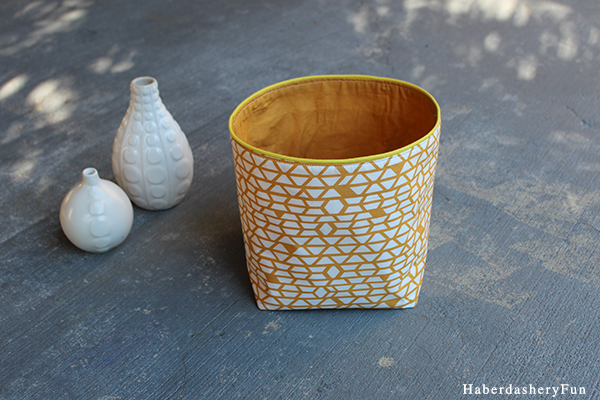
Want to know what fabric I used? Check out Art Gallery Fabrics – the collection is called Arizona from April Rhodes – the mustard yellow print is called “Canyon Wall” and the mint is called “Triangle Tokens”.

This post was brought to you in collaboration with The Fat Quarter Shop. They provided me with the fabric to create this post. I appreciate the support that allows me to create new and unique content for my blog. That’s it for today. Happy Sewing.

32 Comments

« WIP.. What’s In Store Showcase
October Round Up »

Comments

  1. Ann says

    10/28/2014 at 11:28 pm

    You are officially not invited to my house if you should ever be in the neighbourhood. I don’t have nearly enough storage and what I do have is not nearly as cute as yours!

    Reply
  2. Amy W says

    10/29/2014 at 12:38 am

    You are so talented. Seriously. Start selling these, I will buy them!! =)

    Reply
  3. Anne says

    10/29/2014 at 9:57 am

    Looking around my house I see how badly I need to organize! It would probably take an army of these baskets!
    I’ve got a Craft Gossip post scheduled for this morning that links to your tutorial:
    http://sewing.craftgossip.com/tutorial-fabric-storage-bins-with-piping/2014/10/29/
    –Anne

    Reply
  4. Domestic cleaning Richmond says

    10/29/2014 at 11:20 am

    Great diy storage bins. I love them. Have to try it when I have more free time.

    Reply
  5. Kelly says

    11/03/2014 at 12:34 am

    I am so excited to see this tutorial! This is right up my alley–and just what I need to get more of my stuff organized! Thanks, and pinning!

    Reply
    • Haberdashery Fun says

      11/03/2014 at 9:58 am

      Hi Kelly,

      Thanks for the comment. I’m glad you plan to make one. If you do, please make sure to upload your images to the HaberdasherFun Flickr page.. Would love ton see what you make.

      Reply
  6. Yasmina/Mina and Her Blog says

    11/03/2014 at 7:39 am

    GASPING! You my lady is genius!! I love love the yellow bin and then I saw the mint one, fell in love too! I neeed to try this!
    I was hoping you had more instruction (scrolling down you did!) Thank you!

    Reply
    • Haberdashery Fun says

      11/03/2014 at 9:59 am

      Hi Yasmina. Thanks for the moment. You made my day. If you make a bin, please come back and be sure to upload your images to the HaberdasherFun Flickr page.. Would love ton see what you make. 🙂 Have a great day.

      Reply
  7. Ntina says

    11/03/2014 at 12:00 pm

    these look so cute! I would totally put them in the nursery! I’m stopping by from Bewitchin’ Projects Block Party

    Reply
  8. Jenna @ A Savory Feast says

    11/03/2014 at 6:14 pm

    These are too cute, and they seem pretty easy to make, too. I have a bit of an obsession with storage bins, especially when they are made with adorable fabric like these.

    Reply
  9. Katie Goldsworthy says

    11/04/2014 at 6:35 pm

    These are awesome! Sharing on FB! Thanks for linking it up at Monday Funday!

    Reply
  10. Emily @ Two Purple Couches says

    11/04/2014 at 9:48 pm

    These are fabulous! I’d never think about making storage bins from fabric! Pinning for later 😉

    Reply
    • Haberdashery Fun says

      11/05/2014 at 7:34 pm

      Thanks Emily. You’ll have lots of fun making these :). Have a great night.

      Reply
  11. Nici says

    11/07/2014 at 3:53 pm

    Oh my goodness! These little storage bins are darling! I love the fabric you chose. Thanks for sharing at my Creative Ways Link Party!
    Blessings,
    Nici

    Reply
  12. Kyla @HouseOfHipsters says

    11/11/2014 at 4:34 pm

    I LOVE THESE! Thanks for sharing! Also wanted to let you know about a new linky party starting this Saturday at 8pm called “Found & Foraged” Can’t wait to party with you at http://www.houseofhipsters.com

    Reply
  13. Jann from Newton Custom Interiors says

    12/31/2014 at 8:44 am

    These bins are adorable! Love your fabric choices, and the great tutorial. Just my kind of sewing project!

    Reply
  14. Nancy in IN says

    12/31/2014 at 9:43 am

    Like.
    Why does it say fat quarter friendly and then days you need one yard of two different fabrics?
    I know it is according to size but it is confusing to me and would be to a beginning sewer.

    Reply
    • Haberdashery Fun says

      01/01/2015 at 11:20 am

      Hi Nancy,

      Thanks for the comment. You are right it is confusing… The pattern fits on 1 fat quarter, but you would need 2 fat quarters/same color for the outside and 2 fat quarters for the lining/same color… I’m going to adjust the post slightly for this info. Hope this helps and thanks for stopping by and letting me know – Marni

      Reply
  15. Steph says

    06/27/2015 at 12:20 am

    Why do you need to use 2 different types of pellon?

    Reply
    • Haberdashery Fun says

      06/27/2015 at 11:22 am

      Hi Steph,

      It isn’t necessary for both, but the 809 Decor Bond makes the fabric quite stiff, is great for the outside and holding the bin up.. The Shape Flex gives the lining portion just a little structure, but doesn’t make it too stiff.. You could test first – Try fusing a a small square piece of the interfacing to a small portion of your fabric and you can feel the difference.

      Let me know how it goes – Marni

      Reply
  16. SALLY ONG says

    07/02/2015 at 10:29 pm

    I wonder how to make the fabric basket sturdy? Please advise. Thank you.

    Reply
    • Haberdashery Fun says

      07/03/2015 at 11:46 am

      There are a few options you can take – Decor bon 809 makes fabric bins sturdy. You can also use fusible batting. Check out these tutorials:
      Reversible Storage Bin – https://haberdasheryfun.com/fabric/diy-reversible-fabric-storage-bin
      Storage Bin W/ Handles – https://haberdasheryfun.com/fabric/diy-fabric-bin-with-handles

      Let me know how it goes – Marni

      Reply
  17. Lisa says

    08/23/2015 at 11:58 pm

    And here I was going to buy trashcans for my bedroom, living room and desk area. I have a chest of drawers full of fabric and interfacing that could whip these up in a day. Thanks for the tutorial!

    Reply
  18. Judy S. says

    09/18/2016 at 1:46 pm

    Cute bins …love the fabric. What is the size of the finished bin? I know the sides are flexible but approximate measurements, including the measurements of the bottom, would be helpful.

    Reply
    • Haberdashery Fun says

      09/19/2016 at 12:14 am

      Hi Judy. The bins with piping measure 6 3/4″l x 6 3/4″w x 7″h
      Marni

      Reply

Trackbacks

  1. CraftCrave | DigiFree | CraftCrave says:
    10/28/2014 at 8:21 pm

    […] DIY.. Storage Bins With Piping – 1 freebie(s)? […]

    Reply
  2. Tutorial: Fabric storage bins with piping – Sewing says:
    10/29/2014 at 10:47 am

    […] DIY.. Storage Bins with Piping, by Haberdashery Fun […]

    Reply
  3. October Round Up | Haberdashery Fun says:
    10/30/2014 at 3:29 pm

    […] […]

    Reply
  4. Frugal Crafty Home Blog Hop #101 says:
    11/09/2014 at 9:00 pm

    […] DIY Fabric Bins With Piping […]

    Reply
  5. Do Tell Tuesday No. 49 - Little Red WindowLittle Red Window says:
    11/10/2014 at 10:01 pm

    […] DIY Storage Bins with Piping from Haberdashery Fun […]

    Reply
  6. 15 Purses, Bags and Totes You Can Sew! - The Crafty Blog Stalker says:
    01/17/2015 at 6:52 pm

    […] you use some cute Fabric Bins in your house? I’m thinking one of these would be great by the stairs to collect items that […]

    Reply
  7. Spring Sewing Projects Galore! - Cathey's Sewing Vacuum says:
    03/27/2019 at 3:02 pm

    […] Bins from Haberdashery Fun: Patterned bins are useful in a myriad of spaces — offices, nurseries, bedrooms, and entryways […]

    Reply

Leave a Reply Cancel reply

Your email address will not be published. Required fields are marked *

This site uses Akismet to reduce spam. Learn how your comment data is processed.

About me


Hi there - I'm Marni Weaver. A sewer, a sometimes quilter and a lover of fabric design. I started this blog to share my ideas. Come Join the Fun
shop now

Popular Categories

project for baby fabric projects seasonal projects fat quarter projects sewing tips and tricks inspiration

Categories

  • Applique
  • Baby
  • Bags and Pouches
  • Block Printing
  • Color
  • DIY Projects
  • Fabric
  • Fabric Design
  • Fat Quarter Projects
  • Home Decor
  • Inspiration
  • Just for Fun
  • Kids
  • No Sew
  • Patterns
  • Print On Fabric
  • Quilting
  • Scrap Fabric Projects
  • Seasonal
  • Sewing Tips & Tricks

Lovely sponsors

Recent Comments

  • Easy Little Kid Sewing Project | Haberdashery Fun on DIY.. Make Monster Inspired Face Cloths
  • Easy Little Kid Sewing Project | Haberdashery Fun on DIY.. Easy Toddler Apron
  • HaberdasheryFun and an easy Kraft-tex sewing project | Haberdashery Fun on Collapsible Kraft-Tex Bowl
  • HaberdasheryFun and an easy Kraft-tex sewing project | Haberdashery Fun on Sewing With Kraft-Tex
  • 3 Simple Summer Sewing Tutorials | Haberdashery Fun on Sew A Canvas Zipper Pouch

Projects Elsewhere

find me on Pellon Projects sew mama sew contributor

momtastic contributor

Pinterest

Visit Marni@Haberdashery Fun's profile on Pinterest.
Follow on Bloglovin

I'm Reading

  • Cluck Cluck Sew
  • Cooking Dangerously
  • In Color Order
  • Jen Hewitt
  • Jolly Jabber
  • Karly Spalding Photography
  • Leigh Laurel Studios
  • Lindsay Sews
  • Lotta Jansdotter
  • Love Patchwork and Quilting Magazine
  • Made
  • Making It Lovely
  • Noodle-Head
  • Polka Dot Chair
  • Sharon Holland Designs
  • Silhouette America Blog
  • Silhouette Design Store
  • The Purl Bee
  • The Purple Fig

Press:

Stitch Winter 2014

haberdashery_fun

Marni Weaver
Block and paper print from Saturday’s workshop. Block and paper print from Saturday’s workshop. This was a fun workshop to lead. Such an awesome group with great questions and engagement. Many new friends to follow here on IG❤️

Thank you to everyone who signed up or attended a workshop this Spring. 

I love teaching about simple shapes. It really is eye opening when you start deconstructing a repeat pattern into super simple shapes!

My block printing made easy online class starts today with module 1 out now. It will be offered again this August. More workshops and details to come. 

#haberdasheryfun #blockprintingmadeeasy #simpleshapes #surfacepattern #surfacepatterndesign #memademay2023 #100dayproject #100dayproject2023 #easycarve #haberdasheryfunclasses
One more, one more.. I had so much fun, I’m offe One more, one more.. I had so much fun, I’m offering one more workshop for the spring season.

This Saturday, May 20th @ 10am est. Come join the fun!

I love teaching the basics to block printing using simple shapes. Feel like you can’t draw? thats ok, I have a guided worksheet that we use. 

If you cant make the workshop and want a deep dive into block printing, my online course starts this Monday, May 22. It’s a 3 week adventure with self paced video modules, worksheets and Saturday Live Q&As

Link in profile has details for the free workshop and my course.

#haberdasheryfun #blockprintingmadeeasy #simpleshapes #memademay2023 #blockprintingsimpleshapes #surfacepatterndesign #100dayproject #100dayproject2023 #memademay #konacotton #konacottonsolids
Sharing a few simple blocks from the last few week Sharing a few simple blocks from the last few weeks of workshops. I had a blast teaching these workshops. So I am now considering adding one more workshop this week. Should it be daytime or in the evening? I would love to hear your thoughts.

TBD on date and time, will share more details here and a sign up page in the next few days.

#blockprinting #blockprintingmadeeasy #haberdasheryfun #haberdasheryfunpatterns #surfacepatterndesign #memdemay2023 #100dayproject2023 #100dayptoject #haberdasheryfunclasses #printwithspeedball
What a fun workshop yesterday. Thanks to all who j What a fun workshop yesterday. Thanks to all who joined and gave their  time and energy. We had participants from South Africa to Austria to Canada and here in the US. I love it b/c I am from Alberta Canada and live in Atlanta.

My workshops are only an hour and we have alot to accomplish.. but I love hearing where are from and what they are up to! 

We even had a brief appearance from the cutest 11mos old ❤️🎉 

I played with the same shape the last 3 workshops and had fun seeing what could be made with the half moon shape. Now what yo do next?? Sew something or have fun with them in illustrator 

#haberdasheryfun #haberdasheryfunpatterns #onlineclasses #blockprintingmadeeasy #memademay2023 #100dayproject #100dayproject2023 #surfacepatterndesign #blockprintedfabric #konacotton #konacottonsolids
I’m hosting one last workshop this week. Come jo I’m hosting one last workshop this week. Come join in for some fun creating block prints with simple shapes. 

Can’t draw? Don’t feel inspired or imaginative?? That’s ok. I promise block printing can be fun and easy.

Sign up details in the link in my profile. See you Wednesday ❤️

#haberdasheryfun #blockprintingmadeeasy #haberdasheryfunpatterns #zoomclasses #surfacepatterndesign #memademay2023 #100dayproject #blockprinting #fabricdesign #fabricdesigner #blockprinted
Follow on Instagram

Copyright © 2023 · Klar theme by Crimson Pear :: web & surface design

Copyright © 2023 · Klar on Genesis Framework · WordPress · Log in