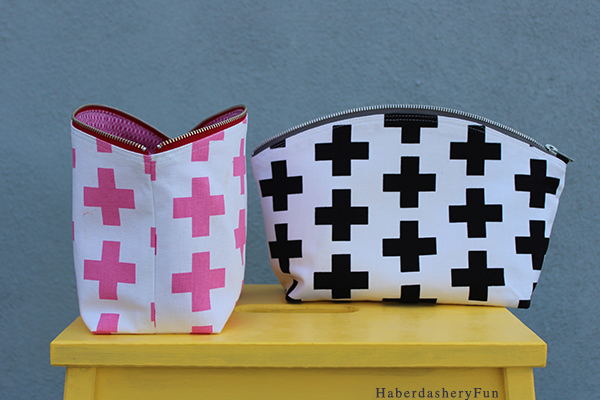
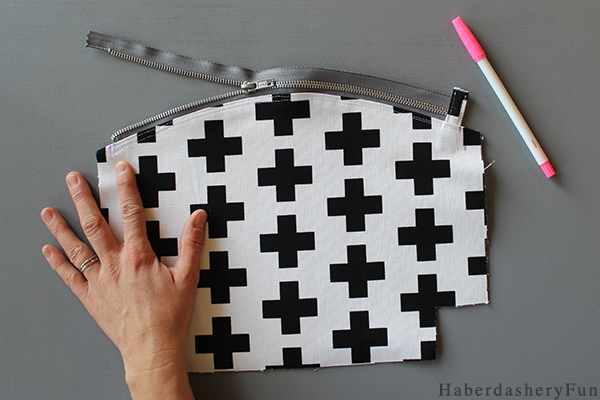
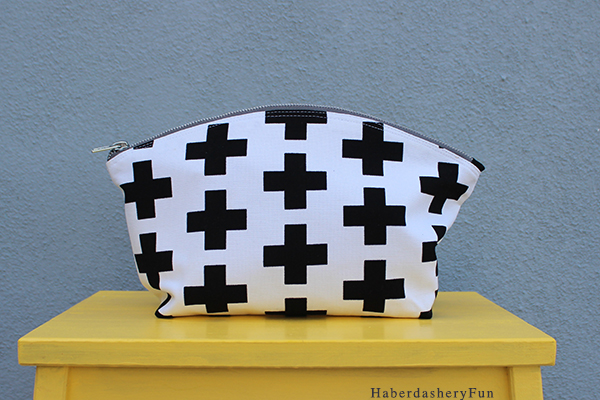
I’ve been staring at my Geo Pop canvas fabric for months. I love CANVAS fabric and the the bold, modern prints designed by Emmie K and from Robert Kaufman Fabrics are right up my alley. The fabric has been sitting under my monitor and I’ve had a gazillion ideas on what I should sew. I finally decided to make a versatile clutch / make-up pouch.
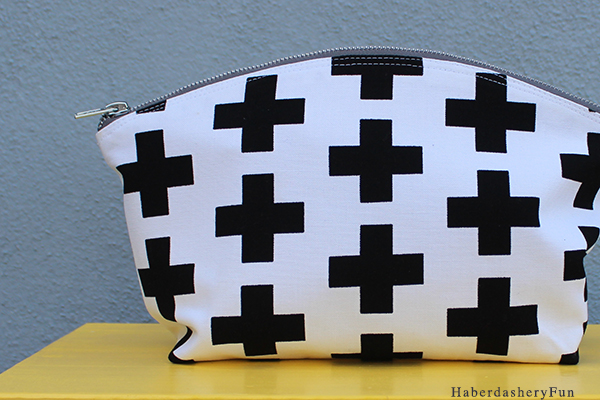
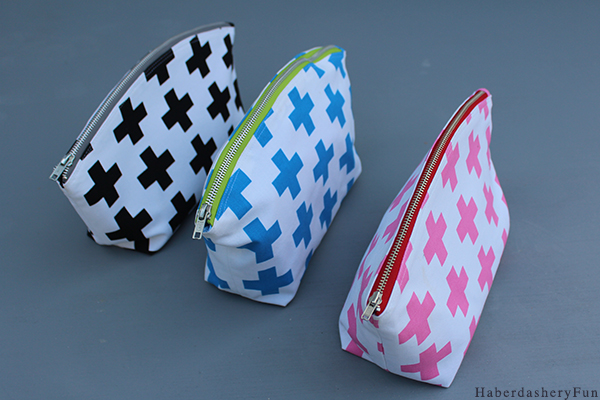
The details are in the fabric.. This is a pretty basic clutch, but the fabric and a contrast zipper make it pop. Plus, I really love the curve along the top edge!
The pattern is now available for purchase in my online store.
Materials:
- Canvas fabric for exterior
- Cotton fabric for lining
- Interfacing – try Pellon SF101
- 12″ or 14″ metal zipper – try Ziptit on Etsy. They have a great selection of affordable metal zippers.
- Disappearing fabric pen
- Pressing ham – optional
- Sewing machine and supplies
- Iron and ironing board
- Paper and pen for template
A couple things to consider before we get started:
- The top curve of the pouch is is a little tricky, so the zipper will be sewn in a little differently than my other zipper tutorials.
- Metal zippers can be difficult to work with. I suggest lengthening the stitch length and then sewing slowly.
- Create a hard paper template for ironing the top curve. To make the template, print 2 paper patterns and tape along the CF. Follow along the curve in the steps below.
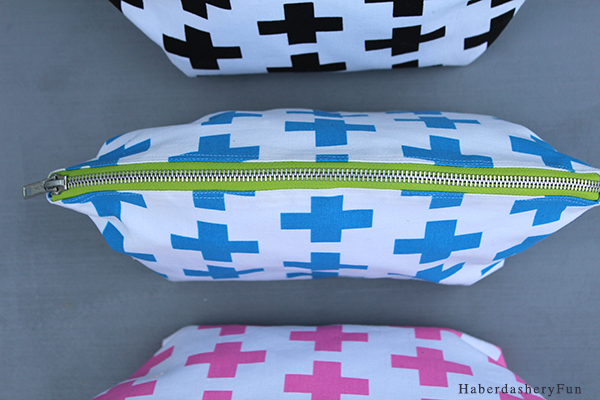
- This pouch has a tab at only one end I love this feature, as it makes for a really wide pouch opening.

Cut your pieces:
- Outside – Fuse the SF101 Interfacing to the wrong side of the cotton canvas. Cut 2 pieces.
- Lining – Cut 2 pieces. Note – if you want an extra sturdy pouch, fuse interfacing to the wrong side of the lining as well.
- Zipper tab – Cut 1 rectangle measuring 3″L x 2″W.

Let’s go:
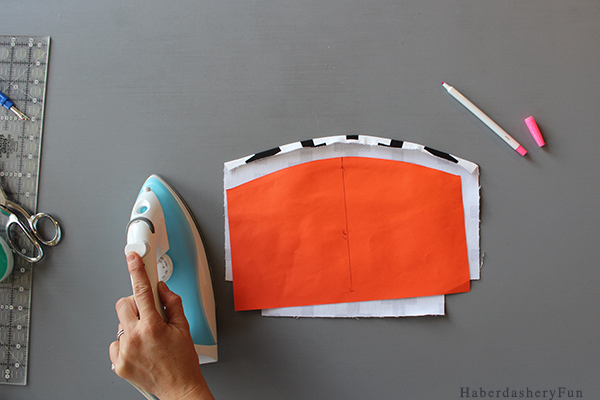
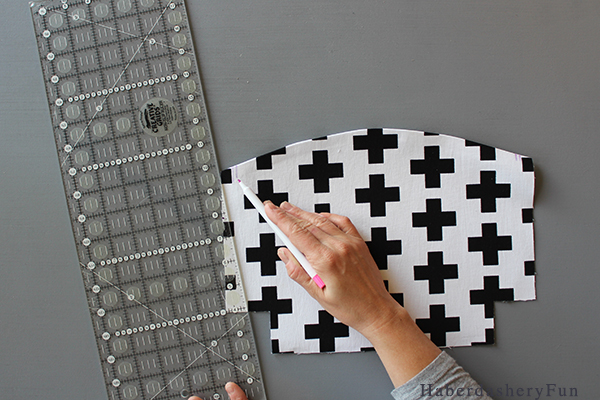
Step 1 – Use your ruler, disappearing fabric ink pen and template and mark a dashed line along the top curve 1/2″ from the top edge. Turn and fold the top edge under 1/2″ / fold under at the dashed line. Press. The template helps make sure that the top edge and side seams are even and match. Lay the 2 pieces on top of each other and make sure everything matches, especially where they meet at side seams. Re-press and adjust if needed. Repeat for the lining pieces.
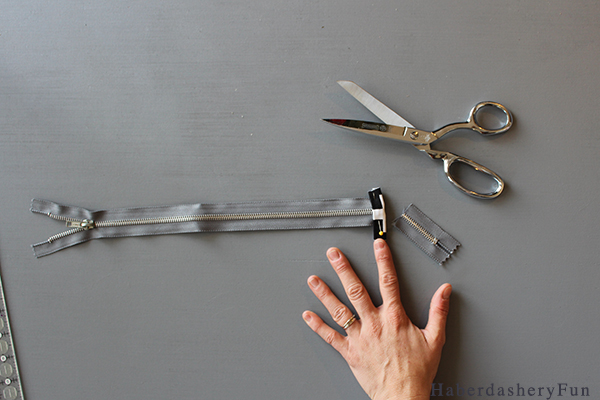
Step 2 – Prepare the zipper – Cut the zipper to measure 12 1/4″. Cut the bottom portion off, as you will add a tab to cover the bottom zipper stop. Fold the zipper tab rectangle in half along the center, fold each end inwards to meet at the center fold. Press with an iron. Insert the zipper tab over the raw edge of the zipper end. Lengthen the stitch length on your machine. Place into your sewing machine and stitch the zipper down. Sew very slowly over the teeth or you can break a needle. Set zipper aside.
Step 3 – On the outside pouch piece, measure inwards 1/2″ from the top edge/side seam and make a mark. Measure inwards another 1/8″ and make another mark. Repeat for the other side.
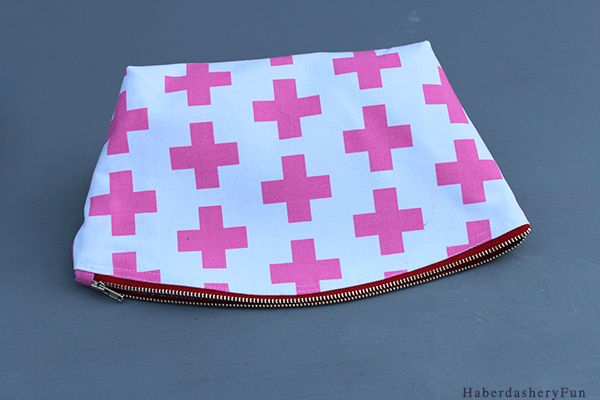
Step 4 – Start at the top of the zipper. Place the top metal stop at the 5/8″ mark and pin the zipper in place along the top edge. The zipper tab should end at the other 5/8″ mark. Turn and fold under the zipper tape at the top stop. Pin the zipper tape in place.

Step 5 – Place into your sewing aching and topstitch the zipper down with a 1/4″ seam allowance. Start stitching at the 1/2″ pen mark and stop at the other side- 1/2″ pen mark. Repeat for the other piece. Note – You do not need change to your zipper foot. Press. Use your pressing ham and press the zipper curve in place. The sewing ham helps set a nice, smooth curve.
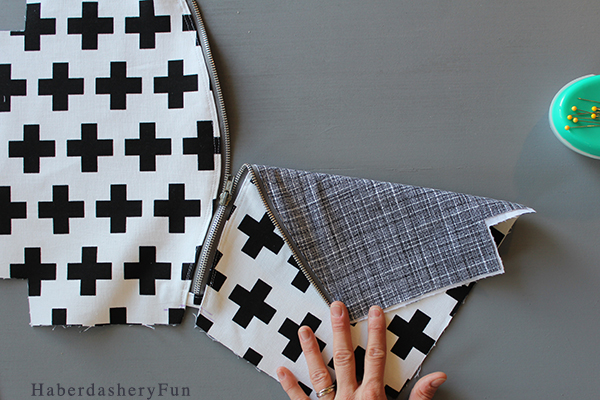
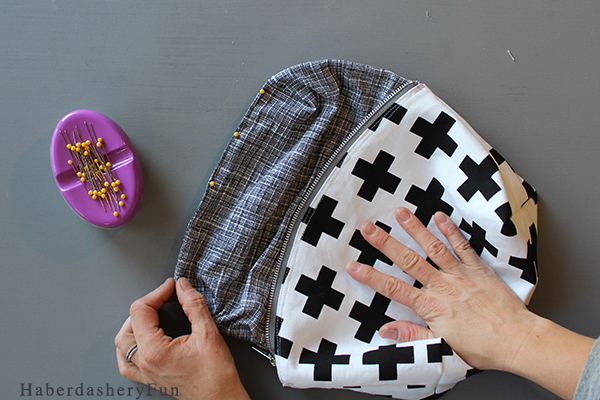
Step 6 – Repeat and now sew both lining pieces into the pouch. Place the lining piece, wrong sides facing on the back of the pouch piece. Pin along the top edge. Place into your sewing machine and edgestitch in place with a scant 1/8″ seam allowance. You want to catch both the outside and lining fabric with this seam.
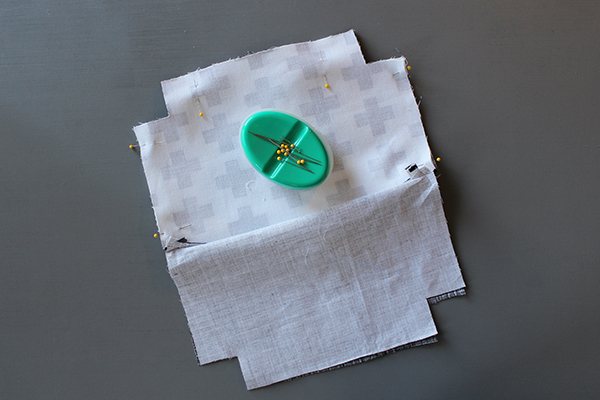
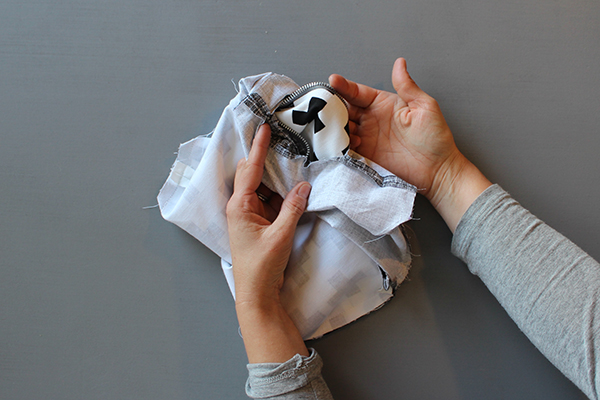
Step 7 – Sew the pouch together – Open your zipper and fold in half. Fold along the zipper and also fold the zipper tab in half. Place outside pieces right side together and lining pieces right side together. Pin along the outside edge. Place into your sewing machine and first stitch the outside side seams and bottom seam together. Use a 1/2″ seam allowance. Repeat and stitch the lining side seams and bottom seam together with a 1/2″ seam allowance. Leave a small 2″ – 3″ opening along the bottom lining seam. Press.
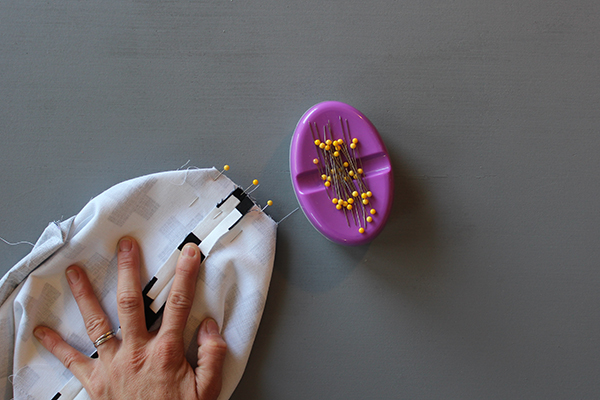
Step 8 – Create the corners – For one corner, twist the side seam and bottom seam to lay on top of each other. Finger press to lay flat and match at the seams. Open seam allowance. Pin. Place into your sewing machine and stitch together with a 1/2″ seam allowance. Repeat for all corners.
Step 9 – Turn right side out through the lining opening. Press all seams.
Step 10 – Pin the opening at the bottom seam. Place into your sewing machine and sew opening closed.
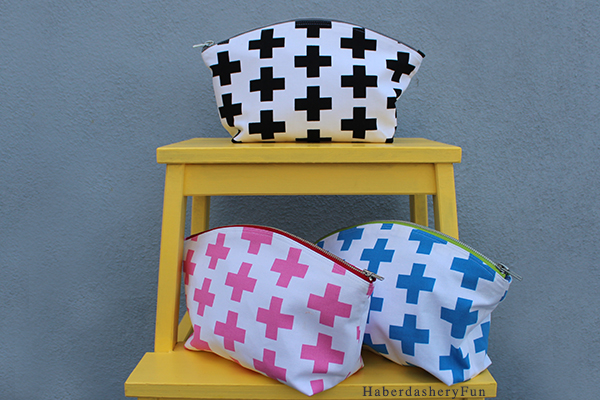
Thats it! Fun right? Emmie K and Robert Kaufman just launched Geo Pop Canvas 2.. so many modern canvas options now.
Thank you for your support and patience. The pattern is now available in my shop. Please let me know if you plan to sew a curvy zipper pouch. I love hearing from you all and look forward to seeing your finished projects.
Happy Sewing – Marni


Many thanks for this tutorial, I’m french and I think it’s very well explained ! And with all these fotos, it’s very easy to understand !
Please, Can you send a mail when the pattern is ready ?
Best regards from Paris!
Elisabeth
Enjoyed the tutorial. Please email me the pattern when it is ready.
Really cute! Please email me once pattern is ready. Thanks!
Hi Marni, I absolutely love this curvy Zip Clutch, and would really love to get the pattern, when it’s ready. Please send it to me at the above e-mail address. Thanks!
Therese Fryksdale
I love this curved zipper clutch! I have some laminated fabric that I’ve been wanting to use for a makeup bag just couldn’t find the right pattern. This is it! Please email me when you have the pattern ready.
Thanks so much!!
Hi Cecilia – I’ve thought laminated fabric would be great for this as well!! I’ll let you know when it’s up. Have a great day and weekend. – Marni
Can’t wait for the pattern
Love love the bags. Please email when pattern is available.
I’m looking for my first project to try with laminated fabric too! This is it 🙂 I’d love to try this pattern when it’s available – thanks for emailing me then!
Love this shape! Great use of fabric too.
This is really neat! Can’t wait to get the pattern. 🙂
Cute pouch, I’d love the pattern please!
Thank you for a great tutorial. I would like the pattern template when it is ready – thanks again.
They look lovely. I think my daughters would love these. Please email the pattern to me when available.
Please notify me when your pattern is ready-looks great!
Great tutorial- may I please the pattern?
Thanks
Cette pochette est vraiment très jolie. merci pour le partage. Amicalement
I’d like to make on of these bags. You did an amazing job!
Can’t wait to try your pattern. Thanks.
Thanks for the tutorial. I have wondered how to do this.
Please send me an email when the pattern is available.
Thanks again ….. /L
Thank you for a well written tutorial. I would love to have the pattern when it is available.
These look really good. Hope they’re not too difficult. Would love the pattern when available. Thanks.
I was looking for a tutorial to make some zipped pouches for Christmas. Yours looks really good and well written, I will be giving it a go. Thanks
Hi,
I just wondered if this pattern is ready yet?? Would love to make it for a christmas present 🙂
Thanks!
xx
Hi Louisa, Thanks for checking in. I’m so sorry for the delay.. I hope to get up asap.. Most likely early next week which is cutting it close. At least you can get buy more fabric 🙂 and get your supplies ready – Marni
Love this!!
Can you email please!
Hi Gill – for sure.. Will let you know. I hope to have up real soon. – Marni
These are adorable. Would love the pattern when it’s available! Thanks so much!
Thanx for the tut! Would love to have your pattern. I will show off here in Holland 😉
Lin
So cute! Would love the pattern also, would make some cute Christmas presents 🙂
I love your clutch! So cute! Thanks for sharing your crafty inspiration on this week’s Monday Funday Party!
Thanks Pauline! Have a great weekend. – Marni
In love with this. Good explanation of all construction steps. Can’t wait for the pattern.
This is so cute! I like your tutorial (and how you showed putting the zipper in before sewing the purse together, seems like it’s always last and a struggle).
Thanks for sharing on Monday Funday!
Holly @ Creatively Living
Thank you for these clear instructions! Looking forward to receiving the pattern!
I love all your tutorials and creations- this one is no different! I’d love the pattern when it’s available!
Super cute! I love how wide they are when they open. Pinning!!! Thanks!
Très jolie pochette.
Looking forward to receive the pattern.
Thank you.
I’d love the pattern to the curvy top clutch.
I’d love the pattern for curvy top clutch
Like Elizabeth, I am french and your tutoriel is very well explain and easy to understand.
Could you send me the pattern, il you please, when it will be ready?
Thanks very much.
I looked after the pattern… it’s not here… and I saw your proposition… so… I’d like it please !!!
Your pouch will be done here in France for my daughters and I !!!
Tks !
Love this, please could you email the pattern. Do you think it would work with oilcloth with the curve? X
hi,
lovely pouch. I would also love to get the pattern.
Great looking pouch! I would love to try and sew it. Yes, please email me when you have the pattern done. Thanks!
Great tutorial. Would love a copy of the pattern.
Bonsoir , j’aimerais recevoir ce modèle de trousse , s’il vous plait !
Hi Marni, love the curve zipper pouch and would like the pattern when ready. Happy sewing ✂️. Cheers Trish
Quelle belle trousse ! I would love to have your pattern, please. Thank you !
Love your bag and would love the pattern