Haberdashery Fun

  • Home
  • About
    • Look Book
  • Contact
    • Collaborate?
  • Tutorials
  • Shop
    • Email
    • Facebook
    • Instagram
    • Pinterest

Keep up to date with the latest posts!

DIY.. Sew A Fabric Flag Banner Part 2

in Fat Quarter Projects on 30/05/13

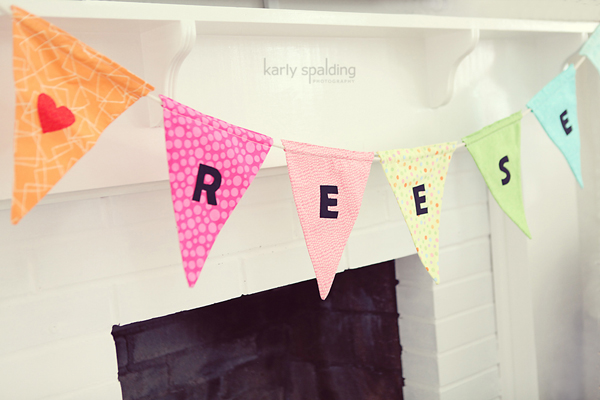
I hope you are having a great week. To follow up with my post from Tuesday, here is part 2 of Sewing A Fabric Flag Banner.  If you are just tuning in now, click here for part 1.

By now you should have:

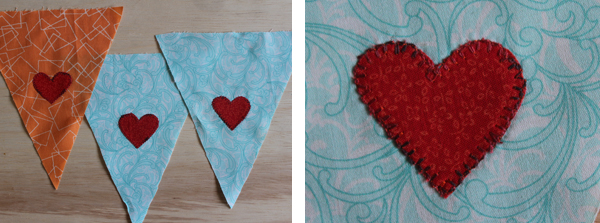
  1. Developed and cut your triangle pieces
  2. Prepped and cut your letters
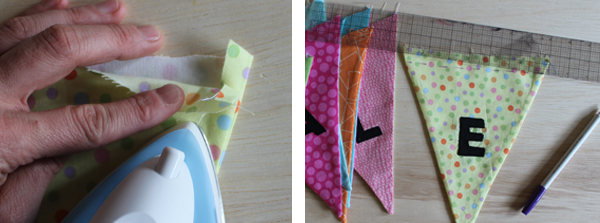
  3. Ironed the letters down to each flag piece

If not.. Well, you have all the time in this DIY/ Internet world.  Here are the final steps to sewing the bunting:

Applique around the edges of each word.  Remember to applique each side BEFORE you sew the triangles together.

Place right sides together and pin. Position into your sewing machine and sew with a 1/4″ seam allowance for each side [not the top edge].  Stop 3/4″ from the top edge and backstitch. Trim the bottom corner. It is important to do this step. When you turn the flag right side out you need the fabric to fit into this small area.

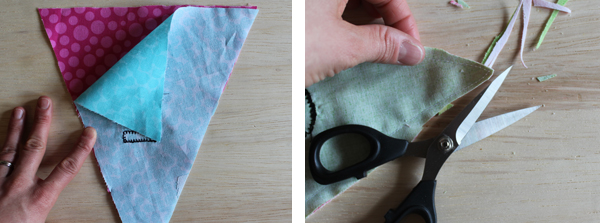
Turn right side out and wiggle the corner/point into place. If you are SUPER careful, use a pin and pull the point out.. but be careful not pull too much out.  Press the seams.

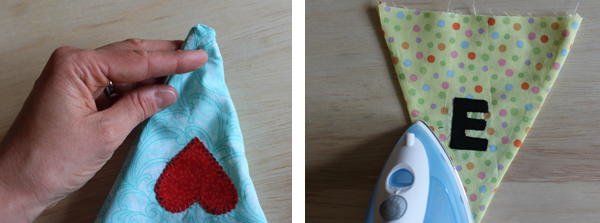
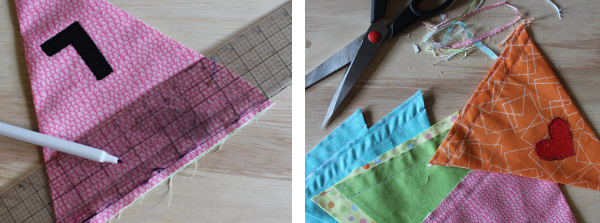
When pressing the seams, press all the way to the top. This will press a 1/4″ seam allowance that creates a casing for the string. Using a disappearing fabric pen, mark a “dashed” line 3/4″ down from the top edge.

With the flag turned right side out, sew along the dashed line.  Backstitch at each end. This creates the bottom of the casing.  Mark another dashed line 1/4″ down from the top edge. This closes the casing and gives about a 1/2″ area for the string to fit through. Sew along the second line. Backstitch at each end again.  CAREFULLY trim down the top edge.

Use a small amount of  fray check along the raw edges.  This will help stop the top edges from too much fraying. Insert the string through the casing..

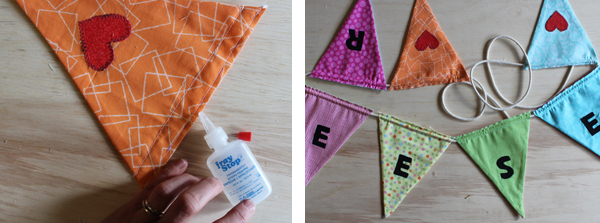
Well, that’s it. Happy sewing.

Click here if you want to see my tutorial on covering the rope ends.. To see the images from Reese’s Princess Party.. Check out my amazing friend..Karly Spalding Photography.

3 Comments

« DIY… Sew A Fabric Flag Banner
DIY.. Teabag Inspired Rope End Covers »

Comments

  1. Katie Goldsworthy says

    06/06/2013 at 8:04 am

    Very cute. I like them sewn!

    Thanks for linking it up at Monday Funday!

    Reply

Trackbacks

  1. DIY.. How to Sew a Fabric Flag Garland | Haberdashery Fun says:
    05/30/2013 at 8:57 am

    […] This week I am trying something a little different for my DIY posts.  I plan to do the party garland as a “Sew A Long”  project this week. Today, I will talk about materials, developing the pattern and then prepping/cutting the garland pieces.  Later this week, I will show how to sew the garland together.  Update..  Click here for Part 2 […]

    Reply
  2. How to cover the ends of rope | Haberdashery Fun says:
    06/03/2013 at 11:29 am

    […] I thought I was finished talking about the fabric flag garland that I made last week.. While I was packing it up to send to my friend, I realized how ugly the ends of the rope were.. They were covered in duck tape to hold the string from fraying. There was no way I would send it looking like that.  So, I decided to create one more post and then I would officially put this one to bed! You can check out the garland tutorials  – Part 1 and Part 2 […]

    Reply

Leave a Reply Cancel reply

Your email address will not be published. Required fields are marked *

This site uses Akismet to reduce spam. Learn how your comment data is processed.

About me


Hi there - I'm Marni Weaver. A sewer, a sometimes quilter and a lover of fabric design. I started this blog to share my ideas. Come Join the Fun
shop now

Popular Categories

project for baby fabric projects seasonal projects fat quarter projects sewing tips and tricks inspiration

Categories

  • Applique
  • Baby
  • Bags and Pouches
  • Block Printing
  • Color
  • DIY Projects
  • Fabric
  • Fabric Design
  • Fat Quarter Projects
  • Home Decor
  • Inspiration
  • Just for Fun
  • Kids
  • No Sew
  • Patterns
  • Print On Fabric
  • Quilting
  • Scrap Fabric Projects
  • Seasonal
  • Sewing Tips & Tricks

Lovely sponsors

Recent Comments

  • How To Make Hand warmers | Haberdashery Fun on DIY.. Sew Heart Shaped Baby Burp Cloths
  • How To Make Hand warmers | Haberdashery Fun on How To Make Mini Heart Shaped Hand Warmers
  • Make Spooky Monster Inspired Face Cloths | Haberdashery Fun on DIY.. Make Monster Inspired Face Cloths
  • How To Sew A Fabric Bin | Haberdashery Fun on Sew An Easy Fabric Storage Bin
  • Make The Alma Tote In Fun Colors | Haberdashery Fun on New – The Alma Tote Pattern

Projects Elsewhere

find me on Pellon Projects sew mama sew contributor

momtastic contributor

Pinterest

Visit Marni@Haberdashery Fun's profile on Pinterest.

I'm Reading

  • Cluck Cluck Sew
  • Cooking Dangerously
  • In Color Order
  • Jen Hewitt
  • Jolly Jabber
  • Karly Spalding Photography
  • Leigh Laurel Studios
  • Lindsay Sews
  • Lotta Jansdotter
  • Love Patchwork and Quilting Magazine
  • Made
  • Making It Lovely
  • Noodle-Head
  • Polka Dot Chair
  • Sharon Holland Designs
  • Silhouette America Blog
  • Silhouette Design Store
  • The Purl Bee
  • The Purple Fig

Press:

Stitch Winter 2014

haberdashery_fun

Marni Weaver
Still experimenting with keeping the block printin Still experimenting with keeping the block printing, handmade feel in digital form. This one is a little rougher/less perfect, but still has the spirit ✨ Which one’s your pick—1 or 2.

#haberdasheryfun #versafineink #versafineclair #surfacepatterndesign
Who knew that one little stamp could do so much? # Who knew that one little stamp could do so much?
#haberdasheryfun #versafineink #versafineclair
Just added a new stamp pad to my collection—meet Just added a new stamp pad to my collection—meet Lilac Bloom! 💜 And before you ask… nope, this design is not a corn stalk. Are you a fan of this soft shade, or is it a bit too light for your taste?

#versafineclair #blockprints #surfacepatternprint #haberdasheryfunpatterns #surfacepatterndesign #pfeil
Atlanta feels like a steam room right now 🫠 so Atlanta feels like a steam room right now 🫠 so I’m manifesting cooler temps by reworking my Alberta Wild Rose block print into Evergreen.

#blockprinting #banffnationalpark #alberta #surfacepatterndesign #haberdasheryfun
#versafineclair
Ode to summer travels. Alberta wild rose stamp alo Ode to summer travels. Alberta wild rose stamp along with a few sketches. 

#blockprinting #banffnationalpark #alberta #surfacepatterndesign #haberdasheryfun 
@3dottedpenguinscommunity #versafineclair
Follow on Instagram

Copyright © 2025 · Klar theme by Crimson Pear :: web & surface design

Copyright © 2025 · Klar on Genesis Framework · WordPress · Log in