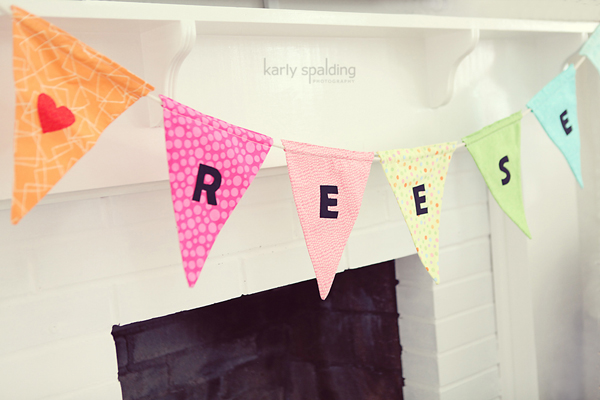
My friend Karly requested a DIY post on making a fabric banner. She has 2 little girls and had birthday parties coming up, so it was the perfect opportunity to make one for them. I have a little boy, so it was fun channeling my inner pinks, purples and yellows for this project. Karly is a LA based photographer. To see the amazing images from Reese’s Princess Party.. click here.
This week I am trying something different with my DIY posts. I’m posting the party banner in a “Sew A Long” format. Today, I will talk about materials, developing the pattern and prepping/cutting the pieces. Later this week, I will show how to sew the bunting together. Update.. Click here for Part 2
Alright. Let’s get started.
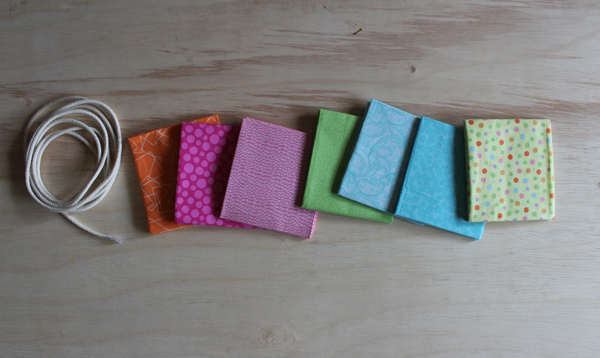
Materials needed:
- Fabric – Fat quarters work great as you don’t need much fabric. Also, by using fat quarters you have the option of picking out multiple colors for a low price
- Fusible Web – Lite Steam A Seam 2 from The Warm Company. This is to applique the letters
- Fusible Interfacing – I like to use Pellon SF101 Shape Flex
- Rope – depends on the garland size. I bought 3 yards
- Name/Letters
- Dritz disappearing ink pen
- Dritz fray check/ fray stop
- Sewing materials – pins, scissors, thread, sewing machine
- Drafting materials – tracing paper, pens, ruler
- Iron and ironing board
Developing the pattern:
I wanted to make a bunting that would work for 2 little girls. Both girls have names with 5 letters, so I decided to place a name on each side of the garland and make it reversible. I added heart symbols on each end for the cuteness factor.
Karly wanted a triangle bunting. Using my tracing paper, I drew an an elongated triangle and cut out letters to see what sizes would work.
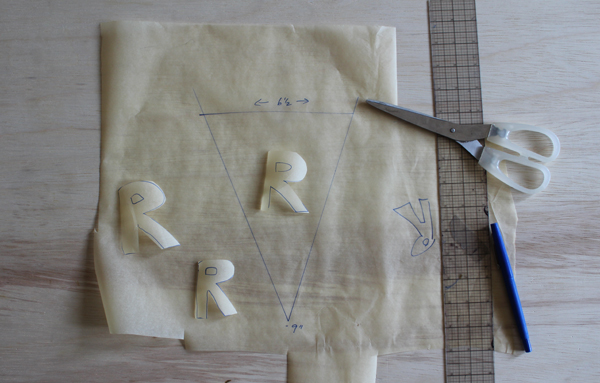
To make your triangle, draw a 10″ line for the bottom. From the middle of this line, go up 8 1/4″. This includes a 1/4″ SA on the 2 sides and 3/4″ SA at the top [where the rope is threaded through].
When I develop my patterns, I like to pin mock ups together. In this case I had paper towel on hand. I cut it to size and pinned it together to see if I liked the size and look.

Prepping and cutting:
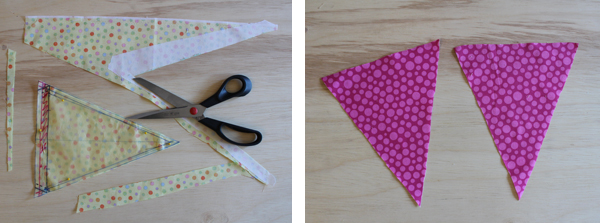
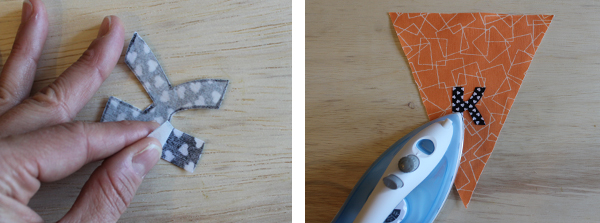
Fuse your fabric – I chose to fuse only 1 side of the fabric. Pin and cut 2 pieces per fabric color.
Using Word, find a font that you like. Enlarge and print the name. Trace onto the Steam A Seam. However, make sure you flip and trace your word backwards. Peel the backing off the Steam A Seam and place onto your fabric. Press with an iron.
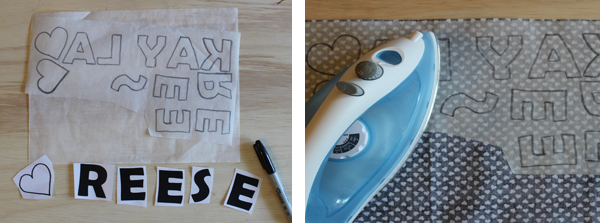
Cut out the letters.
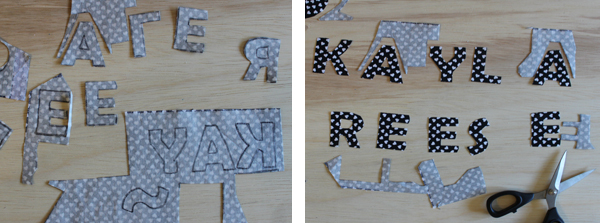
Figure out the letter placement for each triangle. Make sure to lay down with the seam allowances in mind. Peel the backing off and stick down onto your fabric. Iron to set in place.
Alright, that’s it for today. I will be back shortly to sew the banner together.
Happy Sewing!


Yippee! So cool. Look forward to following along!
Marni…these are adorable. I absolutely love them and will be making them for my nieces and nephews.
Did you just use cotton fabric? Also the fusible stuff….is that to adhere your letters? I need to look more closely at the instructions but just wanted to get your opinion on fabric.
Thanks for all your inspirational projects! You are one talented cat.
Hi – yes. I used regualar cotton fabric. I like using quilters fat quarters. You can get a large variety of colors and prints for a great price. The fusible stuff is awesome. It is called Steam A Seam from The Warm Company. You can adhere your letters very easy this way. Thanks for the comments and reaching out
Well done! – i knew it should be easy and your tutorial made it simple! Thanks!