Last week I shared my airport code summer totebag. It was featured on Craftgawker and I am super happy with the results. In just 2 days over 1,500 people checked it out..
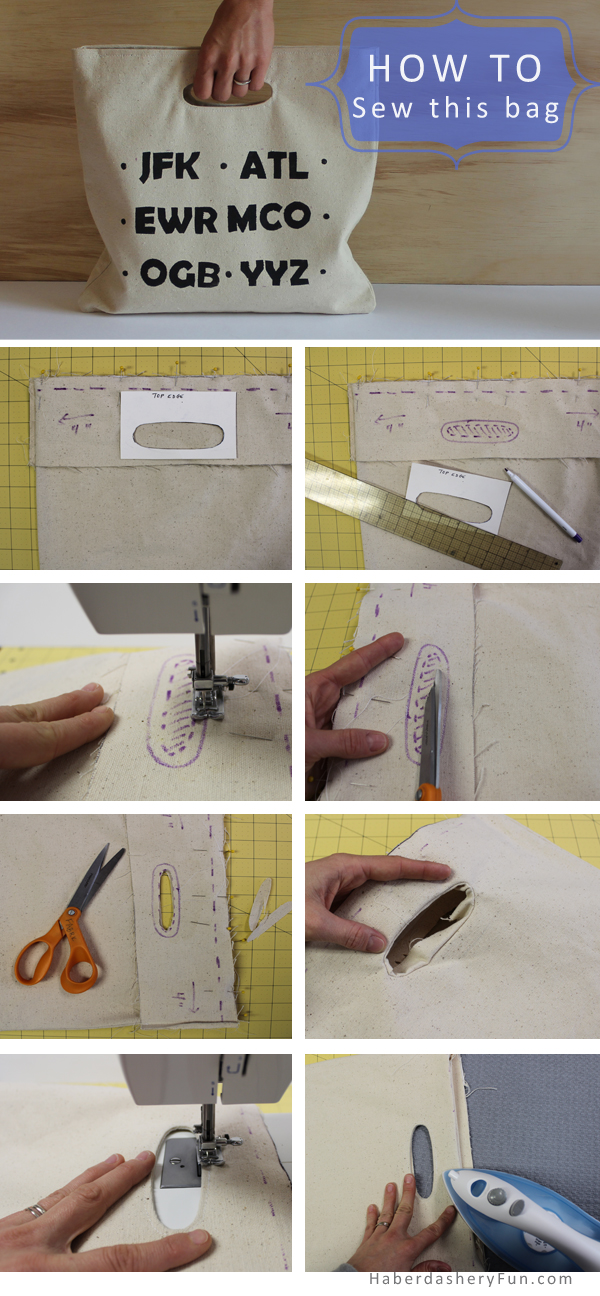
A reader asked if I could post the sewing tutorial for the bag. You can see the full tutorial here, but I thought it would be fun to condense the tutorial down into 8 easy sewing steps.
You will have to do a little pattern drafting for this one. But, even a beginner can make this!! It’s super easy and you can do the drafting right on your fabric. The bag is easy to sew, it is the handle area that takes a little time.
Materials Needed:
- Cotton duck or a decorator weight fabric – the heavier the weight the better. You will need a substantial fabric for the handle area
- Interfacing – I like the Pellon brand for fusible interfacings
- Pins, needles, scissors, thread
- Sewing machine
- Iron and ironing board
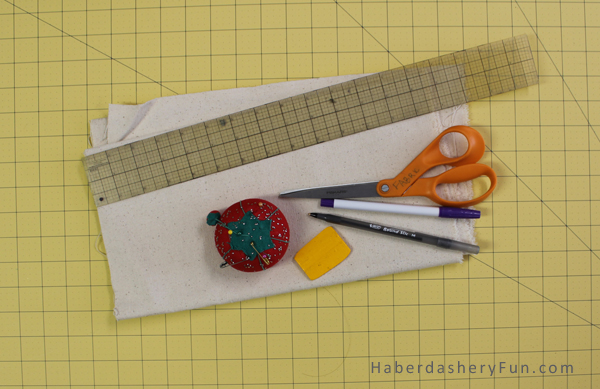
- Ruler, paper, pens
- Disappearing ink pen
Create the 3 following pattern pieces. Measurements below include SA;
- Bag – draw a rectangle 26″L x 13.5″W
- Facing – draw a rectangle 4″L x 13.5″W [ this is for the top handle area]
- Interfacing – draw a rectangle 3″L x 13.5″W [ fuse to each end of the main rectangle]
Time to start sewing the bag!

Click here to print the Handle template – Market-Totebag-Handle-Pattern-Piece.pdf
- With wrong sides together, fold the bag in half. Place into your sewing machine and sew the side seams with a 1/2″ SA. With the bag sewn, turn it right side out. Pin each facing piece to the top edge and pin at sides. The facing side seams are NOT sewn together. With the disappearing ink pen, mark a 1/2″ SA along the top edge. Center the handle template along this SA
- With the disappearing ink pen, trace around the oval – this outside oval is your sewing line. Move 1/4″ inwards and and mark another oval. Mark this with a dashed line – you will CUT along this line
- Place into your sewing machine and sew around the OUTSIDE oval. Press the stitched seam
- With your scissors, pierce into the center of the oval. Cut out the entire center area. Make sure to stop cutting at the dashed line
- Do NOT cut into your SA! Cut and clip the oval edges. Clip the straight lines and notch the round areas..
- Pull the facing through the center of the oval. This means you will pull the facing inwards/into the inside of the bag. Wiggle the oval around until the oval lays flat. You may need to wiggle and reposition the oval ends. Re-clip if needed and wiggle more. Press the oval with a hot iron
- With the oval now laying nice and flat, place back into your sewing maching and edgestitch around the oval. Repeat steps 1-2 for the other oval handle. Now sew the facing side seams with a 1/2″ SA. You are almost finished!
- Turn uder the top edge and facing edge with a 1/2″ SA. Press. With the folded SA now facing each other, place into your sewing machine and edgestitch along top edge. That’s it!
Note – The bag is not lined and the facing bottom edge was left raw. You could finish the facing bottom edge with a colorful binding.
Think of all the fun you could have with this bag.. There are so many variations you could make. You could applique your child’s name or an image on the front. I like the idea of sewing a bunch to use as party favor bags. Agh.. So many things to do, “sew” little time.
That’s it for today. I love hearing from everyone. If you have questions, please leave a comment, email or send a message on facebook. I also love seeing pictures!
Have a great week and happy sewing!


For long distance relationships it would be good….LAX to LGA. Love these!
Ha! great idea.. That would be a lot of fun to make..
This is adorable! Perfect for summer and I love the airport codes. This would be a great gift for a traveler. 🙂