Haberdashery Fun

  • Home
  • About
    • Look Book
  • Contact
    • Collaborate?
  • Tutorials
  • Shop
  • Freebie
    • Email
    • Facebook
    • Instagram
    • Pinterest

Keep up to date with the latest posts!

DIY.. Collapsible Fabric Bowls

in DIY Projects, Fat Quarter Projects on 13/02/14

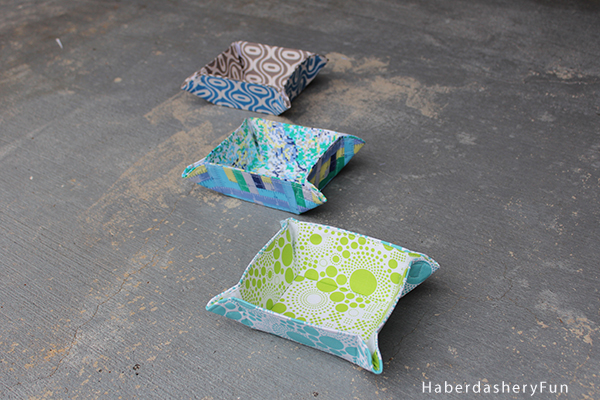
I travel a lot. For the last few years, I have wanted to create mini collapsible fabric bowls to use in my hotel rooms. I’ve often thought they would be perfect travel companions and hold all my little stuff.  I could keep one on the bedside table, one on the bathroom vanity and one by the TV or hotel room door. The bowls would be a drop spot for my earrings, car keys, room keys, chapstick, lipgloss.. When it’s time to hit the road, they would pack flat and not take up too much room in my luggage.

I finally had some down time and made a few bowls.

The pattern is available as a free download in my online store.

Materials Needed:

  1. Cotton Fabric -this is a great fat quarters project
  2. Ultra Firm Fabric Stabilizer – Pellon  71F Peltex 1-Sided Fusible
  3. Disappearing fabric ink pen
  4. Velcro
  5. Fabric glue
  6. Quilting ruler
  7. Sewing machine and related supplies
  8. Iron and ironing board
  9. Wonder clips – optional, use in place of pins

Let’s get sewing!

  1. Cut 2 fabric bowl pieces – 1 lining and 1 outside
  2. Cut stabilizer pieces
  3. Lay stabilizer pieces down onto the OUTSIDE fabric bowl pattern piece.  Leave a scant 1/8″ gap between each piece.  Remember to lay these on the backside of the fabric, place the rough/pebbly side facing down.  Place a piece of fabric on top and press each small piece in place with a hot iron.
  4. Clip into all corner seam allowances.  Turn and roll the seam allowances towards the backside/interfacing. Press in place with an iron. Use a fabric glue stick at the edges help hold in place.
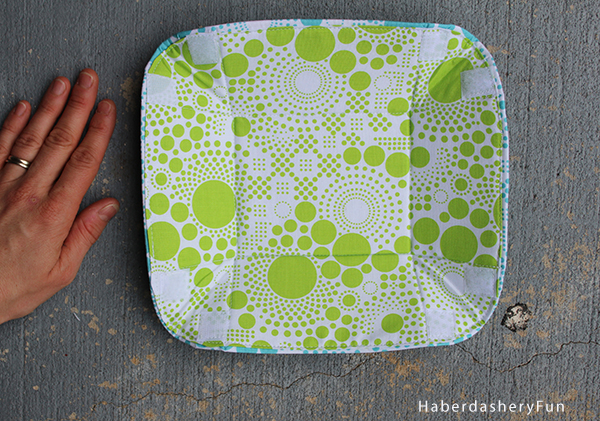
  5. With wrong sides facing each other, place the fabric bowl pieces together. Adjust so that the seam allowances are even at all sides. Trace along the outside edge with a disappearing fabric pen.
  6. Place the outside fabric bowl piece to the side. Following the disappearing fabric pen line, turn and roll the towards the backside. This is similar to step 4, without having interfacing on the backside of the fabric. Press in place with an iron. Place the fabric bowl pieces together, wrong sides together. Press again with an iron.
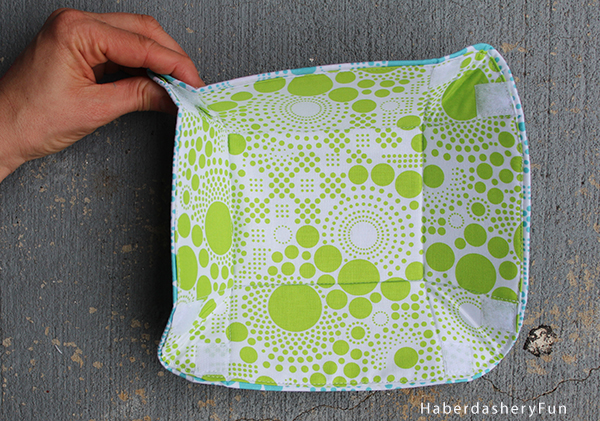
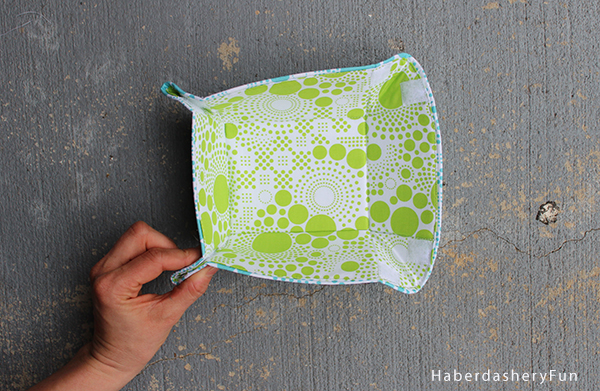
  7. Pin at edges. Place into sewing machine and stitch together around outside edge. Take out of sewing machine. Gently fold along the gap between the interfacing. Using the disappearing fabric pen, draw a line in each gap. Draw all lines. Place into sewing machine and stitch following lines. Remember to backstitch when stopping at each edge.
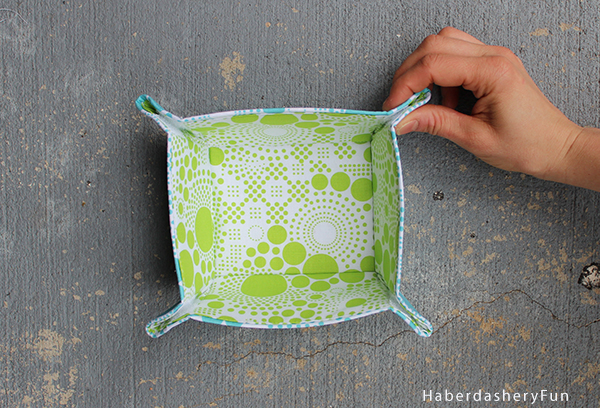
  8. Cut 4 small pieces of Velcro, each measuring 1/2″. Pull apart and place at the corner pieces, as close to the top edge as possible.  Pin in place if needed. Place into sewing machine and sew all Velcro in place.

That’s it! What do you think? Hard or easy to make?

flat2 copy

flat3 copy

flat4 copy

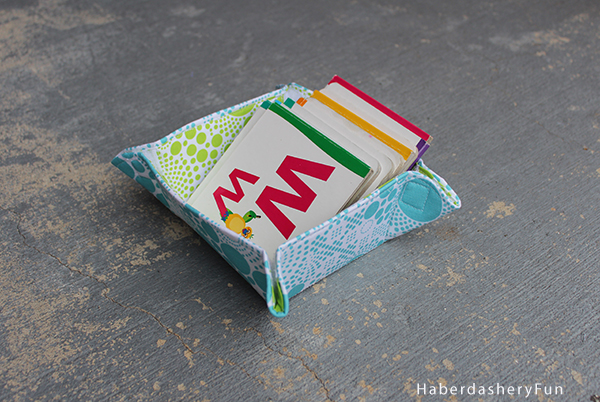
There are so many uses! While I plan to bring them along for my travels, there are many options for around the home. We have these mini ABC books and the bowls hold them perfectly.

How about napkins for an upcoming party?

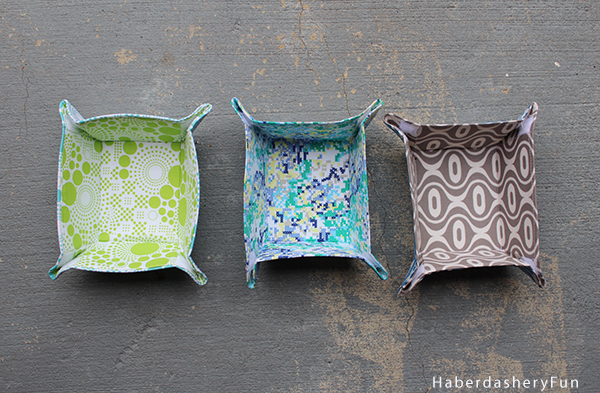
Don’t you just love the fabric I used? A few weeks ago I bought a Lapis Hipster by The RBD Designers for Riley Blake Designs fat quarter bundle. It’s the first time I bought a fat quarter  bundle and it has been great having so many options for coordinating fabric in my stash!

Ps. Want to know the inspiration for the pattern? You’ll never guess what I used..Click here to see more.

Happy Sewing!

Related Posts Plugin for WordPress, Blogger...

25 Comments

« Inspired By.. Fabric Storage Bowls
Sewing Inspiration For Spring 2014 »

Comments

  1. Karin @ Leigh Laurel Studios says

    02/15/2014 at 5:15 pm

    Brilliant! Where were these all those times I’ve been in hotel rooms??

    Reply
    • Haberdashery Fun says

      02/18/2014 at 8:55 pm

      Isn’t that the truth? This will be great for all those little things that roll under the bed. Hope you had a great birthday!

      Reply
  2. Ann says

    02/16/2014 at 9:41 am

    You really do have the best ideas!

    Reply
    • Haberdashery Fun says

      02/18/2014 at 8:54 pm

      Thanks Ann! I appreciate you always stopping by!

      Reply
  3. Amy W says

    02/18/2014 at 5:55 pm

    Wow. I had no idea that’s how you would have made these! So cool and clever. Thank you for sharing at our Link It or Lump It party!

    Reply
    • Haberdashery Fun says

      02/18/2014 at 8:56 pm

      Hi Amy. Thanks for stopping by. They are super easy to make and can hold so many little things around the house.

      Reply
  4. Hannah says

    02/20/2014 at 1:58 pm

    I love the simplicity involved in creating these. It looks really simple, easy, and fun to do in a short period of time. I would definitely use one of these, and am very excited to have found this tutorial. Thanks!

    Reply
    • Haberdashery Fun says

      02/20/2014 at 2:32 pm

      Hi – thank you for stopping by. You will be amazed at how easy they are to make. I will have the pattern to share in about a week, so this will make sewing them even easier! 🙂 I will email you when the pattern goes up.

      Reply
  5. Cynthia says

    02/20/2014 at 2:17 pm

    That is so cool!!

    Reply
    • Haberdashery Fun says

      02/20/2014 at 2:32 pm

      Yay! Thanks so much for stopping by. They are really fun and EASY to make 🙂

      Reply
  6. Amy W says

    02/22/2014 at 11:56 am

    Love these and am featuring them tomorrow at our link party. Be sure to stop by and grab a feature button!

    http://www.delineateyourdwelling.com/2014/02/link-it-or-lump-it-no-27.html

    Reply
  7. Katie Adams says

    02/22/2014 at 2:48 pm

    These are so cute and functional. When you don’t need them they can lay flat for storage. So smart!

    Reply
  8. Shanny Khoo says

    02/23/2014 at 7:11 am

    Wow! Looks easy enough for amatures like me. 🙂 thanks for sharing this tutorial. Am so going to make this in different size: stackable for my boys WIP Lego projects! Hope you’d share your pattern soon so I could give a shout out to my stitchy friends. 🙂

    Reply
    • Haberdashery Fun says

      02/23/2014 at 4:59 pm

      Sounds great! I love the idea of using for the WIP lego projects. I will email and let you know when the pattern is ready.

      Reply
  9. Heather {Woods of Bell Trees} says

    02/26/2014 at 4:07 pm

    Cool, I was looking to buy one of these but now I am going to be making one! YAY! Thanks for the tutorial!

    Reply
  10. Linda Barker says

    03/06/2014 at 9:54 pm

    I think this is such a fantastic idea !! How you came up with the idea, is amazing, plus it’s something that will work; not take up much space, and best of all “work for you.” I don’t travel a lot but I can see other uses as well. Can’t wait to try this project. Linda a retired lady in CA.

    Reply
    • Haberdashery Fun says

      03/07/2014 at 11:24 am

      Hi- thank you so much for your comment. I’ve been on the road this week and used my little bowl in my hotel room and loved it. It warms my heart to know that people find my stuff useful as well 🙂 I really appreciate the feedback!

      Reply
  11. Dee Williamson says

    05/06/2014 at 10:59 pm

    Wow those are amazing! I love it! Thanks for sharing.

    Reply

Trackbacks

  1. El Cajón de los RetalesPanera, o vaciabolsillos » El Cajón de los Retales says:
    02/22/2014 at 7:47 am

    […] se presenta el fin de semana? Si no teneis muy claro qué hacer aquí os presentamos un tutorial bien sencillo, para hacer en una tarde […]

    Reply
  2. Fabric Collapsible Bowl/Tray | Sundae's Shop says:
    07/28/2014 at 3:38 pm

    […] it with you when you travel.  Seems very handy to bring to hotels.   I used the tutorial from here, but have since found an easier one.  The rounded corners were a pain in the butt, so next time I […]

    Reply
  3. Collapsible Fabric Bowl Pattern Now Available | Haberdashery Fun says:
    01/14/2015 at 8:16 pm

    […] Click here for the tutorial. […]

    Reply
  4. 15 FREE Mini Christmas Sewing Makes Tutorials | Prints to Polka Dots Blog says:
    10/27/2016 at 12:30 pm

    […] Collapsible Bowl […]

    Reply
  5. My New Online Pattern Store | Haberdashery Fun says:
    03/23/2017 at 2:35 pm

    […] Collapsible Fabric Bowl Pattern: […]

    Reply
  6. Large Canvas Zipper Beach Pouch | Haberdashery Fun says:
    06/20/2017 at 10:18 am

    […] By the way – I launched my online pattern store this March. My curvy zipper pouch has been very popular and you can purchase the pattern there. I also have 2 free patterns – the reversible 1 hr tote and a collapsable fabric bowl. […]

    Reply
  7. Collapsible Kraft-Tex Bowl says:
    11/30/2020 at 2:17 pm

    […] have a blog post and you can find the step by step tutorial for the fabric bowls here. It is super easy. Over the years, I have made a bunch of these bowls. The Kraft-Tex looks and […]

    Reply

Leave a Reply Cancel reply

Your email address will not be published. Required fields are marked *

This site uses Akismet to reduce spam. Learn how your comment data is processed.

About me


Hi there - I'm Marni Weaver. A sewer, a sometimes quilter and a lover of fabric design. I started this blog to share my ideas. Come Join the Fun
shop now

Popular Categories

project for baby fabric projects seasonal projects fat quarter projects sewing tips and tricks inspiration

Categories

  • Applique
  • Baby
  • Bags and Pouches
  • Block Printing
  • Color
  • DIY Projects
  • Fabric
  • Fabric Design
  • Fat Quarter Projects
  • Home Decor
  • Inspiration
  • Just for Fun
  • Kids
  • No Sew
  • Patterns
  • Print On Fabric
  • Quilting
  • Scrap Fabric Projects
  • Seasonal
  • Sewing Tips & Tricks

Lovely sponsors

Recent Comments

  • 3 Simple Summer Sewing Tutorials | Haberdashery Fun on Sew A Canvas Zipper Pouch
  • 3 Simple Summer Sewing Tutorials | Haberdashery Fun on Sew Asymmetrical Color Block Totes Tutorial
  • 3 Simple Summer Sewing Tutorials | Haberdashery Fun on Sew A Baby Towel With A Hood
  • Make A Simple Block Print Tote Bag | Haberdashery Fun on DIY.. Colorful Dish Towel Tote Bags
  • Make A Simple Block Print Tote Bag | Haberdashery Fun on Sew Asymmetrical Color Block Totes Tutorial

Projects Elsewhere

find me on Pellon Projects sew mama sew contributor

momtastic contributor

Pinterest

Visit Marni@Haberdashery Fun's profile on Pinterest.
Follow on Bloglovin

I'm Reading

  • Cluck Cluck Sew
  • Cooking Dangerously
  • In Color Order
  • Jen Hewitt
  • Jolly Jabber
  • Karly Spalding Photography
  • Leigh Laurel Studios
  • Lindsay Sews
  • Lotta Jansdotter
  • Love Patchwork and Quilting Magazine
  • Made
  • Making It Lovely
  • Noodle-Head
  • Polka Dot Chair
  • Sharon Holland Designs
  • Silhouette America Blog
  • Silhouette Design Store
  • The Purl Bee
  • The Purple Fig

Press:

Stitch Winter 2014

haberdashery_fun

Marni Weaver
My entry for this week’s design challenge @spoon My entry for this week’s design challenge @spoonflower. Browns are definitely not my favorite color these days, but the challenge was “earth tones” and using just 4 colors. 

Ps. This started as a super simple block print and then I scanned it into the computer and drew the pattern in illustrator. 

If you have a moment you can head over to spoonflower to vote. ❤️✔️

#haberdasheryfun #spoonflowerchallenge #spoonflowerdesignchallenge #spoonflowerfabric #blocprintingonfabric #blockprinting #blockprintsmadeeasy ##blockprintmadeeasy #surfacepatterndesign #spoonflowermakers #blockprintestextiles #haberdasheryfunprints
I am so glad it’s the weekend. How about you? I’m off prompt for the month and here is #carvedecember, Day 7 and the prompt for “Long”. I really like structured, linear and streamlined prints. With this challenge, I am playing around and trying new things.

#carvedecember2022 #haberdasheryfun #blockprint #blockprinting #blockprintingmadeeasy #notecardsfordays #speedballart #tsukineko #blockprintedfabric #inkpad #inkpadstorage #surfacepattern #surfacepatterndesign #floralprints #handcarvedstamp #handcarvedstamps.
So many people have asked me about my process. One So many people have asked me about my process. One tip is that I love using a grid to create the overall design and keep the block print streamlined. Here’s how you go about it. #carvedecember #carvedecember2022 #blockprinting #haberdasheryfun #blockprinted #speedballink
Simple block print for the prompt “Ponder”. I Simple block print for the prompt “Ponder”. I get a lot of questions on my process, so you can check out my reel for a little behind the scenes.

#carvedecember #carvedecember2022 #haberdashery #blockprinting #bloxkprintingmadeeasy #blockprintingonfabric #blockprintingworkshop #blockprint #haberdasheryfun #haberdasheryfunpatterns
Day 5 for #carvedecember is “Plain”. I’m not Day 5 for #carvedecember is “Plain”. I’m not a huge fan of florals, and for some reason this shape came to mind. By itself it is kinda boring/ plain. In a repeat design it definitely comes alive. 

What is your printing process? Do you like all an over scattered or a grid pattern? My favorite way to work is using a pencil grid and then making a very linear and streamlined print.

#carvedecember2022 #haberdasheryfun #haberdashery #blockprintsmadeeasy #blockprints #speedballart #blockprintedfabric #haberdasheryfunpatterns
Follow on Instagram

Copyright © 2023 · Klar theme by Crimson Pear :: web & surface design

Copyright © 2023 · Klar on Genesis Framework · WordPress · Log in