Haberdashery Fun

  • Home
  • About
    • Look Book
  • Contact
    • Collaborate?
  • Tutorials
  • Shop
    • Email
    • Facebook
    • Instagram
    • Pinterest

Keep up to date with the latest posts!

Vinyl & Ribbon Pouches – Ribbon Blog Tour

in Bags and Pouches, DIY Projects on 27/03/15

Today is my turn on the Bonnie Christine Ribbon Blog Tour. I am honored to be a part of the blog tour that celebrates the launch of Bonnie Christine’s ribbon line with Renaissance Ribbons.

Bonnie Christone promo2

Bonnie Christine is a surface pattern designer and author of Going home To Roost – A blog dedicated to living an extraordinary life. If you haven’t visited her blog or Instagram page.. Make it a first on your to-do list.. She is one inspiring lady!

Bonnie Christine ribbon

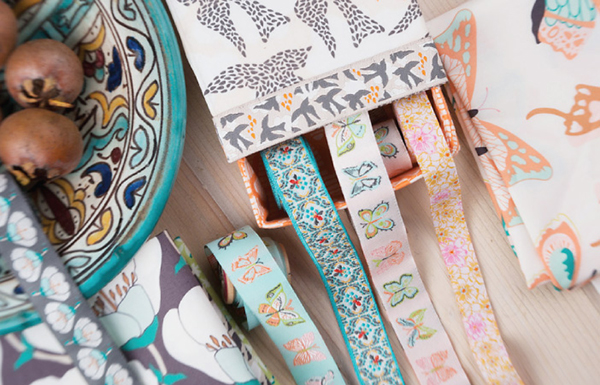
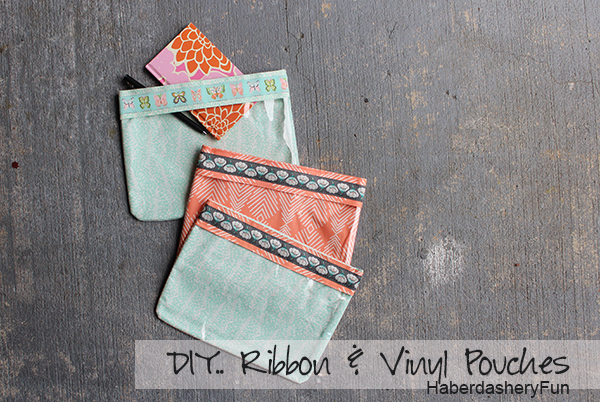
Today I’m sharing my project that was designed using her ribbon and fabric. I have to admit, the fabric and ribbon were so gorgeous that I had a hard cutting them up.

HaberdasheryFun Ribbon and Vinyl

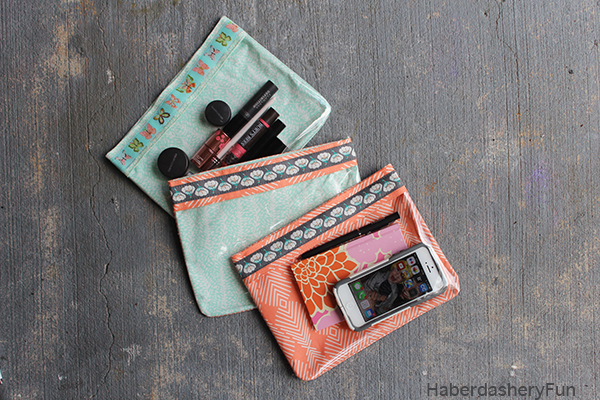
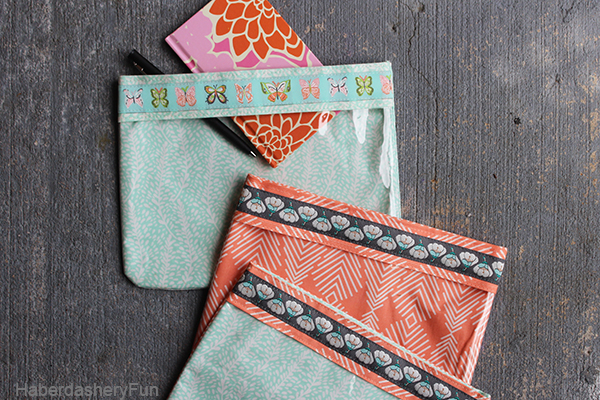
I love sewing with clear vinyl and have wanted to make see-thru makeup cases for my travels. I travel A LOT and always need extra pouches for my travel gear, makeup, receipts, loose change and bills… I thought this blog tour was the perfect opportunity to make a few, plus it was a chance to play around with Bonnie’s awesome colors and prints.
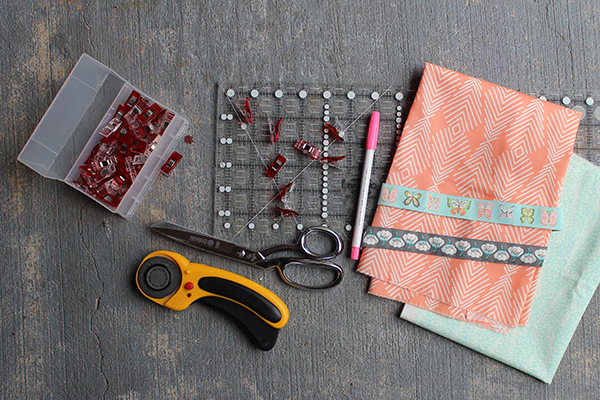
HaberdasheryFun Ribbon and Vinyl 2

Materials:

  1. Cotton Fabric – 1/2 yard in 2 prints
  2. 7/8″ Bonnie Christine ribbon – 1/2 yard
  3. Interfacing
  4. Clear Vinyl
  5. Fabric glue or Wonder-WebTape
  6. Velcro Sew on Tape – 3/4″
  7. Wonder Clips
  8. Rotary cutter, mat and ruler
  9. Disappearing fabric pen
  10. Medium size spool of thread for for corner template
  11. Sewing machine and sewing supplies
  12. Iron and ironing board

Ribbon and vinyl supplies

Note – Bonnie Christine fabric is made by Art Gallery Fabrics and the collection I made my pouches from is called “Winged”. You can find her ribbons over at Renaissance Ribbons.

Ok, let’s get started:

HaberdasheryFun Ribbon and Vinyl Main

Cutting directions:

  1. Cotton fabric #1 for the back piece – Cut 1 rectangle measuring 10″W x 8″L.
  2. Cotton fabric #2 for the lining piece – Cut 1 rectangle measuring 10″W x 8″L.
  3. Cotton fabric #1 or #1 – Top and facing piece – Cut 2 rectangles measuring 10″W x 2 1/2″L.
  4. Clear Vinyl – Cut 1 rectangle measuring 10″W x 7 1/2″L.
  5. Interfacing – Cut 2 rectangles measuring 10″W x 8″L. Depending on the weight of your fabric, use this for the back and lining pieces.
  6. Ribbon – Cut 2 pieces 10″ in length.
  7. Velcro Tape – Cut 1 piece 10″ in length.

Sewing directions:

Ribbon and vinyl step1B

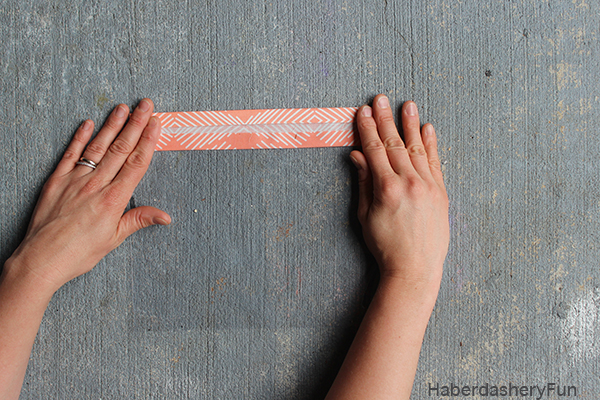
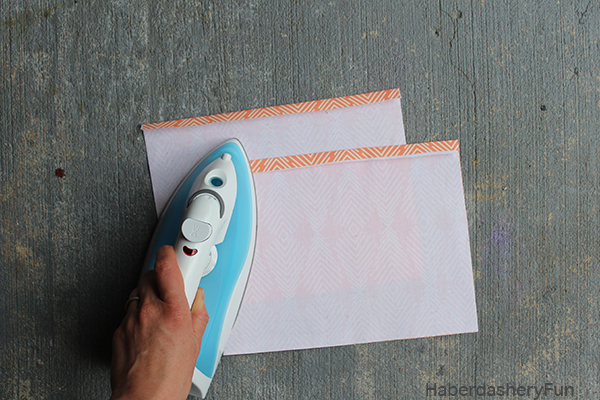
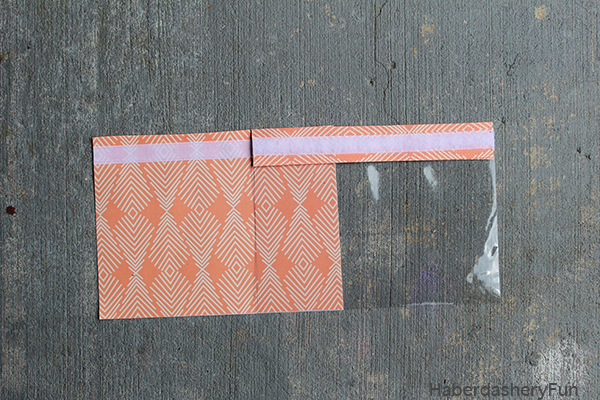
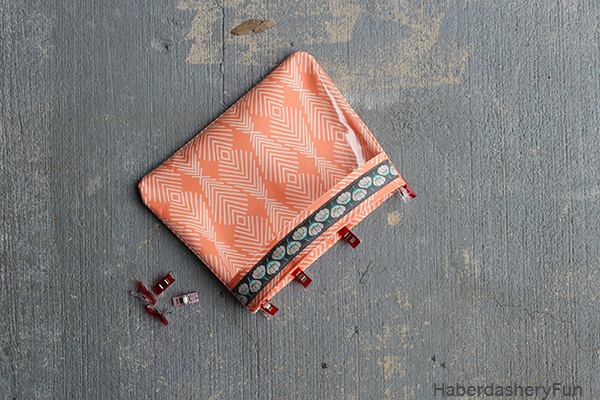
Step 1: Lay the 2 rectangles measuring 10″W x 2 1/2″L on your work space. For both rectangles, turn the long side of the top and bottom edges under 1/2″. Place 1 piece along the 10″ side of the clear vinyl. The folded edge should cover the edge of the clear vinyl. Use a small bit of fabric glue or Wonder Tape to help hold the fabric in place.  Turn over and place the other rectangle piece on the backside. Adjust so the front and back match up. Place into your sewing machine and edge stitch along the top and bottom edges.

Ribbon and vinyl step2

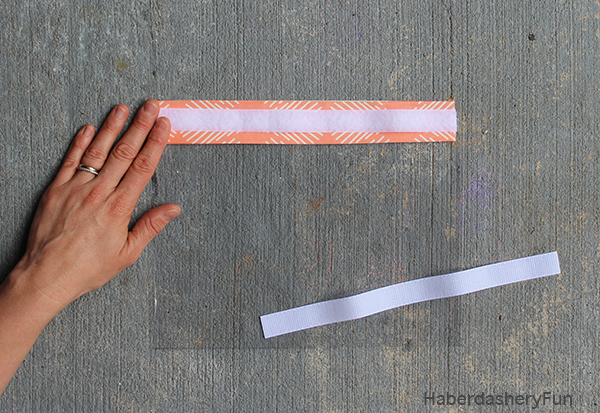
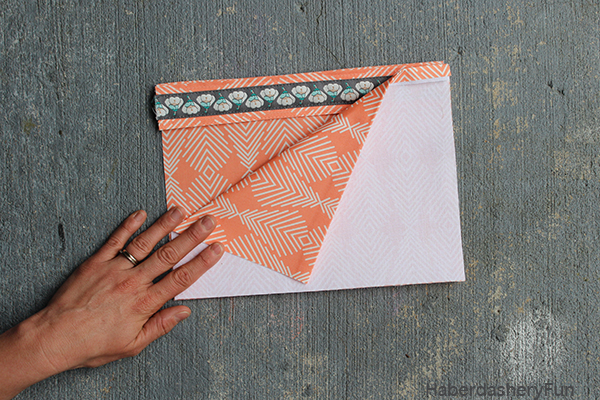
Step 2: Open the Velcro and lay the hook side along the back edge. Center. Sew in place. Lay the ribbon on the other side and center. Sew in place.  The Velcro is slightly slimmer than the ribbon, so the stitch will be covered. Sew aside.

Ribbon and vinyl step3

Ribbon and vinyl step3B

Step 3: Lay the 2 rectangles measuring 10″W x 8″L on your work space. For each rectangle, turn and fold one of the 10″ edges under 1/2″. On the lining fabric, lay the loop side of the Velcro approximately 1/4″-3/8″ down from the top edge [ right side of the fabric]. NOTE: Before you sew the Velcro in place, make sure to match up with the hook/vinyl piece. Adjust if needed and sew in place.

Ribbon and vinyl step4

Ribbon and vinyl step4A

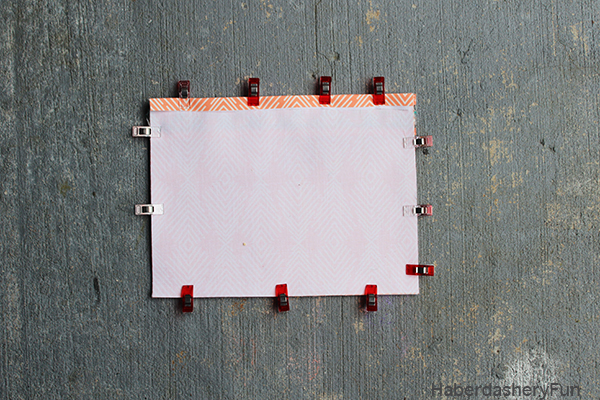
Step 4: Sandwich the 3 pieces in the following order – #1. Lining piece, Velcro/right side facing up. #2. Vinyl piece, Velcro facing the lining fabric. #3. Back piece on top of the vinyl, right side facing down. NOTE: Use wonder clips to hold together. If you choose to pin, make sure to pin inside the seam allowance. Pins will leave holes in the vinyl, so pin carefully. Make sure all the top edges line up. Place into your sewing machine and stitch the sides and bottom together with a 3/8″ seam allowance.  Backstitch at the top edges.

Ribbon and vinyl step5

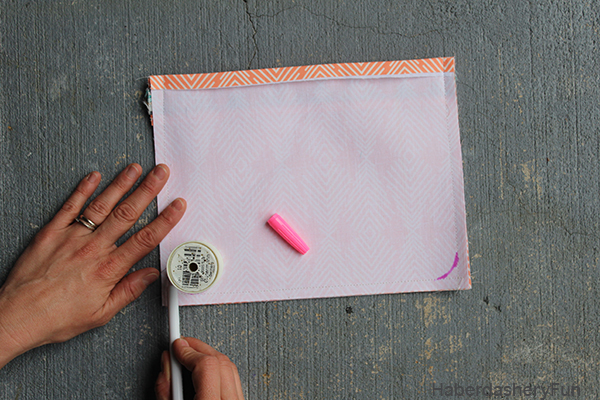
Step 5: Place the curve template [ spool in this case] at the bottom corners. Using a disappearing fabric ink pen, draw the curves. Place back into your sewing machine and stitch following the curves. Remember to backstitch. Trim off the excess fabric.

Ribbon and vinyl step6

Step 6: Turn right side out. Wiggle corners into place. Finger press along the outside edge to help lay the vinyl flat.

Ribbon and vinyl step7

Step 7: Use Wonder Clips or pin the lining and back piece together at the top edge. Place into your sewing machine and stitch together, starting at one side seam. Backstitch at each side seams and/or continue and stitch around the entire top edge.

So thats’ it. Fun right? What kind of combination would you make.. The same print or a mix of patterns and colors? There are so many ways you can make this pouch.

HaberdasheryFun Ribbon and Vinyl close

Make sure to check out the blog tour, but especially my neighbors — Alexis Wright from My Sweet Sunshine Studio and Kate McCown from Sunflower Paperie

Please note that I was provided the ribbon and fabric for this post. All opinions are my own. Happy Sewing!

Related Posts Plugin for WordPress, Blogger...

31 Comments

« DIY.. Kids Name Pillow + Giveaway
Sew Asymmetrical Color Block Totes »

Comments

  1. Sara says

    March 27, 2015 at 12:25 pm

    I love these! It has been so much fun to see the variety of projects that everyone is making!

    Reply
  2. Audrey says

    March 27, 2015 at 3:50 pm

    I had a hard time cutting into my fabric and ribbon too! Love these little vinyl pouches, and I’ve sen wanting to sew with vinyl more. Thanks for the push and the tutorial!

    Reply
  3. erica says

    March 28, 2015 at 11:06 am

    Beautiful! Going to make one for my sister, she works in retail and they need to carry their personal belongings in see thru bags, this will be perfect for her and so beautiful. Thank you for a beautiful tutorial

    Reply
  4. Amy W says

    March 29, 2015 at 12:08 am

    Let me know when you start your Etsy shop… I’ll buy everything. =)

    Reply
  5. Brenda says

    March 29, 2015 at 6:34 pm

    So cleaver, I want to make one of these!

    Reply
  6. lorraine williamson says

    March 30, 2015 at 8:39 pm

    this looks so cool thanks for sharing the tutorial will have to try it have a great day

    Reply
  7. Anna says

    March 31, 2015 at 3:53 pm

    What a good idea! Such gorgeous purses! I don’t like cutting into my beautiful fabric either 🙂

    Reply
  8. Crystal Wall says

    April 1, 2015 at 12:41 pm

    Found these on the link love. I adore them. So cute! Great idea 🙂
    ~Crystal
    Crochet, A Day In The Life
    http://krystlewv.blogspot.com

    Reply
  9. Mel @ Adventures of Mel says

    April 2, 2015 at 12:40 pm

    Such pretty ribbon and fabric! Love these cute little pouches, especially the fact that they’re see through. Thanks so much for sharing at Inspire Me Wednesday. Featuring you in next week’s issue.

    Reply
  10. Allison CB says

    April 3, 2015 at 12:27 pm

    Love those ribbons….and those clover clips make things so much easier don’t they! 🙂

    Reply
  11. Kathleen Berlew says

    April 4, 2015 at 8:31 am

    Hi! I just stopped by from the Whatever Goes Wednesdays Link Party. Love this project. You’ve inspired me to try sewing with vinyl!

    Reply
    • Haberdashery Fun says

      April 5, 2015 at 9:27 pm

      Hi Kathleen – thanks so much for stopping by. Let me know how it goes.

      Reply
  12. Marci says

    April 12, 2015 at 6:06 pm

    these look so cute, I have tried to make things with vinyl in the past but they never turned out this nice. I’m encouraged to try again.
    thanks

    Reply
  13. Anne says

    April 19, 2015 at 2:10 pm

    Pretty! I’ve got a Craft Gossip post scheduled for later today that links to your tutorial:
    http://sewing.craftgossip.com/tutorial-clear-front-zippered-travel-pouches/2015/04/19/ –Anne

    Reply
  14. Brianna says

    May 10, 2015 at 10:24 pm

    Oh, I like these! I’ve never seen vinyl bags so pretty before.

    Reply
  15. Lynda says

    May 22, 2015 at 10:09 am

    Which needle is used for sewing clear vinyl please?
    Well done tutorial. I appreciate that.

    Reply
    • Haberdashery Fun says

      May 22, 2015 at 10:19 am

      HI Lynda, So far, I’ve used a regular needle and thread for sewing with vinyl..

      Marni

      Reply
  16. elaina says

    October 15, 2017 at 8:50 am

    These are so cute! I’m always looking for easier sewing projects that my daughter might like to do together. She just got a new kids sewing machine and i think she would like this cute project. Thanks for sharing!

    Reply
  17. Broadway Fabrics says

    October 22, 2020 at 5:42 pm

    wonderful fabric design. I love it.

    Reply

Trackbacks

  1. CraftCrave | DigiFree | CraftCrave says:
    March 28, 2015 at 7:07 am

    […] Vinyl & Ribbon Pouches – Ribbon Blog Tour – 1 freebie(s)? […]

    Reply
  2. 5 DIY para intentar este fin de semana | Cosas Molonas | DIY Blog says:
    April 4, 2015 at 4:14 am

    […] No hay nada más útil que un pequeño neceser transparente cuando viajas para no tener que revolver toda la maleta o bolso buscando algo. El tutorial de Haberdashery explica paso a paso como hacerlo con tela, cinta y vinilo. […]

    Reply
  3. Tutorial: Clear front zippered travel pouches – Sewing says:
    April 19, 2015 at 3:57 pm

    […] Vinyl & Ribbon Pouches – Ribbon Blog Tour, by Haberdashery Fun […]

    Reply
  4. Links for the Weekend | StacySews says:
    April 24, 2015 at 10:07 am

    […] liquids in clear bags. Who says that yours can’t be pretty too? Learn how to sew up these TSA style pouches for your next […]

    Reply
  5. 50 Sewing Projects for Beginners this Summer - Hobbycraft Blog says:
    July 12, 2015 at 12:58 pm

    […] DIY Ribbon and Vinyl Pouches by Haberdashery Fun […]

    Reply
  6. Vinyl Pouches - Sewtorial says:
    August 26, 2015 at 6:41 pm

    […] small items like make-up or keys and the perfect size for dropping in your purse for safe keeping. Haberdashery Fun shows how to make these adorable vinyl […]

    Reply
  7. 20 Crafts Made with Ribbon! - Little Red WindowLittle Red Window says:
    November 19, 2015 at 7:16 am

    […] Vinyl Ribbon Pouches from Haberdashery Fun […]

    Reply
  8. Hello 2016.. Best Projects 2015 | Haberdashery Fun says:
    January 1, 2016 at 4:27 am

    […] Vinyl and Ribbon Pouches […]

    Reply
  9. Sew An Emergency Travel Pouch | Haberdashery Fun says:
    February 10, 2016 at 12:01 am

    […] New to sewing with vinyl? Check out my other vinyl tutorials here – clear vinyl wallets, ribbon and vinyl pouches and vinyl and fabric cosmetic […]

    Reply
  10. You’ll Easily Find Everything In Your Bag With These 23 DIY Pouches And Cases says:
    March 14, 2016 at 3:41 am

    […] Tutorial via haberdasheryfun.com […]

    Reply
  11. 5 Pretty Springtime Crafts | Spoonflower Blog says:
    June 14, 2017 at 1:57 pm

    […] Vinyl & Ribbon Pouches | Haberdashery Fun […]

    Reply
  12. Large Canvas Zipper Beach Pouch | Haberdashery Fun says:
    June 20, 2017 at 10:30 am

    […] Velcro ribbon pouches […]

    Reply

Leave a Reply Cancel reply

Your email address will not be published. Required fields are marked *

This site uses Akismet to reduce spam. Learn how your comment data is processed.

About me


Hi there - I'm Marni Weaver. A sewer, a sometimes quilter and a lover of fabric design. I started this blog to share my ideas. Come Join the Fun
shop now

Popular Categories

project for baby fabric projects seasonal projects fat quarter projects sewing tips and tricks inspiration

Categories

  • Applique
  • Baby
  • Bags and Pouches
  • Color
  • DIY Projects
  • Fabric
  • Fabric Design
  • Fat Quarter Projects
  • Home Decor
  • Inspiration
  • Just for Fun
  • Kids
  • No Sew
  • Patterns
  • Print On Fabric
  • Quilting
  • Scrap Fabric Projects
  • Seasonal
  • Sewing Tips & Tricks

Lovely sponsors

Recent Comments

  • Make Nine in 2021 – Sew, Bake, Snap on DIY.. Reversible Fabric Storage Bin
  • 26 Diy placemats ideas - Perfect Table Setting on DIY.. Heart Shaped Placemats Tutorial For Sew Mama Sew
  • More Free Tote Patterns | on Reversible 1 Hour Tote Pattern
  • Collapsible Kraft-Tex Bowl on DIY.. Collapsible Fabric Bowls
  • Haberdashery Fun on DIY.. Reversible Fabric Storage Bin

Projects Elsewhere

find me on Pellon Projects sew mama sew contributor

momtastic contributor

Pinterest

Visit Marni@Haberdashery Fun's profile on Pinterest.
Follow on Bloglovin

I'm Reading

  • Cluck Cluck Sew
  • Cooking Dangerously
  • In Color Order
  • Jen Hewitt
  • Jolly Jabber
  • Karly Spalding Photography
  • Leigh Laurel Studios
  • Lindsay Sews
  • Lotta Jansdotter
  • Love Patchwork and Quilting Magazine
  • Made
  • Making It Lovely
  • Noodle-Head
  • Polka Dot Chair
  • Sharon Holland Designs
  • Silhouette America Blog
  • Silhouette Design Store
  • The Purl Bee
  • The Purple Fig

Press:

Stitch Winter 2014

haberdashery_fun

I made the most glorious little Kraft-tex journal I made the most glorious little Kraft-tex journal cover over the holidays.  Not only do I love the color of the month for December (blue turquoise), but the texture of my journal is like aged leather and looks durable and rugged. Did you know Kraft-tex is actually paper??? My cover was simple to make and is just one rectangular piece of Kraft-tex, folded over at the ends and topstitched. Thats it.❤️

You can check @ctpublishing for other projects and more info.
.
.
.
#haberdasheryfun #haberdasheryfunpatterns #krafttex #krafttexuniversity #krafttexstyle #ctpublishing #isew #isewlation
Highlights from 2020. Glad it’s complete. Upward Highlights from 2020. Glad it’s complete. Upward and onward. What are you creating for the year ahead? Here’s to making 2021 a creative, fun, adventurous and graceful year.
What a fun class! Thank you to the participants in What a fun class! Thank you to the participants in my first zoom block printing class. It was an amazing group of people coming together with a common goal - sharing their love of print and pattern design.

My hubby snapped a few pictures during the workshop. I’m normally a “hider outer”, but thought this was a perfect opportunity to say Hi.  Even if it is looking down and away from the camera. 🤪

I will be hosting another block printing zoom workshop mid January. Come one come all. DM or email me for details.
.
.
.
#coffeewithhaberdasheryfun #blockprintingworkshop #zoomclass #pdfpattern #haberdasheryfun #haberdashery 
#blockprint #blockprinting #isew #fabricdesign #surfacepatterndesign #zoomsewingclass #zoomdesignclass
You’ve printed some fabric.. now what?? Build or You’ve printed some fabric.. now what?? Build or buy a frame and make yourself some easy wall art = ✔️

Want to learn how to block print? Grab a cup of coffee, a few supplies and join me for a free zoom class this Sunday, Dec 13th at 11am ( Eastern Time Zone ).

Check my recent blog post for the supply list. If you want to come and just hang out and watch, that’s ok too. DM or email me for details.
.
.
#haberdashery #blockprint #coffeewithhaberdasheryfun #PDF 
#isew #haberdasheryfun #curvyzipperpouch #fabricdesign 
#surfacedesign #haberdasheryfunpatterns #creativehappylife
Want to learn how to block print? I’m hosting a Want to learn how to block print? I’m hosting a free zoom class and the supply list is now up on my blog. You can DM me or send an email to marni@haberdasheryfun.com to join this free class. Click on the link in my bio to go to my blog.

Sunday, December 13 at 11am Est time zone.

.
#haberdashery #haberdasheryfun #blockprinting #pdfpattern #haberdasheryfunpatterns #coffeewithhaberdasheryfun #fabricdesign #blockprint
Follow on Instagram

Copyright © 2021 · Klar theme by Crimson Pear :: web & surface design