Haberdashery Fun

  • Home
  • About
    • Look Book
  • Contact
    • Collaborate?
  • Tutorials
  • Shop
    • Email
    • Facebook
    • Instagram
    • Pinterest

Keep up to date with the latest posts!

DIY.. Party Plate Storage Tote

in DIY Projects, Fabric on 25/06/13

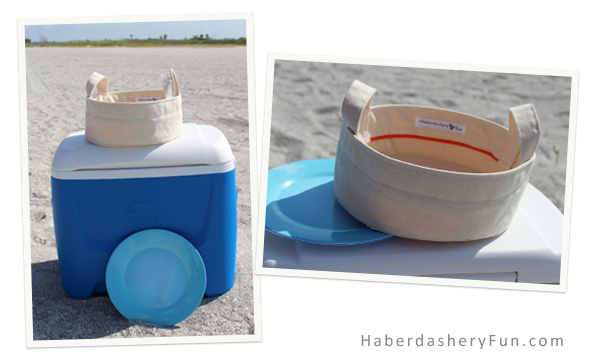
Hosting a beach party??

Bathing suit, towel and umbrella = check.  Food and bevies = check.  Plates, glasses and cutlery = check.  Decorations = check.  Cute storage holder for your re-usble plates…Nope.

Why not dress up your upcoming party with an adorable plate holder?  It will hold all your re-usable plates and you will look like such a chic and stylish party hostess!

Great for the beach, on your back patio or at a garden party!

I love making storage bins and hope you jump on board the storage bin train with me.. I have multiple variations up my sleeve and can’t wait to share them over the upcoming months!

Materials Needed:

  1. Cotton canvas
  2. Binding
  3. Sewing supplies – scissors, thread, pins
  4. Drafting material – ruler, pens, paper
  5. Sewing machine
  6. Plate for reference

I made a version of this storage bin before, but a few readers commented that it looked hard to make. So I revamped the sewing steps and made it MUCH easier.  You can see the original post here.

How to create your 2 pattern pieces:

  1. CIRCLE / BOTTOM – I used a 9″ plate. To get the bottom pattern piece – trace around the outside of your plate. Add some wiggle room [1/8″] and then the seam allowance [1/2″]. Mark a small line as a starting point.
  2. RECTANGLE / SIDE – I measured my stack of plates to get the tote height. I decided on 5″ high when finished. I also added a 2″ fold to the top edge. To get the rectangle pattern piece – First draw a long straight line and then a perpendicular line 7″ up. This cross section will be your starting point. Place the mark on your circle at this cross section and carefully walk  your circle along this line. Walk your circle pattern piece along the line until you fully rotate and hit the original mark. You will now have the length of the rectangle pattern piece and it should be around 30″ long and 7″ high. Make sure to add 1/2″ SA to all edges!

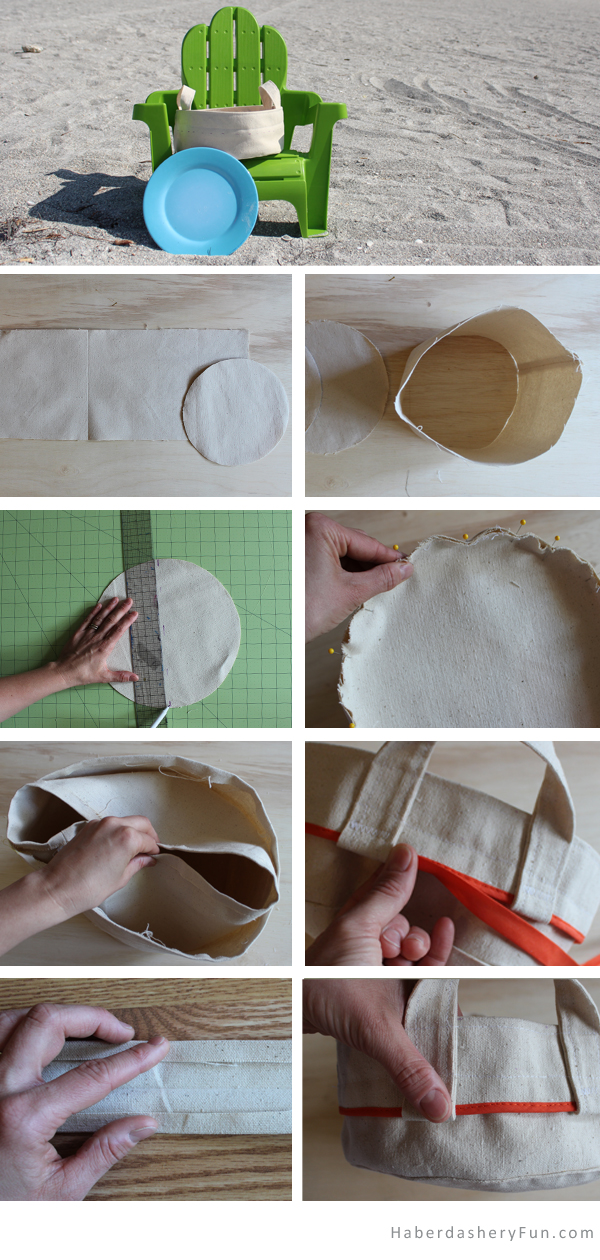
8 Easy steps to sew the tote:

  1. Cut out 2 of each pattern piece
  2. Sew the rectangle ends together. This will make a cylinder.  Remember to press your seams – first press them flat and then open and press again. Repeat to make a second cylinder
  3. Mark the center of the circle and also the center of rectangle with your disappearing ink pen. This is very similar to notching your fabric. It will help with placement and pinning the circles to each side piece
  4. Pin the bottom to each cylinder matching up the lines you marked. Matching your “notches” will help alot!  Sew with a 1/2″ SA. Press the seams. You should now have 2 completed cylinders
  5. Turn 1 cylinder right side out. Leave the other as is. Place the “as is” cylinder into the cylinder that is right side out. Wiggle the bottom piece and bottom seams into place. Press the bottom seams so they lay crisp and flat
  6. Sew your binding along the top edge. Chose a fun pop color! Turn the top edge down 2″ and press
  7. Cut and sew your straps. I have a GREAT strap making tutorial.. To see the easy steps, check it out here
  8. Insert each strap end under the folded edge. Pin in place. Pin and place all 4 strap ends. Place into your sewing machine. Sew with either a 1/4″ or 1/2″ SA and and sew the folded edge down onto your tote

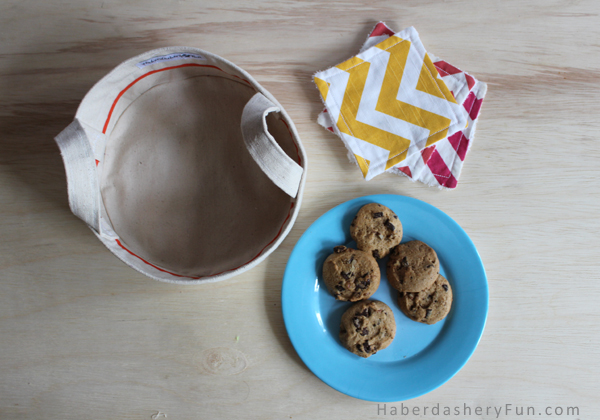
Voila!! You have finished your storage tote.. If you start today, you can make this awesome little tote in time for Canada Day or the 4th of July!

Happy Sewing.

Related Posts Plugin for WordPress, Blogger...

7 Comments

« Make A Pom Pom Beach Bag
Sew A Long.. Make A Journal Cover »

Comments

  1. Bonnie says

    June 25, 2013 at 4:53 pm

    Love this! You are right, it does look super easy.
    Thanks

    Reply
  2. Trish says

    June 26, 2013 at 10:02 am

    I absolutely love these! What if you could put some type of insulator for ice ? I could see a few beers popping out the top there. 🙂

    Reply
    • Haberdashery Fun says

      June 29, 2013 at 12:08 pm

      Wow. Great idea.. Nw you have me thinking! So many options. I’ll let you know what I come up with!

      Reply
  3. Emelia says

    June 30, 2013 at 7:23 pm

    Awesome idea. Just in time for my 4th of July party

    Reply
  4. Katy says

    July 6, 2013 at 11:00 am

    glad I found you. Fun idea for a party or even as a hostess gift? I like the idea for using for beverages

    Reply

Trackbacks

  1. Tutorial: Party plate storage tote | Sewing | CraftGossip.com says:
    June 28, 2013 at 9:49 am

    […] Marni from Haberdashery Fun shows how to make a party plate storage tote.  It’s a nice way to corral your plastic plates when you’re taking a picnic to the park.  And for your indoor shindigs, it’s a more festive way to put plates out on a buffet table.  Go to her  blog for the tutorial. […]

    Reply
  2. Tutorial: Party plate storage tote | Sewing Patterns says:
    June 28, 2013 at 4:37 pm

    […] Marni from Haberdashery Fun shows how to make a party plate storage tote.  It’s a nice way to corral your plastic plates when you’re taking a picnic to the park.  And for your indoor shindigs, it’s a more festive way to put plates out on a buffet table.  Go to her  blog for the tutorial. […]

    Reply

Leave a Reply Cancel reply

Your email address will not be published. Required fields are marked *

This site uses Akismet to reduce spam. Learn how your comment data is processed.

About me


Hi there - I'm Marni Weaver. A sewer, a sometimes quilter and a lover of fabric design. I started this blog to share my ideas. Come Join the Fun
shop now

Popular Categories

project for baby fabric projects seasonal projects fat quarter projects sewing tips and tricks inspiration

Categories

  • Applique
  • Baby
  • Bags and Pouches
  • Color
  • DIY Projects
  • Fabric
  • Fabric Design
  • Fat Quarter Projects
  • Home Decor
  • Inspiration
  • Just for Fun
  • Kids
  • No Sew
  • Patterns
  • Print On Fabric
  • Quilting
  • Scrap Fabric Projects
  • Seasonal
  • Sewing Tips & Tricks

Lovely sponsors

Recent Comments

  • Make Nine in 2021 – Sew, Bake, Snap on DIY.. Reversible Fabric Storage Bin
  • 26 Diy placemats ideas - Perfect Table Setting on DIY.. Heart Shaped Placemats Tutorial For Sew Mama Sew
  • More Free Tote Patterns | on Reversible 1 Hour Tote Pattern
  • Collapsible Kraft-Tex Bowl on DIY.. Collapsible Fabric Bowls
  • Haberdashery Fun on DIY.. Reversible Fabric Storage Bin

Projects Elsewhere

find me on Pellon Projects sew mama sew contributor

momtastic contributor

Pinterest

Visit Marni@Haberdashery Fun's profile on Pinterest.
Follow on Bloglovin

I'm Reading

  • Cluck Cluck Sew
  • Cooking Dangerously
  • In Color Order
  • Jen Hewitt
  • Jolly Jabber
  • Karly Spalding Photography
  • Leigh Laurel Studios
  • Lindsay Sews
  • Lotta Jansdotter
  • Love Patchwork and Quilting Magazine
  • Made
  • Making It Lovely
  • Noodle-Head
  • Polka Dot Chair
  • Sharon Holland Designs
  • Silhouette America Blog
  • Silhouette Design Store
  • The Purl Bee
  • The Purple Fig

Press:

Stitch Winter 2014

haberdashery_fun

I made the most glorious little Kraft-tex journal I made the most glorious little Kraft-tex journal cover over the holidays.  Not only do I love the color of the month for December (blue turquoise), but the texture of my journal is like aged leather and looks durable and rugged. Did you know Kraft-tex is actually paper??? My cover was simple to make and is just one rectangular piece of Kraft-tex, folded over at the ends and topstitched. Thats it.❤️

You can check @ctpublishing for other projects and more info.
.
.
.
#haberdasheryfun #haberdasheryfunpatterns #krafttex #krafttexuniversity #krafttexstyle #ctpublishing #isew #isewlation
Highlights from 2020. Glad it’s complete. Upward Highlights from 2020. Glad it’s complete. Upward and onward. What are you creating for the year ahead? Here’s to making 2021 a creative, fun, adventurous and graceful year.
What a fun class! Thank you to the participants in What a fun class! Thank you to the participants in my first zoom block printing class. It was an amazing group of people coming together with a common goal - sharing their love of print and pattern design.

My hubby snapped a few pictures during the workshop. I’m normally a “hider outer”, but thought this was a perfect opportunity to say Hi.  Even if it is looking down and away from the camera. 🤪

I will be hosting another block printing zoom workshop mid January. Come one come all. DM or email me for details.
.
.
.
#coffeewithhaberdasheryfun #blockprintingworkshop #zoomclass #pdfpattern #haberdasheryfun #haberdashery 
#blockprint #blockprinting #isew #fabricdesign #surfacepatterndesign #zoomsewingclass #zoomdesignclass
You’ve printed some fabric.. now what?? Build or You’ve printed some fabric.. now what?? Build or buy a frame and make yourself some easy wall art = ✔️

Want to learn how to block print? Grab a cup of coffee, a few supplies and join me for a free zoom class this Sunday, Dec 13th at 11am ( Eastern Time Zone ).

Check my recent blog post for the supply list. If you want to come and just hang out and watch, that’s ok too. DM or email me for details.
.
.
#haberdashery #blockprint #coffeewithhaberdasheryfun #PDF 
#isew #haberdasheryfun #curvyzipperpouch #fabricdesign 
#surfacedesign #haberdasheryfunpatterns #creativehappylife
Want to learn how to block print? I’m hosting a Want to learn how to block print? I’m hosting a free zoom class and the supply list is now up on my blog. You can DM me or send an email to marni@haberdasheryfun.com to join this free class. Click on the link in my bio to go to my blog.

Sunday, December 13 at 11am Est time zone.

.
#haberdashery #haberdasheryfun #blockprinting #pdfpattern #haberdasheryfunpatterns #coffeewithhaberdasheryfun #fabricdesign #blockprint
Follow on Instagram

Copyright © 2021 · Klar theme by Crimson Pear :: web & surface design