Last week I finally had a few spare moments to sit down and think. I gathered all my bias tape and zippers and came up with this tutorial. I love finding unique fabric, colorful trim, a fun notion or doo-dad and combining them all in different ways.
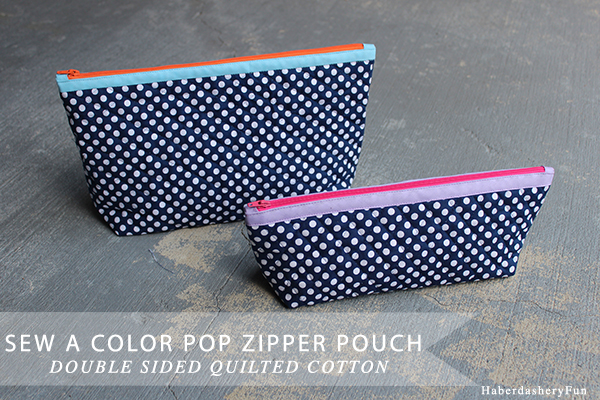
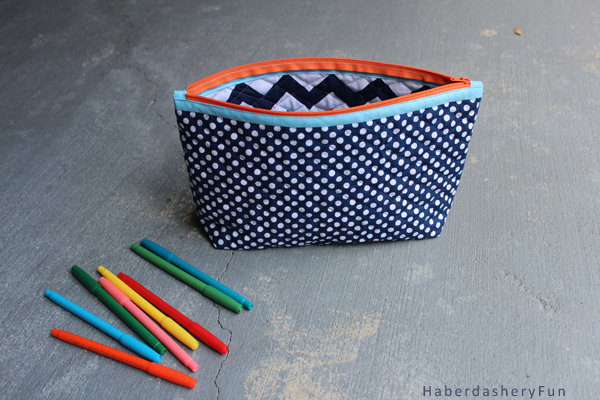
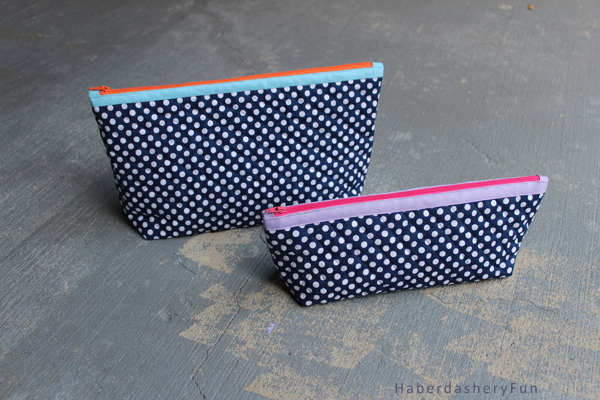
There are a few great things about this pouch. #1. LOTS of color #2. It is super easy to sew AND #3.. You don’t need to add lining. Not adding lining is my favorite part. The fabric is already quilted. It is a double sided quilted cotton from Riley Blake Designs. I was part of their blog hop last July and asked for way too much fabric. I’ve had extra in my stash begging to be used. I love that you just bind the seams and are good to go.
Materials:
- Double sided quilted cotton fabric – check out Riley Blake Designs
- Zipper
- Bias tape – I used Wrights 1/2″ double fold bias tape
- Sewing supplies
- Rotary cutter, mat and quilting ruler – check out Creative Grids
- Disappearing fabric pen or chalk pen – I love using the Clover Chaco Liner
- Sewing machine
- Iron and ironing board
Before we get started, you need to cut your fabric. Below are the dimensions for 2 sizes:
- Small pouch – cut 2 rectangles measuring 13″L x 6.5″W
- Large pouch – cut 2 rectangles measuring 14″L x 9″W
Let’s get sewing:
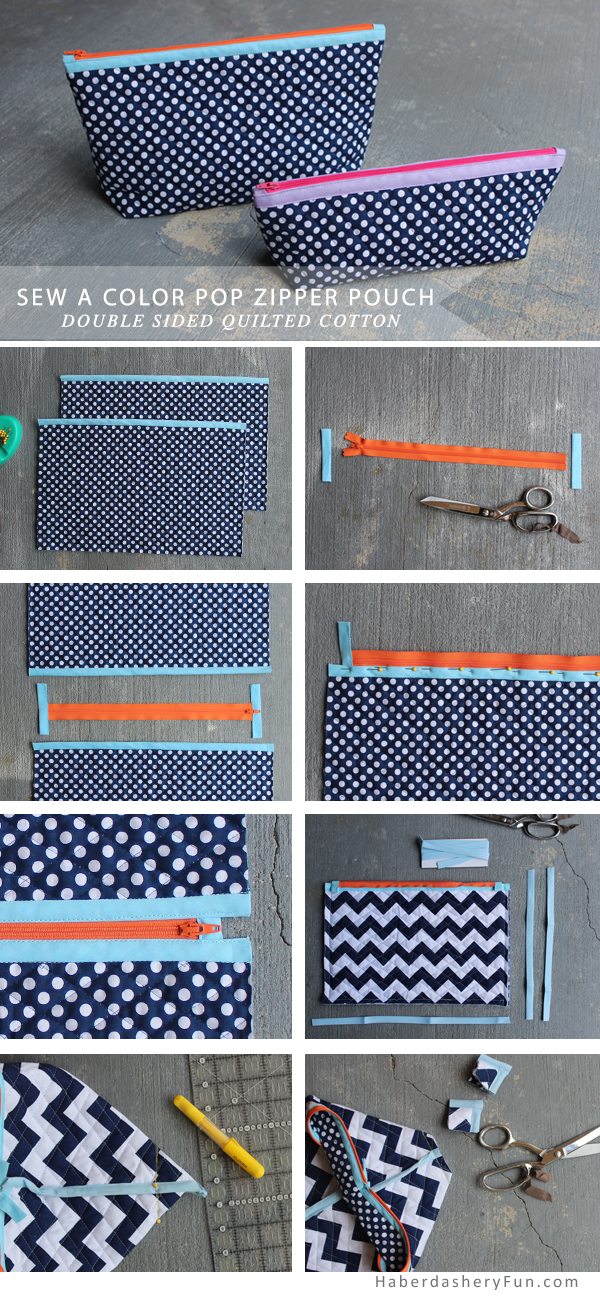
- Cut 2 pieces of bias tape the length of your fabric. Leave a 1/2″ at each end. Cover the raw edge with the bias tape and sew. Make sure the bias tape is sewn to the long end of each rectangle.
- Cut your zipper to size. Cut the zipper 1 1/2″ shorter than the length of the rectangle [13″]. Cut 2 pieces of bias tab for the tab at each end. Cover the ends with the tape. I wrote a tutorial that will help this on Momtastic. Click here to see the tab step in more detail.
- Lay the zipper under the bias tape. Center the zipper. There should be 3/4″ at each end. Stitch in place.
- Lay the other rectangle on top of the zipper. Repeat as step above.
- Fold in half along the zipper. Right sides facing each other. Pin at side seams. Place into sewing machine and stitch the sides together with a 1/2″ seam allowance. Open the zipper and then sew the bottom edge together with the 1/2″ seam allowance.
- Cut the bias tape to the length of the side seam. Leave a little extra for wiggle room. Cover the raw edges. Repeat for the bottom edge.
- Pinch and wiggle the side and bottom seams to lay on top of each other. Make sure there is a 45 degree angle at the side, place the ruler 1 1/2″ from the tip and draw a line with a disappearing fabric pen. Pin. Place into sewing machine and stitch following the line.
- Cut off the ends. Bind the edges with bias tape. Turn right side out. Wiggle all corners into place and you are complete.
That’s it. Finished sizes are: small pouch is 11 3/4″L x 3″W x 4 1/2″H and the large pouch is 13″ L x 3 5/8″ x 6 3/4″
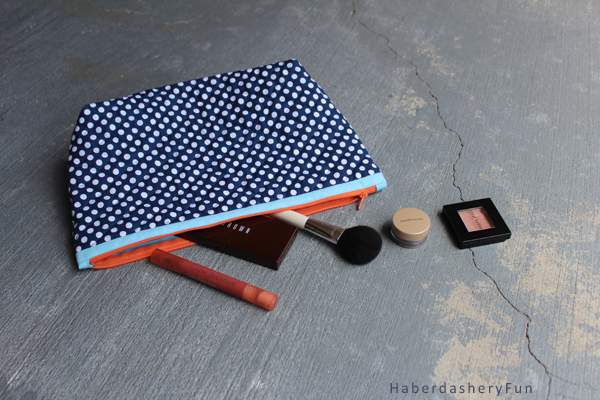
There are so many options for this guy. I’m surprised at the large size and how useful it is. I hold my sewing stuff in it, but it would also be great for make-up, baby gear or school stuff… And remember that gift giving season is coming up. I promise, any friend, sister or Mom would love to receive this pouch.
That’s it for today. Let me know how it goes. I love hearing from you. If you make a pouch, please come to my Facebook page and share your photos. Also, please come back on Thursday.. I’m working with Jo-Ann fabrics and sharing my Fabric A-Frame Organizer as part of the #SewYourStyle Jo-Ann and Pellon blog hop. I’m pretty excited about this opportunity.
** Please note that this post contains affiliate links. If you purchase a product through the link, I will receive a small commission. I’m sure you will love the product – a zipper, bias tape, chaco liner, etc.. I use these all the time.***





Sooo cute!!
Love it – I’m nuts about polka dots and colour! Thanks for the how-to.
Thanks Kate! I love polka dots as well!
Looove how these turned out!
These are fabulous! I’m always a sucker for a good pop of color. And polka dots. It’s a great combo.
I would love for you to join us and link up at Inspire Us Thursday: Sew Needle Stitch Hook on The Inspired Wren.
This is awesome! I am pinning it for later!
Thank you for stopping by 🙂
Wow! What a great tutorial! Please don’t judge the quality of my zippered pouch to harshly. It was made quickly with a two year old destroying the room as I sewed : )!
Do you have to use bias tape?
Adorable. Pinning! Would love to have you link up with us this morning at the DIY’ers.
http://biggerthanthethreeofus.com/the-diyers-16/
Thanks for stopping by. I would love to link up and will head over now 🙂
Using bias to finish the edge along the zipper is an excellent idea! It makes a nice flat border. Thank you for inserting so many pictures into the tutorial. 🙂
Thanks so much for leaving a comment. The pouches are super easy to do and adds such a pop of color. I’m glad you like the images!
so cute! You can never have too many of these pouches ;o) You are featured this weekend at the Create Link Inspire features over at Nap-Time Creations- Emily
These are just adorable! And, I love that you don’t have to sew a separate lining. Just one question… In step one, when you sew the bias tape on the long edge, you’re covering the raw edge, and not just top-stitching it in place, right? That’s what my sewing brain is telling me, but my eyes are debating the fact and I just wanted to be sure.
I have some gorgeous hand-dyed fabrics, and I’m thinking that I might need to make a little quilt sandwich with them so I can turn them into pouches! It’s an extra step to quilt the fabric myself but I think it would be worth it in the end. Thanks for the inspiration!
Thanks for stopping by Cindy. Yes, you cover the raw edges with the bias tape. Good suggestion – I will revise the step, as covering the raw edges makes more sense. Thank you! 🙂
So cute Marni!! I love the color pop with the polka dots! I also really love the quilted chevron inside! I’m pinning to my sewing project board:)
Thanks Tori. They are super easy to make and I love the no lining option
These are very cute! I have some quilted fabric I’d like to use! I see in the pictures that there is bias tape at each end of the zipper but don’t see any mention of this step in the directions. I am just missing it somehow?
Hi, Thanks for stopping by. I just looked over my directions and you are right, the bias tape part is kind of vague. Should be in step 1 – lay your rectangles on your work surface. Cover one LONG end of each rectangle with bias tape [meaning cover the raw edge]. Sew bias tape down as desired.
Hope this helps and let me know how it goes – Marni
I think Sue means the short pieces of bias tape that cover the ends of the zipper. I was also wondering about that. What step would it be? Do you sew those down as you sew the rectangles to the zipper?Thanks!
Hi Kathleen, Ohhh. gotcha. No, first cut 2 pieces of bias tape about 3-4″ [ these will be tabs that covered each end]. Trim your zipper and then sew one strip to each end. This clean finishes the zipper end. I wrote a tutorial on this over at Momtastic – ti shows the tabs in more detail. Here is the link:
http://www.momtastic.com/diy/415383-zipper-pouch-bags/
Let me know if this helps? Plus I’ve started a Flickr group. Please consider joining and adding your project to the group. I’d LOVE to see it 🙂
What does it look like inside – how do you cover the seams with tape? Do you go all around in one piece or do you do each bit separately?
Hi Sara, The easiest method would be to just wrap the seams with the bias tape, pin and then stitch down. To be really neat – turn and fold the bias tape under at each end to clean finish it. For the inside there are 5 places for the bias tape… #1-2) Each side seam #3) Bottom seam #4-5) Box each corners and then sew the bias tape to each side. That’s it. Let me know how it goes.
Do you have to use bias tape
Hi There. No – you can use anything really, it just needs to fold over the raw edge. Try using fabric. I’d love to see finished pictures of your pouch.
Marni
Hi, love this case is quilting fabric expensive and where could i purchase it as cheaply as possible?
Hi There, Thanks for leaving a comment. You could always quilt you own fabric.. I have a tutorial here – https://haberdasheryfun.com/diy-projects/diy-quilt-your-own-fabric
I also looked and you can get the Riley Blake double sided quilted fabric online for $15 a yard right now. Check out – https://www.fabric.com
Let me know how it goes. I would love to see finished images of your pouch 🙂
Marni
J’adore! C’est trop mignon. Bravo!
Trying to put mine together now and my zipper doesn’t line up like yours in the picture. I used template and bought a 7″ zipper, however when I put the closer 1/2 from edge on the left, the zipper doesn’t go all the way across. It is about 1/2 ” short. Could you have used a 9″ zipper?
Hi there.. Yes, I think your zipper is too short.. Mine was a very long zipper that I trimmed down to size.. If you’ve already sewn the tabs at each end of the 7″ zipper, just adjust the fabric rectangle and make it smaller.. Your pouch will be smaller, but that’s ok.
For adjusting the size of the rectangle, you want the side of the rectangle where you are placing the zipper to be 1 1/2″ LONGER than the zipper. However, BEFORE you cut your real fabric, test this measurement out on a scrap piece of fabric and see if the length works.. I even use paper towels for this trial and error part. Pin the zipper in place and see if it works.. If it does, you have the right size. Adjust accordingly.
Let me know if this works and how it goes 🙂
Marni
Thank you so muuuch ! <3
Thanks so much for this. Made one for my husband with marine themed fabric. Small one fit his headphones with room for ipod. Instructions worked beautifully. Really appreciated your linked zipper tutorial!
HI Nancy,
Thank you for your comment – it made my day! I appreciate your letting me know and would love to see images of the finished product! Have a great night – Marni
so cute! You can never have too many of these pouches. Do you have to use bias tape?
Hi Addison,
Sorry for the delay in getting back t you. I just had a baby so I am a tad behind in things. For the pouch, you can use anything really, it just needs to be able to fold over and enclose the raw fabric edges..
Marni