This one is just in time to kick off the holidays!! These days it seems like all my seasonal posts come just in the nick of time. It’s not that I am a procrastinator.. I need more hours in every day. Don’t we all?
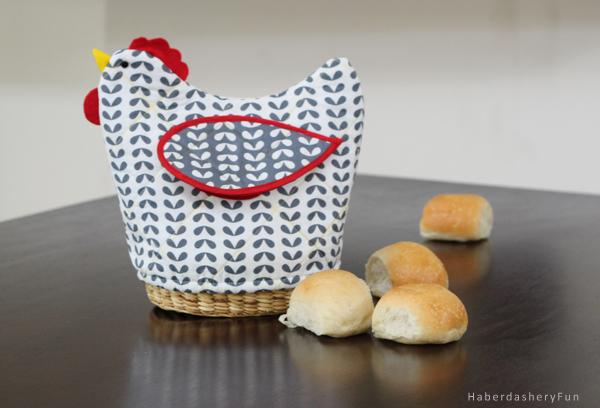
This funky little chicken isn’t just for the holidays. While the holidays are a great time to showcase it, why not use it all year? It is a great decorating piece. You can lift up a wing up and pull a dinner roll from inside the basket. And this is really easy to make. I know it looks a little hard.. But after you quilt the fabric, it’s just a few steps and then ta-da!
This tutorial is shared over at the Pellon Projects website.. Head on over to download the PDF. It has very detailed step by step instructions including the chicken template.
Materials Needed:
- Printed cotton fabric – 1/2 yard
- Solid cotton fabric – 1/2 yard
- Felt squares – 2 colors
- 1/4″ elastic
- 2 small buttons
- Double fold bias tape – home-made or store bought
- Rotary cutter, cutting mat and quilting ruler
- Chaco quilting marker
- Quilt basting spray
- Batting – Pellon TP971F Fusible works great
- Sewing machine and sewing supplies
- Iron and ironing board
- Small oval basket – no handles
Before we get started..
- I strongly suggest you quilt your own fabric. This chicken is way too cute to go and buy ugly quilted fabric. No worries, I have an easy tutorial you can follow. You can check it out here.
- After reading my tutorial, quilt your fabric as you like.
- You will also need to back the quilt. Use quilt basting spray. Spray the solid fabric and gently lay onto the batting. This sandwiches the batting between the pattern fabric and the solid fabric. Now place into your sewing machine.. You are ready to quilt.
- The chaco marking pen leaves a mark.. But it isn’t permanent; it can be washed off.. You can see that my chicken still has little yellow lines on it.. It was my first sample in the real fabric, so I haven’t washed the lines off yet.
- Wash your fabric.
Let’s get sewing:
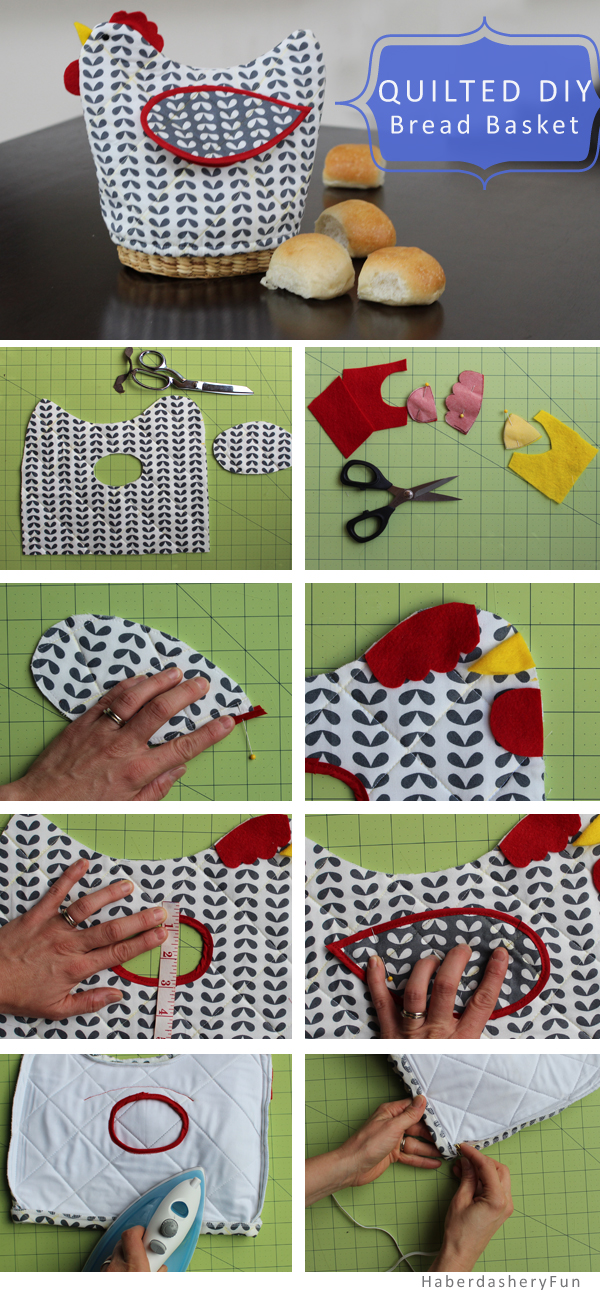
- Lay the chicken and wing pattern pieces on the quilted material and cut out.. Important – mirror the chicken pieces
- Cut out the wattle, comb and beak pieces from the felt squares
- Cut bias tape for each wing and also the ovals. Pin and then stitch in place. For the wings, leave a 1″ tail when pinning the bias tape down. Sew the bias tape around the oval and then tuck the tail under/towards the back and backstitch.
- Fold the beak in half. Place the wattle, comb and beak pieces onto the chicken’s face. The fold of the beak is on top. Note that all pieces face inwards..Seems weird, but trust me
- Measure and mark 5/8″ above the oval. Make a small mark with the chaco marking pen.
- Pin the wing in place. Adjust accordingly and place in the center of the chicken’s body. The wing needs to fully cover the oval hole. Place into sewing machine and stitch down. Start the stitch approximately 1″ from the wing tip and end 1″ from the the oval center front. Repeat for the other wing
- Place right sides together. Pin. Place into sewing machine and stitch with a 1/2″ seam allowance. Press seams. Measure and turn up bottom seam 1/2″. Pin. Place into sewing machine and edge stitch. Leave a small 1″ opening for the elastic
- Cut approximately 15″ of elastic. Place a pin at one end and insert into the opening. Pull through entirely. Adjust gathers. Sew elastic together as well the the opening shut.
Fabric source.. “Shades of Black” by Me and My Sister Designs for Moda Fabrics.
Happy Thanksgiving!


Very nice. I love the creative contrast you have done with the fabric, also love the rooster design.
Thanks Mom!! 🙂
nice.
another great project idea. keep em’ coming…..my wife just gets so excited each time a new project hits…..thanks and happy holidays from the Jackson’s
This is so cute!! What a fun idea, my kids would love it! And thanks for your sweet comment on my blog! I hope you have a wonderful Thanksgiving!
Hey Mindi, Thanks for stopping here at my blog.. Seriously, your photos are really fantastic! Have a great Thanksgiving as well. 🙂
This is such a cute idea! I wish I had someone to make this for as a gift for Christmas. Maybe I can make it for myself!
I love the chicken!! Great tutorial too. I would feel very comfortable making my own for sure so adding to my list of must makes! We would love you to link up to our Snickerdoodle Sunday @ 2crochethooks if you get a chance!
Thank you for linking up to Snickerdoodle Sunday! I so love this little chicken and have added it to my list of must make!
Hi – thank you! You will LOVe making this little guy 🙂
Wow! I love this basket cover! I think chickens are fun kitchen decor!
Navy Wifey Peters @ Submarine Sunday Link Party
Thanks for stopping by. I love this chicken as well :). I’ll come on over and check out your link party!
I LOVE THIS! Pinning it and for sure wil be making for my Mum in the future! She will love it 😀
Thanks for sharing!
Hannah ♫
Sew Lah Tea Dough
Hi- Awesome.. Thank you so much! I’m sure your Mom will love it. After the quilting part, it is really easy to sew 🙂
VERY chic(ken) bread basket cozy! Definitely want to try this for cozy weekend mornings. Thanks so much for the inspirations!
hi – thank you for your kind comments!
What a cute tutorial! I might try making a bigger version to cover my kitchen aid…
(Visiting from Flamingo Toes link party)
Awesome! let me know how it goes and please send pictures of your finished chicken!! 🙂
This is just so creative and adorable! I love the fabric you used too with the reversed whites and greys.
Love this and think I need to make several! Thank you for sharing.
I definitely need one of these, super cute idea! I also liked Rina’s idea of making a bigger one to cover a Kitchen Aid mixer. Thanks for sharing this. Happy Holidays!
Thanks Burger Nerd! I agree, would make an awesome kitchen aid cover!
I created your adorable Chicken Bread Basket Cover for my mom’s kitchen. I linked your page up to my post. Thank you so much for creating such a lovely pattern.
http://www.kaleidoscopeofcolors.com/2014/09/chicken-sewing-crafts.html
Thank you for this post. Super cute project. I was just gifted a bunch of half finished ones and really appreciate your tutorial for finishing them off.
Wonderful fabric design.