Haberdashery Fun

  • Home
  • About
    • Look Book
  • Contact
    • Collaborate?
  • Tutorials
  • Shop
    • Email
    • Facebook
    • Instagram
    • Pinterest

Keep up to date with the latest posts!

DIY.. Summer Totebag

in DIY Projects, Print On Fabric on 19/07/13

I’ve been traveling alot again.. I hate to admit this, but since the beginning of June I have been to the following places – New York, Atlanta, a small town in New Jersey, Miami, Orlando, Charlotte, Orangeburg, SC and Toronto.. No joke.

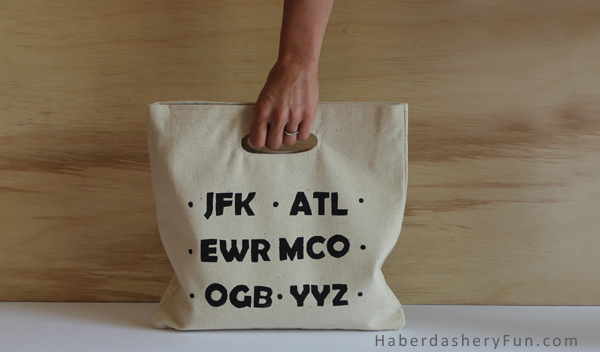
A few months ago I had a similar crazy work schedule and created an airport code themed totebag. I  thought it was cute and in a weird way, a funny keep sake.. One day my travel schedule [hopefully sooner than later] will be MUCH slower and I will have the bag to remember..

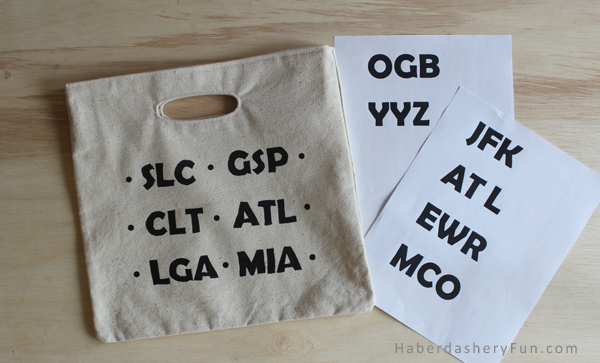
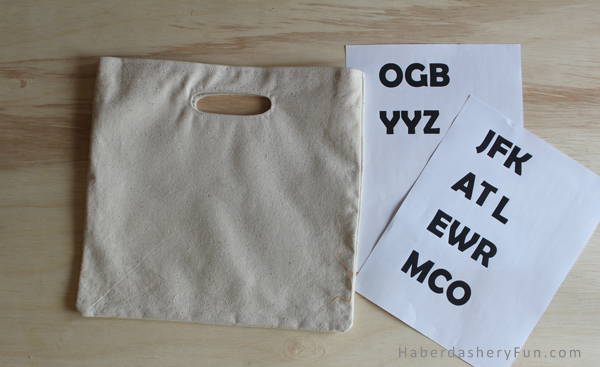
One side of the bag was blank and I don’t like incomplete projects.  With finishing my big “tour”, this was the perfect opportunity to fill it in.  Can you guess the first round of airports codes? Main Front600px

Materials Needed:

  1. Fabric – Sew your bag! I made the bag myself and you can get the tutorial here.
  2. Link to the handle template here – Market-Totebag-Handle-Pattern-Piece.pdf
  3. Sewing materials – pins, needles, thread
  4. Sewing machine
  5. Iron and ironing board
  6. Freezer paper
  7. X-Acto knife
  8. Cutting mat
  9. Pens, ruler, paper scissors
  10. Tulip fabric ink – I really like this brand of fabric ink
  11. Sponges

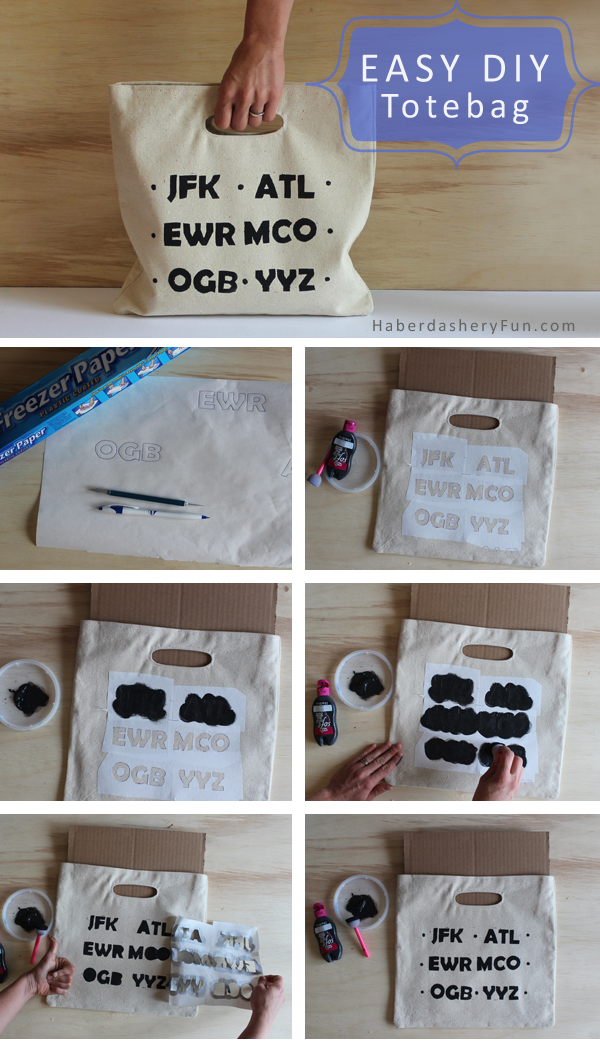
I reduced the steps from before. These are your basic 6 steps for printing with freezer paper:

  1. Find your font and print it out. You may need to print a few versions to get the right size and placement for your bag. Place the paper under the freezer paper and trace. Trace with the shiny side of the paper down
  2. Gently cut out the words with an X-Acto knife on top of a mat. Place the shiny side down and iron onto your fabric. No Steam. Don’t pull the iron over the paper, lift and press. You want to make sure all the edges are firmly down
  3. Place cardboard under your fabric. Dab ink over the cut out areas. Make sure to dab very gently near the edges. Do not pull/push the sponges along the fabric – you do not want to lift the edges of the freezer paper. This will make the ink run!
  4. Continue to dab on surface area until it is all covered
  5. While the ink is still slightly wet, pull the freezer paper off the fabric. Use the tip of the X-Acto knife to pull the little centers off the letter Os, As, Bs..
  6. Using a whole punch, I added the little dots around the outside.  I think it makes the design look more finished

Once you have tried printing with freezer paper you will be hooked! I promise..

So, what do you think? Travelling this summer? Special destination like a wedding or reunion? Why not make a themed totebag today.

Happy sewing!

16 Comments

« DIY.. Applique Something Fun!
Sew A Summer Totebag In 8 Easy steps »

Comments

  1. Trish says

    07/19/2013 at 1:17 pm

    LOVE IT! These are sooo cute. Wow.

    Reply
    • Haberdashery Fun says

      07/20/2013 at 9:00 pm

      Thanks for stopping by!

      Reply
  2. Karin @ Leigh Laurel Studios says

    07/20/2013 at 8:40 am

    I love this idea! Our daughter has traveled so much. . . I should make something for her with all the airport codes of places she’s been!

    Reply
    • Haberdashery Fun says

      07/20/2013 at 8:59 pm

      I agree, this is a fun keepsake for anything travel related – destination wedding, girls trip, family reunion.. The list goes on.

      Reply
  3. Lindsey says

    07/20/2013 at 8:10 pm

    I love this! It’s like a secret code! Can you post the tutorial to sew that bag next!? Found you on craftgawker right above my own project! (HelloHydrangea.com)

    Reply
    • Haberdashery Fun says

      07/20/2013 at 8:58 pm

      Sure. I can post it next week. Thanks for stopping by. I will check out your blog

      Reply
  4. Jonie says

    07/27/2013 at 10:21 am

    I saw this on Twitter. Very cool

    Reply
  5. carissa says

    07/29/2013 at 1:08 pm

    what a fun idea!

    Reply
  6. Krista @thehappyhousie says

    07/31/2013 at 11:36 am

    I really love this! The bag is so adorable and I absolutely love the airport codes… and freezer paper is such a great tip. Definitely going to use it!

    Thanks so much for linking up at the Inspiration Monday Party this week! I was so excited to guest host and to get to see so many fabulous new projects and blogs! Have a great week:)

    Krista @ the happy housie

    Reply
    • Haberdashery Fun says

      07/31/2013 at 11:08 pm

      Hi Krista, Thank you so much for stopping by and the comments. Glad you learned something new!

      Reply
  7. Beth K says

    08/28/2013 at 3:16 am

    Nice bag! Skip the tracing step and run your freezer paper through your printer — first cut the freezer paper to 8 1/2″ x 11″.

    Reply
    • Haberdashery Fun says

      08/28/2013 at 9:58 am

      Hi – thanks! I didn’t realize that was an option, or was to afraid to try it. Going to use my printer going forward – so much easier!! 🙂

      Reply

Trackbacks

  1. DIY.. Thank-You Wine Tote | Haberdashery Fun says:
    07/29/2013 at 11:45 am

    […] I chose to applique the words onto the fabric and used a contrasting thread color. If you don’t know how to applique or don’t really like to applique, you could also use freezer paper to screen print. I love to use freezer paper and have many tutorials here on my blog. My recent Summer Totebag project has been very popular, check it out here. […]

    Reply
  2. Tips.. Working with Freezer Paper | Haberdashery Fun says:
    04/08/2014 at 3:53 pm

    […] to share a little FYI on the subject! If you want to see one of my favorite freezer paper projects, click here to see my market […]

    Reply
  3. Printing Your Designs on Fabric | Haberdashery Fun says:
    02/10/2015 at 1:23 pm

    […] Airport Code Market Bag: […]

    Reply
  4. DIY.. Fire Truck Party Favor Bags | Haberdashery Fun says:
    02/13/2016 at 2:07 am

    […] are a ton of freezer paper tutorials out there. I have a few here on my site and you can see them here and here. Give freezer paper a try – I highly recommend it. It is very satisfying to see […]

    Reply

Leave a Reply to Tips.. Working with Freezer Paper | Haberdashery Fun Cancel reply

Your email address will not be published. Required fields are marked *

This site uses Akismet to reduce spam. Learn how your comment data is processed.

About me


Hi there - I'm Marni Weaver. A sewer, a sometimes quilter and a lover of fabric design. I started this blog to share my ideas. Come Join the Fun
shop now

Popular Categories

project for baby fabric projects seasonal projects fat quarter projects sewing tips and tricks inspiration

Categories

  • Applique
  • Baby
  • Bags and Pouches
  • Block Printing
  • Color
  • DIY Projects
  • Fabric
  • Fabric Design
  • Fat Quarter Projects
  • Home Decor
  • Inspiration
  • Just for Fun
  • Kids
  • No Sew
  • Patterns
  • Print On Fabric
  • Quilting
  • Scrap Fabric Projects
  • Seasonal
  • Sewing Tips & Tricks

Lovely sponsors

Recent Comments

  • How To Make Hand warmers | Haberdashery Fun on DIY.. Sew Heart Shaped Baby Burp Cloths
  • How To Make Hand warmers | Haberdashery Fun on How To Make Mini Heart Shaped Hand Warmers
  • Make Spooky Monster Inspired Face Cloths | Haberdashery Fun on DIY.. Make Monster Inspired Face Cloths
  • How To Sew A Fabric Bin | Haberdashery Fun on Sew An Easy Fabric Storage Bin
  • Make The Alma Tote In Fun Colors | Haberdashery Fun on New – The Alma Tote Pattern

Projects Elsewhere

find me on Pellon Projects sew mama sew contributor

momtastic contributor

Pinterest

Visit Marni@Haberdashery Fun's profile on Pinterest.

I'm Reading

  • Cluck Cluck Sew
  • Cooking Dangerously
  • In Color Order
  • Jen Hewitt
  • Jolly Jabber
  • Karly Spalding Photography
  • Leigh Laurel Studios
  • Lindsay Sews
  • Lotta Jansdotter
  • Love Patchwork and Quilting Magazine
  • Made
  • Making It Lovely
  • Noodle-Head
  • Polka Dot Chair
  • Sharon Holland Designs
  • Silhouette America Blog
  • Silhouette Design Store
  • The Purl Bee
  • The Purple Fig

Press:

Stitch Winter 2014

haberdashery_fun

Marni Weaver
Still experimenting with keeping the block printin Still experimenting with keeping the block printing, handmade feel in digital form. This one is a little rougher/less perfect, but still has the spirit ✨ Which one’s your pick—1 or 2.

#haberdasheryfun #versafineink #versafineclair #surfacepatterndesign
Who knew that one little stamp could do so much? # Who knew that one little stamp could do so much?
#haberdasheryfun #versafineink #versafineclair
Just added a new stamp pad to my collection—meet Just added a new stamp pad to my collection—meet Lilac Bloom! 💜 And before you ask… nope, this design is not a corn stalk. Are you a fan of this soft shade, or is it a bit too light for your taste?

#versafineclair #blockprints #surfacepatternprint #haberdasheryfunpatterns #surfacepatterndesign #pfeil
Atlanta feels like a steam room right now 🫠 so Atlanta feels like a steam room right now 🫠 so I’m manifesting cooler temps by reworking my Alberta Wild Rose block print into Evergreen.

#blockprinting #banffnationalpark #alberta #surfacepatterndesign #haberdasheryfun
#versafineclair
Ode to summer travels. Alberta wild rose stamp alo Ode to summer travels. Alberta wild rose stamp along with a few sketches. 

#blockprinting #banffnationalpark #alberta #surfacepatterndesign #haberdasheryfun 
@3dottedpenguinscommunity #versafineclair
Follow on Instagram

Copyright © 2025 · Klar theme by Crimson Pear :: web & surface design

Copyright © 2025 · Klar on Genesis Framework · WordPress · Log in