Haberdashery Fun

  • Home
  • About
    • Look Book
  • Contact
    • Collaborate?
  • Tutorials
  • Shop
  • Freebie
  • Block Printing Course
    • Email
    • Facebook
    • Instagram
    • Pinterest

Keep up to date with the latest posts!

DIY.. Velcro Advent Calendar

in DIY Projects, Seasonal on 01/12/14

It’s beginning to look a lot like Christmas..

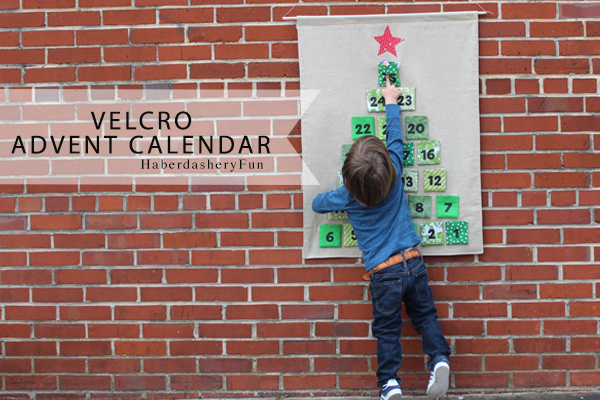
Advent Main Tanner jumping

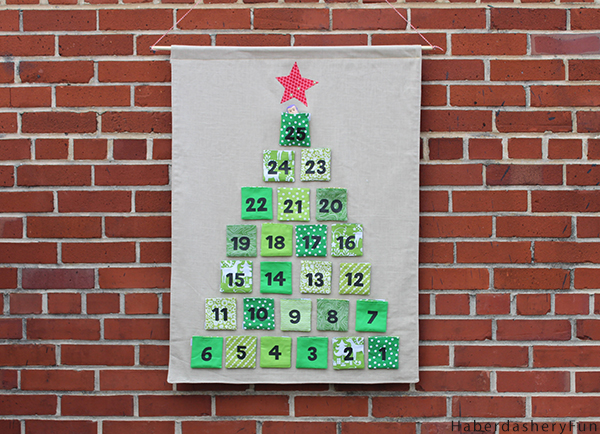
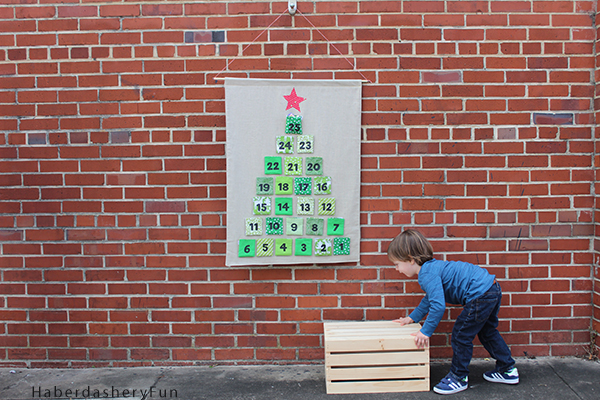
Advent Main Brick Wall Solo

I love this time of year. As a Canadian living in the States, I love the time period between late November and January 1st. Family gatherings, parties and all the holiday festivities keeps me in smiles for weeks.

Velcro Advent Calendar HaberdasheryFun

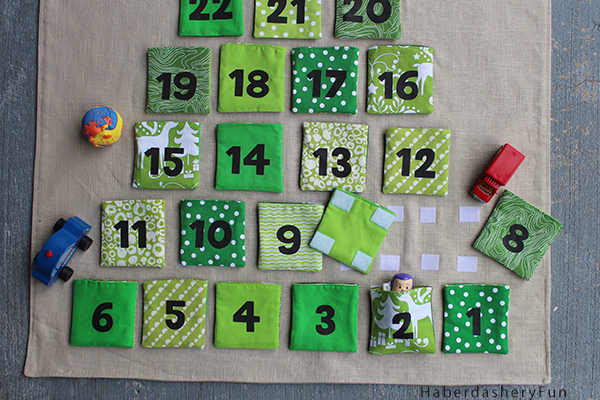
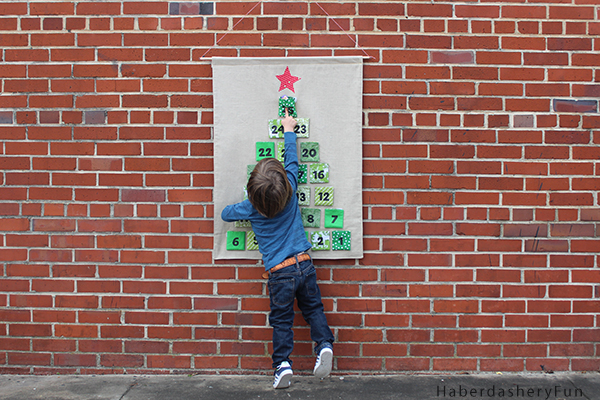
I was super happy when the VELCRO® Brand asked me if I wanted to participate in a holiday craft and come up with an advent calendar.. A little daunting at first, I had to wrap my head around a design and what I was going to sew. I pondered the idea for a few weeks and how VELCRO® could make for a fun, holiday activity… My son is starting to learn his numbers and ABCs.. I decided an advent calendar with removable pouches would not only be a great learning tool, but also an amusing activity leading up to the big day. Click here to head over to the VELCRO® Brand blog.

Advent Main Buzz with Velcro

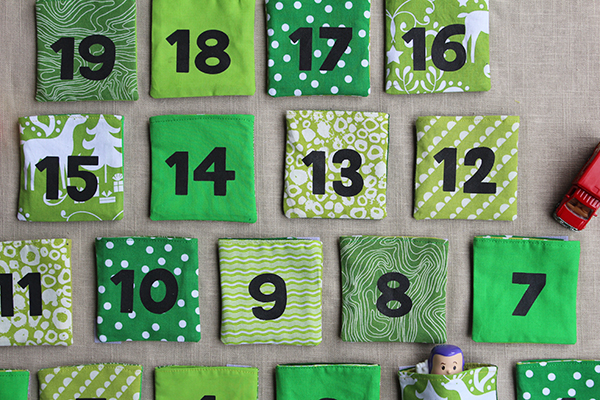
Advent Main close up Buzz

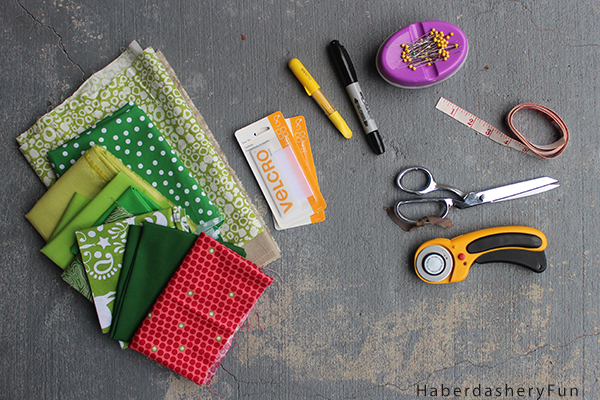
Materials Needed:

  1. Advent calendar – 1 – 2 yards in a light color fabric
  2. Pouches – Scrap fabric or fat quarters in mixture of colors
  3. VELCRO® Brand Iron On Fasteners – 3 boxes of the tape or 6 boxes of the strips
  4. Fusible web – small piece to appliqué star
  5. Rotary cutter, cutting mat and ruler
  6. Sewing machine and sewing materials
  7. Iron and ironing board
  8. Dowel, hooks and string
  9. X-Acto knife and cutting mat
  10. Paper and pen
  11. Freezer paper, fabric ink , cardboard and sponges

Let’s get started:

Advent step1

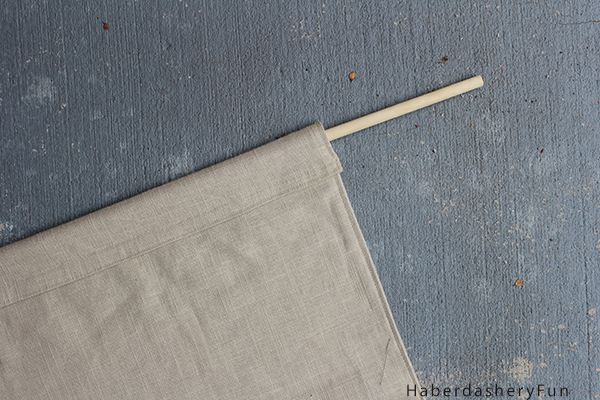
Step 1: Sew the advent calendar backing – Cut 2 large rectangles measuring 38″L x 28″W. Place right sides together and sew all 4 sides together. Leave an opening along the bottom edge approximately 4″ – 5″. Press seams. Trim each corner. Pull right side out through the opening, wiggle corners into place. Turn under bottom opening edge, press and pin closed. Create the dowel holder at the top edge – Turn and fold the top edge under approximately 2″. Insert dowel inside to make sure it slides in ok. From one side to the other, trace a straight line with a marking pen, pin. Place into sewing machine and stitch following the line. Topstitch around the outside edge.

Advent step2

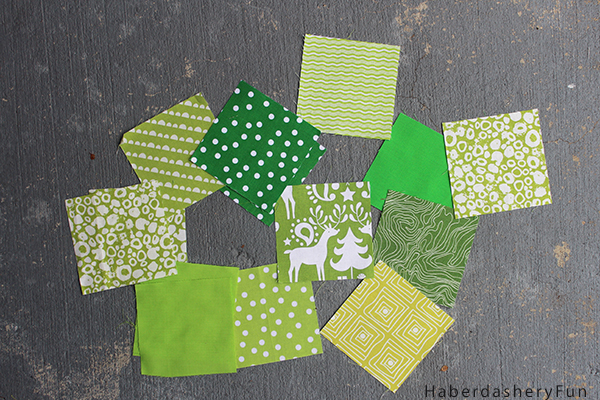
Step 2: Cut 100 squares measuring 4″ x 4″. Cut squares in a variety of colors for a fun look – mix & match front, back and lining pieces.

Advent step3

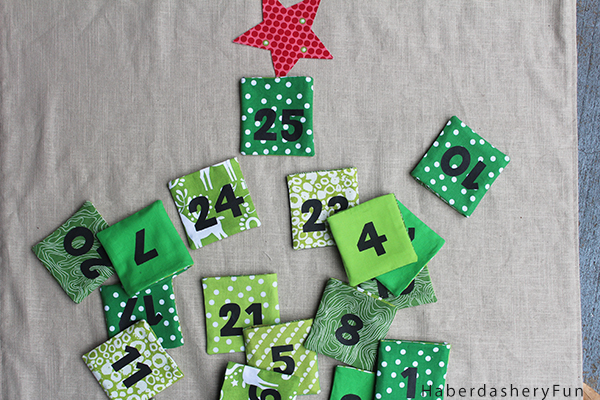
Step 3: Print numbers 1-25. Font size is approximately 1-1/4″. Place freezer paper onto work surface, shiny side down. Trace the numbers onto freezer paper. Make sure to leave room between numbers. Cut out all numbers with the X-Acto knife. Cut around each number, make sure to leave enough room on the sides [extra room for sponge and fabric ink]. Iron numbers 1-25 on each little square. Note – Remember the seam allowances when finding number placement.

Advent step4

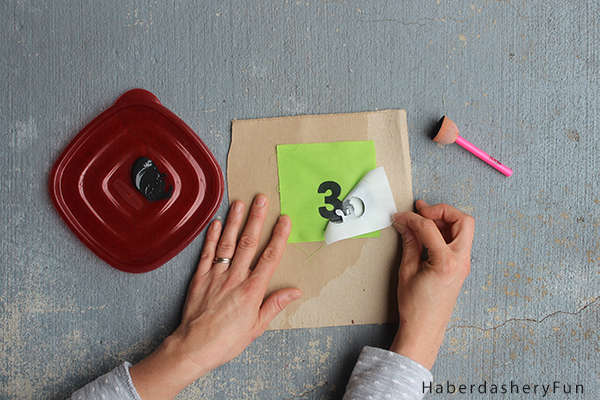
Step 4: Squeeze a small amount of fabric ink into a small dish. Place fabric square onto the piece of cardboard. Use sponge and dip into fabric ink. Gently dab onto the open areas of the freezer paper. Do not goop the fabric ink or it will run. Wait a few seconds until just slightly tacky. Pull off freezer paper. Repeat for all numbers.

Advent step5

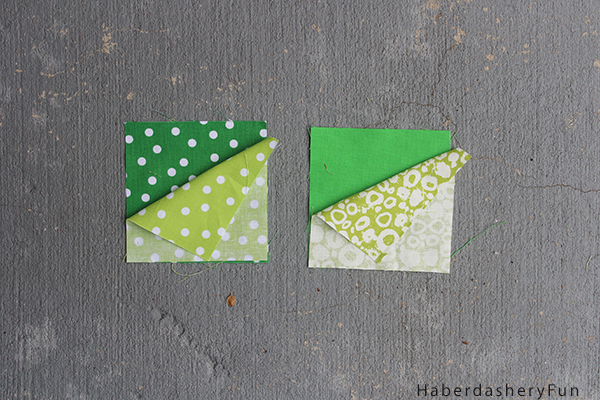
Step 5: Sew the squares – Place 2 squares right sides together and place 2 lining squares right sides together. Pin if needed. Place into your sewing machine and stitch 3 sides together with a 1/4″ seam allowance. Press. Sew all squares together and make 50 little pouches. Trim bottom corners. Press.

Advent step6

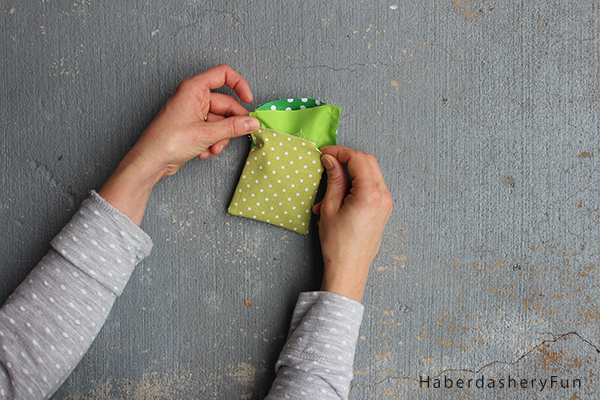
Step 6: Turn one pouch right facing side out and leave the other pouch right side facing in. Place one pouch inside the other. Wiggle into place. Place back into your sewing machine and stitch each pouch together around the top edge.  Leave a small opening to pull right side out. Press.

Advent step7

Advent step7b

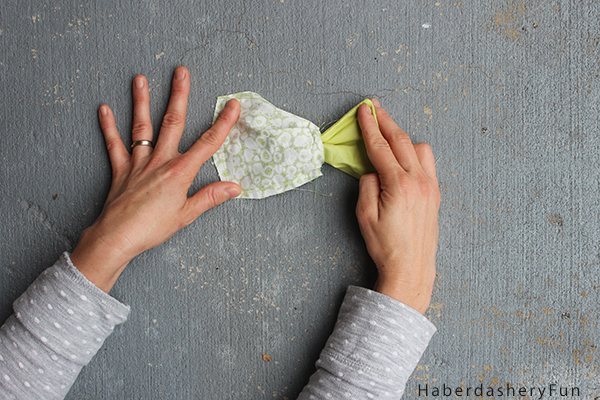
Step 7: Pull one pouch right side out through the small opening. Wiggle everything into place. Press with an iron. Fold under seam allowance for the opening. Place into sewing machine and topstitch around the top edge. Backstitch.

Advent step8

Step 8: Create the star appliqué – Iron red fabric onto fusible web.  Draw star on back of fusible web, cut out. Peel back of fusible web from the star. Find center of the advent calendar and press down. Stitch around the star.

Advent step10

Advent step10b

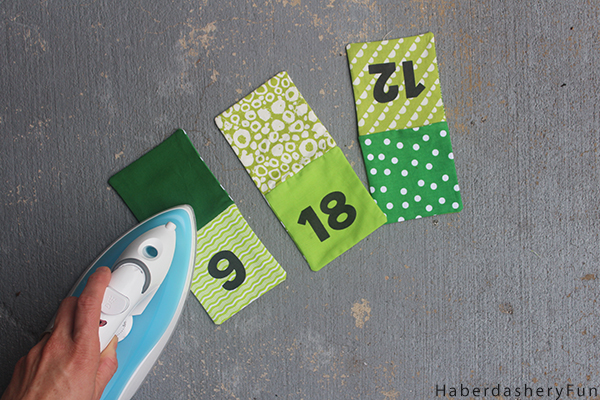
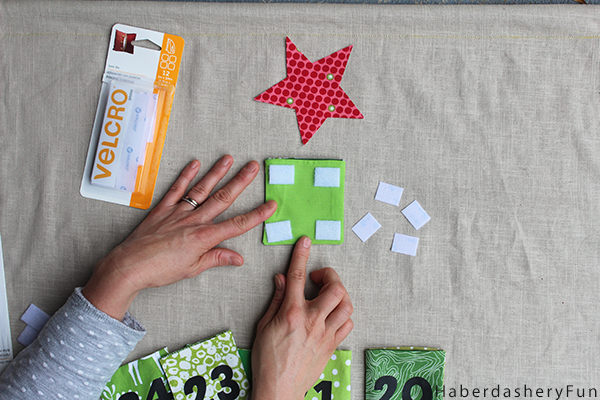
Step 9: Create the tree design on the advent calendar – Cut the VELCRO® Brand Iron On Fasteners into small square pieces. Peel the backing from each square and place 4 hook pieces on one pouch. Repeat for each pouch. Press the fasterners in place with an iron. [ Read package for directions]. Lay the 25 pouches on  the advent calendar in a tree design. Peel the backing from the alternating/ loop pieces and press in place under each pouch.

Advent Main Tanner pushing bin

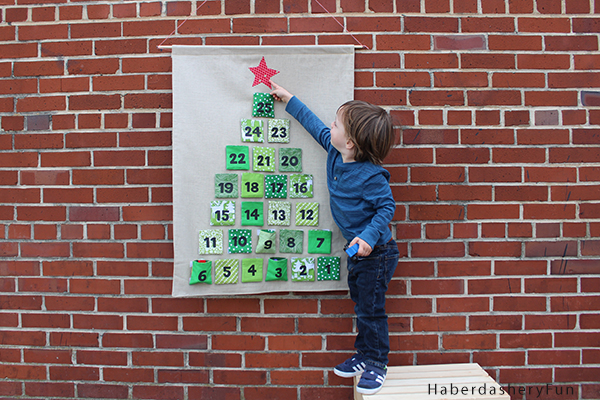
Advent Main Tanner pointing

That’s it – Have a wonderful holiday season! As this project came together, I realized what a unique tradition I was creating. What an entertaining project for the whole family to do together. Enjoy!

Please note that the VELCRO® Brand provided me with the materials for this post, but all opinions are my own. If you remember from my previous blog posts.. I use their products quite often and love sewing with them.
12 Comments

« DIY.. Fold Over Clutch With Ribbon Detail
DIY.. Fabric Clutch w/ Removable Pouches for Sew Mama Sew »

Comments

  1. Mel {MamaBuzz} says

    12/19/2014 at 4:05 pm

    This is such an adorable project! I’m not sure what’s sweeter, the calendar itself or the pics of your son playing with the calendar. You got some great shots! Thank you for sharing at Inspire Me Wednesday. Featuring you in next week’s issue.

    Reply
    • Haberdashery Fun says

      12/19/2014 at 4:43 pm

      HI Mel, Thanks for stopping by and the feature next week 🙂 It was a lot of fun taking his pics while playing with the calendar.. I have a few where Buzz Lightyear falls on his head. Lol.

      Reply
  2. Lou Lou Girls says

    12/29/2014 at 11:38 am

    Hello cute lady! Super cute! Pinned and tweeted. Thank you for being a part of our party. I hope to see you tonight at 7 pm. We love to party with you! Lou Lou Girls

    Reply
    • Haberdashery Fun says

      01/01/2015 at 11:17 am

      Hi Kimmie, Thank you so much. Happy New Year!

      Reply

Trackbacks

  1. CraftCrave | DigiFree | CraftCrave says:
    12/01/2014 at 8:57 pm

    […] DIY.. Velcro Advent Calendar – 1 freebie(s)? […]

    Reply
  2. 25 DIY Advent Calendars For A Fun Countdown Till Christmas says:
    12/04/2014 at 4:44 am

    […] Tutorial via haberdasheryfun.com […]

    Reply
  3. Tutorial: Advent calendar with removable pockets – Sewing says:
    12/05/2014 at 8:37 am

    […] Velcro Advent Calendar, by Haberdashery Fun […]

    Reply
  4. Inspire Me Wednesday Linky Party {Issue 111} - MamaBuzz® says:
    12/24/2014 at 6:01 am

    […] Bake. 8. It may be a bit late in the season, but there’s always next year for this adorable DIY Velcro Advent Calendar from Haberdashery Fun. I’m not sure what’s sweeter, the calendar or the pictures of her […]

    Reply
  5. Printing Your Designs on Fabric | Haberdashery Fun says:
    02/11/2015 at 7:36 am

    […]  Advent Calendar: […]

    Reply
  6. Print Your Own Fabric For Sewing Projects | Haberdashery Fun says:
    01/28/2016 at 5:38 pm

    […] Disclaimer, once you start you won’t be able to stop.. I’ve made printed tea towels, an adorable advent calendar, fire truck birthday party favor bags, Girls trip swag bags, ABC coasters… The list goes […]

    Reply
  7. Print Your Own Fabric For Sewing A Pouch | Haberdashery Fun says:
    02/04/2016 at 10:11 pm

    […] Want to see more Silhouette ideas and tutorials? Click the following links for firetruck party favor canvas totes, easy HTV kids birthday T-shirt, holiday inspired printed tea towels and fabric advent calendar. […]

    Reply
  8. Sew A Shopping Tote Into A Zipper Pouch | Haberdashery Fun says:
    03/15/2016 at 2:24 am

    […] ink and create a design on a cotton tote. Not sure where to start? Try one of my tutorials here and here. Skip this step if you already have a cotton tote ready to […]

    Reply

Leave a Reply Cancel reply

Your email address will not be published. Required fields are marked *

This site uses Akismet to reduce spam. Learn how your comment data is processed.

About me


Hi there - I'm Marni Weaver. A sewer, a sometimes quilter and a lover of fabric design. I started this blog to share my ideas. Come Join the Fun
shop now

Popular Categories

project for baby fabric projects seasonal projects fat quarter projects sewing tips and tricks inspiration

Categories

  • Applique
  • Baby
  • Bags and Pouches
  • Block Printing
  • Color
  • DIY Projects
  • Fabric
  • Fabric Design
  • Fat Quarter Projects
  • Home Decor
  • Inspiration
  • Just for Fun
  • Kids
  • No Sew
  • Patterns
  • Print On Fabric
  • Quilting
  • Scrap Fabric Projects
  • Seasonal
  • Sewing Tips & Tricks

Lovely sponsors

Recent Comments

  • Easy Little Kid Sewing Project | Haberdashery Fun on DIY.. Make Monster Inspired Face Cloths
  • Easy Little Kid Sewing Project | Haberdashery Fun on DIY.. Easy Toddler Apron
  • HaberdasheryFun and an easy Kraft-tex sewing project | Haberdashery Fun on Collapsible Kraft-Tex Bowl
  • HaberdasheryFun and an easy Kraft-tex sewing project | Haberdashery Fun on Sewing With Kraft-Tex
  • 3 Simple Summer Sewing Tutorials | Haberdashery Fun on Sew A Canvas Zipper Pouch

Projects Elsewhere

find me on Pellon Projects sew mama sew contributor

momtastic contributor

Pinterest

Visit Marni@Haberdashery Fun's profile on Pinterest.
Follow on Bloglovin

I'm Reading

  • Cluck Cluck Sew
  • Cooking Dangerously
  • In Color Order
  • Jen Hewitt
  • Jolly Jabber
  • Karly Spalding Photography
  • Leigh Laurel Studios
  • Lindsay Sews
  • Lotta Jansdotter
  • Love Patchwork and Quilting Magazine
  • Made
  • Making It Lovely
  • Noodle-Head
  • Polka Dot Chair
  • Sharon Holland Designs
  • Silhouette America Blog
  • Silhouette Design Store
  • The Purl Bee
  • The Purple Fig

Press:

Stitch Winter 2014

haberdashery_fun

Marni Weaver
Block and paper print from Saturday’s workshop. Block and paper print from Saturday’s workshop. This was a fun workshop to lead. Such an awesome group with great questions and engagement. Many new friends to follow here on IG❤️

Thank you to everyone who signed up or attended a workshop this Spring. 

I love teaching about simple shapes. It really is eye opening when you start deconstructing a repeat pattern into super simple shapes!

My block printing made easy online class starts today with module 1 out now. It will be offered again this August. More workshops and details to come. 

#haberdasheryfun #blockprintingmadeeasy #simpleshapes #surfacepattern #surfacepatterndesign #memademay2023 #100dayproject #100dayproject2023 #easycarve #haberdasheryfunclasses
One more, one more.. I had so much fun, I’m offe One more, one more.. I had so much fun, I’m offering one more workshop for the spring season.

This Saturday, May 20th @ 10am est. Come join the fun!

I love teaching the basics to block printing using simple shapes. Feel like you can’t draw? thats ok, I have a guided worksheet that we use. 

If you cant make the workshop and want a deep dive into block printing, my online course starts this Monday, May 22. It’s a 3 week adventure with self paced video modules, worksheets and Saturday Live Q&As

Link in profile has details for the free workshop and my course.

#haberdasheryfun #blockprintingmadeeasy #simpleshapes #memademay2023 #blockprintingsimpleshapes #surfacepatterndesign #100dayproject #100dayproject2023 #memademay #konacotton #konacottonsolids
Sharing a few simple blocks from the last few week Sharing a few simple blocks from the last few weeks of workshops. I had a blast teaching these workshops. So I am now considering adding one more workshop this week. Should it be daytime or in the evening? I would love to hear your thoughts.

TBD on date and time, will share more details here and a sign up page in the next few days.

#blockprinting #blockprintingmadeeasy #haberdasheryfun #haberdasheryfunpatterns #surfacepatterndesign #memdemay2023 #100dayproject2023 #100dayptoject #haberdasheryfunclasses #printwithspeedball
What a fun workshop yesterday. Thanks to all who j What a fun workshop yesterday. Thanks to all who joined and gave their  time and energy. We had participants from South Africa to Austria to Canada and here in the US. I love it b/c I am from Alberta Canada and live in Atlanta.

My workshops are only an hour and we have alot to accomplish.. but I love hearing where are from and what they are up to! 

We even had a brief appearance from the cutest 11mos old ❤️🎉 

I played with the same shape the last 3 workshops and had fun seeing what could be made with the half moon shape. Now what yo do next?? Sew something or have fun with them in illustrator 

#haberdasheryfun #haberdasheryfunpatterns #onlineclasses #blockprintingmadeeasy #memademay2023 #100dayproject #100dayproject2023 #surfacepatterndesign #blockprintedfabric #konacotton #konacottonsolids
I’m hosting one last workshop this week. Come jo I’m hosting one last workshop this week. Come join in for some fun creating block prints with simple shapes. 

Can’t draw? Don’t feel inspired or imaginative?? That’s ok. I promise block printing can be fun and easy.

Sign up details in the link in my profile. See you Wednesday ❤️

#haberdasheryfun #blockprintingmadeeasy #haberdasheryfunpatterns #zoomclasses #surfacepatterndesign #memademay2023 #100dayproject #blockprinting #fabricdesign #fabricdesigner #blockprinted
Follow on Instagram

Copyright © 2023 · Klar theme by Crimson Pear :: web & surface design

Copyright © 2023 · Klar on Genesis Framework · WordPress · Log in