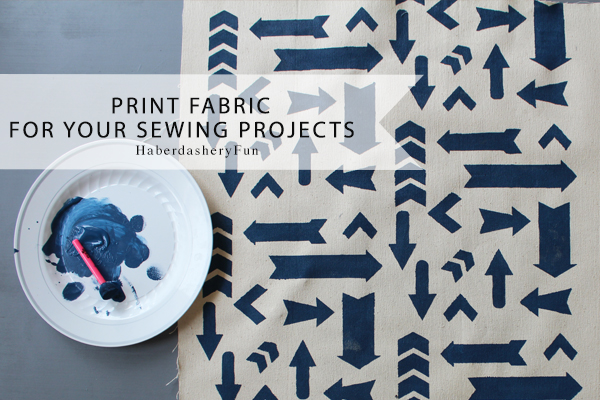
I’ve been searching for an arrow fabric for weeks and haven’t found a print that that grabs my attention. So as most of my projects go, it created the opportunity to design, print fabric and share the results..
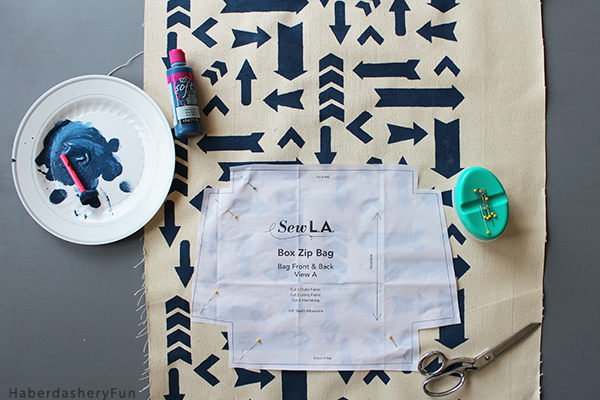
I few months ago I bought a boxy pouch pattern from Sew LA. We moved to Los Angeles last June and I was excited to have stumbled upon this creative sewing space. Unfortunately, just as I found them, they announced they were closing their store.. Boooo.
I’ve wanted to make boxy pouches for ever. You’ve probably seen a gazillion tutorials on Pinterest, I have… So while I could make my own pattern and share the tutorial for a boxy pouch, the samples in the Sew LA store were adorable and I had to buy the pattern. I love supporting other designers and shopping local, so this was a win-win scenario.
It’s been a slow process for me to get blogging again on a consistent basis. Have you noticed? Well, I haven’t shared a lot about it, but I’m pregnant with our second child. It’s been a long road and we are thrilled about having another boy. I’m due April 1st and the countdown is on! My 4 year old son stays home with me a few days a week and let’s just say blogging hasn’t been as easy as before. I’ve stopped and started so many sewing projects it’s driving me crazy..
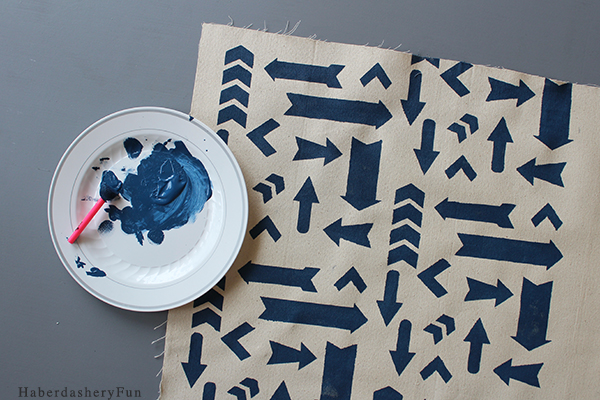
Printing my own fabric gave these boxy bags such a unique twist. This has been a blast and I’m sure you’ll love trying it out. I’ll share the pouch next week!
Lets get started:
Materials:
- Cotton or canvas fabric in a light color
- Fabric scissors
- Silhouette machine and supplies
- Freezer paper, fabric paint and sponge – Try Martha Stewart, Silhouette Fabric ink or the Tulip brand
- Iron and ironing board
- Craft paper
A few things to consider:
- Print extra fabric – My boxy pouch pattern has 2 sizes. I wasn’t sure if I was going to make the large or small pouch, so I cut enough blank fabric to make the decision later on. Yay for extra material for a second pouch.
- Start small – Is this your first time printing on fabric or printing your own design? Start with a small, simple pattern or project so you don’t overwhelm yourself!
- Multiple colors – Do you want to print different colors? Use one color fabric paint on the top of the design and a second color on the bottom half. Just make sure to lay out the pattern pieces ahead of time, so you have enough of the one color for all the pieces.
Lets get started:
Step 1 – Pull out your Silhouette machine and find a design in the Silhouette Design store. I LOVE the work from Karla Dudley. I’ve used her designs before and if you are looking for a fun, whimsical, yet modern shape – she is your go-to lady. Measure your pattern and figure out how much fabric you need. For this pouch I cut a fabric rectangle measuring 29″L x 24″W.
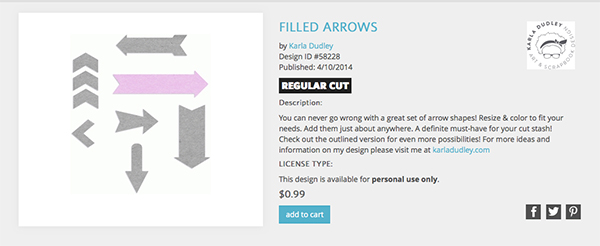
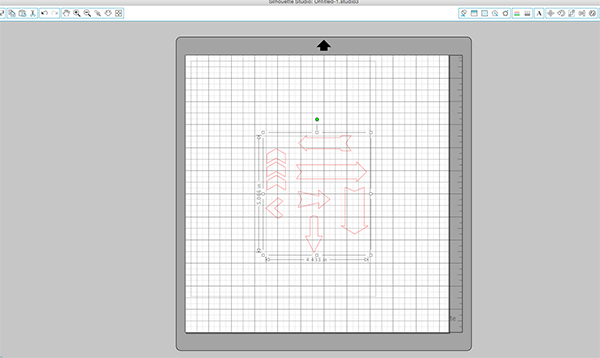
Step 2 – Open Silhouette Design studio and pull up the design. Play around with the design. In my case this is what I did: I enlarged her entire design, ungrouped the arrows and then copied and pasted different arrows to fill the blank space. For visual interest, I also resized some arrows and made them smaller and larger. I rotated others at different angles. Be aware of the overallI also design to make sure there aren’t any empty areas that the eye gravitates towards.
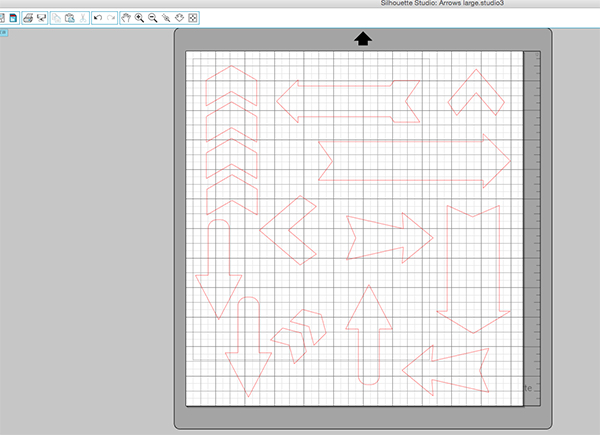
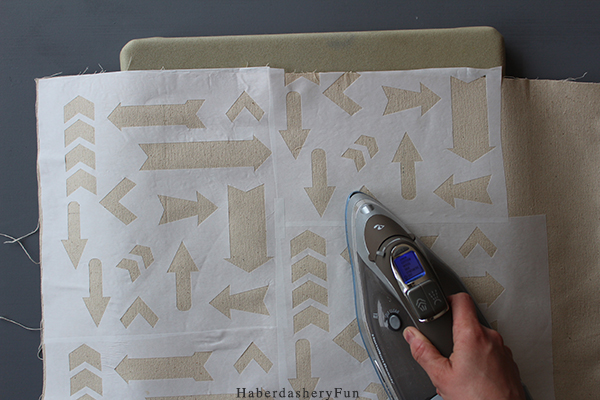
Step 3 – Send the file to be cut. Place the freezer paper onto your fabric and figure out how many pieces are needed to print the fabric. In my case, I needed 6 cut files.
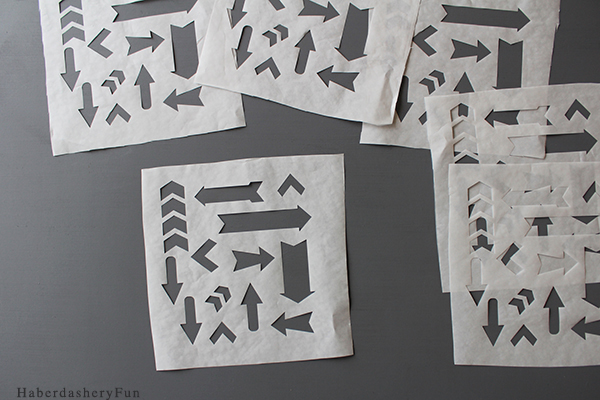
Step 4 – Lay the freezer paper onto the fabric. First make a column and line everything up. You can either use a ruler, or just eyeball it. I wasn’t overly concerned about it being perfect, so I didn’t use a ruler. Make a second column, but offset the design and start the freezer paper in the middle of the freezer designs from the first column. This will help break up the print and keeps the eye roaming around the fabric.
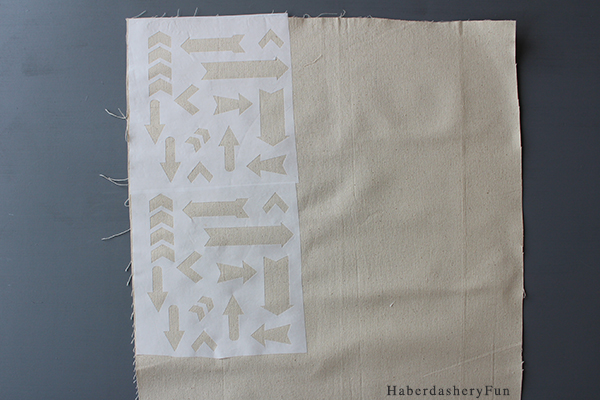
Step 5 – Happy with the layout? Press in place with an iron. Note: Make sure to lift and press the freezer paper in place, don’t drag the iron over the cut edges.. This could easily rip or lift the corners. Press any loose corners firmly down. Fabric paint will bleed into any areas that have knicks, cuts or are not set down properly.
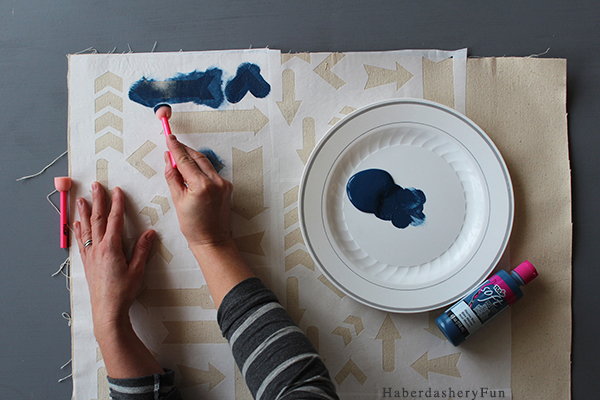
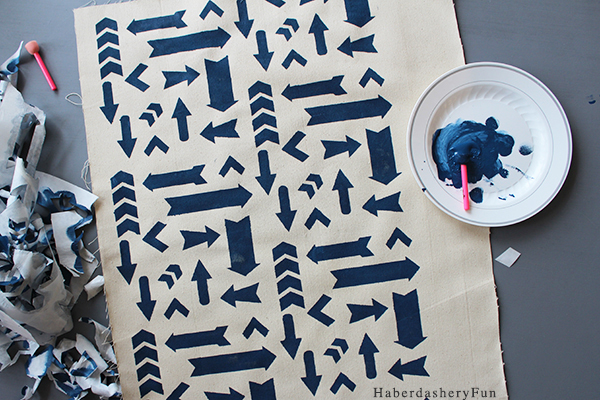
Step 6 – Squirt a small amount of fabric paint onto a plate, place the sponge into the ink and gently dab onto the fabric surface. Work fast. Do not “pull” the sponge around, just dab lightly. Do not goop, if you think you are gooping the fabric paint.. you probably are.
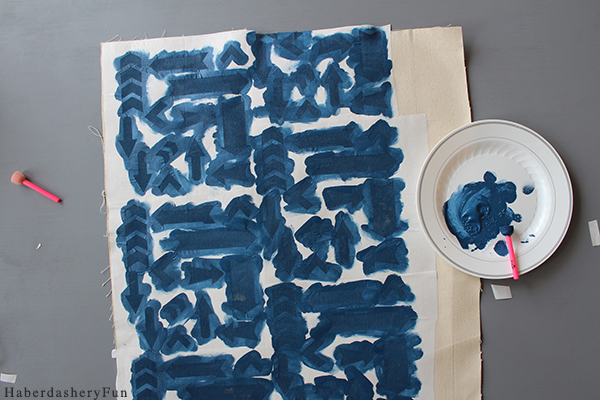
Step 7 – While the fabric paint is still wet, gently pull the freezer paper away from the fabric.
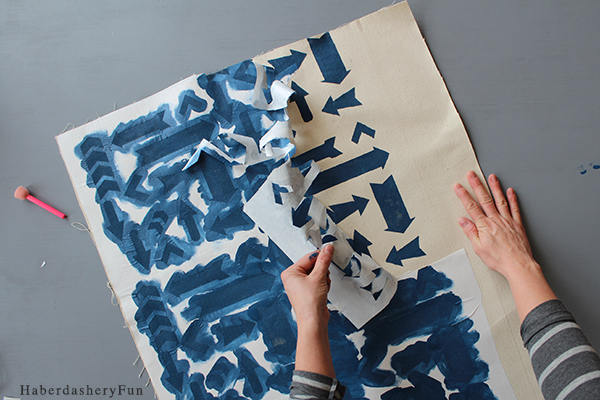
Step 8 – Set aside to dry and admire your work!
Printing on fabric can and will become an addiction. Want to see more of my printed tutorials? I’ve made printed tea towels, an adorable advent calendar, fire truck birthday party favor bags, Girls trip swag bags, ABC coasters… The list goes on.
Want to see the finished pouch? Click here to go to the big reveal..


What a great idea. I love the pattern you designed. Congrats on the new baby.
Thanks Anja! It was fun to make the print.. Looking forward to many more :). Where in Canada are you? I noticed .ca..
It looks really easy in article but how does it hard that you can understand it Admin.