Haberdashery Fun

  • Home
  • About
    • Look Book
  • Contact
    • Collaborate?
  • Tutorials
  • Shop
    • Email
    • Facebook
    • Instagram
    • Pinterest

Keep up to date with the latest posts!

DIY.. Reversible Fabric Storage Bin

in DIY Projects, Fabric on 03/04/14

I’m addicted to making fabric storage bins.  How about you?

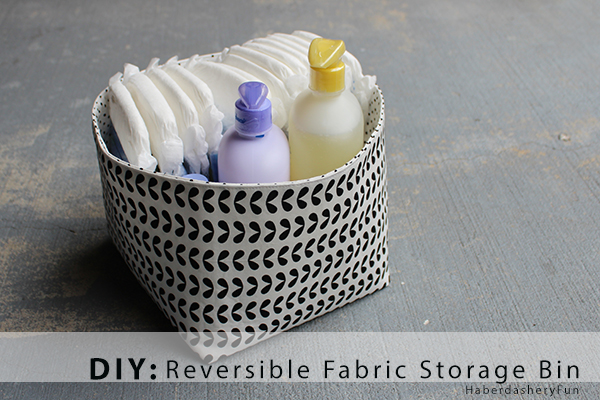
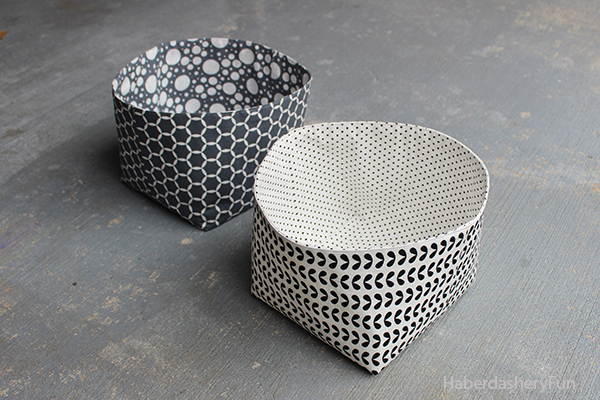
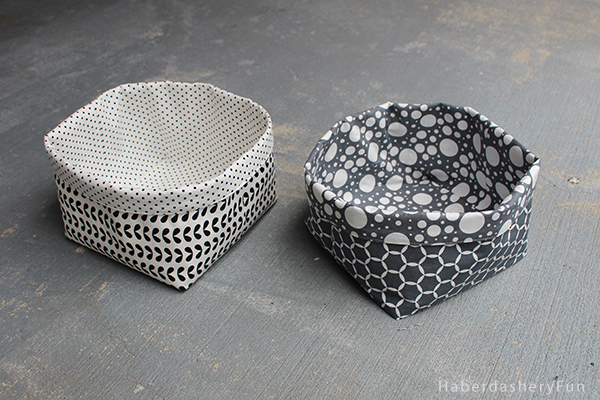
I made smaller versions of these last year and have always wanted larger ones. I finally had a few free hours to work on the pattern and get a few made. I love how they turned out and how they look with the top edge rolled down. And they are reversible too!

Wouldn’t they make an awesome baby shower or house warming gift? Fill it with a bunch of goodies and you are good to go..The only problem I see is that if you make one to give as a gift, you may decide to keep it at the last moment.  I’ve done this before.

The finished size is 8.5″L x 9″W x 7″H

Supplies Needed:

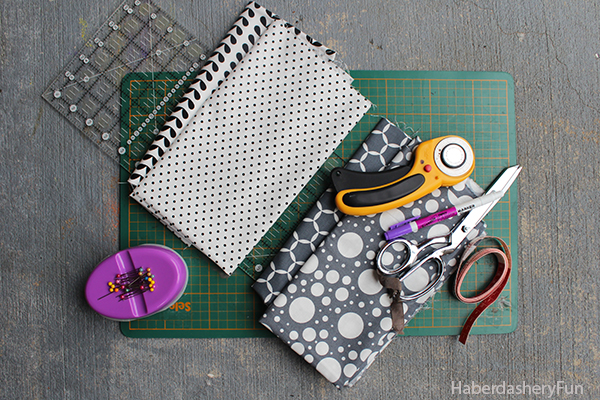
  1. Cotton fabric outside – 1/2 yard
  2. Cotton fabric lining – 1/2 yard
  3. Pellon Décor-Bond 809 – 1 yard
  4. Sewing machine and related supplies
  5. Rotary cutter, cutting mat, quilting rotary cutting ruler
  6. Disappearing ink pen
  7. Iron and ironing board

Before we get started, you will need to complete the following:

  1. Cut your fabric –  cut 2 rectangles measuring 18″ x 24″ from the outside and lining fabrics. Repeat and cut another 2 rectangles from the Pellon Décor-Bond 809.
  2. Fuse the Décor-Bond to the wrong side of the main and lining fabrics.

Alright, let’s get sewing your simple fabric bin!

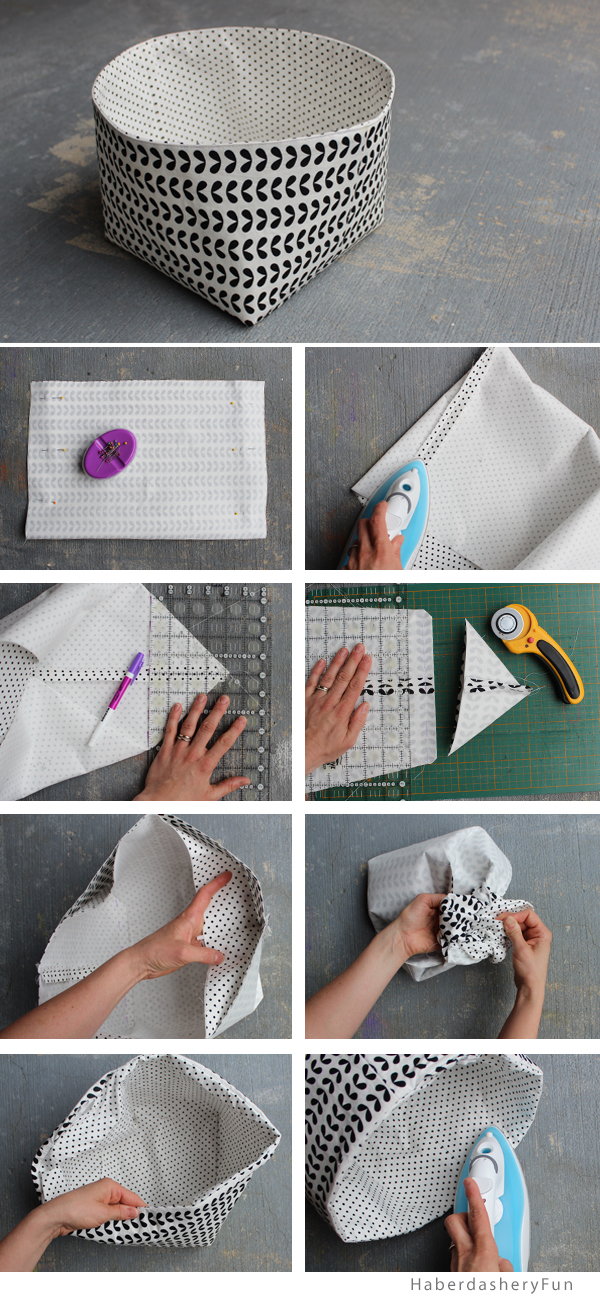
  1. Fold the rectangle in half, to measure 18″ x 12.” Pin along sides if needed. Place into sewing machine and stitch with a 1/2″ seam allowance.
  2. Press side seams while closed. Open and press again.
  3. Sew those boxed corners! Start with the main fabric. Wiggle the fabric around so that the side seams are facing upwards. Make a point and also make sure that the sides sit at a 45 degree angle.  Finger press any wrinkles out.  Measure 4″ upwards from the tip and mark a dashed line with a disappearing ink pen. Pin. Place into sewing machine and stitch following the dashed line. Backstitch. Repeat for the other side and again for the lining fabric.
  4. Place the quilting ruler onto the corner. Lay the ruler so you have a 1/2″ seam allowance. Cut along the ruler edge using a rotary cutter [ you will cut the tip off].  Repeat for the other side and again for the lining fabric.
  5. Turn project so they sit as bins. Main bin is facing right side in and lining bin is facing right side out.  Place the lining bin into the main bin. Wiggle the corners into place. Make sure side seams match up.  Pin around the top edge. Place into the sewing machine and stitch together with a 1/2″ seam allowance. Leave a 4″ opening near a side seam.  Press with an iron.
  6. Gently pull the bin through the 4″ opening.
  7. Wiggle the fabric into place. Roll down top edge to sit into place and make sure all corners match. Press along top edge with an iron, turn the 4″ opening seam allowance under. Press in place. Pin if needed. Place into the sewing machine and edgestitch along the entire top edge.
  8. Press the bin with an iron.

That’s it! Easy right? Well I have great news.. This project is available over at the Pellon Projects website. Click here to head on over to get the PDF. You can save the tutorial and print it later.

Want to sew other reversible projects? How about a great everyday bag? Click here for my Reversible Tote Tutorial.

Fabric reference.. I LOVE this fabric. I bought a bunch of coordinating fabric from this collection. It is from Moda Fabrics and called “Shades of Black” by Me and My Sister Designs.

118 Comments

« Riley Blake Union Jack Blog Tour
Quick Tip.. Working with Freezer Paper »

Comments

  1. Amy (^..^)~ says

    04/03/2014 at 12:38 pm

    I love the fabric, too! This looks like an awesome way to stay organized, I’m so messy. 🙂

    catscraftsncritters.blogspot.ca

    Reply
    • Haberdashery Fun says

      04/04/2014 at 12:32 pm

      Hi Amy, They are a great landing spot for all the clutter in our house. I might even put one on our stairs to catch the clutter there. They fit perfectly on the tread!

      Reply
  2. Ann says

    04/03/2014 at 1:11 pm

    Amazing! So pretty. You’re right that they’re ideal gift baskets.

    On another note, I made cheerleader t-shirts for my daughter’s bday party last week with homemade appliqué – my first time. It worked perfectly, and although I didn’t use a pattern you created to do it, you definitely inspired confidence in me so that I wasn’t afraid to make rather than buy. Thanks!!

    Reply
    • Haberdashery Fun says

      04/04/2014 at 12:29 pm

      Hey Ann,

      That is awesome! I’m so happy that I helped inspire you to applique and it worked out! Yay! Ps The shrimp salad on your blog looks amazing!!

      Reply
  3. Trish says

    04/03/2014 at 2:50 pm

    I want these all over my house!

    Reply
    • Haberdashery Fun says

      04/04/2014 at 12:28 pm

      If you are nice to me.. I might bring one for you when I see you on our girls trip next month! 🙂

      Reply
  4. Julie says

    04/06/2014 at 4:38 pm

    These are lovely and your tutorial is so clear – fantastic.

    Reply
    • Haberdashery Fun says

      04/08/2014 at 9:51 am

      Hi – Thank you for stopping by, I’m glad to hear my tutorial is clear and seems easy to make 🙂

      Reply
  5. ananda says

    04/08/2014 at 10:00 am

    hi marni! this is sooo beautiful! love your choice of fabrics! thank you for sharing! =)

    Reply
    • Haberdashery Fun says

      04/08/2014 at 10:07 am

      Thanks for stopping by. I love the DIY picture farm on your blog today.. The colors you chose are great!

      Reply
  6. Deonna at the Child at Heart blog says

    04/08/2014 at 2:11 pm

    Hey Girl! It’s Deonna from the Child at Heart blog! I would love for you to link up at our party this week and share your great idea! http://www.thechildatheartblog.com/2014/04/link-party-with-morganize-with-me.html

    Reply
    • Haberdashery Fun says

      04/08/2014 at 3:13 pm

      Sounds great! Thanks for stopping over. I’ll look into your blog and link party now 🙂

      Reply
  7. onel says

    04/08/2014 at 9:01 pm

    Thank you for the tutorial! I’m new to machine sewing and this looks like a great project to start with! Beautiful choices of fabric! Love them! 🙂

    Reply
  8. Erica says

    04/09/2014 at 9:20 am

    This is adorable! So perfect for craft room storage. I love that they are reversible. I’ve pinned this project to my sewing to do list!

    Reply
  9. Anne Weaver says

    04/09/2014 at 10:31 am

    I could use these in every room of my house! I’ve got a Craft Gossip post scheduled for later today that links to your tutorial:
    http://sewing.craftgossip.com/tutorial-reversible-fabric-storage-baskets/2014/04/09/
    –Anne

    Reply
  10. Elo says

    04/10/2014 at 5:23 am

    I’ve been looking for such a tutorial for quite a long time now, so thank you for sharing! Nice choice of fabric, I’m definitely going to make one… or more! 🙂

    Reply
    • Haberdashery Fun says

      04/10/2014 at 9:50 am

      Thank you! I’m glad the tutorial works for you.. It’s easy as well, so many bins can be made in a weekend.

      Reply
  11. Morgan says

    04/10/2014 at 6:00 pm

    I love what you created! Any sort of bin makes me happy, especially one that you can customize. Your blog is beautiful and because I like to sew, this is going to be an excellent spot for me to hang out. Thanks for linking up with me and Deonna!

    Reply
  12. Angela says

    04/10/2014 at 9:25 pm

    What is the finished size? Could you tell me how to make a large one to hold a bunch of magazines?

    Reply
    • Haberdashery Fun says

      04/10/2014 at 9:38 pm

      Hi – the finished size is 8.5″L x 9″W x 7″H. Magazines will sit in this nicely, however, they won’t stay standing up in my bin. It isn’t sturdy enough with just cotton fabric and the Décor-Bond 809 fused to each side. Try using a heavier weight fabric with the decor bond on each side and bet it will work. Let me know how it goes.

      Reply
  13. Diane @ Vintage Zest says

    04/17/2014 at 12:45 pm

    This is so fun and perfect for the huge amounts of fabric in my stash that would be nice as a lining OR the main fabric! Also, congrats because you are featured on this week’s Do Tell Tuesday link party and have been pinned to our features board! Feel free to grab a button and link up this week too. 🙂 http://www.vintagezest.com/2014/04/do-tell-tuesday-19-with-features.html

    Diane @ Vintage Zest

    Reply
  14. Deonna at the Child at Heart blog says

    04/18/2014 at 3:21 pm

    I featured you from the Morganize with Me link party: http://www.thechildatheartblog.com/2014/04/my-favorites-from-link-party-with.html

    If you haven’t signed up for my giveaway this month please come by! Have a joyful day 🙂

    http://www.thechildatheartblog.com/2014/04/spring-statement-necklaces-from.html

    Reply
    • Haberdashery Fun says

      04/19/2014 at 9:31 am

      Thank you! I’ll come on over and check it out. Have a great week-end.

      Reply
  15. Roberta @ Mommy Like Whoa says

    04/20/2014 at 11:39 am

    Hey! I love this! Just wanted to let you know I featured you on my blog this morning! http://mommylikewhoa.com/2014/04/best-internet-volume-7/

    Reply
    • Haberdashery Fun says

      04/20/2014 at 1:49 pm

      Thank you! I’ll head on over and check out your blog. 🙂

      Reply
  16. Dee Huynh says

    04/22/2014 at 12:31 pm

    Thank you Marni for the great post! I’d like to make a bunch of these beautiful bins – any suggestions on how to calculate fabric dimensions if I want bins of different sizes than what you have here?

    Reply
    • Haberdashery Fun says

      04/22/2014 at 12:45 pm

      Hi – Thanks for stopping by. I’m working on a post for a larger size and hope to share this week or next. I have a tutorial for small ones here – https://haberdasheryfun.com/diy-projects/diy-easy-fabric-storage-bin. Good idea for a post – I can share the dimensions for a bunch of sizes. Thank you -I will do this soon 🙂

      Reply
      • Dee Huynh says

        04/22/2014 at 3:07 pm

        Thank you for the quick response! I can’t wait for the dimensions! Also, I came across another blog where they suggest using plastic canvas (in addition to interfacing) as a stiffener on bins – what’s your take on this?

        Reply
        • Haberdashery Fun says

          04/23/2014 at 9:15 am

          Hi – I’m not sure what plastic canvas is.. I’ve used many different products from Pellon. The last one I found is called Decor Bond 809 and it works great – it really makes a light cotton fabric quite stiff. The larger the bin, the more interfacing needed. For a large bin I would use a thicker lining fabric like cotton canvas. If you also interface the cotton canvas lining it will be quite sturdy.

          Check out my plate and halloween bowl tutorials.. Theses are round and they use cotton canvas and I like how they turned out:
          Plate: https://haberdasheryfun.com/fabric/diy-party-plate-storage-tote
          Halloween Candy Bowl:https://haberdasheryfun.com/diy-projects/diy-halloween-candy-bowl

          Reply
  17. Lynsey says

    04/23/2014 at 3:59 pm

    Thanks so much for sharing this great tutorial!
    Lynsey x

    Reply
  18. Victoria says

    04/23/2014 at 6:19 pm

    I love how easy this looks and sounds. I recently got a sewing machine and this looks like the perfect thing to make till I get better! Thank you!

    Reply
    • Haberdashery Fun says

      04/23/2014 at 9:48 pm

      That’s awesome to hear.. yes, this is a perfect first project. You can finish it in a few hours. Let me know how it goes – I’d love to see pictures of your finished project!

      Reply
  19. Kim says

    05/13/2014 at 10:49 pm

    Can you tell me what step I could take to add some handles?

    Reply
    • Haberdashery Fun says

      05/14/2014 at 8:31 am

      Hi- Thanks for stopping by.

      If you want to add straps, add them just before step 5. Mark strap placement on either side of the seam – approx 2″ out from each seam. Repeat for the other side. Pin in place. Make sure that the straps hang DOWN/towards the inside of the bin. Now continue with step 5 and place the lining bin into the main bin… When you sew around the top edge, you will sew the straps into place. When you turn the bag right side out the straps will come out facing up.

      Let me know if this makes sense and how it goes! Thanks again for stopping by and have a great day. 🙂

      Reply
  20. Emily says

    06/30/2014 at 4:53 pm

    Alas! I made this (great tutorial), but I guess it was a pattern that depended on a particular type of interfacing. Mine’s lovely in theory, but terroibly floppy… (I have only a small sew shop near me.)

    Reply
  21. Megan says

    09/21/2014 at 2:29 pm

    Great tutorial. The pictures were very helpful. The hardest part was turning the whole thing right sides out!

    Reply
    • Haberdashery Fun says

      09/21/2014 at 7:27 pm

      Thanks for stopping by and leaving a comments. Once you pull the bag right side out, it works and looks awesome.. Isn’t it so satisfying? 🙂

      Reply
  22. Bazil says

    10/02/2014 at 5:21 pm

    Awesome tutorial! If I want to make a taller bin would I add inches to the 18″ side correct?

    Reply
    • Haberdashery Fun says

      10/03/2014 at 2:54 pm

      Hi – Thanks for stopping by :). No it would be the other side — lengthen the 24″ side. Think about adding a bit to the 18″ side at the same time. But I would test out the dimensions before cutting. Try different dimensions on a piece of fabric or even paper to see if you like the shape. Pin as if you are sewing and it will give you an idea of what it will look like.

      Reply
  23. Kate says

    02/25/2015 at 7:14 pm

    i don’t know where I went wrong– but do you connect the two outside and inside pieces before sewing the sides and boxing the corners? I did the one piece and now I’m wondering why I cut two of the lining and two of the outside pieces? From the looks of it I’ll only use one of each?!

    Reply
    • Haberdashery Fun says

      02/25/2015 at 8:08 pm

      Hi Kate – You do need 2 outside and 2 lining pieces.

      #1 – Start by placing the outside fabric right sides together. Sew the sides and bottom with a 1/2″ SA. Press with an iron. Turn and twist so you can box the bottom corners.You now have the outside portion of the tote ready. Set aside
      #2 – Repeat and do the same for the lining.
      #3 – Leave the outside right side facing out, make the lining right side facing in. Place the lining inside the outside fabric. Match along the top edge, make sure the bottom corners match.
      #4 – Pin along the top edge about 2″ down. NOW you connect the 2 together along the top edge with the webbing.

      Hope this helps, let me know how it goes.
      Marni

      Reply
      • Kate says

        02/26/2015 at 3:32 pm

        That makes sense. I don’t know why I didn’t get it the first time. Now to find more fabric so I can re-do the lining! Thanks for responding.

        Reply
  24. erica says

    03/10/2015 at 2:55 am

    thank you so much! i love your tutorials. Just did this bin for my cats toys. came out so awesome

    Reply
  25. Haberdashery Fun says

    12/11/2014 at 10:10 am

    Hi – Thanks for sharing. Your 3 bins are wonderful and so in the holiday spirit!

    Reply
Newer Comments »

Trackbacks

  1. reversible fabric storage bin, by haberdashery fun … says:
    04/16/2014 at 2:32 pm

    […] [Haberdashery Fun] […]

    Reply
  2. Best of the Internet, Volume 7 - Mommy Like Whoa says:
    04/20/2014 at 11:01 am

    […] DIY Reversible Fabric Storage Bin by Haberdashery Fun […]

    Reply
  3. Fabulous Feature Friday says:
    04/25/2014 at 7:00 am

    […] What a handy little fabric bin from Haberdashery Fun. […]

    Reply
  4. April Round Up | Haberdashery Fun says:
    05/01/2014 at 8:12 am

    […] Reversible Fabric Storage Bin – This was a fun tutorial. Fun to create, but also fun to watch the reaction..Wow, wow, wow!! CraftGawker and Apartment Therapy got ahold of this one.. Let’s just say that the general population wants to learn how to sew a fabric bin! […]

    Reply
  5. Eu amo costurar | Tutorial – Cesto dupla face says:
    05/16/2014 at 2:49 am

    […] Imagem: haberdasheryfun […]

    Reply
  6. Utensilio für Bad | ampersand says:
    05/30/2014 at 3:18 pm

    […] ist von hier, Stoff von der Creativa 2014 […]

    Reply
  7. DIY.. Fabric Bin With Handles | Haberdashery Fun says:
    06/17/2014 at 9:28 am

    […] just fine.. It was my head that didn’t on this one. This bin is slightly different than my reversible bin from April – this one is larger and I’ve added a facing and […]

    Reply
  8. Me and My Sister Designs says:
    06/17/2014 at 12:02 pm

    […] to make … it’s made with our “Shades of Black” fabrics. Thanks to Marni at Haberdashery Fun for this great […]

    Reply
  9. Quick Tip.. Sewing Boxed Corners | Haberdashery Fun says:
    07/10/2014 at 12:27 pm

    […] I’ve used this trick many times. You can see my fabric storage bin tutorials here and here. […]

    Reply
  10. Top 10 DIY Fabric Storage Bins says:
    07/29/2014 at 4:14 pm

    […] via haberdasheryfun.com  […]

    Reply
  11. Top 5 Baby Tutorials | Haberdashery Fun says:
    08/12/2014 at 11:20 am

    […] Fabric Storage Bin: […]

    Reply
  12. Top 3 Fabric Storage Bin Tutorials | Haberdashery Fun says:
    08/14/2014 at 4:22 pm

    […] Reversible Fabric Storage Bin […]

    Reply
  13. Fabric Storage Bins | Storage Ideas says:
    08/18/2014 at 5:34 am

    […] Diy.. reversible fabric storage bin | haberdashery fun, I’m addicted to making fabric storage bins. how about you? i made smaller versions of these last year and have always wanted larger ones. i finally had a few free read source… […]

    Reply
  14. Must make! Fabric storage bin | pinechunks says:
    09/19/2014 at 1:26 am

    […] I find this really nice to make and I think they are the best babyshower or housewarming gift! Try one with a little lid on it just to make it a bit different or use an unexpected combination of fabrics. Just give it a go, be creative and enjoy your weekend! For the full tutorial check out Habersashery Fun. […]

    Reply
  15. » Friday I’m In LoveHUNTING BEARS says:
    10/23/2014 at 3:15 pm

    […] Make I love this project – make your own reversible fabric storage bin. […]

    Reply
  16. DIY.. Storage Bins With Piping Trim | Haberdashery Fun says:
    10/28/2014 at 4:24 pm

    […] more bin tutorials? Click here for a larger size and here for a bin with […]

    Reply
  17. 20 DIY Storage Bins, Baskets, and Boxes - Little Red WindowLittle Red Window says:
    10/30/2014 at 7:08 am

    […] DIY Reversible Fabric Storage Bin from Haberdashery Fun […]

    Reply
  18. Friday I’m In Love says:
    11/11/2014 at 3:15 am

    […] Make I love this project – make your own reversible fabric storage bin. […]

    Reply
  19. Simple Reversible Fabric Bin Tutorial | the little red trunk says:
    12/11/2014 at 9:46 am

    […] modified the instructions for these Haberdashery Fun fabric bins to make them taller, and in three different […]

    Reply
  20. Top 5 Sewing Posts from 2014 | Haberdashery Fun says:
    01/06/2015 at 10:16 pm

    […] Reversible Fabric Bin […]

    Reply
  21. DIY: Kangaspussukka | Kalliolle kukkulalle says:
    01/16/2015 at 2:30 am

    […] hyvät ohjeet, joiden avulla pitäisi kangaspussukan ompelu (Kuten Ferm Living postauksessa suunnittelin) […]

    Reply
  22. Cloth Fabric Storage Basket Bins | The Ananasa Blog says:
    02/01/2015 at 1:43 am

    […] we get into sharing these cloth fabric storage basket bins, lets talk about what to do before making […]

    Reply
  23. Fabric Bins | andpins says:
    03/18/2015 at 8:04 am

    […] organize her sewing room and I did a bit of snooping to find out that she liked teal/aqua. I used this tutorial from Haberdashery Fun and used Mousy Mouse from Catnap by Lizzy House, teal Garden Pindot from […]

    Reply
  24. 10 DIY Storage Boxes, Baskets And Containers | DIY & Craftz says:
    03/18/2015 at 9:29 am

    […] 5. Haberdashery Fun […]

    Reply
  25. DIY Bedroom Storage Boxes That Will Give You More Space | Handmade Gallery says:
    03/31/2015 at 5:57 pm

    […] Source: haberdasheryfun.com […]

    Reply
  26. ComfyDwelling.com » Blog Archive » 15 Smart And Space-Saving DIY Bathroom Storage Items says:
    04/07/2015 at 4:58 pm

    […]  haberdasheryfun.com via  planb.annaevers.com via  andersonandgrant.com via  upstyler.net via […]

    Reply

Leave a Reply Cancel reply

Your email address will not be published. Required fields are marked *

This site uses Akismet to reduce spam. Learn how your comment data is processed.

About me


Hi there - I'm Marni Weaver. A sewer, a sometimes quilter and a lover of fabric design. I started this blog to share my ideas. Come Join the Fun
shop now

Popular Categories

project for baby fabric projects seasonal projects fat quarter projects sewing tips and tricks inspiration

Categories

  • Applique
  • Baby
  • Bags and Pouches
  • Block Printing
  • Color
  • DIY Projects
  • Fabric
  • Fabric Design
  • Fat Quarter Projects
  • Home Decor
  • Inspiration
  • Just for Fun
  • Kids
  • No Sew
  • Patterns
  • Print On Fabric
  • Quilting
  • Scrap Fabric Projects
  • Seasonal
  • Sewing Tips & Tricks

Lovely sponsors

Recent Comments

  • How To Make Hand warmers | Haberdashery Fun on DIY.. Sew Heart Shaped Baby Burp Cloths
  • How To Make Hand warmers | Haberdashery Fun on How To Make Mini Heart Shaped Hand Warmers
  • Make Spooky Monster Inspired Face Cloths | Haberdashery Fun on DIY.. Make Monster Inspired Face Cloths
  • How To Sew A Fabric Bin | Haberdashery Fun on Sew An Easy Fabric Storage Bin
  • Make The Alma Tote In Fun Colors | Haberdashery Fun on New – The Alma Tote Pattern

Projects Elsewhere

find me on Pellon Projects sew mama sew contributor

momtastic contributor

Pinterest

Visit Marni@Haberdashery Fun's profile on Pinterest.

I'm Reading

  • Cluck Cluck Sew
  • Cooking Dangerously
  • In Color Order
  • Jen Hewitt
  • Jolly Jabber
  • Karly Spalding Photography
  • Leigh Laurel Studios
  • Lindsay Sews
  • Lotta Jansdotter
  • Love Patchwork and Quilting Magazine
  • Made
  • Making It Lovely
  • Noodle-Head
  • Polka Dot Chair
  • Sharon Holland Designs
  • Silhouette America Blog
  • Silhouette Design Store
  • The Purl Bee
  • The Purple Fig

Press:

Stitch Winter 2014

haberdashery_fun

Marni Weaver
It’s been awhile since I printed some fabric. Pl It’s been awhile since I printed some fabric. Played around with space on this one and wanted to see what would happen when the I didn’t lay the hexagons in perfect symmetry. I chose Interstellar music for the post. Thoughts on the movie? That movie really got me.

#surfacepatterndesign #haberdasheryfunpatterns #blockprinting #blockprintingart #versafineink #versafineclair #deepdiveplay #3dottedpenguinscommunity #surfacepatterndesigner #geometricpattern #repeatpatterndesigner #textilepattern #patterndesign 

@3dottedpenguinscommunity
Magic lives in the opposite. Obsessed with my new Magic lives in the opposite. Obsessed with my new love: developing inverse blocks. 

#surfacepatterndesign #haberdasheryfunpatterns #blockprinting #blockprintingart #versafineink #versafineclair #deepdiveplay #3dottedpenguinscommunity #surfacepatterndesigner #geometricpattern #repeatpatterndesigner #textilepattern #patterndesign
Carve, stamp, scan — my last block print in digi Carve, stamp, scan — my last block print in digital form..

#surfacepatterndesign #haberdasheryfunpatterns #blockprinting #blockprintingart #versafineink #deepdiveplay #3dottedpenguins #surfacepatterndesigner
Working through my deeply committed relationship w Working through my deeply committed relationship with single-color prints and playing with color. 

#surfacepatterndesign #haberdasheryfunpatterns #blockprinting #blockprintingart #versafineink #deepdiveplay #3dottedpenguins
Instagram said I have to start making reels. So he Instagram said I have to start making reels. So here I am mildly uncomfortable, half heartedly participating. The “Next Best Chapter” is playing in the background, because apparently this is it.

#surfacepatterndesign #haberdasheryfun #blockprintingtechnique #blockprintinglove #versafineclair #pfeil
Follow on Instagram

Copyright © 2025 · Klar theme by Crimson Pear :: web & surface design

Copyright © 2025 · Klar on Genesis Framework · WordPress · Log in