Haberdashery Fun

  • Home
  • About
    • Look Book
  • Contact
    • Collaborate?
  • Tutorials
  • Shop
  • Freebie
    • Email
    • Facebook
    • Instagram
    • Pinterest

Keep up to date with the latest posts!

DIY.. Mini Book Tote and Journal Cover

in DIY Projects, Fat Quarter Projects on 17/09/13

Do you have a reader or budding author in your house? Or maybe you’re hoping to create a little book worm..  Well, I’m happy to share this fun mini book tote and journal cover today.

I learned how to make the journal cover from the blog Darling Adventures.  Ginny hosted a Sew A Long a few months ago and we made the journal cover. I made it for a friend, who requested I make one for her 8 year old niece, Grace.

I was originally only going to sew Grace the journal cover.  After completing it, I realized that most 8 years olds LOVE little bags, so I created this pint-sized version to hold the composition book.

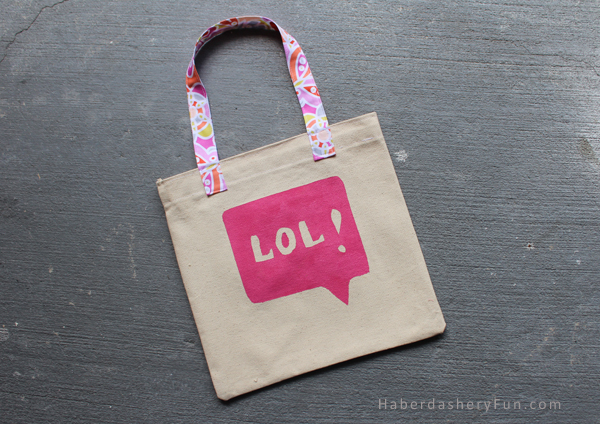
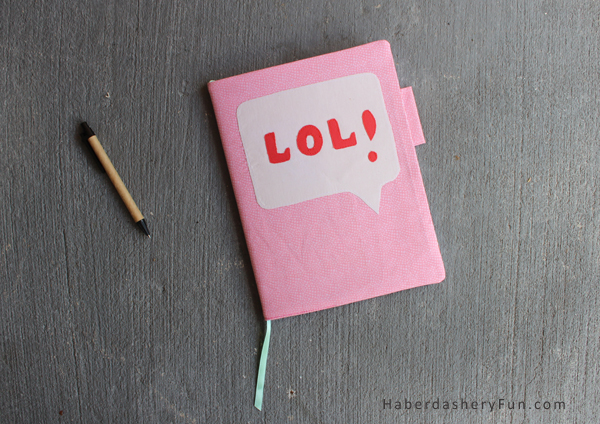
These projects are great for beginner sewers.  They are easy and there are just a few steps within each. Why not involve your child and design/sew the projects together? You can call it project “book worm”.  The 2 of you can come up with a unique word, color scheme and choose the fabric together… For Grace’s journal, she wanted the color pink and “LOL”.  I thought it would be fun to make everything match, so the tote straps match the lining of the journal cover. Wouldn’t this be an entertaining project to take on!?

Here is what you need to get started:

Mini Book Tote Supplies:

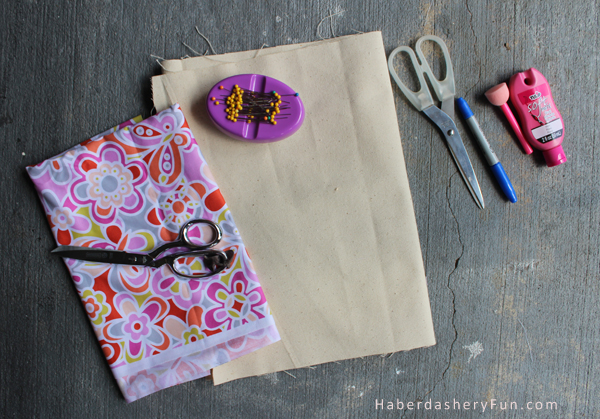
  1. Cotton canvas for exterior
  2. Fabric for straps
  3. Sewing supplies and sewing machine
  4. Iron and ironing board
  5. Word/ letters to trace
  6. Freezer paper
  7. Fabric ink, sponges
  8. Paper scissors
  9. Cardboard

So let’s get going..

Before we get sewing, you will need to cut your tote and strap:

  1. Canvas fabric – Cut a rectangle measuring 25″L x x 13″W
  2. Strap –  Cut a piece measuring 15″L x  3″W [ the length depends on the size of little person. However, when you cut this in half and it should make 2 straps ]

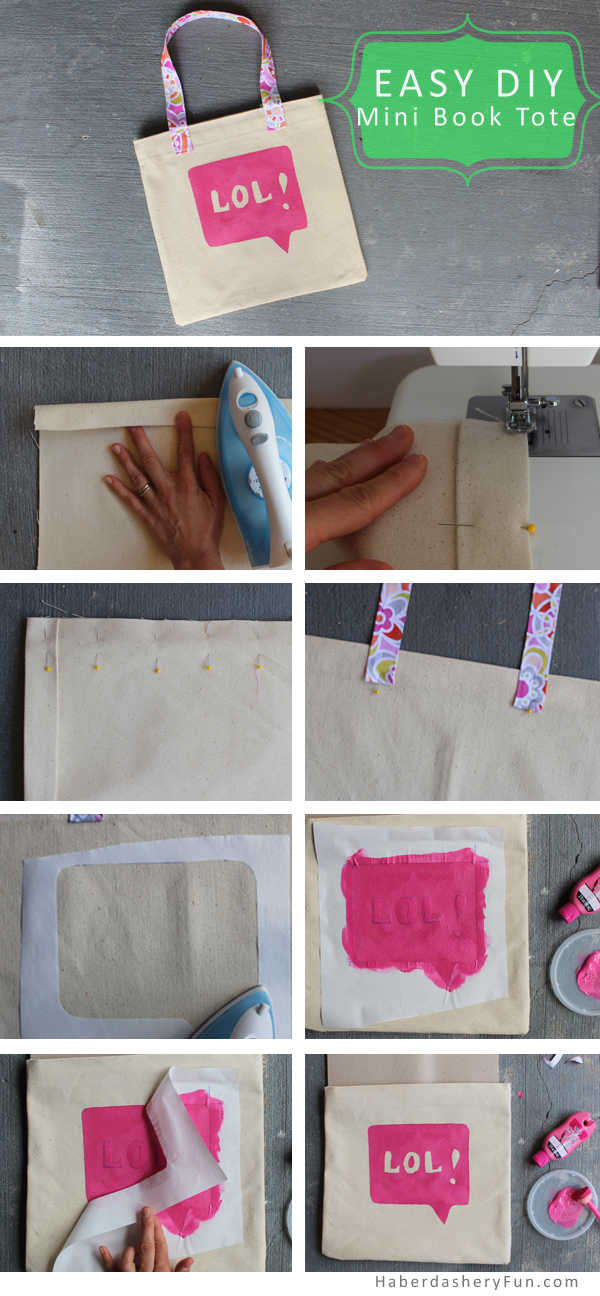
Steps to complete the tote:

  1. Turn and fold each end of the cotton canvas – 1/2″.  Press with an iron. Turn and fold again – 1″. Press again
  2. Place into sewing machine and edgstitch along the top and bottom. Repeat for the other end
  3. Fold the rectangle in half. The folded top edge is on the outside. Pin. Place into your sewing machine and sew the side seams with a 1/4″ seam allowance
  4. Follow my strap making tutorial here. Cut your strap piece in half.  Turn and fold each end 1/4″ and press. Pin down to the outside of the tote. Place into sewing machine and topstitch making a little square
  5. Now add your “design”. For additional info on freezer printing, check out my tutorials here and here. Trace your design onto the freezer paper.  Cut out the design and iron onto the face of the tote
  6. Place cardboard into your tote. This stops any ink from bleeding. Using a sponge,  gently brush the ink onto the design. Cover the entire area and work quickly
  7. While the ink is still stlightly wet, pull off the freezer paper
  8. Voila, that’s it!

So, don’t stop halfway.. Keep on it and make the journal cover as well..

Here is your supply list:

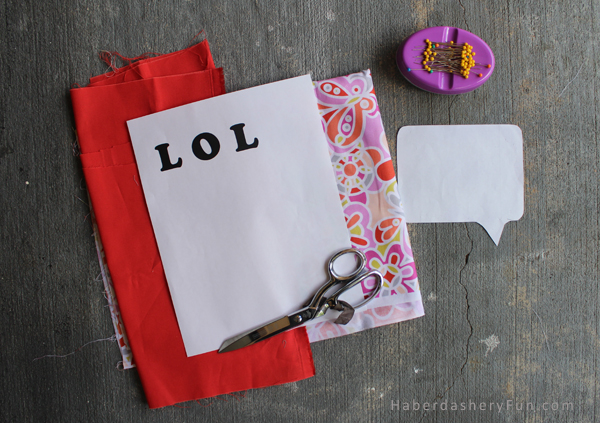
  1. Fabric for cover, lining, flaps and applique – this is a great fat quarter project!
  2. Pellon EZ Steam for applique
  3. Sewing machine and supplies
  4. Iron and ironing board
  5. Word/ letters to trace
  6. Composition book

Head on over to the Darling Adventures blog for the tutorial on how to sew your journal. Ginny created an amazing video tutorial and you can see it here.  The video is concise and professional. I wish I had the capabilites to make one of these!

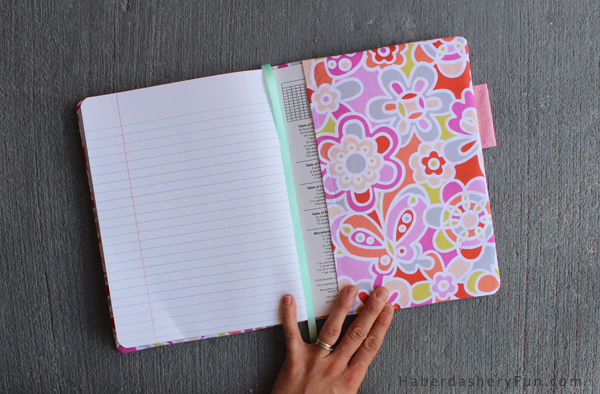
A couple images of my finished journal..

Well, that’s it for today. Hope I’ve inspired you to make something? Happy Sewing.

Related Posts Plugin for WordPress, Blogger...

8 Comments

« How To Sew Binding Strips Together..
New Camera Lens.. New Photos! »

Comments

  1. Trish says

    09/18/2013 at 9:03 am

    OMG it’s amazing!! Love it. You’re amazing Haberdashery Fun!

    Reply
  2. Haberdashery Fun says

    09/18/2013 at 10:37 am

    Thanks Trish! I’m glad you stopped by and I hope Grace likes it!

    Reply
  3. Missy says

    09/22/2013 at 5:32 pm

    I have an 8 year old girl who definitely loves little bags like this! She also loves to sew, which her mother doesn’t do much of, but this looks like a good project for us to tackle together! Thank you for sharing!

    I found your post on the Inspiration Monday Party.

    Reply
  4. Hannah says

    09/23/2013 at 8:14 am

    This is a super cute idea! I have a few nieces that love little bags, and this looks easy enough to attempt to make! I have wanted to get into sewing again. This is the perfect first project!

    Reply
  5. Brittany says

    09/25/2013 at 8:23 am

    Your tote is so cute, I think I want to make one for myself! Great tutorial, thanks for sharing!

    Reply
  6. Ginny says

    09/30/2013 at 3:25 pm

    What a great idea! Thanks for kicking my journal cover up a notch by making a tote bag to match – how smart is that?!?!

    Reply
    • Haberdashery Fun says

      10/02/2013 at 8:45 am

      Thanks Ginny! I love making your journal cover, so it was the perfect combination

      Reply

Trackbacks

  1. New Camera Lense.. New Photos.. Yeah! | Haberdashery Fun says:
    09/19/2013 at 10:14 am

    […] Tuesday, I wrote a DIY post on a mini book tote and journal cover. Click here if you would like to see the post. I took a few extra shots using my new lense.  I think I am in […]

    Reply

Leave a Reply Cancel reply

Your email address will not be published. Required fields are marked *

This site uses Akismet to reduce spam. Learn how your comment data is processed.

About me


Hi there - I'm Marni Weaver. A sewer, a sometimes quilter and a lover of fabric design. I started this blog to share my ideas. Come Join the Fun
shop now

Popular Categories

project for baby fabric projects seasonal projects fat quarter projects sewing tips and tricks inspiration

Categories

  • Applique
  • Baby
  • Bags and Pouches
  • Block Printing
  • Color
  • DIY Projects
  • Fabric
  • Fabric Design
  • Fat Quarter Projects
  • Home Decor
  • Inspiration
  • Just for Fun
  • Kids
  • No Sew
  • Patterns
  • Print On Fabric
  • Quilting
  • Scrap Fabric Projects
  • Seasonal
  • Sewing Tips & Tricks

Lovely sponsors

Recent Comments

  • 3 Simple Summer Sewing Tutorials | Haberdashery Fun on Sew A Canvas Zipper Pouch
  • 3 Simple Summer Sewing Tutorials | Haberdashery Fun on Sew Asymmetrical Color Block Totes Tutorial
  • 3 Simple Summer Sewing Tutorials | Haberdashery Fun on Sew A Baby Towel With A Hood
  • Make A Simple Block Print Tote Bag | Haberdashery Fun on DIY.. Colorful Dish Towel Tote Bags
  • Make A Simple Block Print Tote Bag | Haberdashery Fun on Sew Asymmetrical Color Block Totes Tutorial

Projects Elsewhere

find me on Pellon Projects sew mama sew contributor

momtastic contributor

Pinterest

Visit Marni@Haberdashery Fun's profile on Pinterest.
Follow on Bloglovin

I'm Reading

  • Cluck Cluck Sew
  • Cooking Dangerously
  • In Color Order
  • Jen Hewitt
  • Jolly Jabber
  • Karly Spalding Photography
  • Leigh Laurel Studios
  • Lindsay Sews
  • Lotta Jansdotter
  • Love Patchwork and Quilting Magazine
  • Made
  • Making It Lovely
  • Noodle-Head
  • Polka Dot Chair
  • Sharon Holland Designs
  • Silhouette America Blog
  • Silhouette Design Store
  • The Purl Bee
  • The Purple Fig

Press:

Stitch Winter 2014

haberdashery_fun

Block Printing
A homemade block printed pouch is perfect for camp A homemade block printed pouch is perfect for camping trips. Holds essentials for the campsite, swimming and the beach. 

Are you a sewer?? My blog has tons of pouch tutorials. See the link in profile and click Blog- sewing.

#haberdashery #blockprinting #blockprintingmadeeasy #100dayofsimpleshapes #speedballfabricink #haberdasheryfunpatterns #haberdasheryfun #blockprintmadeeasy #isew #sewingtutorials Day 33/100
A big hello to everyone new around here. Thank you A big hello to everyone new around here.
Thank you for stopping by ❤️🎉

Did you know that along with all my block printing that I also sew? I have had a sewing blog for 10 years. If you are new to sewing or looking for tips and tricks, I’ve got the spot for you.

Head to the link in my profile and click sewing tutorials - blog. I even have a tutorial for this cross body tote over on my blog. 

#haberdasheryfun #haberdasheryfunpatterns #isewbags #surfacepatterndesigner #blockprintingmadeeasy #100daysofsimpleshapes #100dayproject #dothe100dayproject #haberdasheryfunonlineclasses #konacotton #canvasbags #speedballfabricink #simpleshapesarefun #blockprintmadeeasy
I’m back in my favorite Toronto kitchen so had t I’m back in my favorite Toronto kitchen so had to take a few block print photos. Continuing on with my simple prints theme and playing around with the heart block.

#haberdasheryfunpatterns #blockprinted #100daysofsimpleshapes #speedballfabricink #100daysproject #dothe100dayproject #blockprintedfabric #100daysofblockprinting #blockprintmadeeasy #blockprintingmadeeasy #100daysofsimpleprints #blockprintedfabric #haberdasheryfun Day 32/100
Happy Monday! We are back from vacation and I am s Happy Monday! We are back from vacation and I am still cruising thru my “simple circle” blockprint theme. This one is my favorite of the last group. Swipe to see it’s companions.

What are you working on?

#haberdasheryfun #haberdasheryfunpatterns #speedballink #100dayproject2022 #dothe100dayproject2022 #surfacedesigncommunity #surfacepatterndesign #handmadestamp #blockprintfabrics #blockprintedfabric #100daysofsimpleshapes #blockprintingmadeeasy #blockprintingmadesimple #fatquarterprojects #fatquarterproject #konacottonsolids #konacottons 

Day 31/100
Instagram post 18239908753108863 Instagram post 18239908753108863
Follow on Instagram

Copyright © 2022 · Klar theme by Crimson Pear :: web & surface design

Copyright © 2022 · Klar on Genesis Framework · WordPress · Log in