Haberdashery Fun

  • Home
  • About
    • Look Book
  • Contact
    • Collaborate?
  • Tutorials
  • Shop
    • Email
    • Facebook
    • Instagram
    • Pinterest

Keep up to date with the latest posts!

Sew A Baby Towel With A Hood

in Baby, DIY Projects on 20/07/17

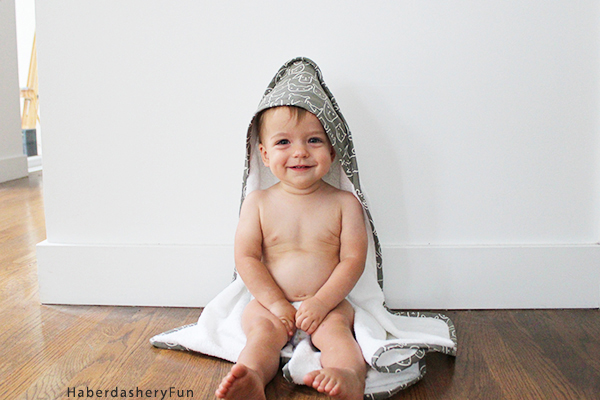
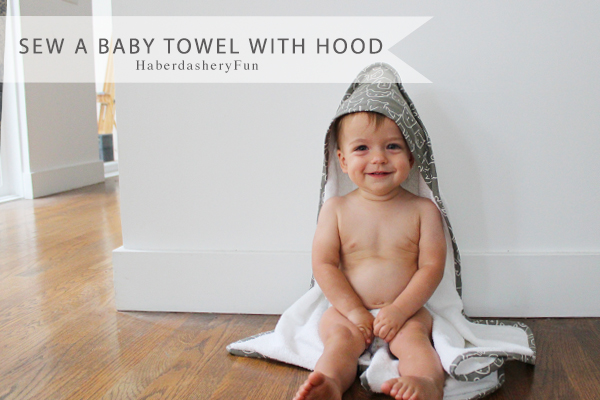
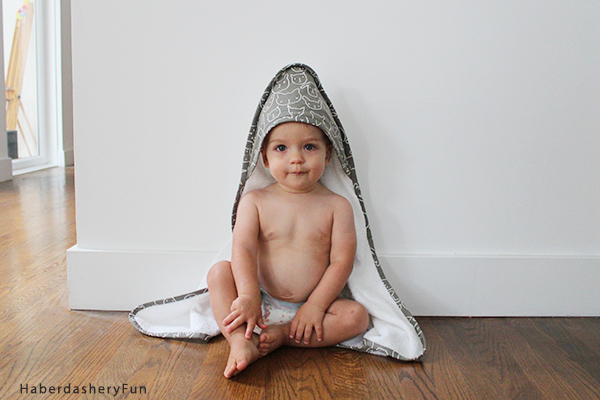
I LOVE this towel or maybe I just want to squeeze the baby in it! I first shared this towel back in in 2013 when my son Tanner was 14 months old. He is now 5 1/2 and entering Kindergarten this fall. Time flies. With number 2 now almost 16 months old, I’ve been wanting to make a towel for him. And as usual, time got away from me…

Materials needed:

  1. Cotton terry towel
  2. Cotton fabric for the binding
  3. Rotary cutter, cutting mat, creative grids ruler
  4. Disappearing fabric ink pen
  5. Sewing materials and sewing machine
  6. Iron and ironing board

A couple comments on the fabric..

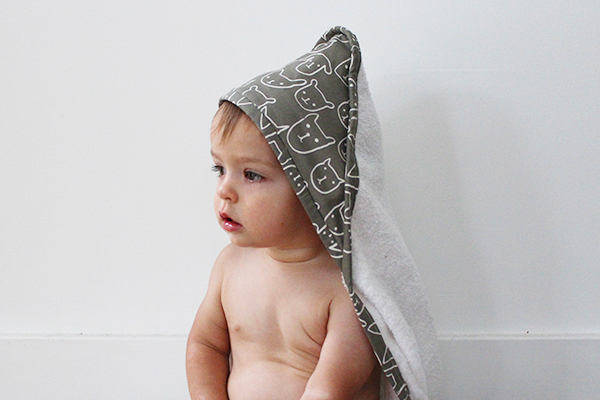
  • Cotton Fabric – Don’t you just love this fabric?? I’ve been hoarding it since Arlo was born.. This cat towel is perfection! It is called “Printshop” by the uber-talented Alexia Abegg...
  • Cotton terry towel – I strongly suggest buying “premium” cotton terry towel. I’ve used the cheaper versions of terry towel and it doesn’t feel and/or look as nice. It also doesn’t hold up as well.

This project is perfect for the confident/beginner sewer. There are quite a few steps in this tutorial. If you need additional images or help along the way, see my prior baby towel post with more in depth details.

The PDF hood pattern is available in my online store.

Let’s get started:

Part A: Cut your fabric and prepare the binding:

  1. Lay the terry towel flat on a large cutting area. Measure and mark a 30″ x 30″ square. Cut the terry towel to this size.
  2. Pin the hood pattern piece down on the terry and also the cotton fabric. Cut one of each.
  3. Place wrong sides together and pin the 2 pieces together. Baste together along the outside edge. This is an important step and will help keep the fabric secure and not have it shift.
  4. Round each outside corner of the 30″ x 30″ towel. Not sure how? Find a cup or bowl and place on the corner. Mark with the disappearing fabric pen and you have a rounded corner.
  5. Cut your binding strips. [3″ width]. Not sure on how to cut binding? I created an easy tutorial here on how to cut binding..
  6. Sew your binding into strips. Trim the seam allowance to be 1/4″.  Iron the seam. Open seam and iron again. Here is a tutorial on sewing binding together.
  7. For the binding, you will need a strip 140″ in length.

Part B:  Sew the hood piece and attach the binding:

  1. Fold the binding in half and press. Press the entire length of the strip in half.
  2. From the binding that you made, cut a strip 19″ long.  This will finish the bottom hood edge. Pin to bottom edge of hood piece. Place in your sewing machine and sew.
  3. With the binding laying flat, press the seam.  Open and iron the seam again.
  4. Roll the binding to the back side and cover the raw edge.  Pin in place if it helps. Iron to set the seam.
  5. Place in your sewing machine and edgestich along the folded edge. The raw seams will now be enclosed by the binding.
  6. Place the hood at corner of towel and pin in place.  Note that there will be extra room in the middle for the baby’s head. Baste the pieces together.
  7. Finish the entire outside edge of the towel with the binding. Start at a straight edge and pin the binding along the raw edge.
  8. Sew the entire length of the binding around the towel. Repeat steps 3, 4 and 5 above for the outside of the towel.
  9. Insert the binding into the beginning binding and pin.

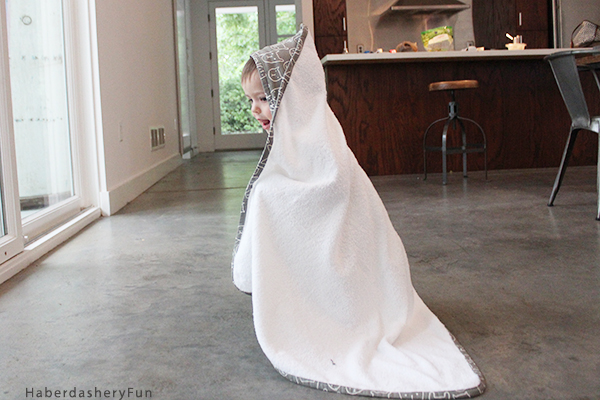
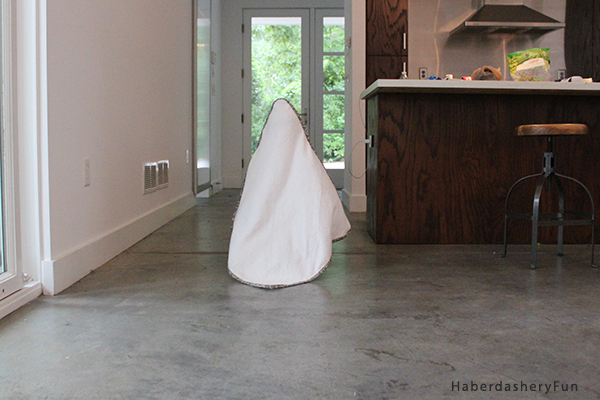
You can see how much fun the towel can also be.. Imagine chasing around a naked baby pre and post bath time! Can you say poop on the floor?

That’s it! So what do you think? Will you make this towel?

Fabric Source – “Print Shop” by Alexia Abegg.

2 Comments

« Tips On Sewing the Curvy Zipper Pouch
HST And Quarter Square Triangle Block »

Comments

  1. Elaina says

    10/15/2017 at 9:58 am

    I just love these adorable hooded baby towels! I think they are a fun homemade baby shower gift too! thanks for the post!

    Reply

Trackbacks

  1. 3 Simple Summer Sewing Tutorials | Haberdashery Fun says:
    08/01/2022 at 10:22 pm

    […] Hooded Baby Towel […]

    Reply

Leave a Reply Cancel reply

Your email address will not be published. Required fields are marked *

This site uses Akismet to reduce spam. Learn how your comment data is processed.

About me


Hi there - I'm Marni Weaver. A sewer, a sometimes quilter and a lover of fabric design. I started this blog to share my ideas. Come Join the Fun
shop now

Popular Categories

project for baby fabric projects seasonal projects fat quarter projects sewing tips and tricks inspiration

Categories

  • Applique
  • Baby
  • Bags and Pouches
  • Block Printing
  • Color
  • DIY Projects
  • Fabric
  • Fabric Design
  • Fat Quarter Projects
  • Home Decor
  • Inspiration
  • Just for Fun
  • Kids
  • No Sew
  • Patterns
  • Print On Fabric
  • Quilting
  • Scrap Fabric Projects
  • Seasonal
  • Sewing Tips & Tricks

Lovely sponsors

Recent Comments

  • How To Make Hand warmers | Haberdashery Fun on DIY.. Sew Heart Shaped Baby Burp Cloths
  • How To Make Hand warmers | Haberdashery Fun on How To Make Mini Heart Shaped Hand Warmers
  • Make Spooky Monster Inspired Face Cloths | Haberdashery Fun on DIY.. Make Monster Inspired Face Cloths
  • How To Sew A Fabric Bin | Haberdashery Fun on Sew An Easy Fabric Storage Bin
  • Make The Alma Tote In Fun Colors | Haberdashery Fun on New – The Alma Tote Pattern

Projects Elsewhere

find me on Pellon Projects sew mama sew contributor

momtastic contributor

Pinterest

Visit Marni@Haberdashery Fun's profile on Pinterest.

I'm Reading

  • Cluck Cluck Sew
  • Cooking Dangerously
  • In Color Order
  • Jen Hewitt
  • Jolly Jabber
  • Karly Spalding Photography
  • Leigh Laurel Studios
  • Lindsay Sews
  • Lotta Jansdotter
  • Love Patchwork and Quilting Magazine
  • Made
  • Making It Lovely
  • Noodle-Head
  • Polka Dot Chair
  • Sharon Holland Designs
  • Silhouette America Blog
  • Silhouette Design Store
  • The Purl Bee
  • The Purple Fig

Press:

Stitch Winter 2014

haberdashery_fun

Marni Weaver
I’m embracing the crazy today. Including the col I’m embracing the crazy today. Including the colors and imperfections in this print.😂

#3dottedpenguinscommunity #haberdasheryfun #blockprintingtechnique #blockprintinglove #versafineclair #pfeil
Joined Ali's @3dottedpenguinscommunity “Play” Joined Ali's @3dottedpenguinscommunity “Play” year-long challenge. It’s been fun and also tough pushing myself out of my comfort zone. I've started by exploring florals, plus experimenting with my style and color palette.

#3dottedpenguinscommunity #haberdasheryfun #blockprintingtechnique #blockprintinglove #versafineclair #pfeil
Another round of block printing, adding inverse st Another round of block printing, adding inverse stamp into the mix. 

#3dottedpenguinscommunity #haberdasheryfun #blockprintingtechnique #blockprintinglove #versafineclair #pfeil @3dottedpenguinscommunity
Quick print of a triangle block I've been working Quick print of a triangle block I've been working on. Plus a little music to go along w/ it.
#haberdasheryfun #blockprintinglove #3dottedpenguinscommunity #versafineink #blockprinting @3dottedpenguinscommunity
It’s a nice, cool spring morning in Atlanta. Wor It’s a nice, cool spring morning in Atlanta. Working through a new hexagon block and making prints. Added a little audio b/c Instagram said to do it. My kids had this song on repeat awhile back.
#blockprintinglove #3dottedpenguinscommunity #haberdasheryfun #blockprinting #surfacepatterndesign
Follow on Instagram

Copyright © 2025 · Klar theme by Crimson Pear :: web & surface design

Copyright © 2025 · Klar on Genesis Framework · WordPress · Log in