I used to groan when it came time to cutting binding, or anything long and rectangular. My pieces would come out all wavy and uneven. A few years ago a teacher showed me the quilting method and I have been happily cutting binding ever since.
Here is a super quick look at how to cut binding.. Unlike my photos, make sure to give your fabric a nice press before you start cutting.
Materials:
- Rotary cutter
- Cutting mat
- Quilting ruler – Creative Grids is non slip and a good choice
- Fabric of choice
8 easy steps:
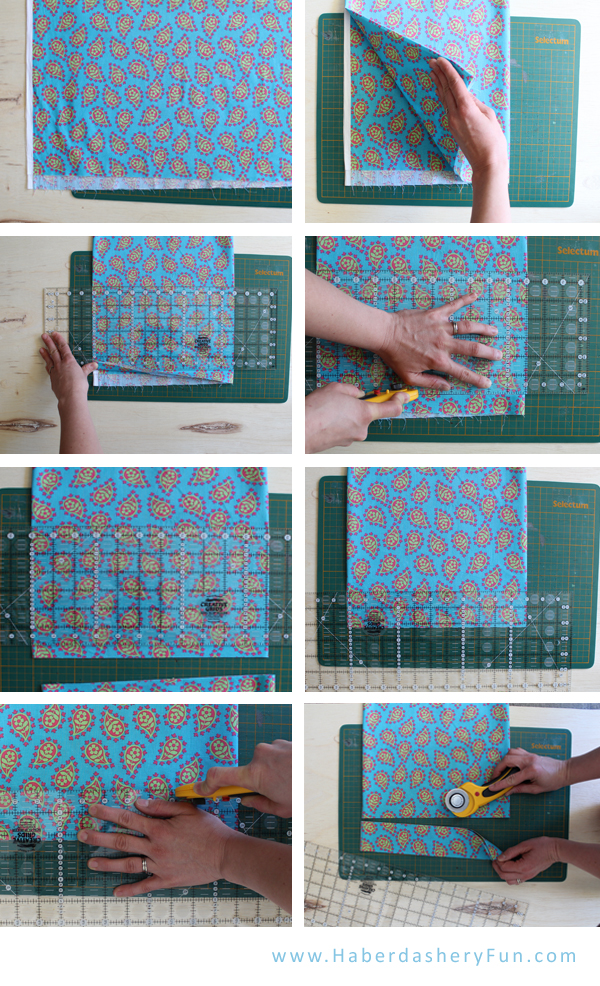
- Iron the wrinkles out of your fabric. Fold your fabric in half by matching selvages. Gently brush any wrinkles away. It is very important your folded edge isn’t twisted. If there are ripples, rework and match selvages until the ripples goes away. It is ok if your bottom edge seems uneven – you will be cutting off this bottom edge.
- Fold the fabric over again. This time matching the folded edge to your selvage edges. You will now have 4 layers. Gently brush away wrinkles again. Be careful not to move your fabric too much.
- Square the ruler with your fabric edges. Look though the layers at the bottom edge. Align the ruler above the highest area, so you will be able to cut through all the layers.
- Press firmly down on your ruler. Using the rotary cutter, cut along the ruler edge. Be careful to NOT move the ruler or the fabric. Cut in one fluid movement
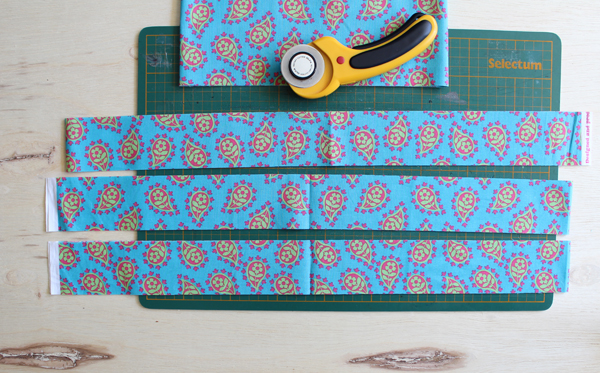
- You now have a new bottom edge that is STRAIGHT. This is the start to your binding.
- Square your quilting ruler against your fabric edges again. This time move up from the bottom edge 2 1/4″ or whatever width you need your bidding to be.
- Press down firmly on the ruler/ fabric again and use the rotary cutter to cut again.
- Gently pull your binding piece away.
If you need more strips.. Just repeat, repeat, repeat!!
Happy sewing.


Love this – I was looking for a tutorial on rotary cutters and found this!! Thanks!
I was thinking of making a quilt, but the binding sewing/ portion scared me! Lol. This is great