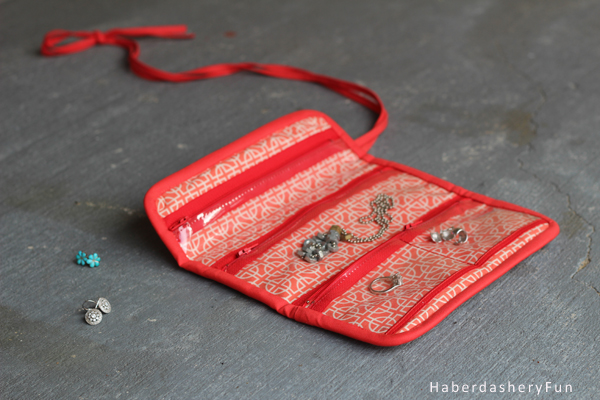
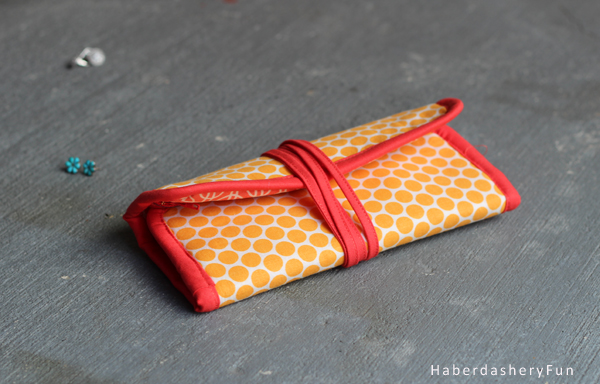
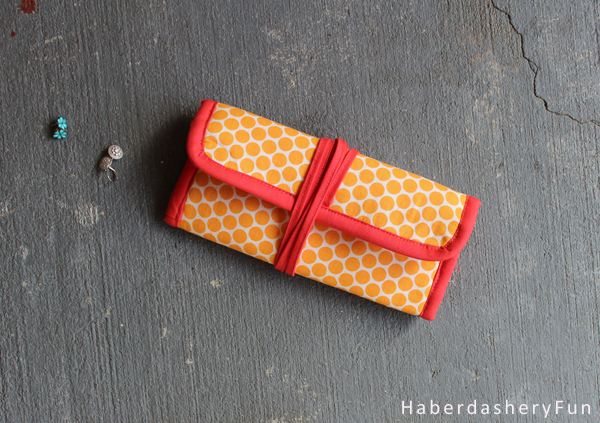
Just in time for the holidays. Ok, so I”m cutting it pretty close for gift giving.. But I promise you all, this mini jewelry roll is really easy to make. Miniature in size, it is perfect for your handbag or weekend tote.
Put away those ziplock baggies and get sewing!!
This little jewelry roll was inspired by a DIY post from a few months ago. Last August I made a travel jewelry roll, but didn’t provide the DIY steps. Quite a few people commented and emailed asking for the tutorial.. So here it is!
My favorite part? Head on over to my profile at the Pellon Projects website to download the step by step tutorial. The PDF makes it super easy to sew this project.
Materials needed:
- 3-4 Fat quarters
- Clear vinyl
- Fusible batting – Pellon TP971 works great
- Double fold bias tape – home made or store bought
- 3 zippers – 7″ wide
- Rotary cutter, cutting mat and quilting ruler
- Disappearing ink pen
- Sewing machine and related supplies
- Iron and ironing board
- Zipper foot – optional
- Cotton balls – optional
A few comments:
- Sewing with vinyl isn’t that hard! No seriously, it isn’t.. When you have the vinyl in your machine, make sure to have a long tail of thread. Hold on the the tail when you start sewing the vinyl. This will help pull the vinyl through your machine.
- Try making your stitch length a little longer. Test out the length on a piece of scrap vinyl.
- Be careful where you place your pins! Pins leave holes in vinyl.. Only pin in the seam allowances
- Struggling with attaching the thin bias tape to the vinyl? Try using a small piece of Wonder Tape under the bias tape. It will hold the tape in place and keep your sanity in check. Easy!
Let’s get started!
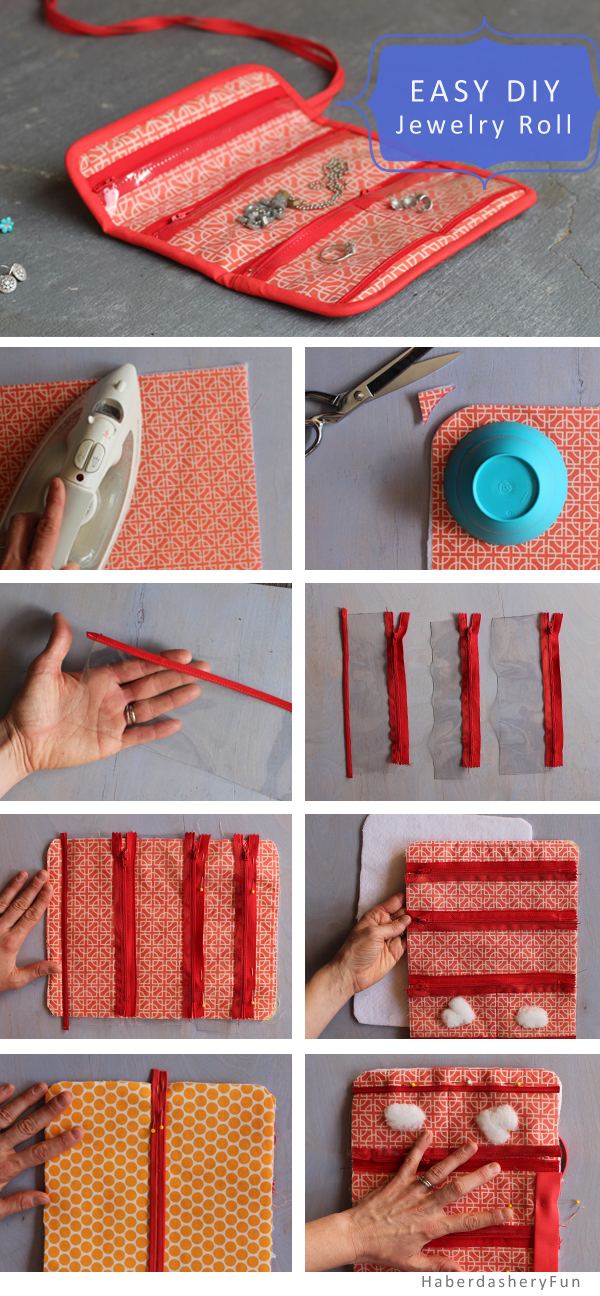
- Cut 4 rectangles measuring 8-1/2″ x 11″. Cut 1 from the outer and lining fabrics and 2 from the batting. Fuse the batting to the back side of the outer and lining fabrics.
- Round all corners. Find a circular template and trace using the disappearing ink pen. Cut each corner off.
- Cut 3 strips from the clear vinyl. Cut 2 measuring 3″ x 9″ and 1 measuring 2″ x 9″. Cut 9″ from the double fold bias tape. Place the tape piece along a long edge of the 3″ vinyl strip and stitch down using your sewing machine. Note that this is the bottom pocket piece for the jewelry roll.
- Using a zipper foot, sew each zipper to a vinyl strip. Place the vinyl ON TOP of the zipper tape and against the teeth. Stitch as closely as possibly, make sure that the zipper can still open. All zipper tabs need to pull from the same side.
- Lay vinyl strips onto fabric and stitch each piece down one at at time. Start with the bottom 3″ vinyl strip. Measure 3/4″ from bottom edge and pin down along the zipper tape. Make sure to always sew along the TOP edge of the zipper tape. Double check each time that the pocket can be opened and something can be placed inside. Important!
- Place the lining and the outer fabric wrong sides together.
- Turn over to have outer fabric facing up. Pin the 2 straps at the top edge. Center at the middle. Stitch down with a SMALL 1/4″ seam allowance
- Pin the binding to the side of roll. Raw edges should be aligned. Stitch down with a 1/4″ seam allowance. Leave a 1″ tail at beginning and end. Tuck binding inside the tail and stitch down again. Turn binding to other side of roll to cover raw edges and stitch in place. Ta- Dah!! You’re done!
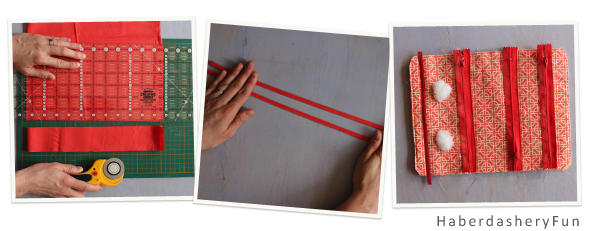
Ok.. So I missed a few steps.. How to cut the binding.. How to sew the straps.. And why are there cotton balls under the vinyl??
- Click here to see my easy tutorial on cutting binding strips. For this project you need to cut binding 2-1/2″ x 40″
- Click here to see another tutorial on sewing straps. For this project you need to cut a strap 1″ x 70″
- Cotton balls…? YES.. Use cotton balls as place holders for your earrings. Place under the vinyl to help determine the pocket size. Keep inside, place into your sewing machine and topstitch a straight line.
Well that’s it. Let me know if you have any questions. Remember, there is a PDF is available to download over at the Pellon Projects website. This has more detailed steps than above. If you sew this jewelry roll I would love to see images of your completed project. Happy Holidays!



Looks great but can’t find it at Pellon Projects. Please provide a link. Thank you 🙂
Hi Ceil. Thanks for dropping by. I just added the link to the post. Here it is: http://www.pellonprojects.com/projects/mini-jewelry-roll/
Just received an email from Pellon. Here’s the address for others who have been looking: http://pellonprojects.wordpress.com/2013/12/17/a-handmade-holiday-2013-mini-jewelry-roll/
You are awesome! Thank you. Let me know how it goes.. Would love to see photos of your finished roll 🙂
So cute! It’s so tough to come up with gifts for teens – I think these would be great
Thanks Ann. I didn’t think about teens, but you are right. They could pick out their own colors/fabrics and make it really personal.
Very cute! I might be able to handle this!
Hi- thanks for stopping by. It is actually quite easy.. Pellon Projects has the PDF you can download. I’d love to see images of your finished project!
I love it!!! And you totally called me on my baggie jewelry packing. ha! I’ve linked to your tutorial over at Craft Gossip:
http://sewing.craftgossip.com/tutorial-mini-jewelry-roll-organizer/2013/12/27/
–Anne
Thanks Anne! I think a lot of people have ziplock baggie habits.. I know most of my friends do, myself included 🙂
This is SO adorable! Just like your blog! I love all the great photos too! Thanks for the great tutorial! You were featured today from the Create Link Inspire party! http://www.marvelousmommy.com/2013/12/7-useful-sewing-tutorials/
Hi – thank you for the feature!
You have been featured on Do Tell Tuesday this week! Feel free to grab a button and link up this week –> http://www.vintagezest.com/2013/12/do-tell-tuesday-4.html
Congrats!
Hi – Wow. Thank you very much!
Awesome project Marni! Thanks for the tutorial! I have been wanting to make something like this for my mom. So this is absolutely perfect! I am featuring you this week on Do Tell Tuesday. I hope you have a wonderful and fun New Year!! 🙂
Hi Tori – Thank you very much! have an awesome NYE!
Thank you for linking up @ Craft, Create & Inspire last week, your awesome project is featured this week..
Stop by the linky party tomorrow and grab a featured button !!
Looking forward to seeing your awesome projects from this week
Claire @ Live Love Create x
Hi Claire – Thank you for the feature!
This is the cutest little thing, i think i need to whip up a bunch of them for gifts. thanks! http://www.handmadeintheheartland.com/
Hi – thank you for stopping by. I agree that they would make great gifts. I already have a few friends asking!!
I blog frequently and I really appreciate your content.
This article has really peaked my interest. I am going
to bookmark your site and keep checking for new information about once a week.
I opted in for your Feed too.
Thanks for providing this tutorial! I made a roll for my smaller crochet tools this weekend, and you can read about it here (and see the photos): http://www.judy-nolan.com/2014/02/23/mini-organizer-for-crochet-tools/
Thanks for linking up! Super cute jewelry bag!
How cute is this one too! I have to sew one of these as well. I’m so glad I discovered your blog, packed with so many great ideas! Thanks!
I made one! I love it!
See it here – http://baileymarieandme.weebly.com/blog/diy-jewelry-roll
Thanks
-Bailey @ BaileyMarieandMe
Thanks for letting me know about your project. i just stopped by your blog and the jewelry roll looks fabulous!!