Haberdashery Fun

  • Home
  • About
    • Look Book
  • Contact
    • Collaborate?
  • Tutorials
  • Shop
    • Email
    • Facebook
    • Instagram
    • Pinterest

Keep up to date with the latest posts!

DIY… Make A Vinyl and Fabric Cosmetic Pouch

in DIY Projects, Fat Quarter Projects on 08/01/14

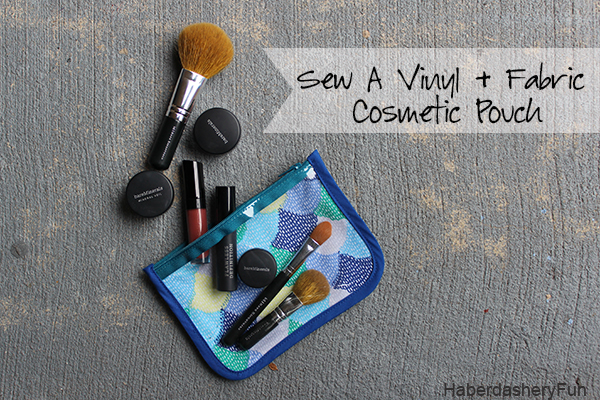
I bought a bunch of make up over the Christmas holidays.  I don’t wear a lot of make-up, but I like buying it, especially the sample sizes at Ulta and Sephora. When I sew, I love working with clear vinyl, so I decided to make some cosmetic pouches…

Vinyl and Fabric pouch copy

A few weeks ago I saw small vinyl brush pouches at the store. I told myself that I couldn’t buy one. I’m convinced that I am a hoarder and buy way to much stuff. I mean really, how many make-up bags does a girl really need? Well, I thought and thought about those pouches and finally decided it was ok to get one… When I went back to the store they were all gone!

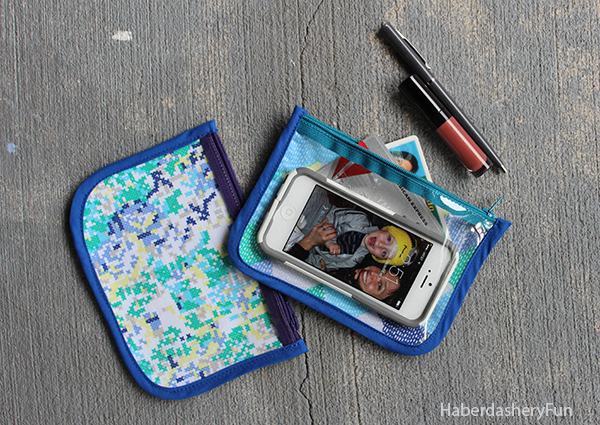
So, I’m attempting to make these from memory. I’ve made a few – they are perfect for make-up, receipts and also an iPhone and cord.

All you need to do is cut 2 fabric rectangles and 1 vinyl rectangle. Round the bottom corners. Here is the quick and easy on making a vinyl and fabric pouch:

Materials Needed:

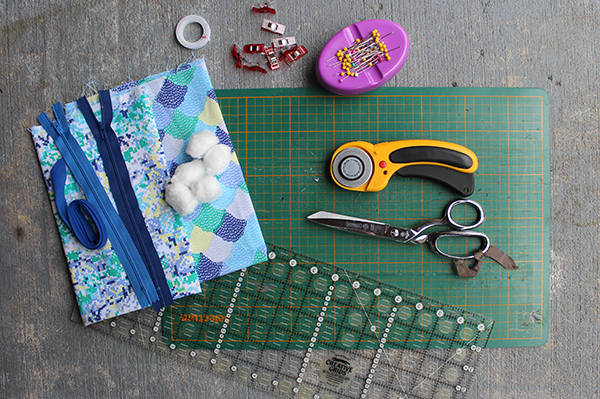
  1. Fabric – 2 colors. 1 for the lining and 1 for the backside
  2. Interfacing – Optional. I used Pellon SF101 because it makes the cotton fabric a little sturdier
  3. 3/8″ bias binding – store bought or homemade
  4. Clear vinyl
  5. Zipper – cut to fit
  6. Thread to match zipper and bias tape. Contrast thread color is also ok
  7. Sewing machine and related supplies
  8. Iron and ironing board
  9. Wonder Clips – optional
  10. Zipper foot – optional
  11. Wonder Tape – optional
  12. Cotton balls – optional

Before we get started, you need to complete the following:

  1. Create your pattern –  Draw 1 rectangle 8″ x 5.5″ [ for the fabric]. Draw 1 rectangle 8″ x 5″ [ for the vinyl]. Round both bottom corners. The top edge is straight
  2. Fabric, both back/main and lining/colorful pattern – Cut 1 piece each
  3. Clear vinyl –  Cut 1 piece
  4. Interfacing – Cut 2 pieces
  5. Fuse the interfacing to the back of the cotton fabric

Alright, let’s get sewing:

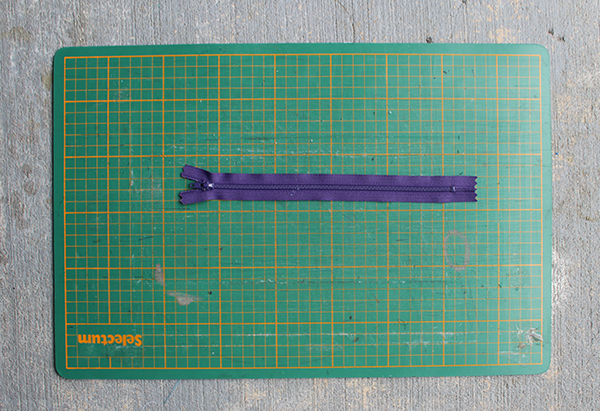
Lay zipper horizontal.  Zipper tab should be facing the left.

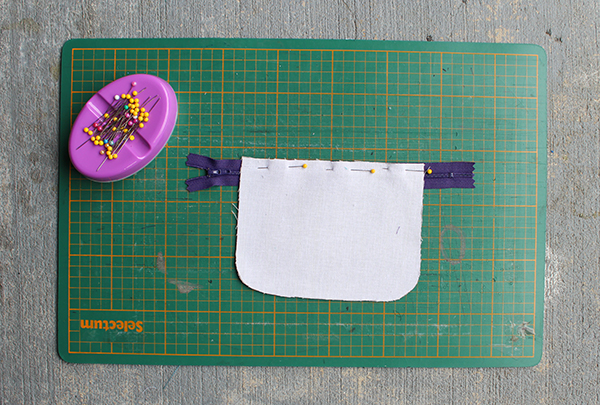
Lay main fabric piece along zipper tape top edge, right sides are facing each other. Pin. Place into sewing machine and stitch together.

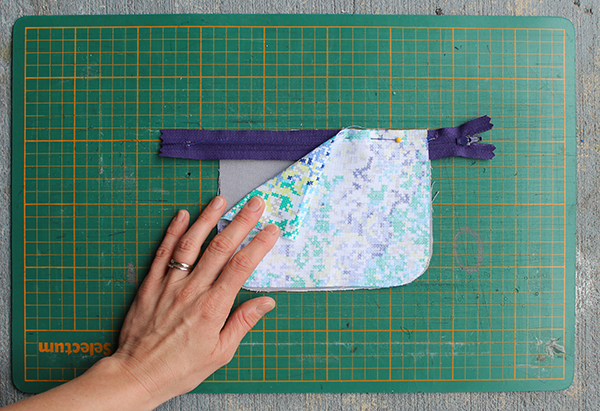
Turn zipper over. Place lining fabric piece on top of zipper tape top edge. Right side is down/facing the back piece. The zipper should be sandwiched between the lining and back fabric pieces. Place into sewing machine and stitch down. Follow previous  stitches.

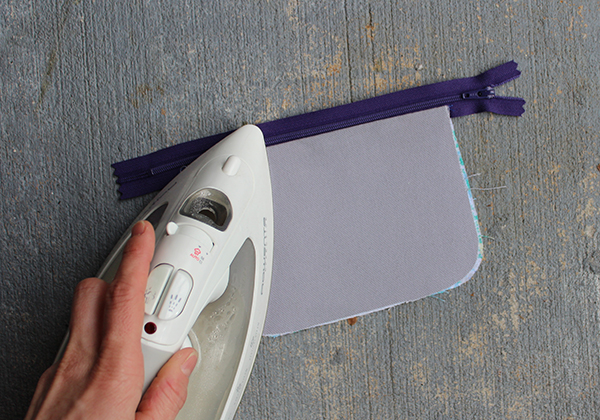
Press seams into place. Be careful to not touch iron to zipper teeth.

Place into sewing machine and topstitch along zipper edge. At the same time, change to a basting stitch. Baste around the non-zipper sides with a 1/8″ seam allowance s. This helps keep the fabric pieces together.

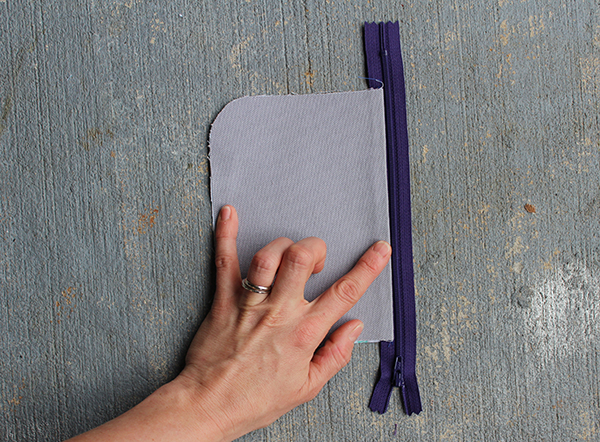
Lay zipper facing right side up. Place vinyl piece on other side of zipper tape. Stitch vinyl to zipper tape. Make sure to stitch as close to zipper teeth as possible, still allowing zipper to open freely.

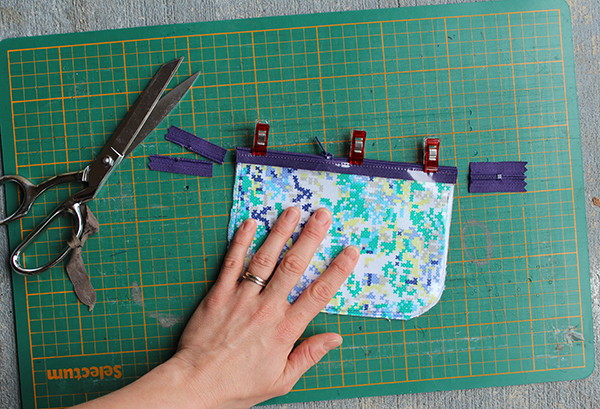
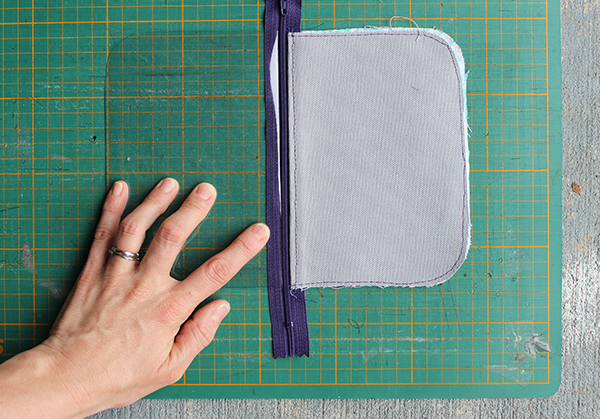
Fold in half at the zipper. Clear vinyl now lays on top of lining fabric right side. Pin/ use wonder clips along zipper folder edge. Cut zipper ends off. Trim edges of pouch making sure all seams are even. Backstitch zipper ends if it makes you feel better.

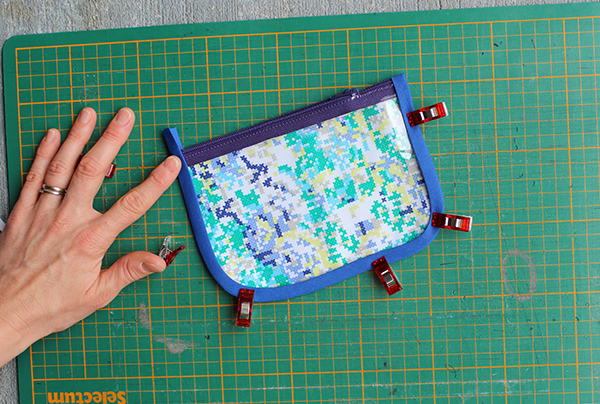
Start at one end and place binding at top corner.  Leave approximately 1″ tail. Wrap and tuck the tail towards the backside, pin and place into sewing machine. Edgestitch. Before finishing at the other end, wrap and tuck there bias tape into itself again. Backstitch.  Quick Tip.. Pesky bias tape falling off the vinyl? Cut really small pieces of wonder tape and stick it under the bias tape. I promise it will hold everything in place.

That’s it!

I travel a lot. I have a system for packing and never unpack my overnight bag. Did you see George Clooney’s “Up In The Air”? My Dad took me to see the mpvie a few weeks before he died.. The memory makes me smile. He wanted me to learn “how to pack”. Anyways, I’m adding my vinyl pouches to the group.  The clear front is great and keeps everything neat and organized. I love seeing the contents inside – at a glance.

You can make a pouch in just a few short hours. Then fill it with all your goodies. If you want to see other projects I made with vinyl, click here for my mini jewelry roll.

Fabric Source – Don’t you love the fabric? This is “Lapis Hipster” made by the RBD Designers for Riley Blake Designs. I bought a fat quarter bundle and love the options I have. With a fat quarter bundle, think of all the coordinating stuff I can make!

20 Comments

« Quilt Along.. Mosaic Tiles Block
Radiant Orchid.. Pantone Color of 2014 »

Comments

  1. Carolyn Michelle says

    01/08/2014 at 2:20 pm

    Love these!! I should whip up some. I have a lot of really cute cottons with no planned project, and who doesn’t need a few bazillion pouches?? Thanks for sharing!!

    -Carolyn

    Reply
  2. Kate says

    01/19/2014 at 12:34 pm

    Great little pouch. I need to get some vinyl as want to make a card holder with it. Is it hard to sew with? Any tips?

    Over from the Sew darn crafty link up.

    I’m going to check out some of your other projects now 🙂

    Kate

    Reply
    • Haberdashery Fun says

      01/19/2014 at 1:15 pm

      Hi Katie. Thanks for stopping by! Vinyl isn’t too hard to work with.. You just need to get the hang of it. The biggest thing could be that your machine struggles to sew with it, not you! First, I would make the stitch length a little longer and have a long thread tail. Hold on to the tail when you start sewing. Don’t use clear thread when starting out the first time with vinyl. Wonder tape also helps to hold little areas in place. Lastly, I’ve read about placing scotch tape on the bottom of the foot, but I haven’t tried that one.. Happy sewing. Let me know how it goes.

      Reply
  3. Kate says

    01/19/2014 at 12:37 pm

    Just checked out you jewellery roll post and that has tips on it about sewing with vinyl 🙂

    Reply
  4. Tori says

    01/20/2014 at 9:08 pm

    Adorable. I need one right now! Thanks for linking up to Do Tell Tuesday! I am featuring you this week. Take care!! <3

    Reply
    • Haberdashery Fun says

      01/20/2014 at 9:20 pm

      Thanks Tori 🙂

      Reply
  5. mp3juice says

    06/04/2016 at 7:46 am

    Thanks for a marvelous posting! I really enjoyed reading it, you could be a great
    author. I will ensure that I bookmark your blog and
    may come back from now on. I want to encourage one to continue your great posts, have
    a nice afternoon!

    Reply
    • Amrapali Gannamaneni says

      02/27/2017 at 5:53 pm

      Hi

      It’s a very nice and useful post.
      If possible could you please provide me the tutorial for the below picture jewellery pouch.

      https://m.indiamart.com/proddetail.php?i=5672556330

      Reply
      • Haberdashery Fun says

        02/28/2017 at 11:33 pm

        Thanks for the comment. Unfortunatelty, I can not create the tutorial for you. If you search Pinterest, I’m sure you will find something that works for you. Have a great day – Marni

        Reply

Trackbacks

  1. Do Tell Tuesday #7 | Lil' Mrs. Tori says:
    01/21/2014 at 1:38 am

    […] DIY Cosmetic Bag // Haberdashery Fun […]

    Reply
  2. January Round up | Haberdashery Fun says:
    02/04/2014 at 10:00 pm

    […] to pouches and love sewing with vinyl. You can check out my colorful vinyl cosmetic pouches here. Think of all the uses for these little guys. Now I need to make larger […]

    Reply
  3. Top 10 Dainty Little DIY Pouches says:
    02/06/2014 at 12:48 pm

    […] DIY project and photo credit to haberdasheryfun.com […]

    Reply
  4. 15 Awesome DIY Pouches says:
    03/27/2014 at 4:28 am

    […] vinyl and fabric pouch (via haberdasheryfun) […]

    Reply
  5. DIY.. Top 5 Vinyl Sewing Projects | Haberdashery Fun says:
    10/20/2014 at 4:03 pm

    […] […]

    Reply
  6. Stacy’s Top Picks Dainty Little DIY Pouches | Stacy's Club says:
    05/24/2015 at 8:06 pm

    […] via haberdasheryfun.com […]

    Reply
  7. Top 10 Dainty Little DIY Pouches | Viseem says:
    05/24/2015 at 9:02 pm

    […] via haberdasheryfun.com […]

    Reply
  8. Sew Clear Vinyl Wallets | Haberdashery Fun says:
    09/23/2015 at 4:42 pm

    […] you’ve read my blog, you know that I’m a sucker for clear vinyl. Click here for another easy fabric pouch and here for double sided vinyl pouch. To date, the double sided vinyl pouch is one of my most […]

    Reply
  9. Sew An Emergency Travel Pouch | Haberdashery Fun says:
    02/10/2016 at 12:02 am

    […] Step 5 – You’re on the home stretch. Sew the double sided pouch as per my instructions here.. New to sewing with vinyl? Check out my other vinyl tutorials here – clear vinyl wallets, ribbon and vinyl pouches and vinyl and fabric cosmetic pouch. […]

    Reply
  10. Large Canvas Zipper Beach Pouch | Haberdashery Fun says:
    06/20/2017 at 10:27 am

    […] Fabric and vinyl see-thru pouch […]

    Reply
  11. DIY Ideas to Try says:
    02/05/2019 at 11:55 am

    […] DIY Makeup Case […]

    Reply

Leave a Reply Cancel reply

Your email address will not be published. Required fields are marked *

This site uses Akismet to reduce spam. Learn how your comment data is processed.

About me


Hi there - I'm Marni Weaver. A sewer, a sometimes quilter and a lover of fabric design. I started this blog to share my ideas. Come Join the Fun
shop now

Popular Categories

project for baby fabric projects seasonal projects fat quarter projects sewing tips and tricks inspiration

Categories

  • Applique
  • Baby
  • Bags and Pouches
  • Block Printing
  • Color
  • DIY Projects
  • Fabric
  • Fabric Design
  • Fat Quarter Projects
  • Home Decor
  • Inspiration
  • Just for Fun
  • Kids
  • No Sew
  • Patterns
  • Print On Fabric
  • Quilting
  • Scrap Fabric Projects
  • Seasonal
  • Sewing Tips & Tricks

Lovely sponsors

Recent Comments

  • How To Make Hand warmers | Haberdashery Fun on DIY.. Sew Heart Shaped Baby Burp Cloths
  • How To Make Hand warmers | Haberdashery Fun on How To Make Mini Heart Shaped Hand Warmers
  • Make Spooky Monster Inspired Face Cloths | Haberdashery Fun on DIY.. Make Monster Inspired Face Cloths
  • How To Sew A Fabric Bin | Haberdashery Fun on Sew An Easy Fabric Storage Bin
  • Make The Alma Tote In Fun Colors | Haberdashery Fun on New – The Alma Tote Pattern

Projects Elsewhere

find me on Pellon Projects sew mama sew contributor

momtastic contributor

Pinterest

Visit Marni@Haberdashery Fun's profile on Pinterest.

I'm Reading

  • Cluck Cluck Sew
  • Cooking Dangerously
  • In Color Order
  • Jen Hewitt
  • Jolly Jabber
  • Karly Spalding Photography
  • Leigh Laurel Studios
  • Lindsay Sews
  • Lotta Jansdotter
  • Love Patchwork and Quilting Magazine
  • Made
  • Making It Lovely
  • Noodle-Head
  • Polka Dot Chair
  • Sharon Holland Designs
  • Silhouette America Blog
  • Silhouette Design Store
  • The Purl Bee
  • The Purple Fig

Press:

Stitch Winter 2014

haberdashery_fun

Marni Weaver
Carve, stamp, scan — my last block print in digi Carve, stamp, scan — my last block print in digital form..

#surfacepatterndesign #haberdasheryfunpatterns #blockprinting #blockprintingart #versafineink #deepdiveplay #3dottedpenguins #surfacepatterndesigner
Working through my deeply committed relationship w Working through my deeply committed relationship with single-color prints and playing with color. 

#surfacepatterndesign #haberdasheryfunpatterns #blockprinting #blockprintingart #versafineink #deepdiveplay #3dottedpenguins
Instagram said I have to start making reels. So he Instagram said I have to start making reels. So here I am mildly uncomfortable, half heartedly participating. The “Next Best Chapter” is playing in the background, because apparently this is it.

#surfacepatterndesign #haberdasheryfun #blockprintingtechnique #blockprintinglove #versafineclair #pfeil
I’m embracing the crazy today. Including the col I’m embracing the crazy today. Including the colors and imperfections in this print.😂

#3dottedpenguinscommunity #haberdasheryfun #blockprintingtechnique #blockprintinglove #versafineclair #pfeil
Joined Ali's @3dottedpenguinscommunity “Play” Joined Ali's @3dottedpenguinscommunity “Play” year-long community. It’s been fun and tough pushing myself out of my comfort zone. I've started by exploring florals, plus experimenting with my style and color palette.

#3dottedpenguinscommunity #haberdasheryfun #blockprintingtechnique #blockprintinglove #versafineclair #pfeil
Follow on Instagram

Copyright © 2025 · Klar theme by Crimson Pear :: web & surface design

Copyright © 2025 · Klar on Genesis Framework · WordPress · Log in