I’ve thought about making a double sided vinyl pouch for months. Every time I shove something into my purse – receipts, coupons, make-up, crayons.. The vision of my pouch pops into my head.
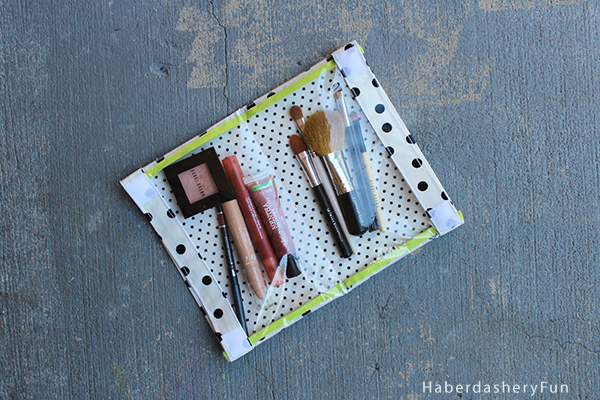
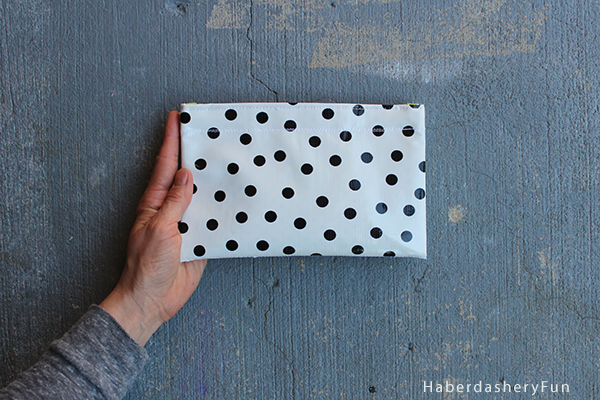
The best part, it folds in half and will fit nicely into a purse or suitcase..
I’ve made a version of this pouch before and use it all the time. Clear vinyl rocks – I love how easy it is to see all my stuff inside. I have a lot of work travel coming up and I wanted to use the pouch to hold my worldy possessions. Perfect timing to finally put my thinking cap on and figure out how to make it…
Materials Needed:
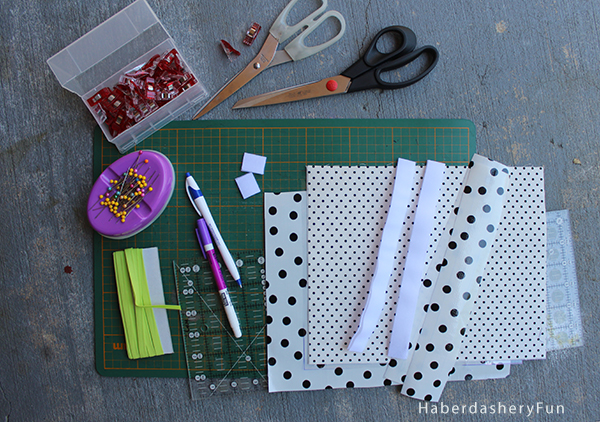
- Clear vinyl – 8 gauge
- Oil Cloth
- Cotton Fabric
- Fusible interfacing – Pellon Decor Bond 809 works great.
- Disappearing fabric ink pen
- Velcro strips
- Sewing machine and sewing supplies
- Double fold bias tape
- Paper scissors
- Pen and ruler
- Wonder clips – Optional. Don’t own wonder clips? I suggest you buy a pack, they work great on projects where pins just won’t do.
Note: I love sewing with vinyl and have tried heavier gauges on different projects. This was the first time sewing with the 8 gauge. At first I thought it might be a bit thin, but after I tested it out on a few samples, I really like the end result. Afraid to sew with vinyl? Fear not, I have a quick tip post on the subject. Click here to read more about it.
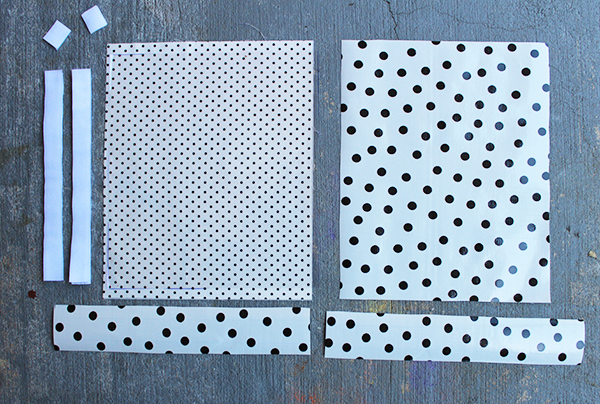
Before we get started, you will need to do the following:
- Cut the oilcloth: 1 rectangle measuring 9″ x 11″ and 2 strips measuring 9″ x 2″
- Cut the lining and fusible interfacing: 1 rectangle each measuring 9″ x 11″
- Cut the clear vinyl: 1 rectangle measuring 9″ x 10″
- Cut velcro: 2 strips measuring 9″ in length. 2 pieces 1 ” in length
- Fuse the interfacing to the backside of the cotton lining
Alright, time to get sewing:
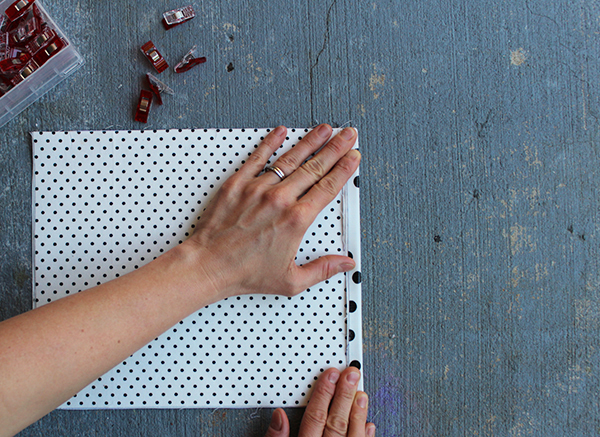
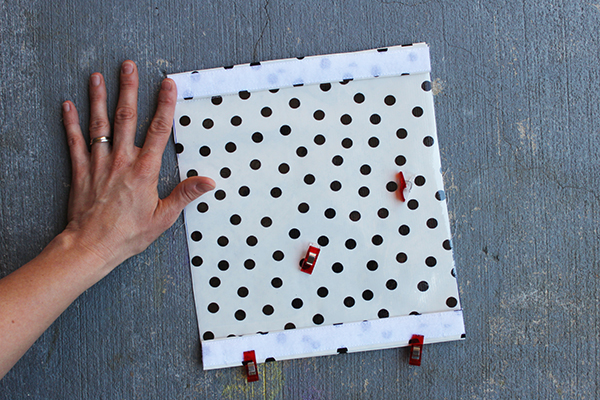
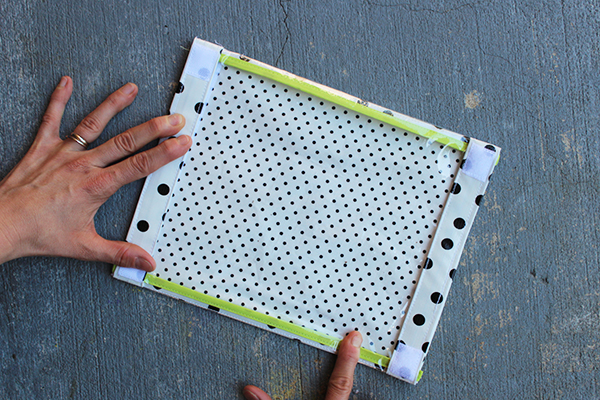
Step 1 – Lay the lining on top of the oilcloth. Wrong sides together. The oilcloth should be facing right side down. Turn and fold the short end under 1/2″. Finger press to hold the fold. While holding the edge under, place the velcro on top. The velcro placement needs to be close to the edge. Use wonder clips to secure at edge. Place into sewing machine and edgestitch the velcro down. Repeat for other end. Stitch along the other long side of the velcro.
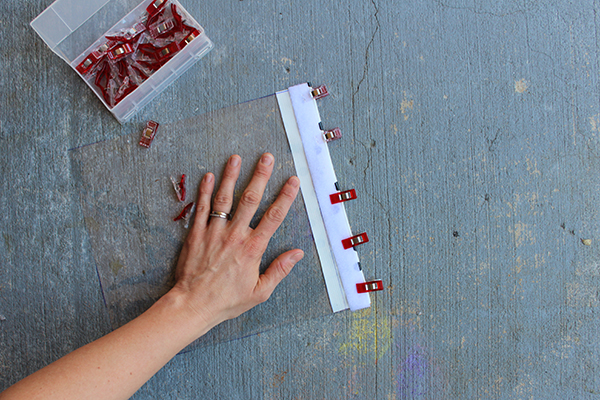
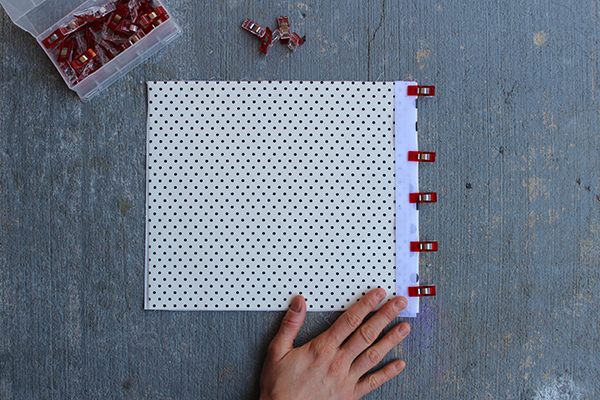
Step 2 – Now place the long rectangle pieces onto your work surface. Right side down. Turn and fold the short side 1/2″. Place the folded edge OVER the clear vinyl edge. Finger press. Lay the velcro on top. The velcro placement to be close to the top edge. Use wonder clips to help hold in place. Place into sewing machine and edgestitch the velcro down. This secures the top side of the velcro down. Turn the fold the other side under 1/2″. The velcro should hide the edges. Adjust so that the seam allowance is even. Place into sewing machine and topstitch down. Repeat for the other side.
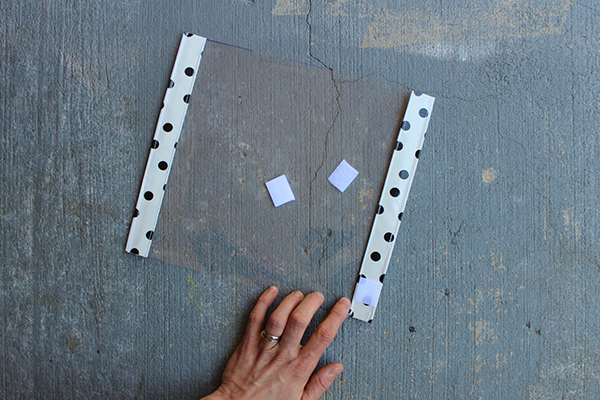
Step 3 – Turn the vinyl piece to be right side up. Measure inwards about 5/8″ and place the 1″ velcro piece. Stitch down. Repeat for the other 3 velcro pieces.
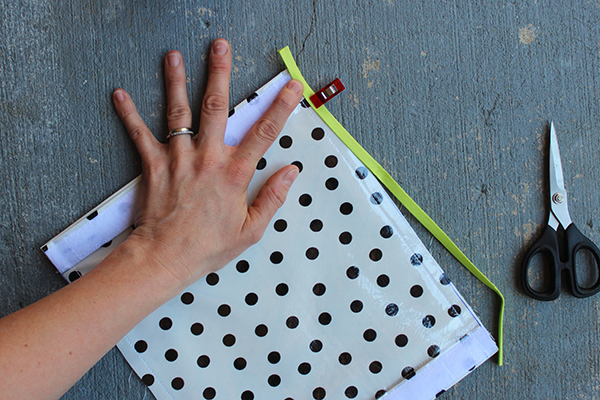
Step 4 – Place right sides together. Use wonder clips to secure at top and bottom edges. Place into sewing machine and stitch together with a 3/8″ – 1/2″ seam allowance. Repeat for the other side.
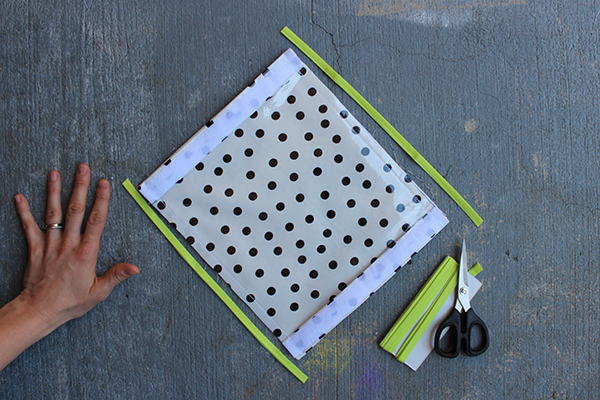
Step 5 – Cut 2 of bias binding approximately 12″ . Place the double fold bias tape over each seam allowance. Fold under at each end. Stitch down with sewing machine.
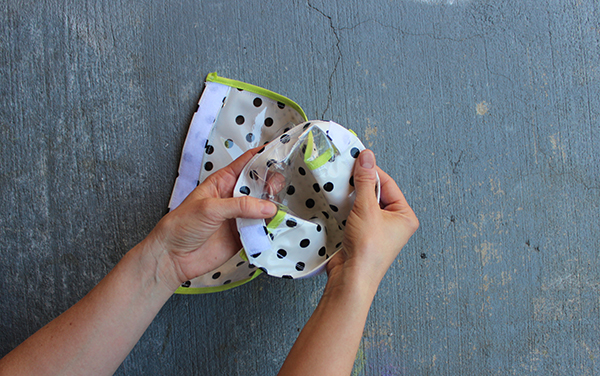
Step 6 – Gently pull the pouch right side out. Wiggle around to lay nicely. Finger press seam allowance edges.
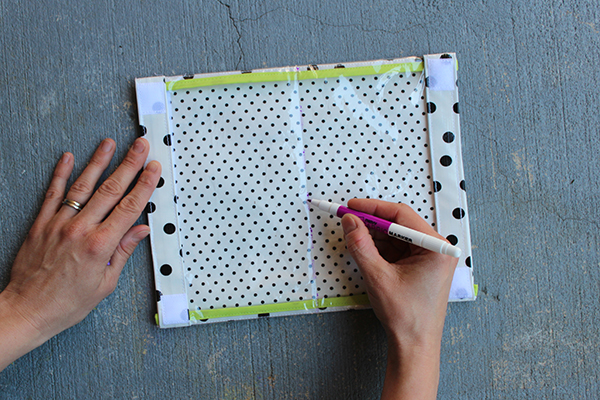
Step 7 – Fold in half to find center. Mark a dashed line with the disappearing ink pen. The pen line may not hold. If this is the case, use tape or something to help guide the stitch line through your sewing machine. Place into your sewing machine and stitch following the line. Backstitch at each end.
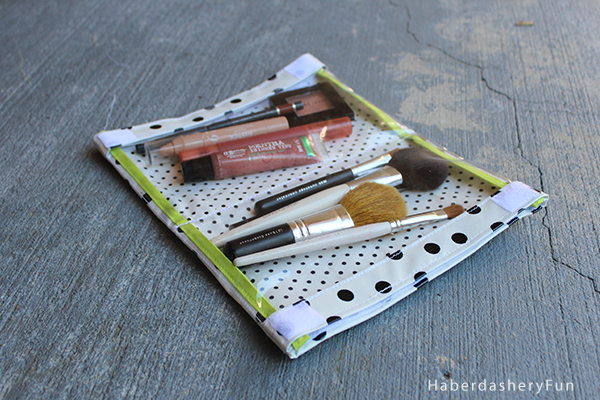
Well, that’s it. Fun right? Think of all the stuff you can fill it with – coupons and store receipts, make-up and brushes, travel essentials, phone cords, kids stuff, school stuff.. Oh the list goes on.


This vinyl pouch is such a practical idea! I have this big bag but they have no additional pockets inside the bag, which makes it difficult if I place my keys and cell together. I know I can always use a cell pouch to protect it but I’d rather make a pouch like this to organize all the stuff. Again thanks a lot for the sewing instructions! Love this!
Thanks Onel!
This is awesome!! I could use a couple in my purse! I’ve linked to your tutorial on Craft Gossip here:
http://sewing.craftgossip.com/tutorial-double-pocket-clear-vinyl-pouch/2014/04/28/
–Anne
This is such a cute idea! Perfect for storing make-up in a carry on!
Thank you for sharing!
Love this! Great tutorial too!
I’ve been looking for just the perfect vinyl case to use in my carry on bag. It never crossed my mind to sew my own. That’s for sharing this.
Great idea! Thanks for sharing!
Your tutorial is awesome and I have never thought of sewing with vinyl. Do you have an etsy shop? I think you have excellent products! Thanks for linking up, you are inspiring me to get back to sewing big time.
Hi Morgan, I’ve been meaning to respond. Thank you so much for the comment, it made my day. It’s nice to hear that my little projects are inspiring people. 🙂 Have a great weekend.
That’s a really clear Tutorial – thank you. Those wonder clips look really useful – I must get some of those.
Thanks for stopping by and leaving a comment :). For sure get the wonder clips – I suggest starting with the small size… There are so many uses for them. I love to use them when pins won’t work/will leave holes.
Oh WOW! I love this so, so, so much. The design is genius. I can’t wait to make one… super giftable too! I would love to link to your tutorial if you didn’t mind!
Hi – Thank you for stopping by and leaving a comment. It is ok to link back to my blog 🙂 I would love to see finished images of your pouch.
my sister just pointed out to me about carrying baggies for her cell charger and cord; This is a really cool project and just in time. Thanks for being a guess on SewCanShe with this feature.
Isn’t that the truth? I use ziplock baggies for everything! I get inspired when I shove something into one and think ah-ha!! I need to make a pouch. Have a great weekend.
Thank you very much pour your tutorial! It makes it so easy to do!! You can see it on my blog.
I’ll comme back on you blog because there’s is a lot of wonderful ideas !! (excuse my bad english !…. ;-( )
Thank you! I checked out your finished pouch and it is amazing! Love the polka dot fabric you chose!
Please voulez vous me dire comment faire pour pouvoir lire et utiliser vos tutos en français
Car j adore ce que vous faites.
Merci merci
Marité
Thank you for your comment!:) Your best bet would be to translate the tutorials on google..It might work, as I translated what you said to me 🙂 I’m sorry I can’t be of more help.
What kind/size of needle did you use with the 8 gauge vinyl? What kind of thread? I’m working on a project using 12 gauge but I’m not sure which thread is best I don’t need super-strong (making pockets to insert name tags – sewn onto a garment bag).
I used a standard needle size and cotton thread. I’ve used clear thread as well, but it was harder to use. Keep extra long tails and hold on to them when you start sewing, it will help feed the vinyl through. Test your machine with a small piece of vinyl before you get going on your project. Also, once you puncture the vinyl it’s basically ruined. So you only have one shot sewing it
Do you have a smaller version of this avail? I would like to make something like this for my diaper bag to hold bandaids and stuff
Hi Jen,
Funny you should ask. I’m working on the double sided pouch for a post next week that has HTV icons and a planned use as a travel pouch for baby and kids. It’s the same size, but I’ve also thought of making a smaller one as well for my handbag and band-aids.. Little kids LOVE and NEED band aids, right? I’ll keep you posted when they go up. – Marni
I was just thinking I want to make some little pouches with vinyl and BOOM there you are. Great design – thatnk you for the free tutorial.
My question is, do I NEED those clover clips. I’ve never needed them for attaching binding on my quilts. But this is a little different. If you say I do – I’ll get them. And where do you buy the vinyl?
Oh never mind – I see what you said in the post about wonder clips. Sorry.
HI Linda – So glad that you are trying the vinyl pouches out.. I saw your 2 comments and wanted to respond, even though you saw the answer. Wonder clips are a nice add on tool with vinyl. You don’t need them, but I like to have them on hand for tricky spots and holding pieces together. Just be super careful with pins – as they will leave little holes in the vinyl and his is where wonder clips can be helpful. Let me know how it goes and send pictures of your finished pouches:)
Marni