Haberdashery Fun

  • Home
  • About
    • Look Book
  • Contact
    • Collaborate?
  • Tutorials
  • Shop
    • Email
    • Facebook
    • Instagram
    • Pinterest

Keep up to date with the latest posts!

Sew Mini Fabric Planter Bins

in DIY Projects, Home Decor on 25/06/15

I recently shared this post over at UCreate and I am happy to be sharing the tutorial here today.

Fabric Planter Group Bin

My son and I recently bought a few succulents for our kitchen table. Truthfully, I’ve been calling them “mini plants”. After hearing everyone call them “succulents” I’ve figured out what to actually call them.. I don’t spend much time in the garden. Can you tell?

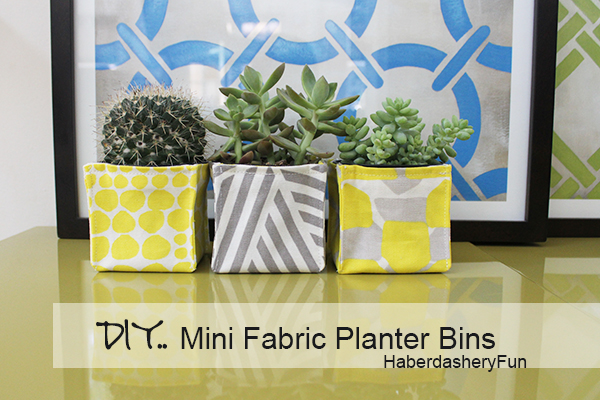
The pots they came in are black, plastic and really ugly. I’m not much of a green thumb, so I have no intention of re-potting them.. While I was looking at the pots I had one of my usual “ah-ha sewing” moments – why not sew colorful, mini fabric bins to cover the pots? Everyone loves a fabric storage bin, right?

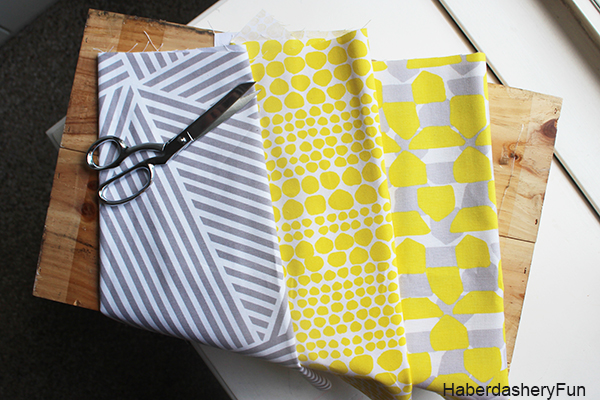
I’ve had my eye on the Nate Burkus home decor fabric collection at Jo-Ann fabrics for quite some time. I love his bold, modern prints. I wanted a heavier weight fabric for this project, so his decorator fabric collection at Jo-Ann Fabrics was right on the mark.

Nate Berkus Fabric

These mini fabric bins are super easy to make and you can sew a bunch in just a few short hours.

Materials:

  1. Cotton fabric in 2 prints – cotton canvas or decorator weight suggested
  2. Disappearing fabric ink pen and ruler
  3. Sewing machine and sewing supplies
  4. Iron and ironing board
  5. Miniature plant in pot – pot height approximately 3 3/8″

Let’s get started:

Fabric Planter Bins HaberdasheryFun

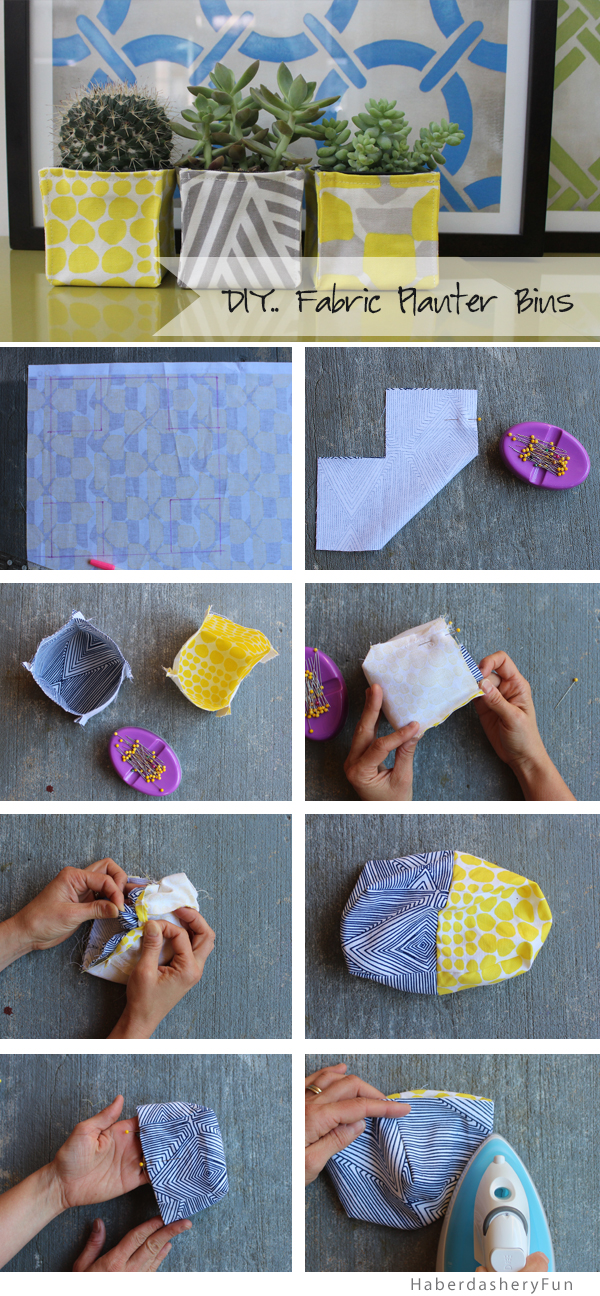
  1. Create the pattern – Lay the “outside” fabric face down on your work surface. Use the disappearing pen and draw a square measuring 10 3/4″ x 10 3/4″. At each corner draw squares measuring 3 1/4″. Cut out following the ink lines.
  2. Cut the fabric – The fabric piece should like something like a cross.  Now lay the fabric down on the “lining” fabric. Pin in place and cut out another. Note – if you plan to make multiple fabric bins, trace off a pattern at this step.Sew the outside bin –  Match the sides of each square at one corner. Pin. Place into your sewing machine and stitch with a 1/2″ seam allowance. Repeat for each corner. Press the seams closed facing one direction.
  3. Repeat step 3 for the lining fabric.  Press the seams closed facing the same direction. You now have 2 little bins.
  4. Turn the outside bin right side facing out. Leave the lining bin, right side facing in. Place the lining bin around the outside bin. Wiggle into place.
  5. Match the points of each corner using your finger. Pin at the top edge/at each corner seam. Place into your sewing machine and stitch along the top edge. Leave a small opening.
  6.  Turn right side out by pulling the bins through the opening. Wiggle the lining bin into the outside bin. Match at each corner. Press the seam along the top edge. Also fold each side seam onto each other and press the seam in place. Pin the small opening closed. Top stitch along the top edge.
  7. Finish the bins – Fold along one side seam. Finger press the seam to sit flat. Place into your sewing machine and edge stitch from the top to the bottom. Backstitch. Repeat for each corner.

Fabric Planter bin Solo

Fabric Planter Bin Combo

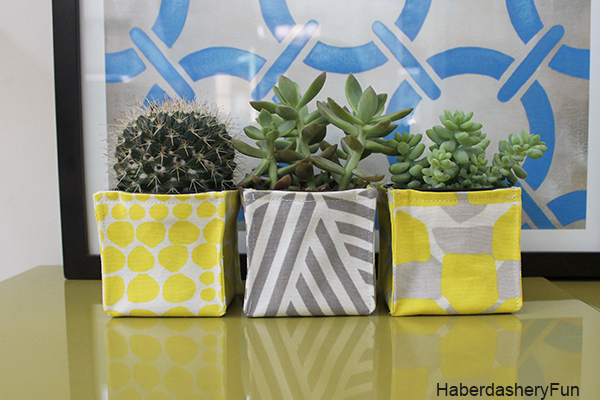
That’s it – adorable, right? Perfect for plants and other stuff as well. Wouldn’t these be great all over the house? They would also make awesome teacher appreciation gifts. Disclaimer.. They are so cute you may have a hard time giving them away!

Got fabric bins on the brain? I have a bunch of tutorials you can try –  check out my reversible fabric bin OR my fabric bin with handles OR my round canvas fabric bin. If you have any questions, please let me know. I love hearing about it all.

Happy Sewing.

Related Posts Plugin for WordPress, Blogger...

18 Comments

« DIY.. Make Mesh Laundry Pods #stylebymethod #clevermethod
Sew Bold Color Blocked Pillows + Giveaway »

Comments

  1. Laurence W says

    June 26, 2015 at 11:50 am

    They are cute ! Thanks for sharing .

    Reply
  2. Ann says

    June 28, 2015 at 4:07 pm

    So sweet! Love the prints

    Reply
  3. Tara Siudy (Little Miss Dexterous) says

    July 5, 2015 at 10:51 pm

    These are so cute! I am going to make some in the next few weeks! Pinning and sharing!

    Reply
  4. Julie says

    July 6, 2015 at 6:26 pm

    Such a simple tutorial, these would be great for all manner of things. They make cute plant pots, it’s nice to use what you have to beautiful your home!
    These plants really are super easy to keep alive – just don’t over water them , they like to be kept a little bit on the dry side – good luck!

    Reply
    • Haberdashery Fun says

      July 6, 2015 at 8:55 pm

      Hi Julie,

      Thank you so much. I need help with all green things. I just moved to California and am taking some time off work, so I am looking fwd to being more of a green thumb. – Marni

      Reply
  5. Christine says

    July 7, 2015 at 8:48 am

    LOVE these planters!

    Reply
    • Haberdashery Fun says

      July 7, 2015 at 12:58 pm

      Thanks Christine! I was just on your site and saw the napkin holders.. Awesome idea – Marni

      Reply
  6. Cat @ MaryMarthaMama says

    July 7, 2015 at 8:53 pm

    So cute and cheery! I love how you paired the fabrics!

    Reply
  7. Kathleen says

    July 9, 2015 at 8:02 am

    Great idea! I love the fabrics you used.

    Reply
  8. Anita says

    July 9, 2015 at 10:05 am

    This is such an amazing idea! Thanks for sharing it. I’m Anita visiting from Creative Ways Link Party.

    Reply
  9. Emily @ The Benson Street says

    September 12, 2015 at 2:39 pm

    Adorable! What a great way to dress up plants. Thanks for sharing at Monday Funday Link Party.

    Reply
  10. Jill says

    September 14, 2015 at 11:49 pm

    Cute little baskets – what a great way to hide the plain plastic pots! Thanks for sharing at A Round Tuit. Hope you have a fabulous week!

    Reply

Trackbacks

  1. CraftCrave | DigiFree | CraftCrave says:
    June 26, 2015 at 2:50 am

    […] Sew Mini Fabric Planter Bins – 1 freebie(s)? […]

    Reply
  2. Friday Finds Link up NOW LIVE - Pink Cake Plate says:
    July 10, 2015 at 4:00 pm

    […] Sew Mini Fabric PlantersHaberdashery Fun […]

    Reply
  3. Friday Finds Linky Party #37 - Tried & True says:
    July 10, 2015 at 4:03 pm

    […] Sew Mini Fabric PlantersHaberdashery Fun […]

    Reply
  4. Craftaholics Anonymous® | Friday Finds link Party 7.10.15 says:
    July 11, 2015 at 11:02 pm

    […] Sew Mini Fabric Planters Haberdashery Fun […]

    Reply
  5. Little Feature in Love Patchwork & Quilting Magazine | Haberdashery Fun says:
    October 6, 2015 at 10:15 am

    […] A few months ago Love Patchwork & Quilting reached out and asked if they could include my mini fabric planter bins in an upcoming issue.  Hello.. A big, big, BIG yes! I love their magazine and buy it every month […]

    Reply
  6. Hello 2016.. Best Projects 2015 | Haberdashery Fun says:
    January 1, 2016 at 4:30 am

    […] Mini Planter Bins […]

    Reply

Leave a Reply Cancel reply

Your email address will not be published. Required fields are marked *

This site uses Akismet to reduce spam. Learn how your comment data is processed.

About me


Hi there - I'm Marni Weaver. A sewer, a sometimes quilter and a lover of fabric design. I started this blog to share my ideas. Come Join the Fun
shop now

Popular Categories

project for baby fabric projects seasonal projects fat quarter projects sewing tips and tricks inspiration

Categories

  • Applique
  • Baby
  • Bags and Pouches
  • Color
  • DIY Projects
  • Fabric
  • Fabric Design
  • Fat Quarter Projects
  • Home Decor
  • Inspiration
  • Just for Fun
  • Kids
  • No Sew
  • Patterns
  • Print On Fabric
  • Quilting
  • Scrap Fabric Projects
  • Seasonal
  • Sewing Tips & Tricks

Lovely sponsors

Recent Comments

  • Make Nine in 2021 – Sew, Bake, Snap on DIY.. Reversible Fabric Storage Bin
  • 26 Diy placemats ideas - Perfect Table Setting on DIY.. Heart Shaped Placemats Tutorial For Sew Mama Sew
  • More Free Tote Patterns | on Reversible 1 Hour Tote Pattern
  • Collapsible Kraft-Tex Bowl on DIY.. Collapsible Fabric Bowls
  • Haberdashery Fun on DIY.. Reversible Fabric Storage Bin

Projects Elsewhere

find me on Pellon Projects sew mama sew contributor

momtastic contributor

Pinterest

Visit Marni@Haberdashery Fun's profile on Pinterest.
Follow on Bloglovin

I'm Reading

  • Cluck Cluck Sew
  • Cooking Dangerously
  • In Color Order
  • Jen Hewitt
  • Jolly Jabber
  • Karly Spalding Photography
  • Leigh Laurel Studios
  • Lindsay Sews
  • Lotta Jansdotter
  • Love Patchwork and Quilting Magazine
  • Made
  • Making It Lovely
  • Noodle-Head
  • Polka Dot Chair
  • Sharon Holland Designs
  • Silhouette America Blog
  • Silhouette Design Store
  • The Purl Bee
  • The Purple Fig

Press:

Stitch Winter 2014

haberdashery_fun

I made the most glorious little Kraft-tex journal I made the most glorious little Kraft-tex journal cover over the holidays.  Not only do I love the color of the month for December (blue turquoise), but the texture of my journal is like aged leather and looks durable and rugged. Did you know Kraft-tex is actually paper??? My cover was simple to make and is just one rectangular piece of Kraft-tex, folded over at the ends and topstitched. Thats it.❤️

You can check @ctpublishing for other projects and more info.
.
.
.
#haberdasheryfun #haberdasheryfunpatterns #krafttex #krafttexuniversity #krafttexstyle #ctpublishing #isew #isewlation
Highlights from 2020. Glad it’s complete. Upward Highlights from 2020. Glad it’s complete. Upward and onward. What are you creating for the year ahead? Here’s to making 2021 a creative, fun, adventurous and graceful year.
What a fun class! Thank you to the participants in What a fun class! Thank you to the participants in my first zoom block printing class. It was an amazing group of people coming together with a common goal - sharing their love of print and pattern design.

My hubby snapped a few pictures during the workshop. I’m normally a “hider outer”, but thought this was a perfect opportunity to say Hi.  Even if it is looking down and away from the camera. 🤪

I will be hosting another block printing zoom workshop mid January. Come one come all. DM or email me for details.
.
.
.
#coffeewithhaberdasheryfun #blockprintingworkshop #zoomclass #pdfpattern #haberdasheryfun #haberdashery 
#blockprint #blockprinting #isew #fabricdesign #surfacepatterndesign #zoomsewingclass #zoomdesignclass
You’ve printed some fabric.. now what?? Build or You’ve printed some fabric.. now what?? Build or buy a frame and make yourself some easy wall art = ✔️

Want to learn how to block print? Grab a cup of coffee, a few supplies and join me for a free zoom class this Sunday, Dec 13th at 11am ( Eastern Time Zone ).

Check my recent blog post for the supply list. If you want to come and just hang out and watch, that’s ok too. DM or email me for details.
.
.
#haberdashery #blockprint #coffeewithhaberdasheryfun #PDF 
#isew #haberdasheryfun #curvyzipperpouch #fabricdesign 
#surfacedesign #haberdasheryfunpatterns #creativehappylife
Want to learn how to block print? I’m hosting a Want to learn how to block print? I’m hosting a free zoom class and the supply list is now up on my blog. You can DM me or send an email to marni@haberdasheryfun.com to join this free class. Click on the link in my bio to go to my blog.

Sunday, December 13 at 11am Est time zone.

.
#haberdashery #haberdasheryfun #blockprinting #pdfpattern #haberdasheryfunpatterns #coffeewithhaberdasheryfun #fabricdesign #blockprint
Follow on Instagram

Copyright © 2021 · Klar theme by Crimson Pear :: web & surface design