Haberdashery Fun

  • Home
  • About
    • Look Book
  • Contact
    • Collaborate?
  • Tutorials
  • Shop
    • Email
    • Facebook
    • Instagram
    • Pinterest

Keep up to date with the latest posts!

Print Your Own Fabric For Sewing A Pouch

in DIY Projects, Print On Fabric on 04/02/16

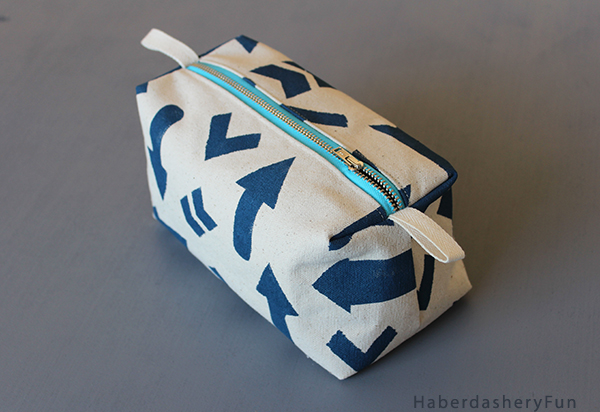
Last week I shared a tutorial on how to make your own printed fabric. This week, I promised a big reveal on the printed fabric sewn into a boxy pouch…

Print your own fabric for sewing projects Main

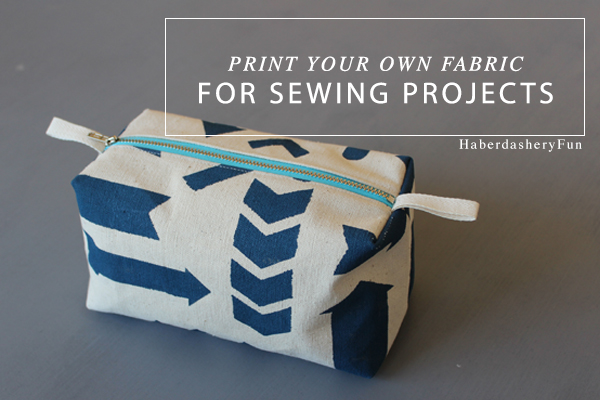
I have to tell you that printing my own fabric was a blast..  I’ve been planning on doing it forever and finally went for it.  There are so many possibilities when you print your own fabric – colors, patterns, shapes and sizes… You can be really creative with this project. And on top of all the design fun stuff, you then get to sew the fabric into something to use on a daily basis. Talk about showcasing your stuff!

Print your own fabric 1

Materials:

  1. Cotton or canvas fabric in a light color
  2. Silhouette machine and supplies
  3. Freezer paper, fabric paint and sponge – Try Tulip brand, Silhouette fabric Ink ink or Martha Stewart
  4. Iron and ironing board
  5. Craft paper
  6. Sewing machine and supplies
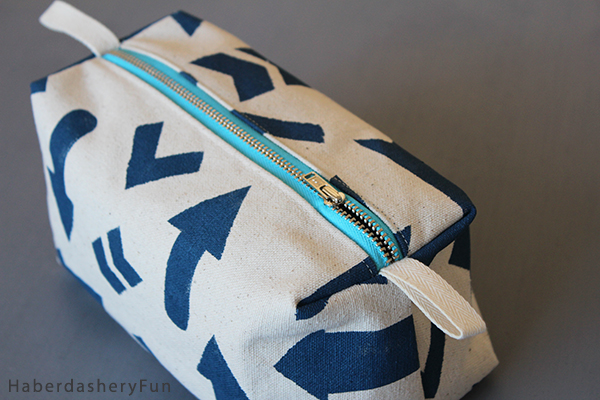
  7. Zipper
  8. Sewing pattern

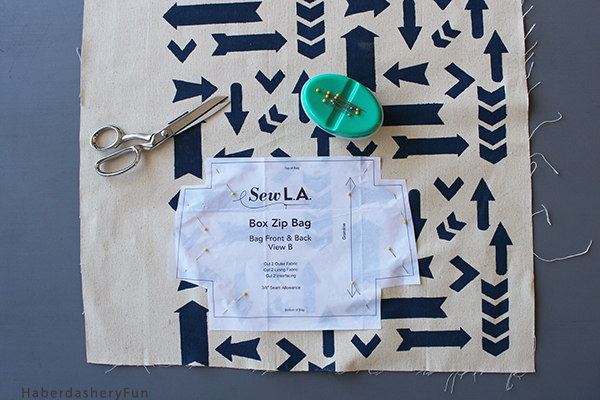
As noted in my last post, I used a pattern that I bought from Sew LA. They have closed their doors, but the pattern is called ” Box Zip Bag”. If you want to see the full tutorial on how to print your own fabric click here.

Printed Boxy pouch

HaberdasheryFun Boxy pouch close up

Let’s get started:

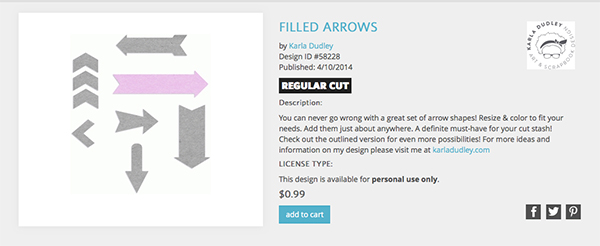
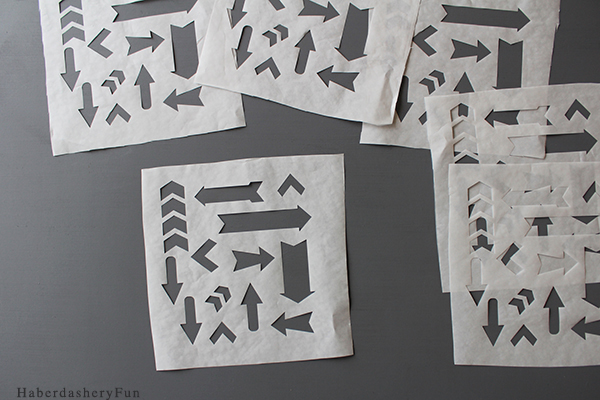
Step 1 – Use your Silhouette machine and create the design. In this case I used Karla Dudley’s  “filled arrows” design and added a few more arrows into the mix. I reworked the group until it had a cohesive feel. After finalizing the design, place the freezer paper onto the mat and send the file to be cut. Use the tools provided with your machine and gently pull the design away from the mat. After measuring my fabric and figuring out the layout and overall design, I cut 6 pieces of freezer paper to make up the fabric design.

Step1

step1

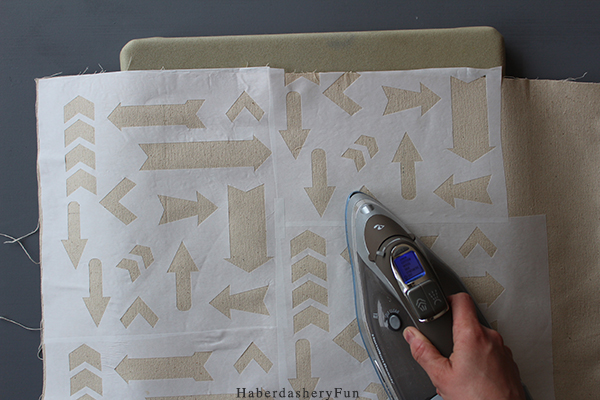
Step 2 – Iron the freezer paper onto the fabric. Start with one column first and then off set the second column and place the freezer paper in the middle of the first column design. This helps break up the pattern.  Gently press the freezer paper in place by lifting the iron up and down.  Don’t pull the iron around or you risk damaging the cut edges.

Step2

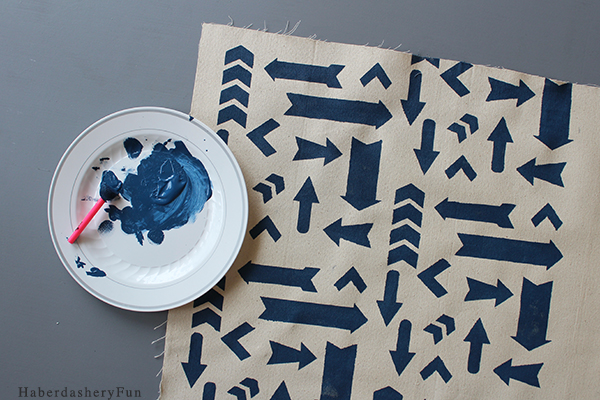
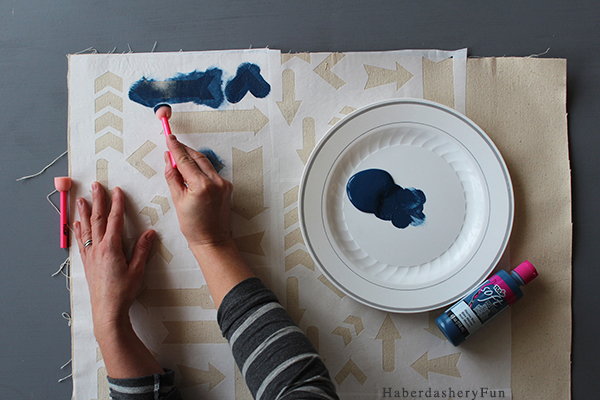
Step 3 – Squirt a small amount of fabric paint onto a plate, place the sponge into the ink and gently dab onto the fabric surface. Work fast. Do not “pull” the sponge around, just dab lightly. Do not goop the fabric paint.. I find the more you goop the fabric ink, the more it bleeds under the freezer paper!

Step3

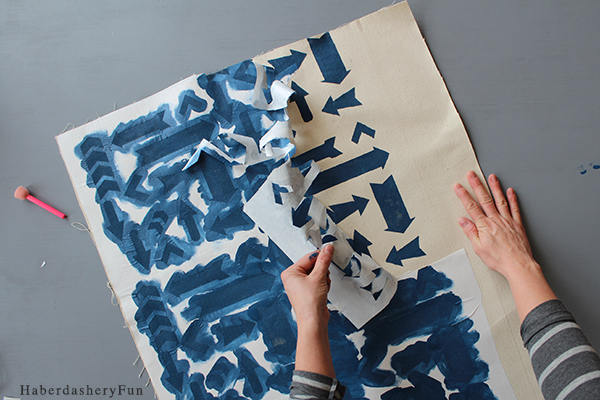
Step 4 – While the fabric paint is still wet, gently pull the freezer paper away from the fabric. Set aside to dry.

Step7

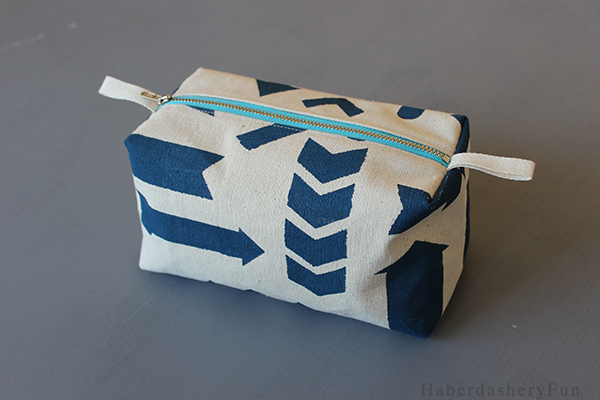
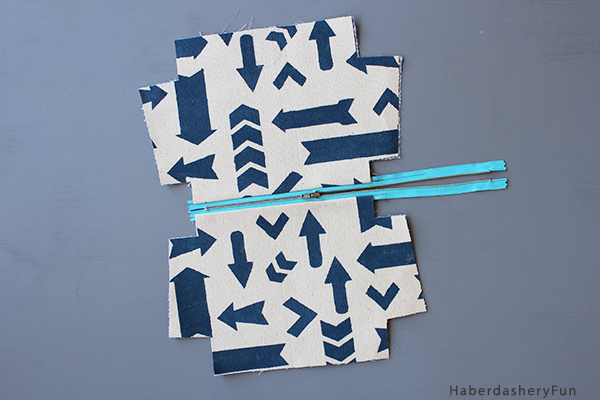
Step 5 – Lay the pattern pieces onto your fabric.  Look for areas that have visual interest.  If you want the same print and placement on each side of your pouch, pin the pattern pieces in same design areas.  I went for a random look with this pouch, as I really liked different areas of the fabric. Note – As you pin in place, remember the grainline on the pattern piece and your fabric.

Step5 part2

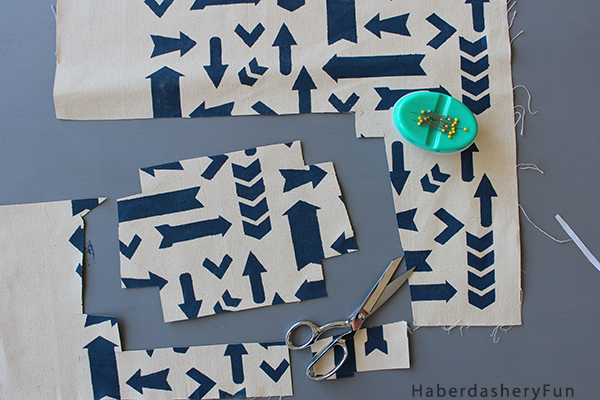
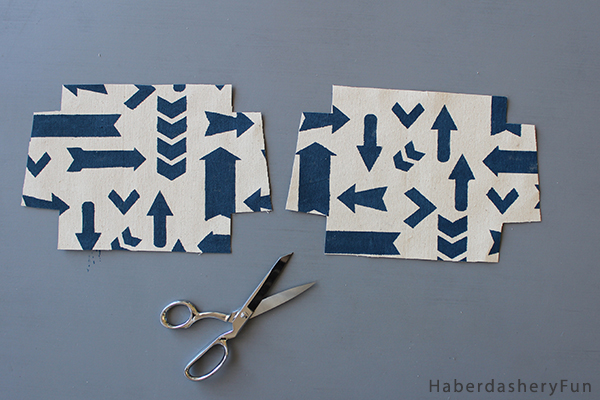
Step 6 – Cut the pieces from your printed fabric. For the outside of the pouch, I only had 2 pattern pieces to cut. Finish cutting the remainder of the pieces – lining, interfacing, etc.

Step6A part2

Step6b part2

Step 7 – Follow the pattern instructions and sew the pouch together. For good workmanship and construction, remember to press as you go!

Step7Part2

That’s it! What are your thoughts on printing your own fabric? Plan to make some? If so, what colors, shapes and patterns inspire you?

printed boxy pouch Side

I’m already addicted to printing my own fabric and have so many ideas up my sleeve.. Can’t wait to share!

Would you like to see more of my Silhouette ideas and tutorials? Click the following links for firetruck party favor canvas totes, easy HTV kids birthday T-shirt, holiday inspired printed tea towels and my fabric advent calendar.

Happy Sewing.

Related Posts Plugin for WordPress, Blogger...

16 Comments

« Easy HTV Kids Birthday T-shirt
Sew An Emergency Travel Pouch »

Comments

  1. Emma says

    February 5, 2016 at 8:41 pm

    So creative and such a great idea. I’ve never thought of printing my own fabric. Thanks for sharing – both tutorials make it look so easy.

    Reply
  2. Maurice Golson says

    February 13, 2016 at 3:19 pm

    Just saw your other post on the colorful zipper pouch. Arrows are awesome. Unique ideas great way to use up the freezer paper.

    Reply
  3. DazzleWhileFrazzled says

    March 3, 2016 at 11:05 pm

    So cute! I don’t have a Silhouette machine so I’ll have to print my own fabric the “old fashioned” way by tracing a template! Visiting from Weekend Retreat party.

    Reply
    • Haberdashery Fun says

      March 5, 2016 at 4:18 pm

      That will work 🙂 I used to trace my designs onto freezer paper and cut out with an X-Acto blade all the time.. Thanks for stopping by and have a great weekend – Marni

      Reply
  4. Brittany Nikole says

    March 5, 2016 at 2:51 pm

    Absolutely love these printing on fabric posts- I’ve been focused on making paper prints for the wall lately and this inspired me to get back into working with fabric:) Thanks for sharing!

    Reply
    • Haberdashery Fun says

      March 5, 2016 at 4:12 pm

      Thank you so much for stopping by! Can’t wait to check out what you’ve been up to – Marni

      Reply
  5. Shellie says

    March 8, 2016 at 7:18 am

    Creative project…Thanks for adding this to the Thursday Favorite Things Blog Hop!

    Shellie
    http://www.thefabjourney.com

    Reply
  6. Jerusha (ThePositiveYear.com) says

    March 8, 2016 at 1:18 pm

    I wrap bento boxes for my family for lunch and this is a perfect idea for a lovely wrap. I can’t wait to try it! – Jerusha, ThePositiveYear.com

    Reply
  7. Anna says

    March 9, 2016 at 2:13 pm

    That looks like a lot of fun!

    Reply
  8. Alina Watson says

    April 1, 2016 at 12:56 am

    Hi Haberdashery,

    Great Job by you Haberdashery, You have done a awesome job. Basically this kind of work is so hard to create awesome print for Sewing a pouch.

    Sewing a pouch looks really amazing & color combination is superb.

    Reply
    • Haberdashery Fun says

      April 1, 2016 at 10:49 am

      Hi Alina,

      Thanks so much for your kind comments. Hope you have a great day! – Marni

      Reply

Trackbacks

  1. Sew A Colorful Printed Pouch | Haberdashery Fun says:
    February 13, 2016 at 12:16 am

    […] to seethe project where the arrows came from, click here. How about the little houses, click here. I have another project where I saved my freezer bits.. […]

    Reply
  2. Features from The Handmade Hangout #91 says:
    March 10, 2016 at 5:05 am

    […] Haberdashery Fun shares how to print your own fabric […]

    Reply
  3. Craft Frenzy Friday #131 - Craft Dictator says:
    March 10, 2016 at 8:01 pm

    […] 5.Print Your Own Fabric for Sewing a Pouch at Haberdashery Fun […]

    Reply
  4. Craft Frenzy Friday (March 11) - momhomeguide.com says:
    March 10, 2016 at 8:31 pm

    […] 5.Print Your Own Fabric for Sewing a Pouch at Haberdashery Fun […]

    Reply
  5. Print Your Own Fabric For Sewing Projects | Haberdashery Fun says:
    May 13, 2016 at 3:22 pm

    […] to see the finished pouch? Click here to go to the big […]

    Reply

Leave a Reply Cancel reply

Your email address will not be published. Required fields are marked *

This site uses Akismet to reduce spam. Learn how your comment data is processed.

About me


Hi there - I'm Marni Weaver. A sewer, a sometimes quilter and a lover of fabric design. I started this blog to share my ideas. Come Join the Fun
shop now

Popular Categories

project for baby fabric projects seasonal projects fat quarter projects sewing tips and tricks inspiration

Categories

  • Applique
  • Baby
  • Bags and Pouches
  • Color
  • DIY Projects
  • Fabric
  • Fabric Design
  • Fat Quarter Projects
  • Home Decor
  • Inspiration
  • Just for Fun
  • Kids
  • No Sew
  • Patterns
  • Print On Fabric
  • Quilting
  • Scrap Fabric Projects
  • Seasonal
  • Sewing Tips & Tricks

Lovely sponsors

Recent Comments

  • Quilted Ripstop Reversible Tote | Haberdashery Fun on Quick Tip.. Sewing Boxed Corners
  • Make Nine in 2021 – Sew, Bake, Snap on DIY.. Reversible Fabric Storage Bin
  • 26 Diy placemats ideas - Perfect Table Setting on DIY.. Heart Shaped Placemats Tutorial For Sew Mama Sew
  • More Free Tote Patterns | on Reversible 1 Hour Tote Pattern
  • Collapsible Kraft-Tex Bowl on DIY.. Collapsible Fabric Bowls

Projects Elsewhere

find me on Pellon Projects sew mama sew contributor

momtastic contributor

Pinterest

Visit Marni@Haberdashery Fun's profile on Pinterest.
Follow on Bloglovin

I'm Reading

  • Cluck Cluck Sew
  • Cooking Dangerously
  • In Color Order
  • Jen Hewitt
  • Jolly Jabber
  • Karly Spalding Photography
  • Leigh Laurel Studios
  • Lindsay Sews
  • Lotta Jansdotter
  • Love Patchwork and Quilting Magazine
  • Made
  • Making It Lovely
  • Noodle-Head
  • Polka Dot Chair
  • Sharon Holland Designs
  • Silhouette America Blog
  • Silhouette Design Store
  • The Purl Bee
  • The Purple Fig

Press:

Stitch Winter 2014

haberdashery_fun

My 5 yr old modeling the latest print from Sunday’s block printing zoom workshop. It’s fun to try to draw, carve and print all the while teaching and sharing over zoom. The prints made during these workshops aren’t perfect, but they sure are fun and memorable to create. Thank you to the small group of participants in attendance this Sunday, teaching these workshops has been good for my soul. 
.
Details soon to come for next month’s / May workshop. For more information email - marni@haberdasheryfun.com
.
#haberdashery #haberdasheryfunpatterns #haberdasheryfun #zoomworkshop #haberdasheryfunclasses #pdfpatterns #isew #printandpattern #printmaking #surfacepatterndesign #zoomclasses #isewbags #printmakersofinstagram
My next workshop is here! Have you wanted to lea My next workshop is here! 

Have you wanted to learn to block print and don’t know where to start? This is the perfect intro class and you will be up and running in 1 hour. 

Sunday, April 11th 
11am- 12pm EST
Space is limited.

Email me at marni@haberdasheryfun.com for details.

#zoomclasses #pdfpattern #isew #haberdashery #haberdasheryfun #haberdasheryfunpatterns #haberdasheryfunclasses #pdf #sewing
Day 22 of #marchmeetthemaker2021 is “Hands”. . Day 22 of #marchmeetthemaker2021 is “Hands”.
.
My 5yr old loves to snoop and to go through my stuff. He especially loves my block printing supples, recently found my stash of stamps and lined them up.  When I saw my handiwork from over the years, I thought it would make a fun picture. 
.
.
#marchmeetthemaker #mmtm #speedballart #mmtm2021 #haberdashery #haberdasheryfun #blockprinting #haberdasheryfunpatterns #pdfpattern #isewlation #speedycarve 
#isewbags #isew #zoomclasses #haberdasheryfunclasses #printandpattern #printmakersofinstagram
Day 18 for #marchmeetthemaker2021 was “color”. Day 18 for #marchmeetthemaker2021 was “color”. I often look at people’s Instagram accounts where the colors are soft, muted and soothing. I say to myself ..Oooh. I want my Instagram feed to look like that. But the reality is, I love ❤️ ❤️ ❤️ color. 
.
.
#marchmeetthemaker #mmtm2021 #mmtm #pdfpattern #haberdashery #haberdasheryfun  #isewbags #haberdasheryfunpatterns #isew #konasolids #dollarspotfinds #dollarspot
Day 16 prompt for #marchmeetthemaker2021 is “Fro Day 16 prompt for #marchmeetthemaker2021 is “From The Archives”.. I first posted this picture 2 years ago. ❤️ the red and the simplicity of the print. If you have attended one of my zoom block printing workshops, you may recognize the shapes? Super simple, yet mixed together they make such a fun modern print.
.
.
#marchmeetthemaker #mmtm #isew #haberdashery #isewbags #pdfpattern #surfacedesigners #haberdasheryfun #haberdasheryfunclasses #zoomclasses #learntoblockprint #lovetosew #haberdasheryfunpatterns #speedballart
Follow on Instagram

Copyright © 2021 · Klar theme by Crimson Pear :: web & surface design